
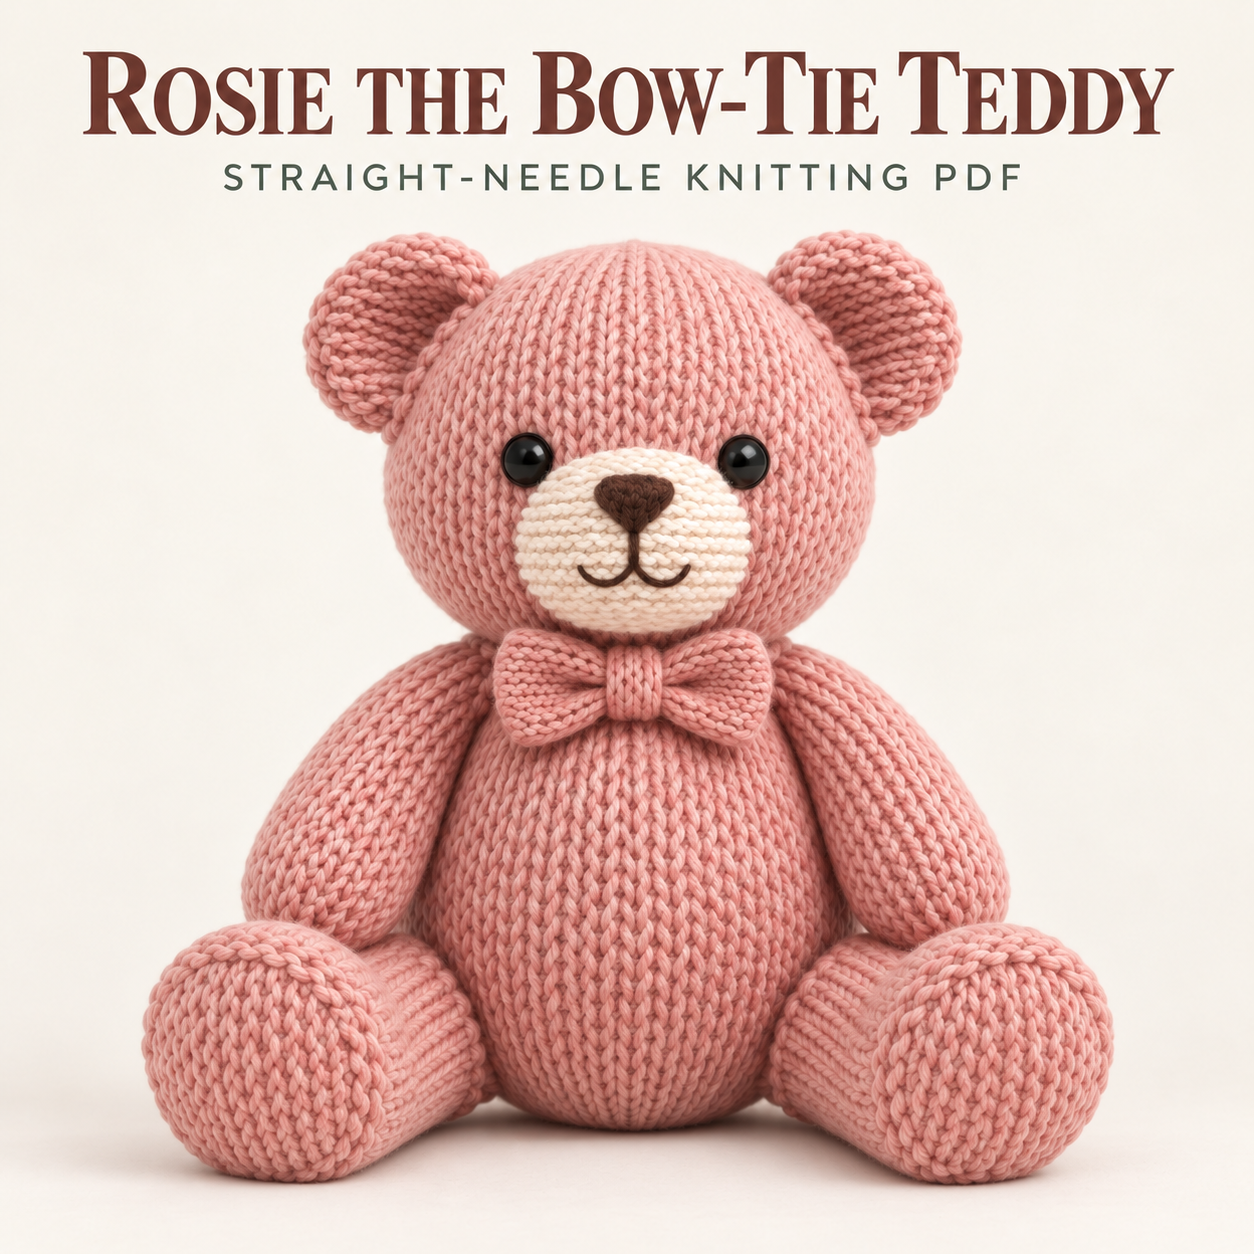
This bow tie teddy knitting pattern creates Rosie, a dusty-rose bear with rounded ears, a cream muzzle, long arms, and large seated feet. A matching knitted bow sits below the face, while a tiny round tail finishes the back. Every component is worked flat on straight needles, then shaped through sewing and stuffing. The PDF describes the difficulty as confident beginner to early intermediate, with familiar knit-and-purl fabric alongside increases, decreases, and careful assembly. This article explains the chunky-yarn supplies, the difference between stockinette and garter pieces, and the placement checks behind the broad seated pose. The complete instructions are available in the PDF download near the bottom.
About This Bow Tie Teddy Knitting Pattern
Rosie’s cream muzzle is worked in garter stitch and lightly padded, giving it a different texture from the smooth stockinette head. A dark brown downward-pointing triangular nose connects to a short stem and two shallow smile curves. The ears also use garter stitch and are cupped at their bases.
The body, arms, feet, and tail remain dusty rose. There are no contrast paw pads or forehead decorations. The head and body have structural centre-back seams, with their front midpoints kept clear for the face and bow. Large feet are splayed outward to create the intended wide silhouette rather than tucked tightly beneath the body.
Skills, Gauge, and Design Targets
The bow tie teddy knitting pattern uses standard flat knitting, knit-front-and-back increases, paired decreases, mattress seams, gathering, and embroidery. Even row matching matters because the long edges become shaped tubes.
approximate measurements are 27–29 cm seated height to the ear tops and 24–26 cm across the feet. Arms are about 9.5–10 cm long; legs and feet are about 11–12 cm long. The muzzle target is 6.5–7 cm wide by 5 cm high, and the bow is about 8–9 cm wide. These figures depend on gauge and finishing.
Stockinette gauge is 14 stitches and 20 rows per 10 cm. Garter gauge is approximately 14 stitches and 26 rows over the same area, so the two textures have different row heights.
Materials and Tools
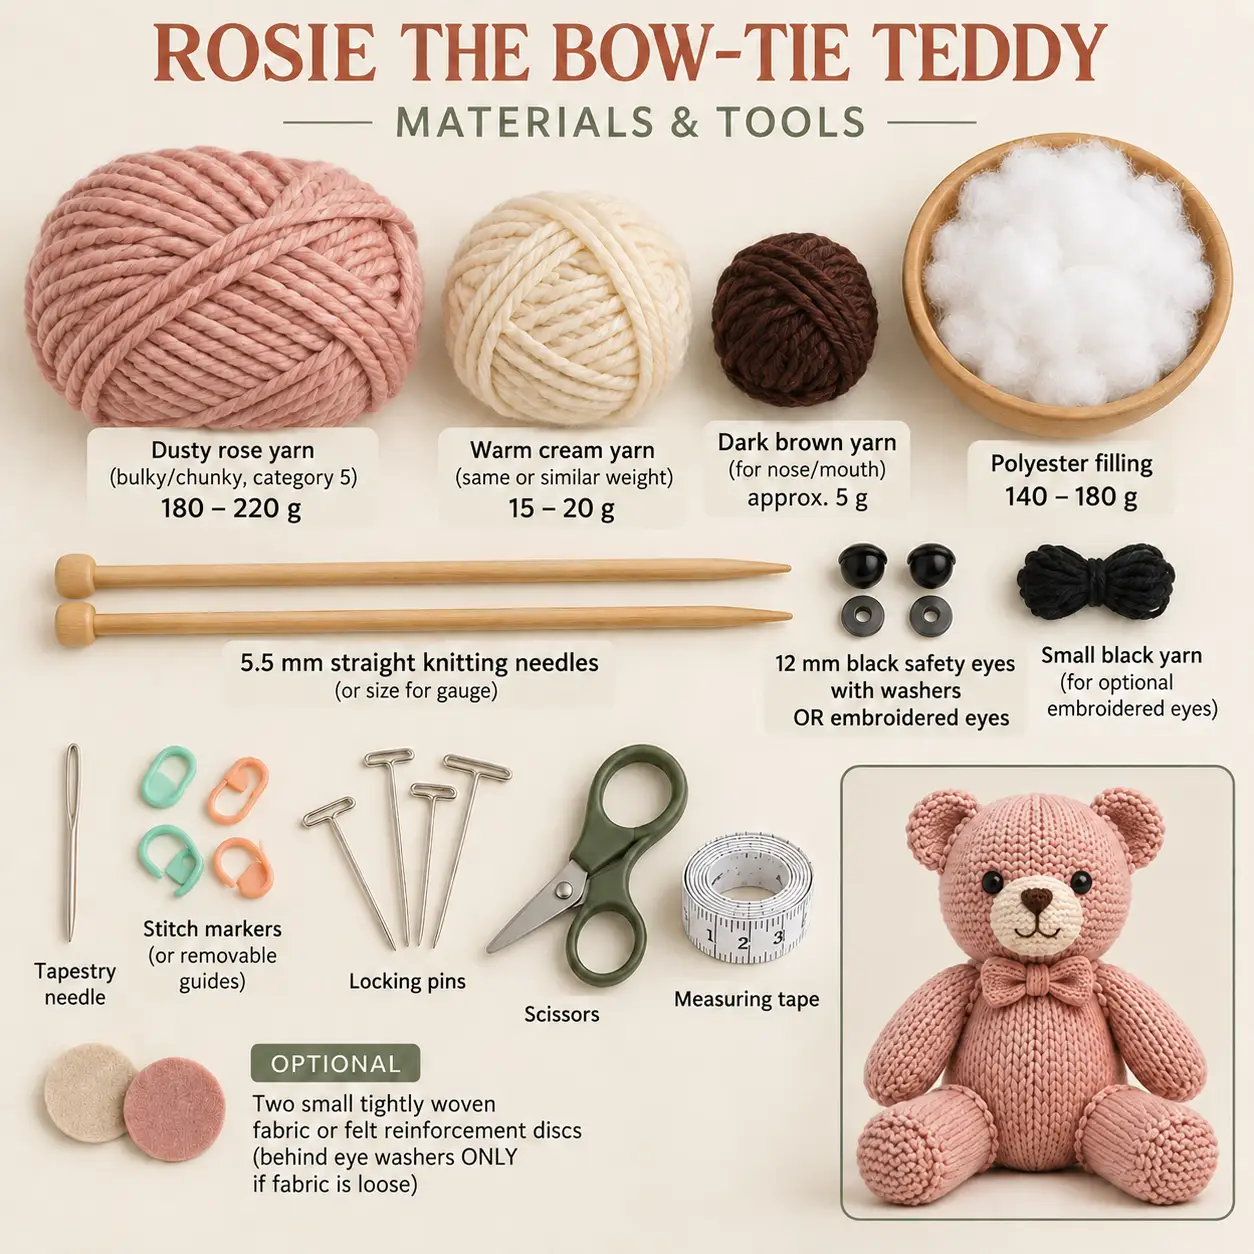
Choose bulky or chunky category 5 yarn: approximately 180–220 g dusty rose, 15–20 g warm cream in the same or a similar weight, and about 5 g dark brown for nose and mouth embroidery. Keep black yarn available if choosing stitched eyes.
The specified needles are 5.5 mm straight needles, or the size needed for the target gauge. Allow approximately 140–180 g polyester toy filling. You also need a tapestry needle, stitch markers or removable guides, locking pins, scissors, and measuring tape.
Eye options are two 12 mm black safety eyes with washers or embroidery. Small tightly woven fabric or felt reinforcement discs are optional behind washers only when loose fabric makes reinforcement necessary; they are not decorative eye patches.
Flat Knitting and Seam Counts
Stockinette means knitting right-side rows and purling wrong-side rows. Garter stitch means knitting every row. The bow rectangle uses stockinette, while its narrow centre band uses garter stitch.
The bow tie teddy knitting pattern includes its edge stitches in the written counts and does not ask for extra selvedge stitches. Those existing edges are used in the mattress seams. Adding an unrequested pair of stitches would change the circumference and could alter feature placement.
The head starts at the lower neck edge and shapes upward; the body starts at the neck and shapes downward. Recognising those opposite directions helps keep the open attachment edges and gathered ends straight during finishing.
Construction and Neck Joining
In the bow tie teddy knitting pattern, install safety eyes while the head lies flat, before seaming and stuffing. The embroidered-eye option is also secured on the reverse at this stage. Gather the crown, sew the centre-back seam, and fill through the open neck edge.
The body is similarly seamed with its neck left open. Embroider the cream muzzle while its reverse is accessible, then attach it with only a small pinch of filling. Cup and attach the ears before joining the head to the body.
The two neck edges have different stitch counts. Quartering both openings lets the small difference be eased evenly around the seam. Finish and attach the arms and legs, add the little knitted tail, then centre and secure the pleated bow.
Tips for the Wide Seated Pose
- Mark centre front at each panel midpoint and keep the back seams vertical. Nearby eye positions should not replace the front guide.
- Match row bars one for one when seaming. Drifting alignment twists a tube even when its shaping rows are correct.
- Overlap both ear bases equally to create matching shallow cups. Compare their depth before sewing them to the head.
- Fill foot fronts firmly and hip ends more moderately. Softer attachment areas flatten neatly against the body.
- Follow the specified front-view leg splay, approximately 40 degrees from vertical. The toes rotate only about 15–20 degrees outward.
- Check the outer foot span while both legs are pinned. The stated wide pose depends on placement as well as knitted length.
These checks give the bow tie teddy knitting pattern its broad base without distorting the toes or torso.
Troubleshooting
Why does this project Tip Over?
Compare leg angles and gently flatten the lower body against a surface. The source allows small changes to lower-body filling when needed. Keep the two attachment heights matched and distinguish the wider leg splay from the smaller toe rotation. Turning the feet sharply sideways does not substitute for positioning the whole legs correctly.
Why Does the Back Seam twist?
Check where the row alignment begins to drift. Reopen that section and match the same row bars on both edges before continuing. Avoid pulling one side farther along to make the gathered end meet; that can shift the front midpoint and tilt the face.
Why Do the Ears or Bow look Uneven?
Reset each ear’s small base overlap so both cups have the same depth, then compare attachment height. For a twisting bow, add discreet tacks at the back corners after centring the wrapped band. Keep the stockinette rectangle evenly pleated rather than tightening one side more than the other.
Care and Eye Choices
Follow the yarn and filling care labels. Gentle spot-cleaning may help preserve the lightly padded muzzle and pleated bow. If washing is appropriate, avoid wringing, reshape the seated base, and allow the filling to dry thoroughly.
Inspect the neck, limb seams, and small tail regularly. The bow tie teddy knitting pattern notes that detachable safety eyes may be unsuitable for children under three and offers embroidery instead. Secure all threads and choose materials for the intended use. The source describes its dimensions as design targets and does not claim physical testing.
Download Rosie’s Complete PDF
The complete bow tie teddy knitting pattern includes flat component tables, gauge for both textures, approximate measurements, eye-access instructions, placement maps, stuffing advice, neck easing, assembly, final checks, and troubleshooting. Personal handmade use is described unless separate seller licensing says otherwise; the file itself should not be redistributed or resold without permission. Use the PDF for all shaping rows and precise placement marks.
DIGITAL DOWNLOAD ONLY — NO PHYSICAL ITEM WILL BE SHIPPED.
Leave a Reply