
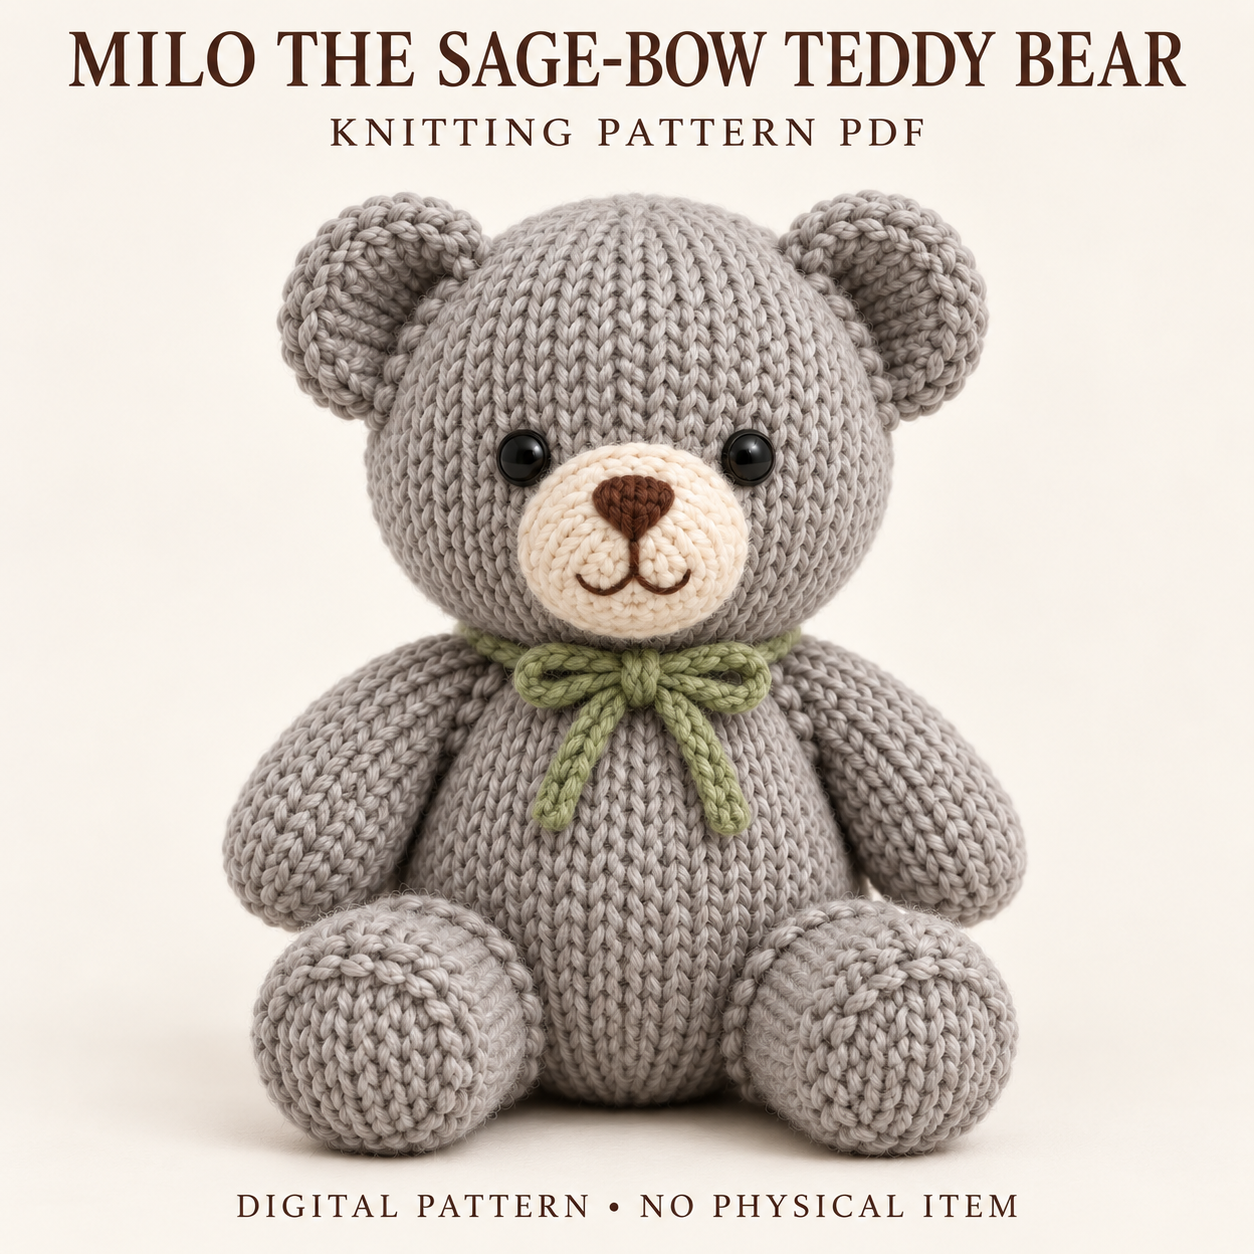
Milo’s sage bow teddy bear knitting pattern makes a grey seated bear with a round head, a cream muzzle, and a narrow green neck tie. Large forward-facing feet support the rounded body, while shallow cupped ears and a small rear tail complete the silhouette. The tie is a knitted cord shaped into a small bow, with balanced loops and two slender hanging ends. This project combines circular stockinette with a flat muzzle, cord knitting, simple embroidery, and carefully aligned assembly. It suits confident beginners to intermediate makers familiar with shaping and seaming. The guide below explains the supplies, construction, and finishing choices; the complete PDF near the bottom provides all written component instructions and placement details.
Details of the sage bow teddy bear knitting pattern
The head, body, arms, feet, ears, and tail all use grey yarn. There are no contrasting paw pads or a separate belly patch. A cream oval muzzle carries the dark brown triangular nose and gently curved mouth, with only light padding beneath it.
The green accessory is a narrow four-stitch I-cord tied into an actual bow. It differs from a broad, separately sewn rectangular bow tie. A raised grey line runs down the centre back of the head and body. This is chain-stitch embroidery worked with a tapestry needle, rather than a knitted shaping line.
Skills, gauge, and finished-size targets
You will use knit and purl stitches, circular stockinette, increases and decreases, binding off, I-cord, seaming, and facial embroidery. Consistent tension helps the separate pieces retain their planned proportions.
The sage bow teddy bear knitting pattern specifies 18 stitches and 25 rounds per 10 cm for circular stockinette after light handling. Flat stockinette is approximately 18 stitches and 28 rows per 10 cm, so its row gauge differs from the circular fabric.
The PDF’s design targets include 27–29 cm seated height, a head 12.5–13.5 cm wide, and feet approximately 7–8 cm long by 5.5–6 cm wide. The green tie is about 32–34 cm long. These are planned sizes that vary with yarn, tension, filling, and finishing.
Worsted yarn and knitting supplies
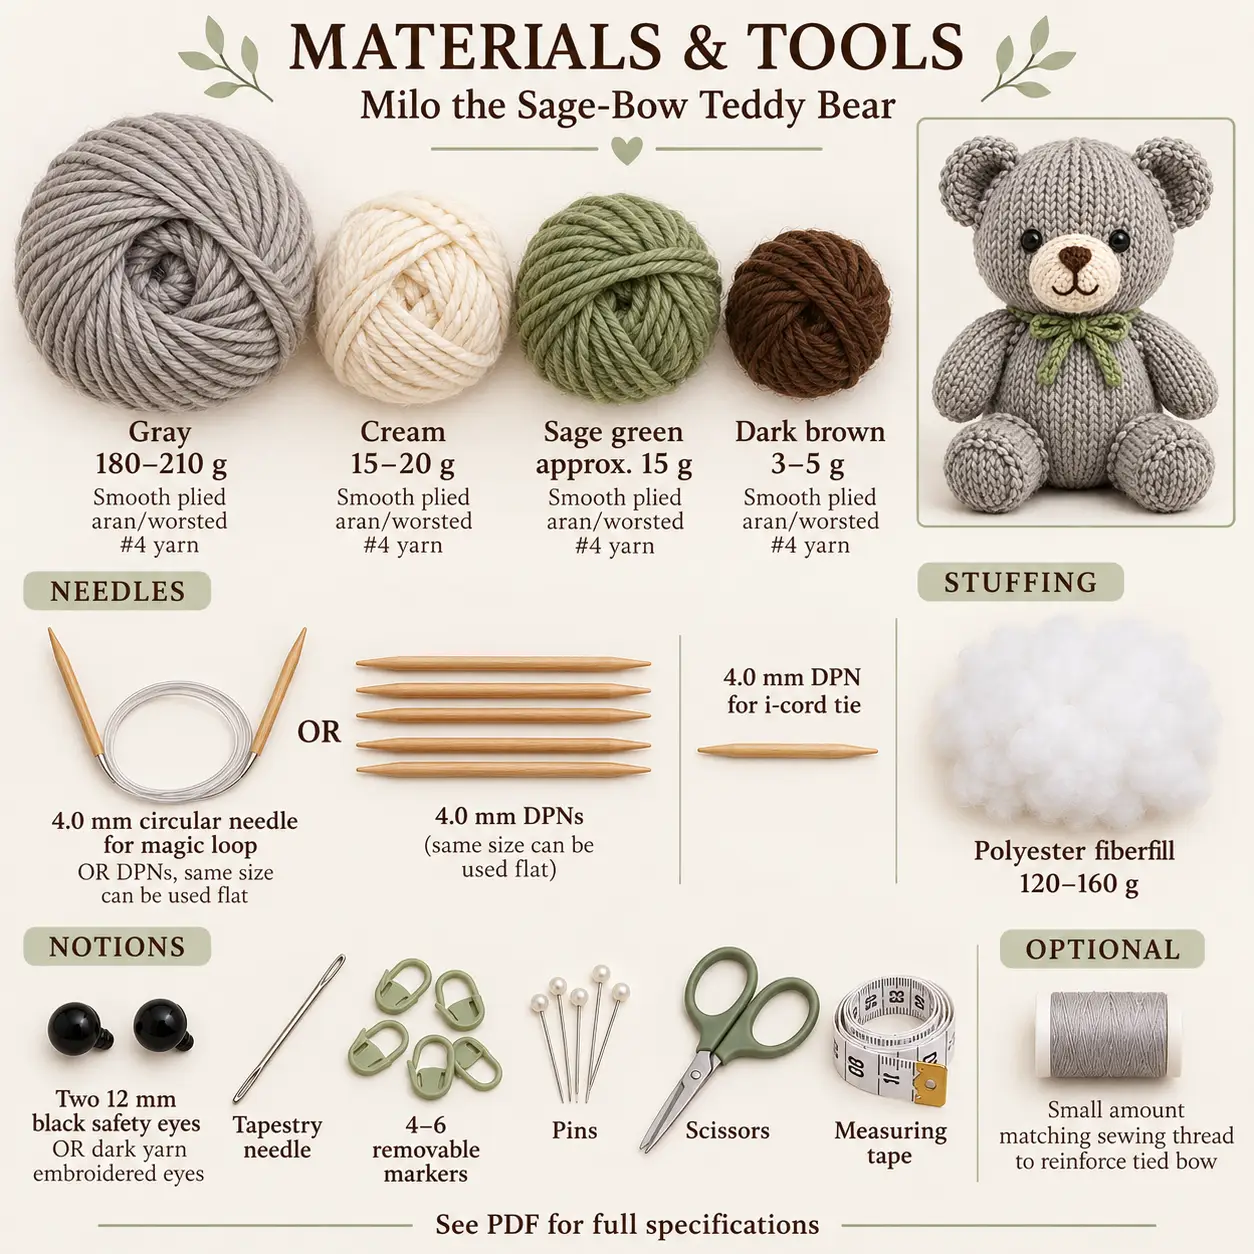
Choose smooth plied aran or worsted yarn, weight number four. Prepare approximately 180–210 g of grey, 15–20 g of cream, 15 g of sage green, and 3–5 g of dark brown for the facial embroidery.
The sage bow teddy bear knitting pattern uses 4 mm circular needles for magic loop or DPNs, with the same size suitable for flat knitting. A 4 mm DPN is needed for the cord technique. Choose two 12 mm black eyes or dark yarn for embroidered eyes, and allow approximately 120–160 g of polyester fiberfill.
Notions include a tapestry needle, four to six removable markers, pins, scissors, and measuring tape. A small amount of matching sewing thread is optional for reinforcing the tied bow. The raised back line uses the tapestry needle; it does not require a crochet hook.
How the knitted components are constructed
The head starts at the crown and finishes with an open neck. The body starts at its open neck and closes at its base, leaving upper access for stuffing. Those matching neck edges are joined during assembly, with their physical front and back guides aligned.
Arms begin at the paws and have open upper attachment edges. Feet begin at the toes and finish at their rear attachment edges. The muzzle is knitted flat, while the ears and small tail are separate shaped pieces.
In the sage bow teddy bear knitting pattern, the back embroidery is added before the neck join. Secure its tails through the accessible head and body openings. The embroidered chain sits on the finished fabric and does not change the underlying stitch counts.
Face preparation and assembly sequence
Mark and finish both eyes before stuffing the head, while their internal ends or hardware remain reachable. Embroider the brown nose and mouth on the cream muzzle with its wrong side accessible, then secure those ends before attaching it.
Centre the muzzle on the front guide and add only a thin layer of padding. Attach the ears as shallow cups, leaving their upper curves free. Prepare the filled body and attach its limbs and small tail using the placement references.
Complete the centre-back embroidery, then pin and sew the head-to-body join. Check both guides so the back lines meet and the face remains forward. Tie the green cord around the neck with its bow at centre front, assess the loop balance, and remove the temporary markers.
Tips for filling and tying the cord bow
Use small tufts to fill the head evenly without concentrating extra pressure behind the eyes. Firm filling at the body’s base supports the seated pose; more moderate filling above it preserves the rounded chest without stiffening the neck.
The sage bow teddy bear knitting pattern needs firmer foot toes with more moderate filling toward the rear. Keep the arm tops lightly filled, and leave the ears unfilled so their shallow cups remain flexible. The muzzle and tail each need only light padding.
Measure the cord’s finished length before tying. Smooth out twists, form small balanced loops, and let the tails hang downward. If reinforcement is needed, use a discreet tack through the knot and neck fabric rather than flattening the entire bow against the bear.
Troubleshooting the bow, balance, and neck seam
Why does my sage bow teddy bear knitting pattern bow twist or slip?
Untie the cord, straighten it, and retie without carrying a twist into either loop. Keep the knot centred and the loops even. The PDF allows a small securing tack through the knot and neck fabric if the bow continues to move.
Why does the bear tip backward or sideways?
Check that the feet sit sufficiently low and forward, with both toes contacting the surface. Redistribute filling toward the lower body and confirm that the rear tail sits above the base rather than pushing the bear forward. Re-pin the affected attachment before resewing.
Why is there a gap at the neck join?
Compare the two neck edges and the spacing of the sewing stitches. The PDF suggests a second small whipstitch pass where needed. Keep the join even without tightening it into a deep ridge, and confirm that no filling or guide yarn is caught in the seam.
Care and eye-finishing choices
After completing the sage bow teddy bear knitting pattern, use the yarn manufacturer’s care instructions for the assembled plushie. Gentle surface cleaning may be suitable. Avoid wringing or pulling the cord bow while damp, reshape the filled pieces carefully, and let them dry thoroughly.
The PDF recommends securely embroidered eyes instead of detachable eye components for items intended for children under three, alongside applicable local requirements. Check that the nose and mouth ends, back embroidery, neck seam, ears, and limbs are securely finished. Remove all temporary guide yarn and inspect the small tied accessory before use.
Download Milo’s complete pattern PDF
The sage bow teddy bear knitting pattern PDF contains the full shaping instructions, face-placement guidance, stuffing notes, back embroidery, and assembly sequence. Use the complete file for exact counts and the cord-tie method.
DIGITAL DOWNLOAD ONLY — NO PHYSICAL ITEM WILL BE SHIPPED.
Leave a Reply