
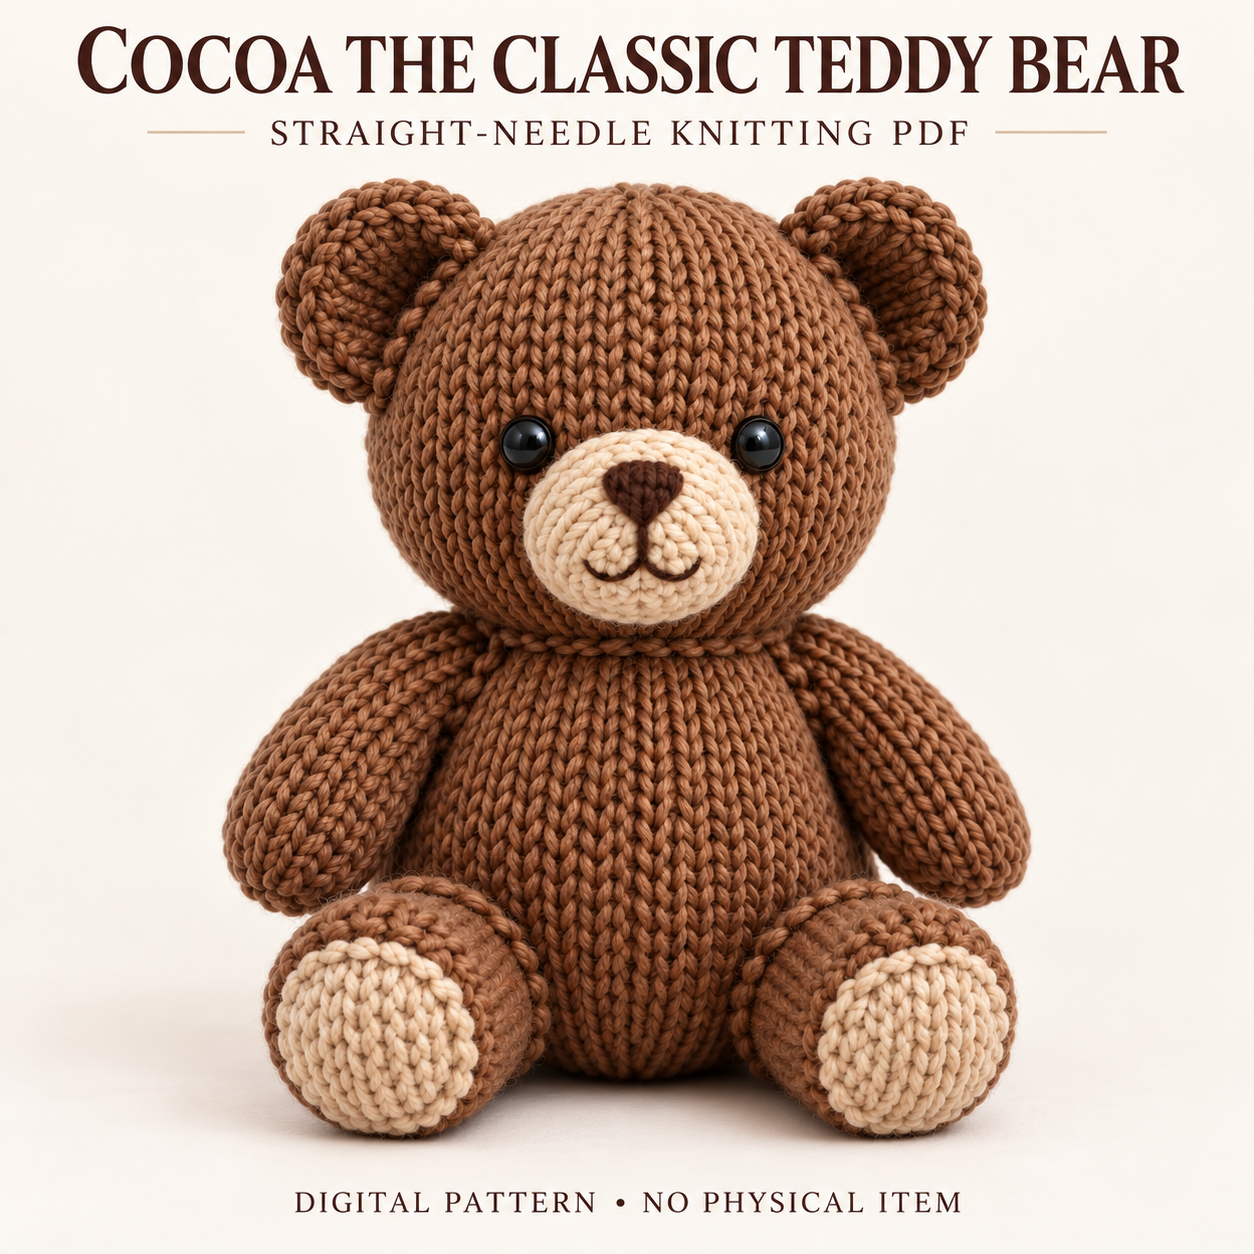
This teddy bear knitting pattern makes Cocoa, a seated brown plushie with a rounded head, small round ears, and cream accents on the muzzle and feet. Its simple color palette leaves the knitted texture and joined limbs clearly visible. All components are worked flat, then seamed and stuffed; circular knitting is not required. The PDF places the project at confident beginner to intermediate level, with basic shaping supported by careful face preparation and assembly. This overview covers the supplies, calculated size targets, construction, and finishing checks that help you decide whether the project fits your skills. The complete downloadable PDF, including written row tables and placement maps, is introduced near the bottom.
About this teddy bear knitting pattern
Cocoa has a rounded head above a fuller lower body, with tapered arms and feet angled forward in a seated pose. The muzzle carries a dark-brown embroidered nose and two shallow mouth curves. A small bobble tail finishes the back; the reference has no clothing or neck accessory.
The design uses twelve knitted pieces across eight component types. The head and body are each a shaped panel whose side edges become a center-back seam. The teddy bear knitting pattern uses matching arm and leg instructions, with the mirrored appearance created through their attachment angles rather than different left and right shaping.
Skill level, size targets, and gauge
- Craft and type: flat-knitted stuffed teddy bear.
- Level: confident beginner to intermediate.
- Calculated seated height: approximately 24–26 cm.
- Calculated seated depth: approximately 15–17 cm.
- Gauge: 20 stitches × 28 rows per 10 cm in unstretched flat stockinette.
- Needle size: 4.0 mm, adjusted only as needed for dense fabric.
These are design targets, not verified physical measurements. The PDF does not give a completion-time estimate. In the teddy bear knitting pattern, the main challenge is maintaining symmetry as flat fabric becomes a stuffed form. The face, neck join, and seated foot angles deserve a slower check before final sewing.
Yarn and tools for Cocoa
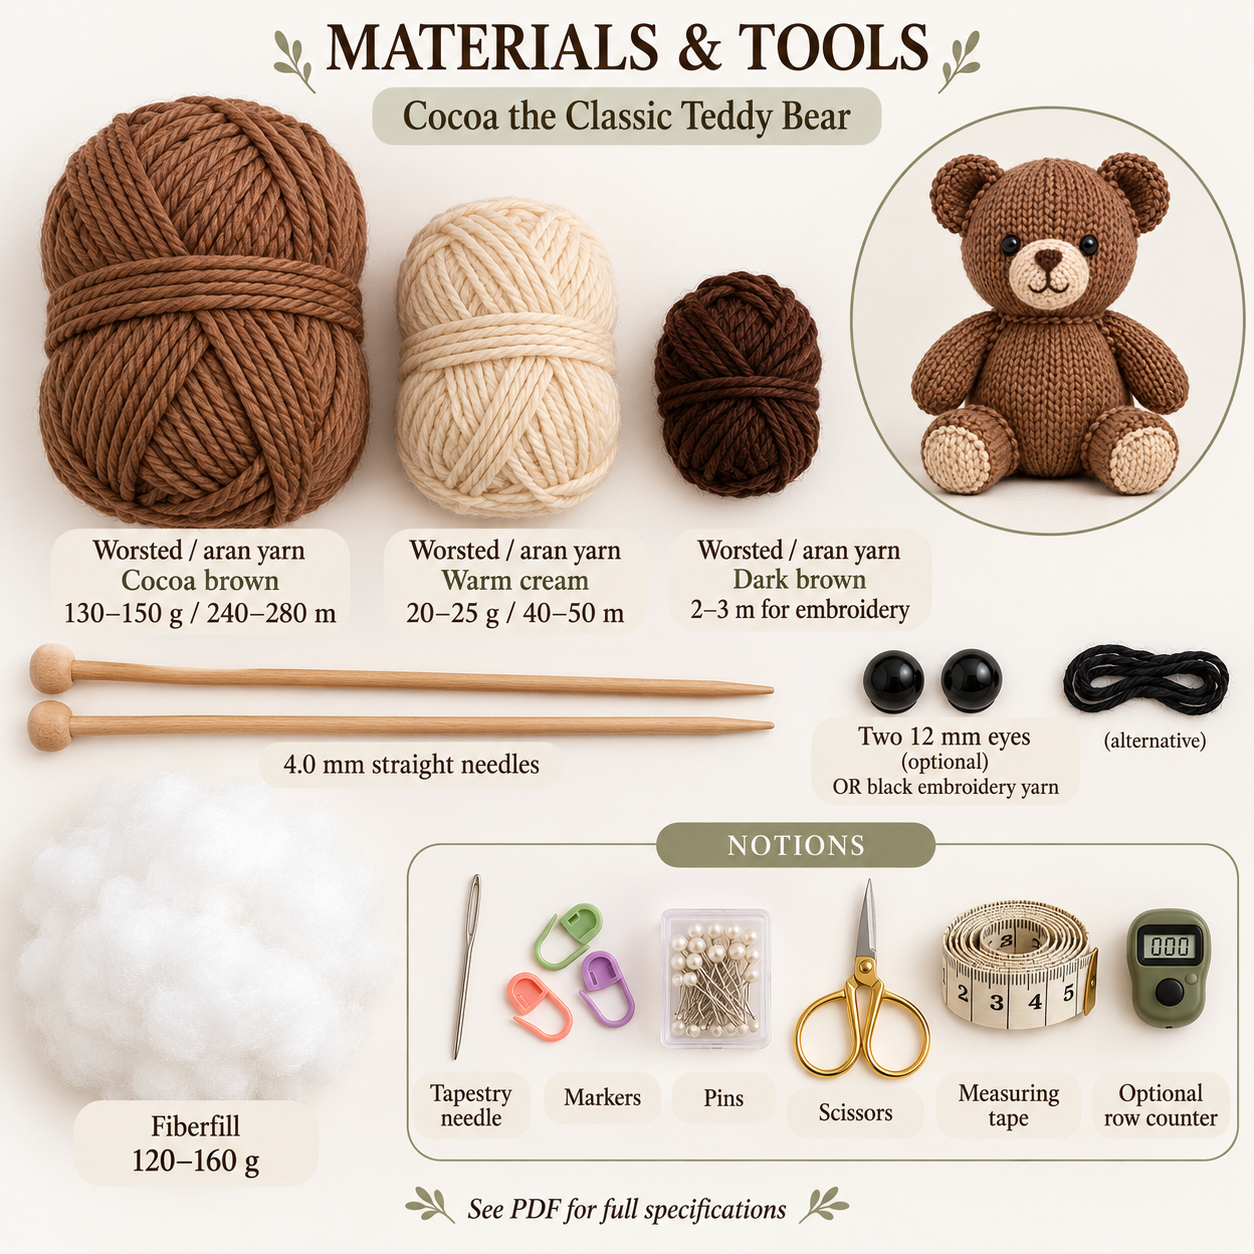
The supplies are worsted/aran yarn in cocoa brown and warm cream, plus a small amount of dark brown for embroidery. The brown allowance is approximately 240–280 m, or 130–150 g depending on yarn density. Cream requires approximately 40–50 m, or 20–25 g, while the embroidered nose and mouth use about 2–3 m dark brown.
Use 4.0 mm straight needles or a circular needle used flat. Gather approximately 120–160 g polyester fiberfill, a tapestry needle, removable markers or contrasting waste yarn, pins, scissors, measuring tape, and an optional row counter. Eyes may be two 12 mm black safety eyes or embroidered black eyes.
For this teddy bear knitting pattern, keep the same yarn weight and needle combination for brown and cream pieces so the muzzle and pads remain proportional.
Stitches and techniques to know
You will cast on, knit, purl, increase with knit-front-and-back, decrease with knit-two-together, and bind off. Flat stockinette alternates knit and purl rows, so follow the stated right-side and wrong-side labels instead of knitting every row.
The finishing skills include gathering open edges, mattress stitch, stuffing through retained openings, surface attachment, and simple embroidery. These techniques are familiar individually, but their sequence matters. The teddy bear knitting pattern prepares facial details while the inside is accessible, avoiding the need to force eye hardware or embroidery knots into an already closed head.
How the flat pieces become a seated bear
The written component instructions begin with the head and muzzle. Mark the head’s center front before fitting the eyes and cream muzzle. The embroidered nose and mouth are prepared while the head can still be accessed from the back.
The head’s side edges are joined at center back, and stuffing enters through the lower opening. The body is similarly seamed and filled through its neck opening. Align their center-front guides and center-back seams before attaching them.
Separate ears, arms, legs, cream pads, and a small tail complete the plushie. The pads face forward on the feet. The teddy bear knitting pattern finishes with paired attachments checked from several angles, then removal of temporary guides and burial of sewing tails.
Tips for a balanced face and seated pose
- Use the removable center-front guide for facial placement; the back seam is not the face reference.
- Compare eye positions on the same head row before securing hardware.
- Give the muzzle only a small pinch of stuffing so its center lifts gently.
- Flatten both ears to the same width and keep their seams toward the back.
- Keep shoulders and ankle ends softer than paws and feet so they settle against the body.
- Pin both legs together and check the seated posture before sewing either permanently.
The teddy bear knitting pattern relies on a firmer lower body and balanced feet for its intended seated shape. Extra stuffing in a misplaced limb can make the attachment harder to adjust.
Troubleshooting the face, seams, and limbs
Why do the limbs on my teddy bear knitting pattern project look unequal?
Check their knitted lengths first, then compare the attachment spans and angles. The PDF recommends repinning the shorter-looking attachment and viewing both pieces from the front and side. Two identical knitted limbs can appear different when one is sewn higher or angled more steeply.
Why is the muzzle off-center?
Check it against the center-front guide. Open enough of its perimeter seam to shift it into place, keeping its vertical center aligned with the face. Avoid pulling one side tightly as a shortcut; that can distort the oval and change the smile.
Why does the head wobble?
The PDF suggests another pass around the neck seam and short vertical reinforcement stitches between head and body. Use balanced tension. Over-tightening can pucker the neck rather than creating a smoother join.
Care and attachment checks
Choose cleaning according to the yarn and stuffing labels; the PDF does not promise machine washability. Gentle spot-cleaning is a cautious option for a small mark. If washing is permitted, avoid wringing, support the wet shape, and allow the filling to dry fully away from direct heat.
Inspect the muzzle edge, eye area, limb joins, and tail base for loosened stitches. The pattern recommends embroidered eyes for items intended for children under three, providing an alternative without detachable safety-eye components. Follow applicable local requirements and check every attachment before use.
Download the Cocoa knitting PDF
The full PDF contains materials, calculated measurements, gauge, abbreviations, written row tables, placement maps, stuffing guidance, assembly instructions, and troubleshooting. Its printing notes recommend actual-size printing without tiled templates. The file is supplied for personal handmade creation and must not be reproduced, resold, or redistributed.
DIGITAL DOWNLOAD ONLY — NO PHYSICAL ITEM WILL BE SHIPPED.
Leave a Reply