
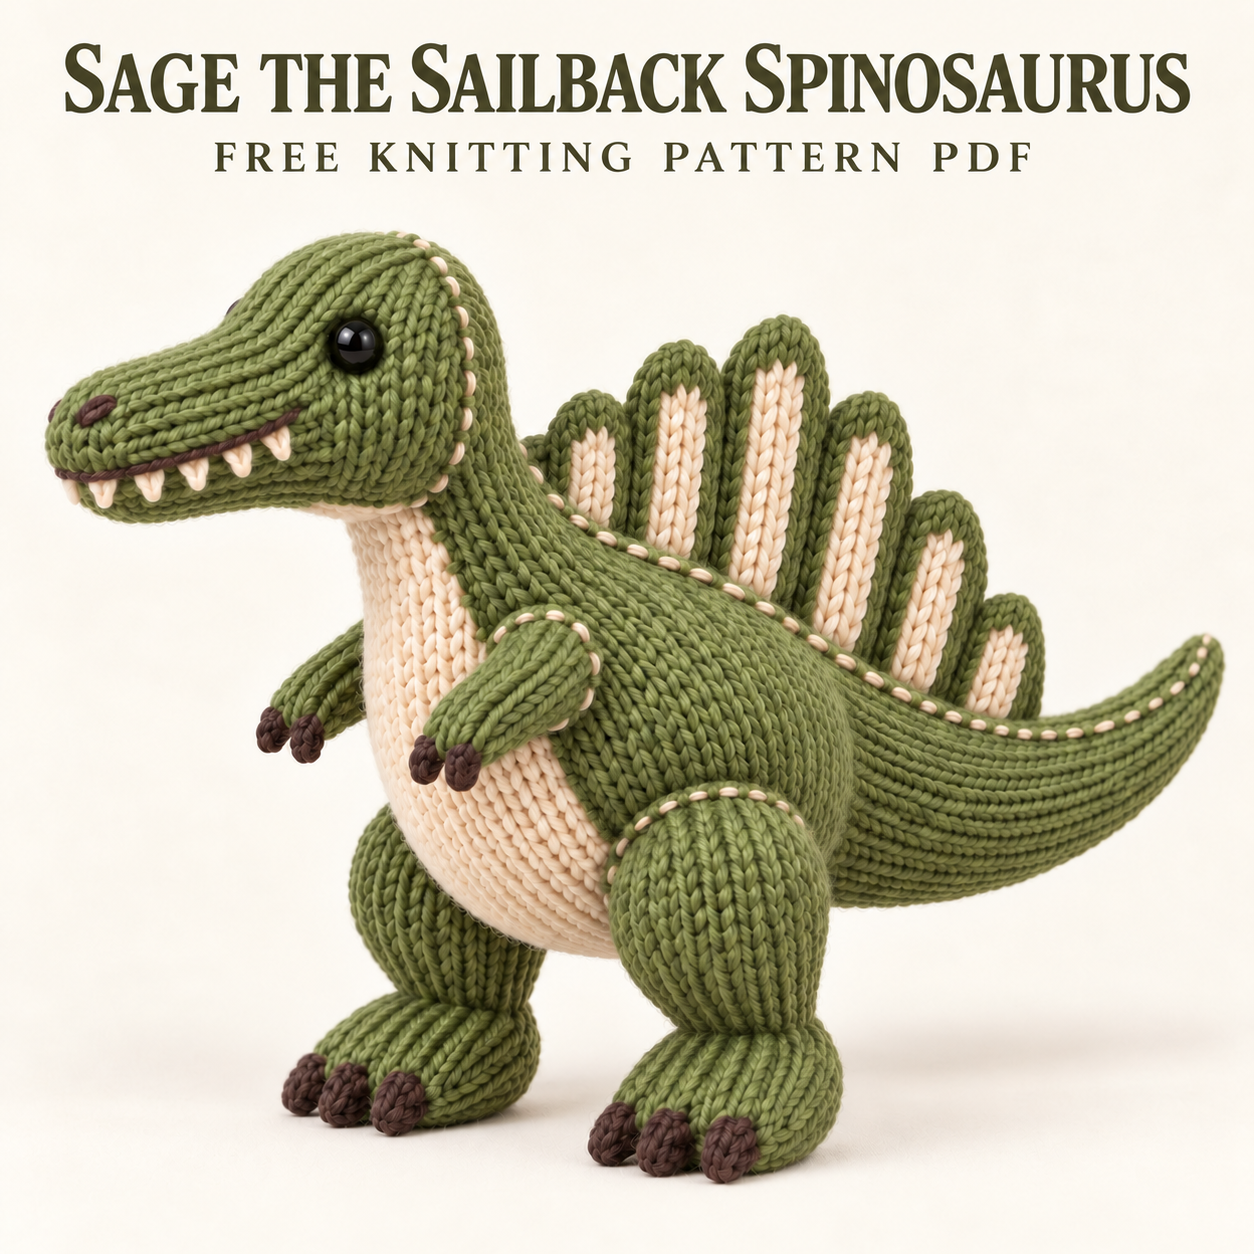
This spinosaurus knitting pattern makes Sage, a standing olive dinosaur with a long crocodile-style snout, a cream throat and belly, and seven striped dorsal fins. Broad hind legs support forward-facing feet, while small forearms hang down with dark brown claws. A long tail curves gently upward behind the body. The PDF lists intermediate difficulty and combines circular stockinette with flat cream panels, grafted paw edges, I-cord claws, duplicate stitch, and embroidery. Several joins remain open until their final filling adjustments are complete. This article explains the supplies and the assembly choices that shape the dinosaur’s posture. The complete free instructions are available in the PDF download near the bottom.
About This Spinosaurus Knitting Pattern
Sage’s snout is longer and narrower than the wider head behind the eyes. Brown nostrils and matching mouth lines define the face, with six small embroidered cream tooth triangles on each side. The flat throat panel meets the belly patch near the neck join.
The seven unstuffed fins form a small, medium, tall, tallest, tall, medium, small sequence from front to rear. Four bases follow the body centre back, and the rear three continue along the tail’s top line. Each broad face has a centred cream stripe with green fabric surrounding it. Cream running stitches also highlight the head, selected attachment seams, and dorsal borders.
Skills, Gauge, and Approximate Size
The spinosaurus knitting pattern uses circular shaping, flat stockinette, Kitchener grafting, I-cord, duplicate stitch, and small embroidery. Assembly needs care because the head joins as a diagonal oval and each fin has a narrow base that must remain separate from its neighbours.
The pattern’s approximate size targets are 27–29 cm tall to the head, 29–31 cm to the tallest fin, and 39–42 cm from snout to tail tip. The tail is about 16–18 cm long, and each foot roughly 6 cm. Materials, tension, filling, and finishing affect the result.
Circular gauge is 22 stitches and 30 rounds per 10 cm on 3.5 mm needles. Aim for approximately 22 stitches and 30 rows for the flat cream panels. The fabric should be dense enough to contain the filling while remaining shapeable.
Materials and Tools
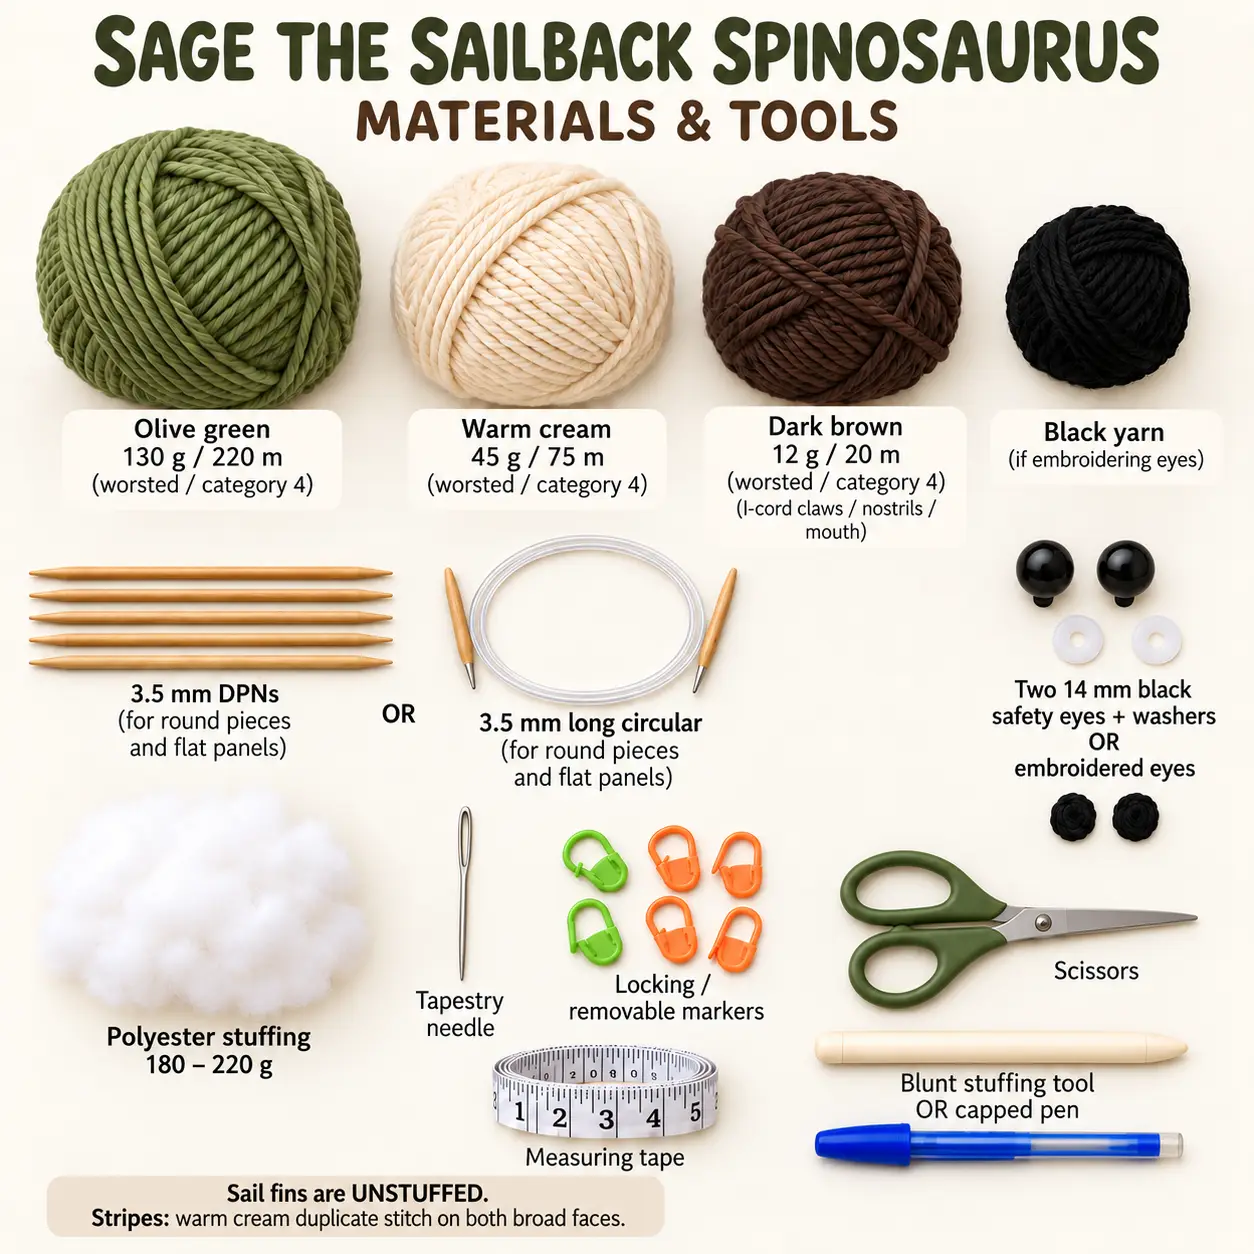
Use smooth medium or worsted category 4 yarn: approximately 130 g/220 m olive green, 45 g/75 m warm cream, and 12 g/20 m dark brown. Brown supplies the claws, nostrils, and mouth. Add black yarn if choosing embroidered eyes.
Use 3.5 mm DPNs or a long circular needle suitable for magic loop. The same size is used for the flat panels. Eye options are two 14 mm black safety eyes with washers or embroidered eyes. Allow approximately 180–220 g polyester stuffing.
Gather a tapestry needle, locking or removable markers, straight pins, scissors, and measuring tape. A blunt stuffing tool or capped pen helps move filling through the tail and snout. The fins and cream panels stay unstuffed, so their shape comes from knitting and attachment.
Grafted Paws, I-Cord Claws, and Sail Stripes
The spinosaurus knitting pattern closes the hand and toe edges with Kitchener stitch, creating flattened grafted ends. Ten tiny brown I-cord nubs attach there: two per hand and three per foot. The centre toe claw points forward, with its neighbours angled slightly outward.
Each fin is knitted in the round, flattened, and decorated on both broad faces with duplicate stitch. Identify the six-column face before adding its two-column cream stripe. Keep green visible around the base, sides, and shaped tip.
The cream dorsal borders are running stitches rather than a knitted colour change. Two lines flank the fin bases across body and tail, then merge behind the seventh fin into one line continuing toward the tail tip.
Construction and Assembly Order
Complete the components and finish the face and cream panels. Install optional eye hardware through the open neck before filling the head. The body closes at both poles; head, tail root, and thigh attachment edges remain open for their joins.
Attach feet to thighs and claws to the grafted paw edges. Sew the belly patch before adding limbs. Attach tail, hind legs, and head, adjusting filling through each final seam gap. The throat and belly panels should meet without a large green space between them.
For the spinosaurus knitting pattern, flatten each shoulder edge and sew through both layers so the arms hang downward and slightly forward. Add fins in order, capturing both layers of their small bases. Finish with the cream seam accents and dorsal borders, then remove guides and bury ends.
Tips for a Long Snout and Balanced Sail
- Keep the snout moderately filled and the wider head firmer. This preserves the length instead of rounding the whole head.
- Check the head from both sides while its diagonal neck join is pinned. The snout should be level or only slightly raised.
- Graft the toe edges horizontally and place thighs over the upper-rear foot areas so the feet project forward.
- Shape the tail with gentle top-centre tacks, directly opposite its underside marker. Avoid shortening the underside.
- Label the fin sizes and pin all seven bases before sewing. Their bodies may overlap visually, while the attachment bases remain separate.
- Keep the striped fin faces pointing left and right rather than toward front and back.
- Make the cream attachment accents loose enough to leave the green fabric unpuckered.
These orientation checks help the spinosaurus knitting pattern retain both its standing pose and its distinctive sailback outline.
Troubleshooting
Why does this pattern Head look Too Round?
Remove some filling from the narrow snout and redistribute it toward the wider rear head. Keep the snout zone moderately filled. If it droops instead, add a little support where it meets the wider head and review the neck attachment angle before tightening the final seam.
Why Does the Tail Point Downward or have a Kink?
Check that the shaping tacks are on the top-centre line, opposite the underside marker. Tighten them slightly and evenly for an upward curve. A sharp kink suggests one tack is too tight; release it and retighten only enough to hold a shallow bend.
Why Does the Sail lean or look Crowded?
Flatten each base evenly and centre it on the assigned body or tail line. Reseam through matching stitch pairs without pulling one side harder. Keep the planned positions while allowing the fin bodies to overlap; do not stack two sewing bases directly on top of each other.
Care and Eye Alternatives
Follow the yarn and stuffing care labels. Gentle spot-cleaning can help preserve the fin stripes, claws, and shaped tail. If washing is suitable, avoid wringing, reshape the feet and fins, and allow all filling to dry completely away from direct heat.
Check the claws, embroidery, fin bases, and major joins before use. The spinosaurus knitting pattern offers embroidered eyes as an alternative to small rigid hardware, which may be unsuitable for recipients under three. Secure all details and follow relevant local requirements without assuming formal safety testing.
Download Sage’s Complete Free PDF
The complete spinosaurus knitting pattern includes component tables, counts, quantities, gauge, measurements, face details, placement maps, fin-size instructions, assembly, stuffing access, and extensive troubleshooting. The PDF is explicitly labelled free. Consult it for the individual rounds, panel rows, grafting positions, and precise attachment coordinates.
DIGITAL DOWNLOAD ONLY — NO PHYSICAL ITEM WILL BE SHIPPED.
Related knitting projects
- Fern diplodocus knitting pattern and free PDF
- Parasaurolophus Knitting Pattern: Perry Complete PDF
- Parasaurolophus Plushie Knitting Pattern: Perry PDF
Looking for other prehistoric toy designs? Find more knitted dinosaurs in our knitted animal pattern library, including Fern the Diplodocus and Mossy the Ankylosaur.
Leave a Reply