
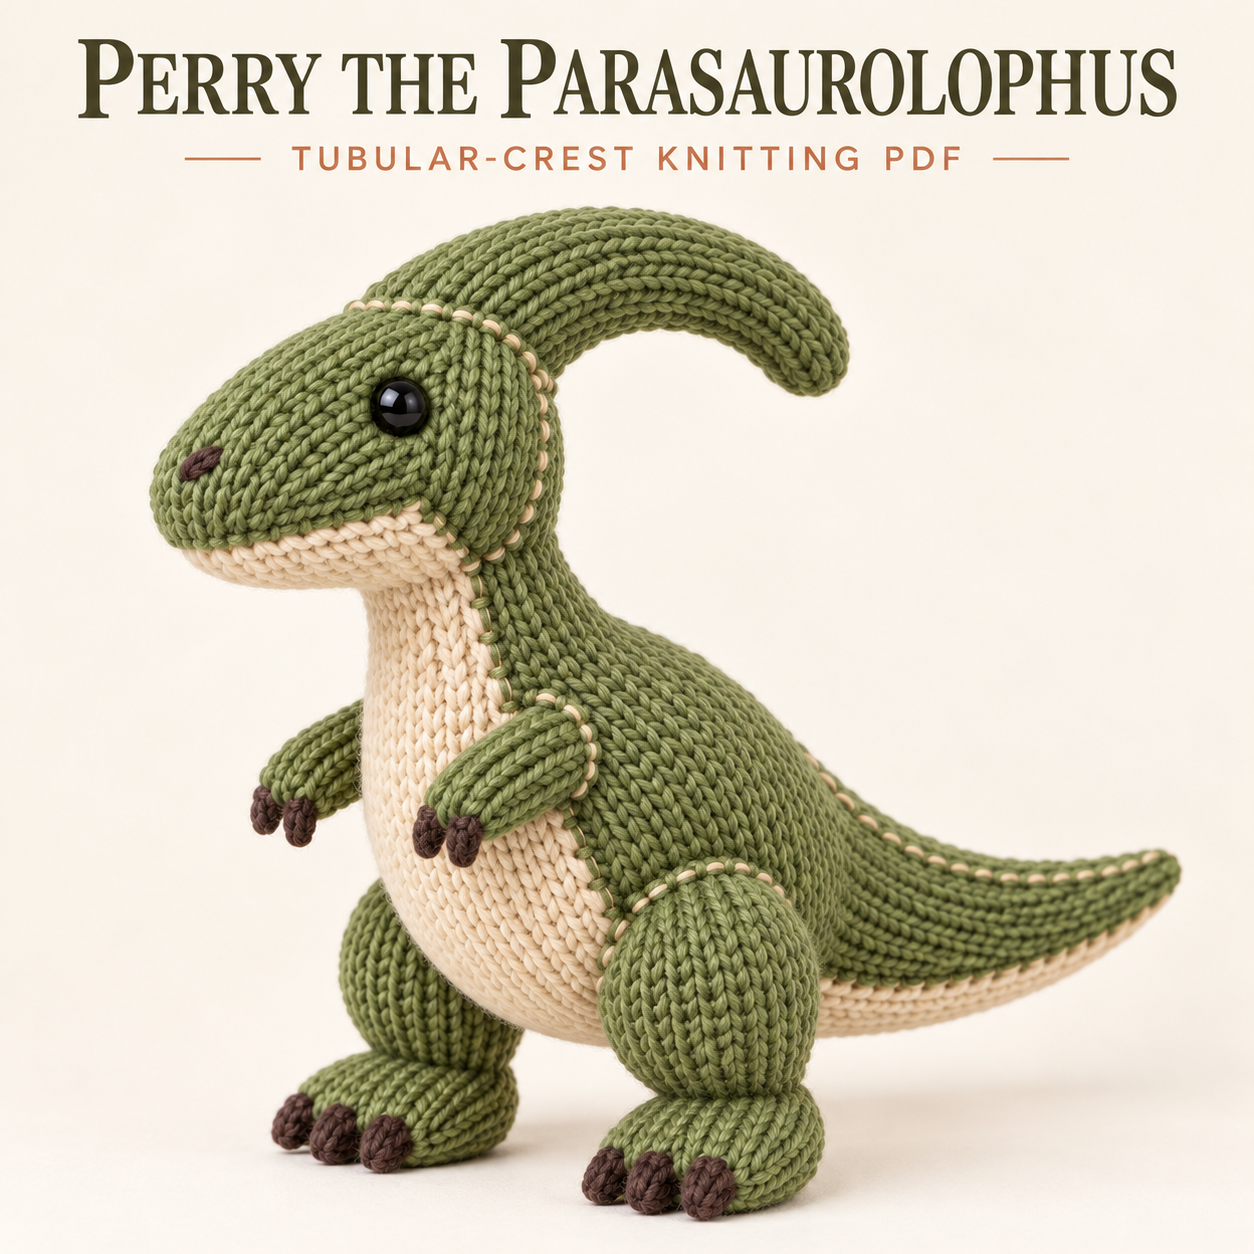
This parasaurolophus plushie knitting pattern creates Perry, a standing dinosaur with a pear-shaped green body, long snout, backward-sweeping crest, and tapered tail. Cream panels brighten the belly, jaw, and tail underside, while brown I-cord claws provide small finishing details. The crest is knitted as a tube, then curved with an underside shaping strand, which gives this version its distinctive profile. The cover lists intermediate difficulty; the introduction also allows confident beginners who already knit comfortably in the round to work through the assembly slowly. This article explains the materials, techniques, and alignment checks before you download the complete PDF near the bottom for all component instructions.
About This Parasaurolophus Plushie Knitting Pattern
The 15-page Perry PDF builds its green forms mainly in circular stockinette. Three separate cream pieces are worked flat: a belly panel, a jaw/throat panel, and a narrow strip along the tail underside. Cream running stitches trace selected panel edges and joins, then continue down the back and across the top of the tail.
The nose is a small brown embroidered oval on the upper snout. It differs from a separate stuffed nose sewn to the tip. The all-green tubular crest also has no cream inset. Keeping these features straight is useful when comparing this file with the other Perry version.
Difficulty, Gauge, and Approximate Size
Small circumferences, multiple stuffed pieces, and deliberate placement make this more involved than a simple one-piece toy. Comfortable knit-and-purl skills are only the starting point; the crest shaping and mirrored leg assembly need attention.
Approximate finished dimensions are 30–32 cm high including the crest, 40–43 cm from nose to tail tip, and 10–11 cm across the widest body. The crest measures about 14–15 cm along its outer curve, and the tail is about 15–16 cm long. The PDF notes that results vary with materials, tension, and stuffing.
The parasaurolophus plushie knitting pattern uses 22 stitches and 30 rounds per 10 cm in circular stockinette, with approximately the same stitch and row gauge for flat panels.
Materials and Tools
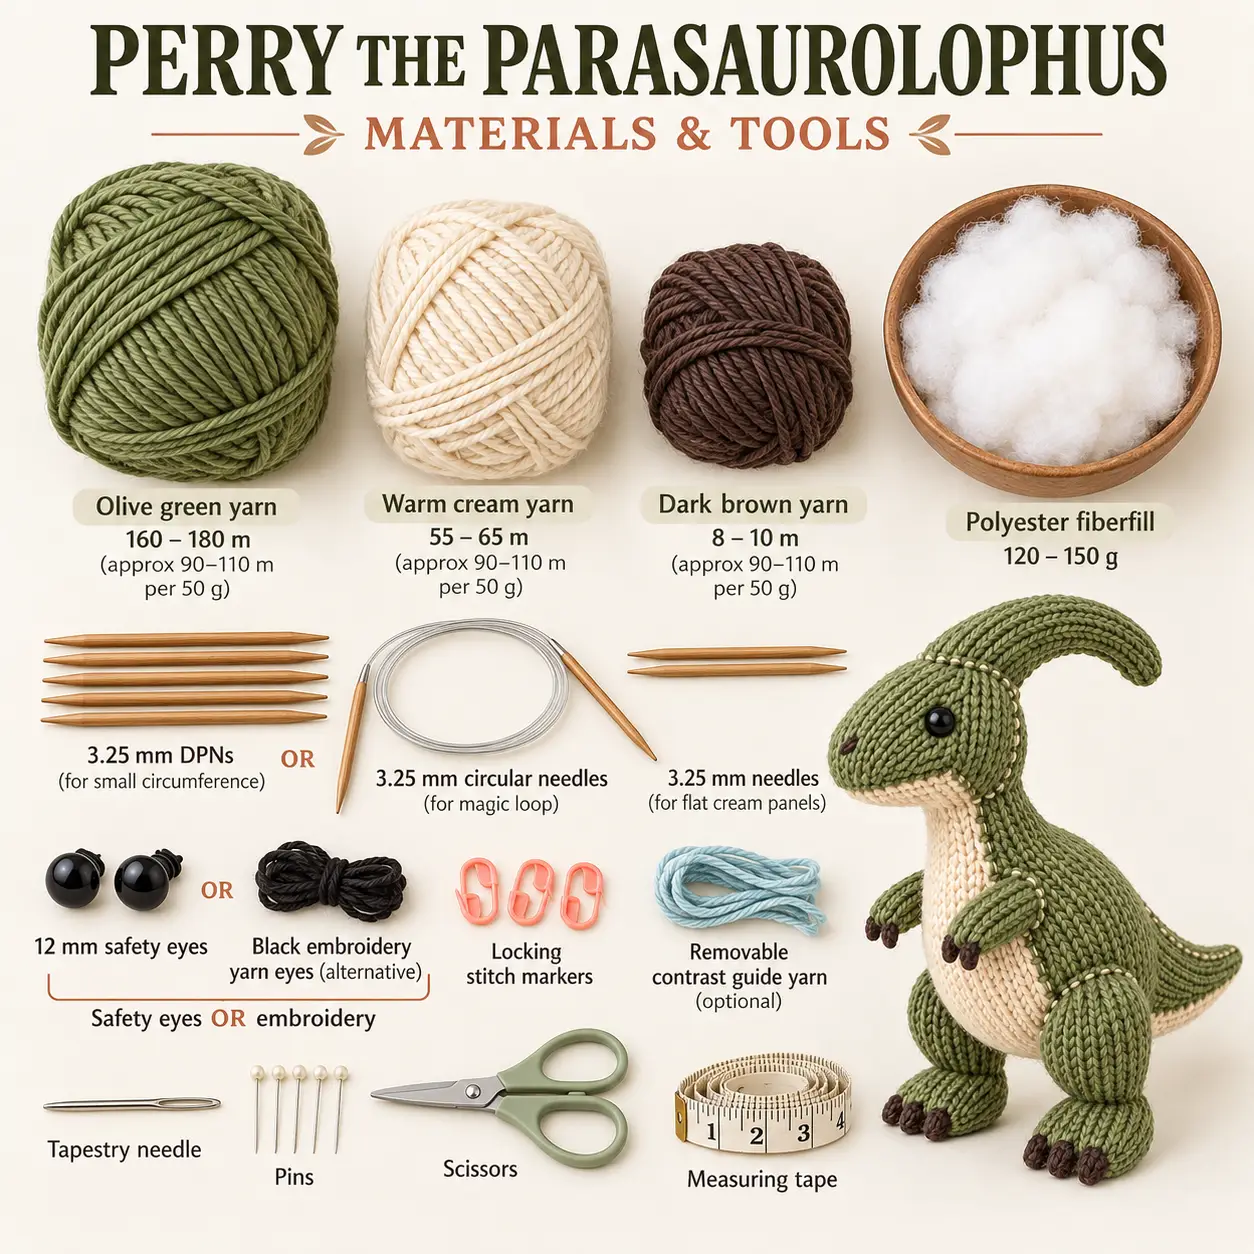
Choose smooth worsted or light Aran yarn, with approximately 90–110 m per 50 g suggested as a useful range. Allow 160–180 m olive green, 55–65 m warm cream, and 8–10 m dark brown. The source supplies these amounts in metres rather than fixed gram quantities.
Use 3.25 mm DPNs or a long circular needle for magic loop, plus the same size for the flat cream pieces. Polyester fiberfill is approximately 120–150 g. Gather a tapestry needle, locking markers, removable contrast yarn, pins, scissors, and measuring tape.
The eye options are two 12 mm black safety eyes or black embroidery yarn. Similar gauge in the green and cream is important: the appliques should rest on the stuffed shapes without being stretched into place.
Techniques Behind the Curved Silhouette
Knit-front-and-back increases build the body, head, and limbs. Knit-two-together decreases narrow their ends, while paired decreases shape the flat panels. I-cord is used for the ten small claws, all left unstuffed.
The crest curve comes from sewing, rather than inserting a wire. Shallow underside tacks shorten that side gradually, while light stuffing allows the tube to bend. The top retains its length, creating a continuous backward arc.
In the parasaurolophus plushie knitting pattern, the body beginning of round stays at centre back; the head and tail markers stay underneath. These landmarks also locate the cream panels and the final centre-back stitching.
Construction and Assembly Order
The body is knitted upward from its lower pole, stuffed, and closed at the neck. The head is also fully closed. This means the head joins to the closed neck through a contact oval, rather than by sewing an open neck ring around the head underside.
Make the belly, jaw/throat, and tail-underside panels separately and smooth them using a fibre-appropriate blocking method. Attach the belly to the body, complete the face, and sew the other cream panels before the head and tail joins obstruct access.
Shape and attach the crest, join the head, then attach the tail. Build the hind legs and feet, add the arms, and finish with cream surface stitching. The thighs keep open tops for their body joins; feet use flattened ankle edges sewn through both layers.
Placement Tips for Perry
- Mark centre front opposite the body beginning of round, then add both side axes. Those guides establish the paired limb positions.
- Label each cream panel by destination. The jaw and belly pieces are different shapes even though both taper.
- Form the crest curve gradually before attaching its root. A low, broad root supports a backward sweep better than an upright horn-like angle.
- Sew the tail underside strip before attaching the tail. Centre it over the tail marker and keep it from wrapping onto the sides.
- Pin both thighs at matching heights before fixing either permanently. Compare the knees from the front and back.
- Keep each flattened foot seam horizontal and capture both fabric layers. This helps the toes point forward.
Working through these checks makes the parasaurolophus plushie knitting pattern easier to assemble consistently.
Troubleshooting
Why Does My Parasaurolophus Plushie Knitting Pattern Crest Stand Straight?
The PDF recommends reducing stuffing in the upper crest and tightening its underside shaping strand a little at a time. The underside must become shorter than the top. If the result develops a sharp bend, release some tension and spread shallower tacks over a longer distance. Aim for a smooth sweep with a gently downward-curving tip.
Why Does the Tail Twist?
Check that the tail beginning of round remains underneath and that the body marker remains at centre back. Repin the root so the tail top continues the body back line. Confirm the cream underside strip is centred before closing the attachment seam.
Why Does Perry Tip Backward?
The source suggests redistributing foot stuffing away from the ankles, positioning the feet slightly farther forward, and shaping the body base so more weight sits over them. Compare thigh heights too. A mismatched pair can undermine balance even when both feet are well shaped.
Care and Secure Finishing
Use the yarn manufacturers’ care instructions as the guide. Spot-clean gently where possible; if washing is appropriate for all materials, avoid twisting the crest or wringing the tail. Reshape the dinosaur and allow its stuffing to dry thoroughly.
Inspect all small claws and attachment seams. The parasaurolophus plushie knitting pattern notes that safety eyes and other small rigid components may be unsuitable for children under three. Embroidered eyes are offered instead. Secure yarn ends deeply inside the stuffed pieces and check the intended use before gifting.
Download the Perry Pattern PDF
The complete parasaurolophus plushie knitting pattern provides written component instructions, quantities, gauge, orientation guidance, placement maps, assembly steps, a piece inventory, finishing checks, and troubleshooting. The source identifies it as a free knitting pattern. Download this version for its tubular crest, separate cream panels, and corresponding joining methods.
DIGITAL DOWNLOAD ONLY — NO PHYSICAL ITEM WILL BE SHIPPED.
Leave a Reply