
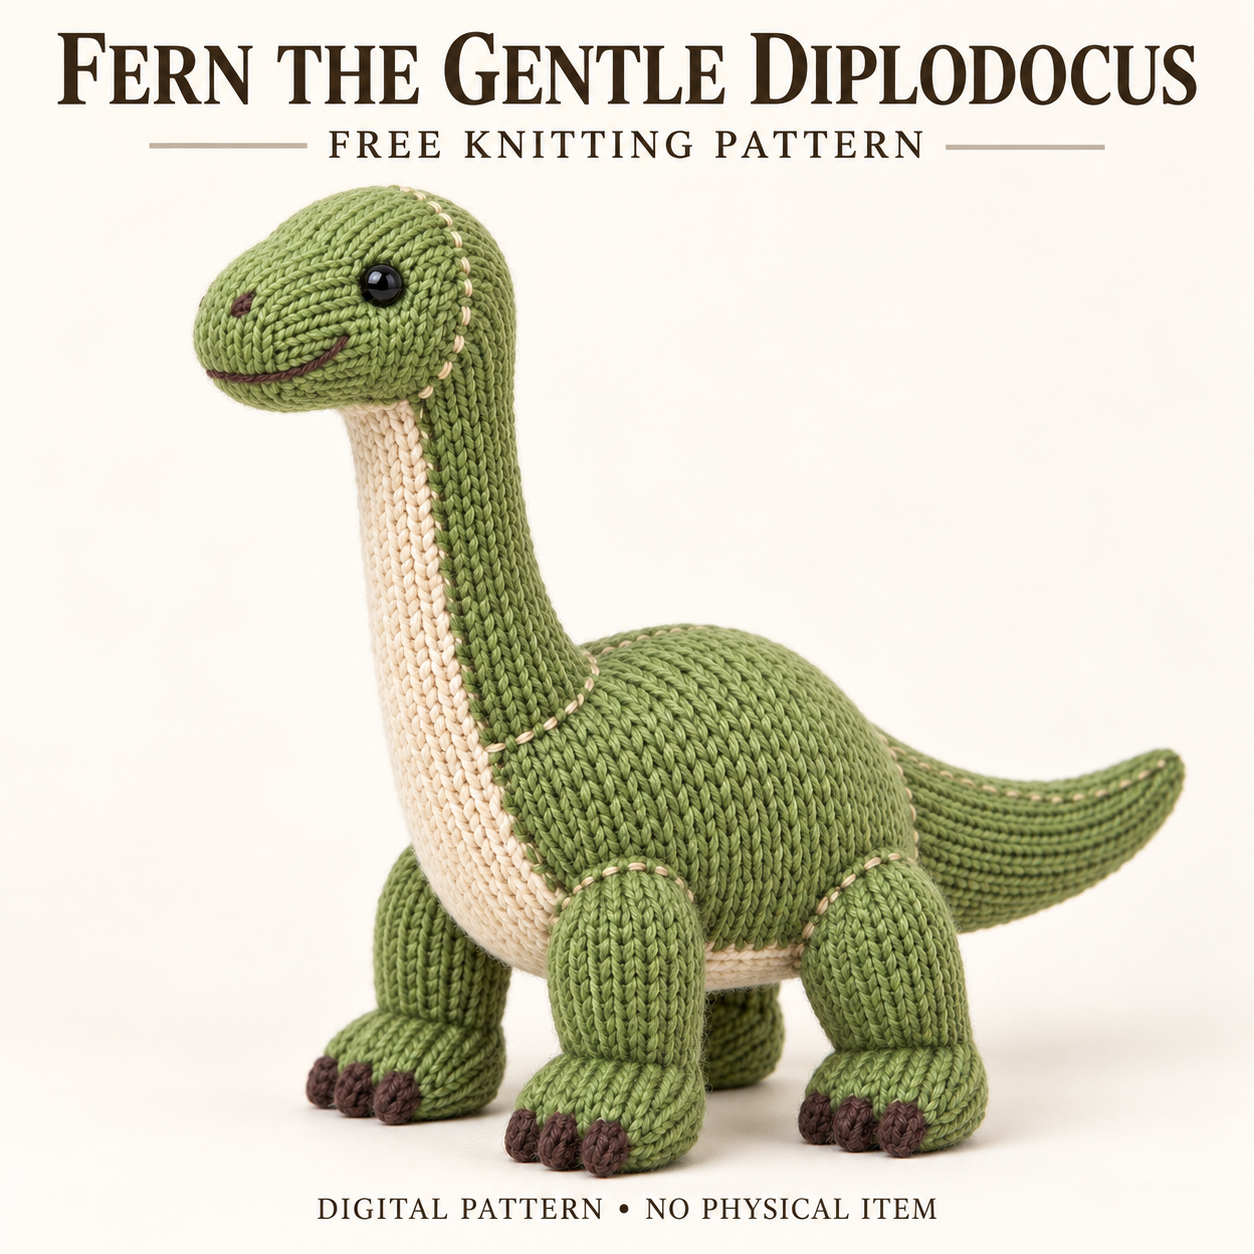
This diplodocus knitting pattern creates Fern, a standing green dinosaur plushie with an upright neck, a rounded body, and a gently tapered tail. Cream throat and belly panels soften the silhouette, while tiny brown claws and an embroidered smile finish the face and feet. The main pieces use circular stockinette; the panels and claw nubs are worked flat. The PDF rates the project intermediate and recommends confidence with small circumferences and sewing stuffed components together. This article explains the materials, construction, and alignment checks that influence the posture, without reproducing the full pattern. The complete free PDF, including its round tables and assembly guidance, is introduced near the bottom.
Features of this diplodocus knitting pattern
Fern’s long neck is a separate knitted tube with a wider body end. The head, torso, tail, upper legs, and broad projecting feet are also distinct components. This lets the maker adjust the pose during pinning rather than relying on one continuous shell.
Warm cream panels run down the throat and across the belly. Their loose ends are incorporated into the neck joins for a connected pale underside. Decorative cream running stitches outline the neck, legs, and tail joins, with a center-back line continuing toward the tail tip. The diplodocus knitting pattern distinguishes these decorative stitches from the green structural seams underneath.
Skill level, approximate size, and gauge
- Craft and type: knitted stuffed long-neck dinosaur.
- Skill level: intermediate.
- Construction: main sections in the round, with flat panels and claws.
- Approximate standing height: 31–34 cm.
- Approximate nose-to-tail length: 39–43 cm.
- Main gauge: 22 stitches × 30 rounds per 10 cm before stuffing.
Flat cream panels should match 22 stitches × 30 rows per 10 cm. The PDF states that finished size varies with materials, tension, and filling, and gives no completion-time estimate. For this diplodocus knitting pattern, matching the flat row gauge is especially useful: a short throat panel should not be stretched to reach its seams.
Yarn, needles, and other supplies
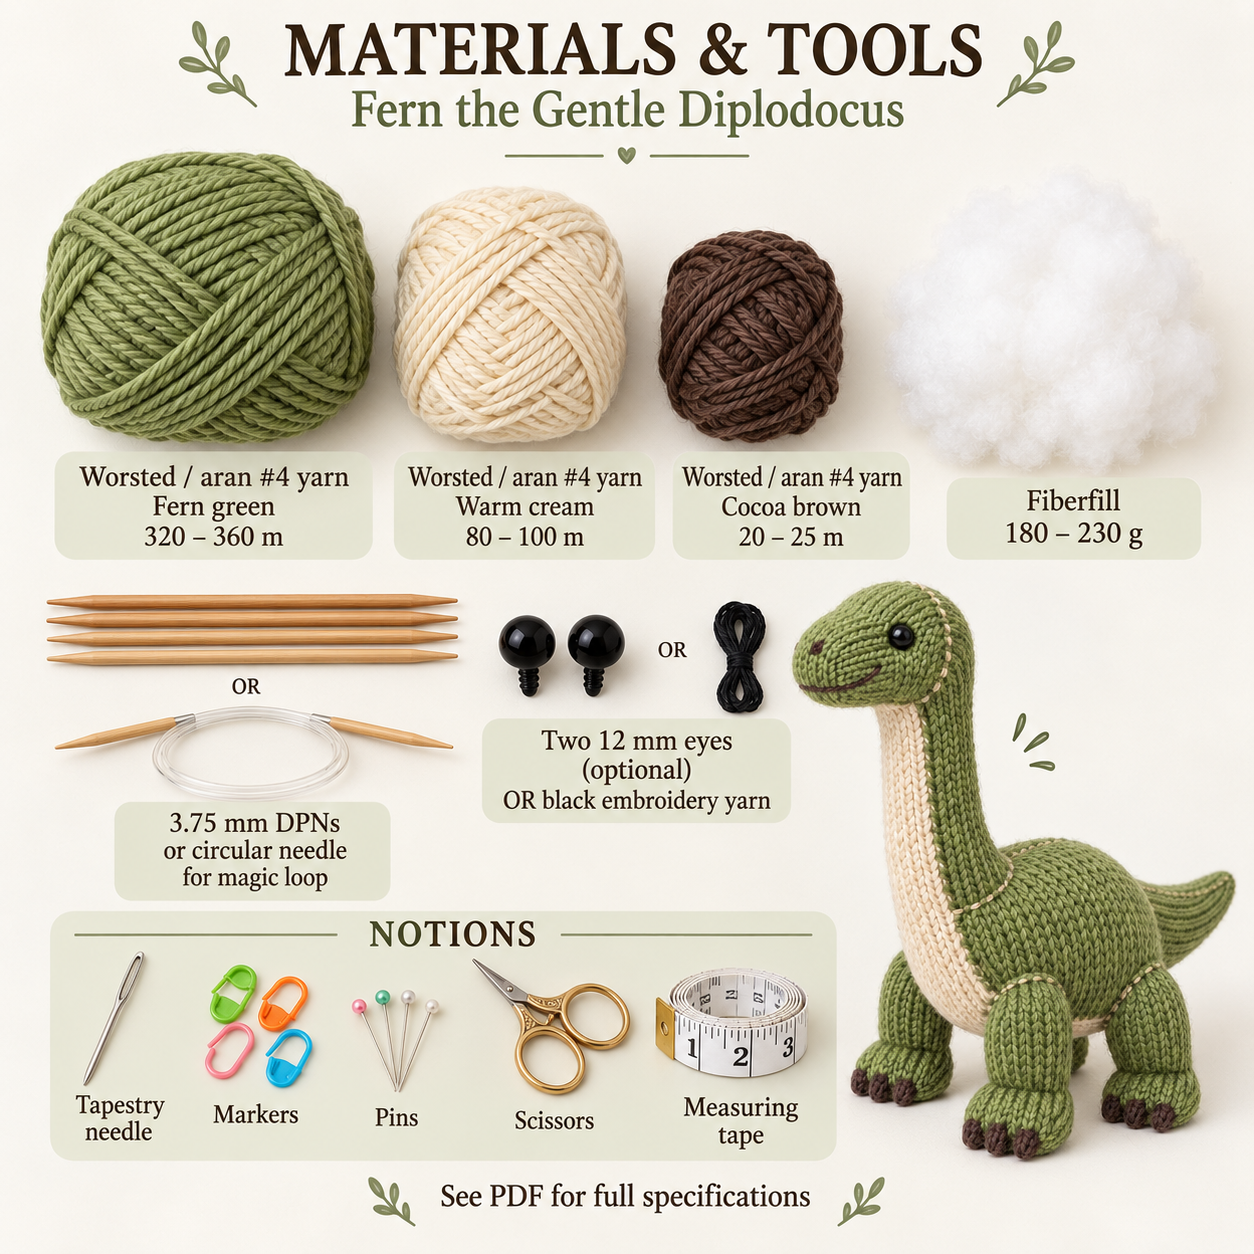
Choose smooth plied worsted/aran #4 yarn. The listed quantities are approximately 320–360 m fern green, 80–100 m warm cream, and 20–25 m cocoa brown. The brown yarn may be the same weight or slightly finer, as stated in the materials list.
Use 3.75 mm double-pointed needles or a circular needle suitable for magic loop. The other supplies are approximately 180–230 g polyester filling, a tapestry needle, stitch and locking markers or scrap yarn, pins, scissors, and measuring tape. Eyes can be two 12 mm black safety eyes or embroidered features.
The diplodocus knitting pattern requires firm fabric that contains stuffing. Check density as well as numerical gauge before committing to the larger pieces.
Knitting and embroidery techniques
The shaping uses knit-front-and-back increases and knit-two-together decreases. You will cast on, bind off, gather small openings, and knit stockinette in continuous unturned rounds. The cream pieces also require purling and attention to their knitted sewing edges.
Finishing includes mattress or ladder stitching, shallow surface attachment, satin-stitch nostrils, a backstitched smile, and loose decorative running stitches. The small claws are knitted nubs, not added rigid hardware. In the diplodocus knitting pattern, most stitch work is repetitive; orienting each opening and keeping the neck balanced calls for the closest attention.
How Fern’s long-neck shape is assembled
The written knitting sections begin with the body and belly panel. The head is worked separately from rear crown toward snout, with eye access preserved before the opening becomes too small. The neck is kept open while its cream throat panel is attached.
During assembly, the prepared head joins the narrow neck end. The neck is filled from above toward its broader base, then attached to the body. The loose cream panel edges are secured into those joins. The tail follows at the rear.
Each foot is attached to an upper leg before the completed legs are positioned on the torso. Brown claws and decorative cream lines finish the details. The diplodocus knitting pattern uses all four foot positions, the neck angle, and the tail attachment together to establish the standing posture.
Tips for the neck and broad feet
- Keep the beginning-of-round markers in the specified underside or inner positions; they help identify front and back.
- Pin the cream panels at full unstretched length before sewing their edges.
- Fill the lower neck firmly in small portions so it supports the upper section without opening the stitches.
- Compare all four foot-to-leg angles before securing their sewing tails.
- Keep the round upper-leg attachment edges in their intended oval shape against the body.
- Leave decorative cream stitches relaxed; the structural seams carry the joins.
These checks help the diplodocus knitting pattern keep its upright neck and forward-facing feet. Assess the pose on a level surface before burying the last attachment tails.
Troubleshooting posture and panels
Why does the neck on my diplodocus knitting pattern project lean forward?
Check that the base is centered on the body’s top line. The PDF suggests opening a short section of the body join, adding firm filling to the lower rear neck, repinning the angle, and resewing. Concentrate support near the base instead of packing the snout harder.
Why does one foot turn outward?
The correction may be at the foot-to-leg seam rather than the body attachment. Reopen the side that needs adjustment, rotate the foot to face forward, and resew. Compare it with the opposite foot before securing the tail.
Why is the cream panel puckering?
Confirm the flat stitch and row gauge first. If the length is correct, remove the tightest surface stitches and resew more loosely. Do not stretch a short panel or pull the green fabric into its shape; the two surfaces should meet comfortably.
Care for the stuffed dinosaur
Follow the yarn and filling manufacturers’ care instructions. Gentle spot-cleaning is a cautious first option for a local mark. If washing is permitted, support the long neck while wet, avoid wringing, reshape the panels and feet, and dry completely away from direct heat.
Check the neck seam, foot joins, claws, and eyes for loosened attachments. The PDF notes that safety eyes and small rigid components may be unsuitable for children under three. Embroidery is an alternative without detachable eye hardware; secure all features and follow applicable local requirements.
Download Fern’s complete free PDF
The full PDF includes materials, gauge, approximate dimensions, abbreviations, component tables, written round and row instructions, finished-view guidance, placement information, detailed assembly, and troubleshooting. Use it for the exact shaping and sewing references rather than treating this overview as a substitute.
DIGITAL DOWNLOAD ONLY — NO PHYSICAL ITEM WILL BE SHIPPED.
Leave a Reply