
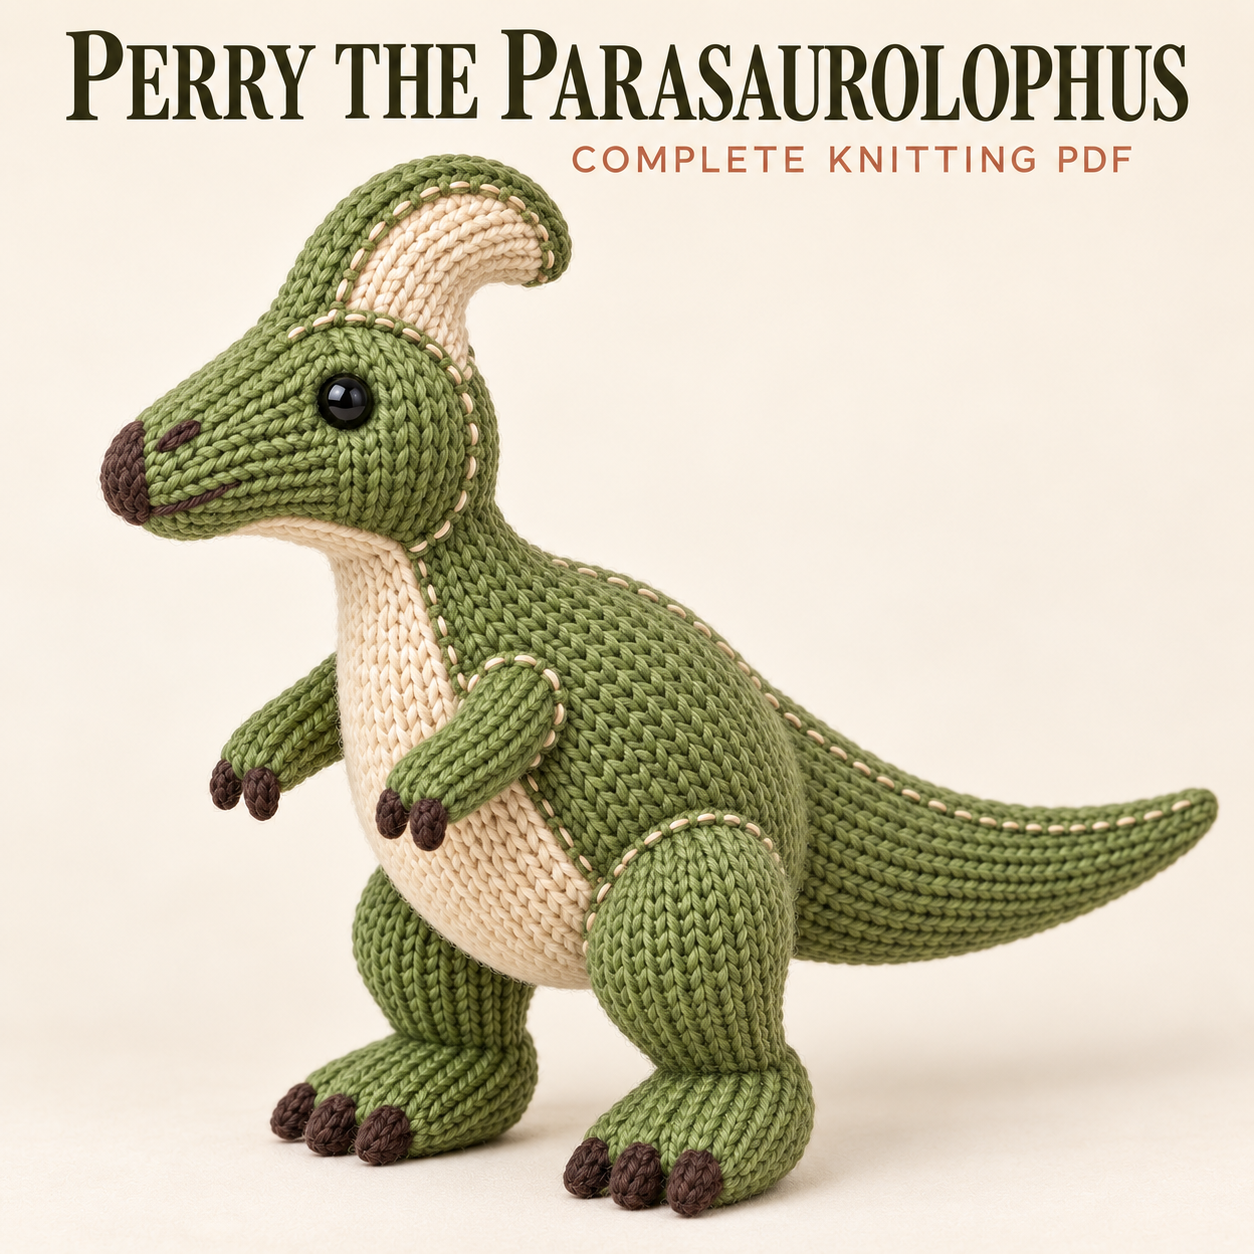
This parasaurolophus knitting pattern makes Perry, a standing olive-green dinosaur with an elongated snout, cream underside, sturdy hind legs, and a tall crest that curves backward. The crest has cream insets on both sides, giving its slim silhouette a clear outline above the head. Brown claws and a low oval nose contrast with the green stockinette, while cream running stitches highlight selected joins. Written for intermediate knitters, the project combines small pieces worked in the round with shaped flat panels and careful assembly. This overview explains the supplies, construction, and placement decisions that matter most, with the complete instructions available in the PDF download near the bottom.
What Distinguishes This Parasaurolophus Knitting Pattern
The 28-page Complete PDF uses two mirrored green shells for the crest, rather than a knitted tube. Each shell receives its own cream inset before the layers are sewn together. That construction creates a narrow, gently curved shape with a visible green border.
A single cream applique travels from the lower belly up the throat to the head underside. The tail remains green, with decorative cream stitching along its top. The brown nose is a separate, lightly stuffed piece attached to the closed snout tip. These details distinguish this version from the other Perry PDF in the collection.
Skill Level, Gauge, and Finished Dimensions
The source identifies the project as intermediate. You need confidence with DPNs or magic loop, shaped stockinette, small-circumference knitting, and attaching stuffed components symmetrically.
The PDF gives approximate finished dimensions of 27–29 cm from feet to crest tip, 34–37 cm from nose to tail tip, and 8–9 cm across the widest body area. The tail is about 15 cm long, and the crest measures 10–11 cm from base to tip. These figures can vary with tension and stuffing.
Both circular and flat stockinette gauges are 22 stitches and 30 rounds or rows per 10 cm. For this parasaurolophus knitting pattern, checking both directions helps preserve the long snout and the fit of the cream panels.
Yarn, Needles, and Notions
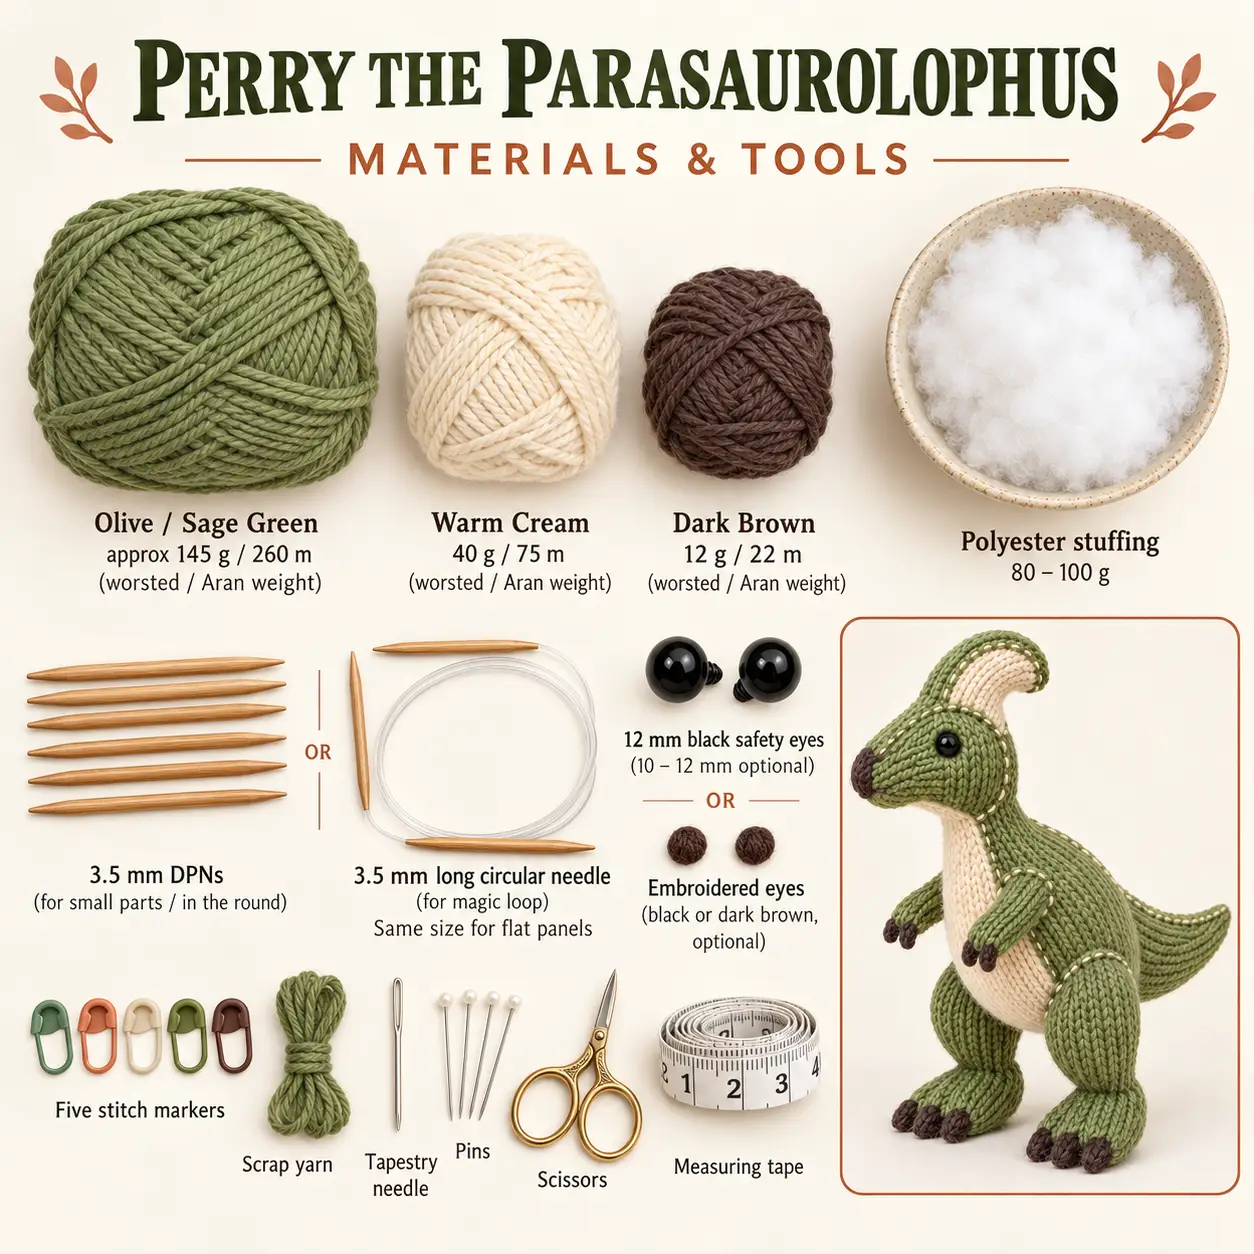
Use smooth worsted or Aran yarn: approximately 145 g/260 m olive or sage green, 40 g/75 m warm cream, and 12 g/22 m dark brown. Similar weight and fibre behaviour in the green and cream help the appliques sit smoothly.
The main needles are 3.5 mm DPNs or a long circular needle for magic loop; use the same size for the flat pieces. Allow approximately 80–100 g of polyester toy stuffing. You also need five stitch markers, scrap yarn, a tapestry needle, pins, scissors, and a measuring tape.
The standard eye choice is a pair of 12 mm safety eyes, with 10–12 mm allowed according to preference. Black or dark brown embroidery yarn provides the stitched-eye alternative.
Shaping and Sewing Techniques
Most green pieces use circular stockinette, with knit-front-and-back increases and paired decreases controlling their profiles. The crest shells, cream insets, and belly/throat panel are worked flat with their smooth right sides facing outward.
Small I-cords form the claws: three for each foot and two for each hand. These remain unstuffed. Mattress stitch joins the crest edges; whip and ladder stitches attach pieces and appliques. The decorative cream running stitch is separate from the structural sewing.
The parasaurolophus knitting pattern keeps the body beginning of round at centre back, the head marker underneath, and the tail marker on its underside. Preserve those references for assembly.
How the Components Fit Together
The body starts at the lower pole and narrows into a neck whose top opening remains available for head attachment. The head runs from snout to back, with both ends ultimately closed. Fit safety eyes while the head is still accessible, before its final decreases.
Prepare the cream-inset crest, tapered tail, two closed upper-leg pods, feet, arms, belly/throat panel, and brown nose separately. Feet retain open ankles for joining to the thighs; arm shoulders are flattened for sewing through both layers.
Finishing the face and crest comes before attaching the head. The cream applique follows, then the tail, hind-leg units, arms, and decorative stitching. That order leaves the major placement lines visible while each join is established.
Tips for a Balanced Standing Dinosaur
- Label crest shells and insets A and B. Matching the mirrored pieces prevents the inner curve from twisting.
- Keep the early snout rounds moderately filled and the cheek area firmer. This preserves an elongated face rather than a ball-shaped muzzle.
- Pin the neck edge evenly around the head underside oval. Gathering the opening can tilt the head.
- Firm the tail base and reduce stuffing toward its tip. Support should come from the broad root, with flexibility farther out.
- Compare both leg units on a flat surface before completing their body seams. The feet should point forward and sit level.
- Use relaxed decorative stitches. Tight cream accents can dent the surrounding fabric.
These checks give the parasaurolophus knitting pattern its intended silhouette without relying on extra rigid supports.
Troubleshooting
Why Does My Parasaurolophus Knitting Pattern Crest Look Puffy?
The crest needs only enough stuffing to keep its two shells from collapsing. Remove excess filling, especially near the base, and flatten the seam gently with your fingers. Also check that both shells have matching row counts and that the shorter inner edges face the snout. More filling cannot correct a mismatched pair.
Why Does the Head Droop or Twist?
The source recommends firmer support in the upper body and lower neck for forward drooping. A sideways twist calls for checking the evenly distributed underside attachment and centred crest. Reopen only the necessary seam section, repin from the body and head guides, and adjust before resewing.
Why Do the Feet or Belly Patch Look Uneven?
Keep foot soles flatter than their tops and compare the thigh attachment spans while the dinosaur is standing. For a rippled applique, release tight stitches and repin without stretching. Shallow, relaxed sewing lets the cream panel follow the rounded body.
Care and Eye Choices
Follow the care instructions for every yarn used. Gentle spot-cleaning can limit disturbance to the narrow crest and decorative joins. If the materials permit washing, avoid wringing, reshape carefully, and let the stuffing dry completely away from direct heat.
Check claws, seams, and eyes before handling or gifting. The PDF notes that safety eyes and other small rigid parts may be unsuitable for children under three; embroidered eyes are the alternative. The parasaurolophus knitting pattern does not establish a safety certification for the finished toy.
Download the Complete Perry PDF
The complete parasaurolophus knitting pattern includes component instructions, stitch counts, gauge, supplies, placement maps, assembly guidance, decorative-stitch paths, troubleshooting, and a quick reference. It is identified as a free knitting pattern in the source PDF. Use that file for the full shaping sequences and placement coordinates.
DIGITAL DOWNLOAD ONLY — NO PHYSICAL ITEM WILL BE SHIPPED.
Leave a Reply