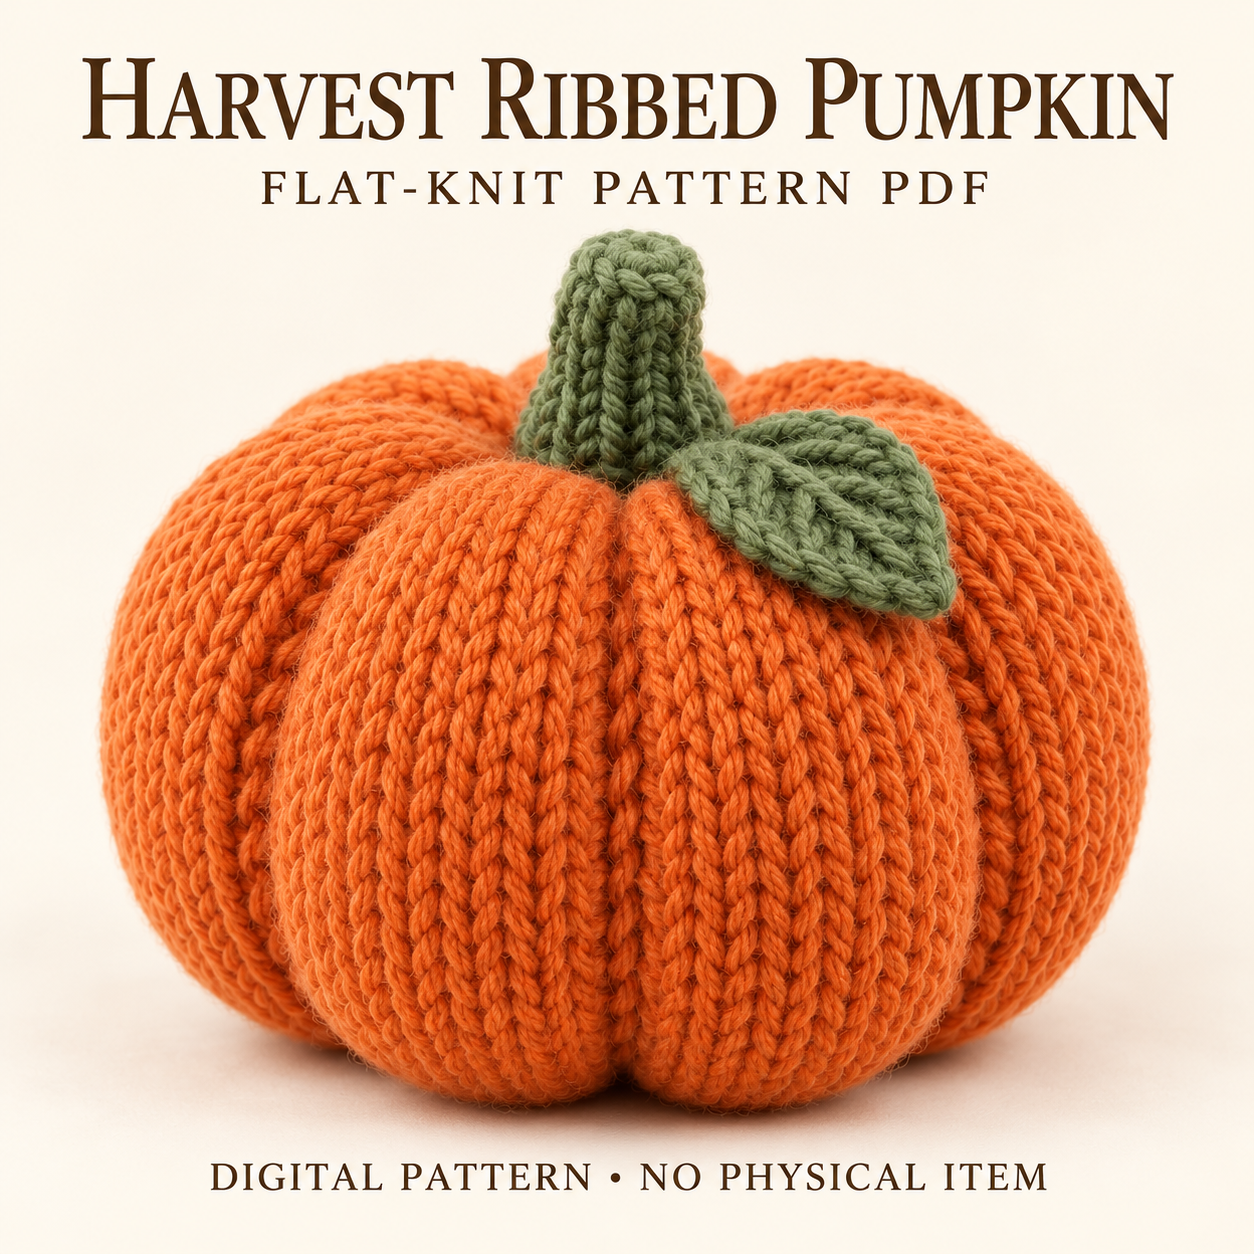
The Harvest ribbed pumpkin knitting pattern starts with a flat rectangle and turns it into a squat orange decoration with eight rounded lobes. A ribbed green stem and a single shaped leaf complete the design, with the leaf resting beside the stem rather than covering the pumpkin’s centre. Broad stockinette panels provide the main texture, while narrower purl grooves guide the final sculpting. This project combines straightforward flat knitting with finishing that deserves a little patience: the seam, gathers, stuffing, and shaping strands all contribute to the silhouette. This guide explains those choices and the supplies listed in the PDF. The complete written pattern is available to download near the bottom for the exact rows and finishing directions.
How the ribbed pumpkin knitting pattern creates its shape
The body is wider than it is tall, with gentle indentations at the upper and lower centres. Its eight broad panels become the visible lobes after the flat fabric is seamed into a tube, filled, gathered, and sculpted.
The back seam joins two half-gutters into one complete groove. That detail matters: it allows the seam to disappear into the segmentation instead of producing an unintended ninth lobe. The green leaf has a stockinette centre, garter edging, and a slipped-stitch vein. Its free outer section gives the decoration a softer outline than a fully stitched-down leaf would.
Skills, gauge, and approximate dimensions
The main body uses repeated knit and purl rows at a constant stitch count. The smaller pieces add shaping, ribbing, and slipped stitches. You will also need mattress seaming, gathering, and a tapestry needle for the sculpting passes. The PDF does not assign a formal difficulty label, so consider those techniques when deciding whether to start.
For the ribbed pumpkin knitting pattern, the body gauge is 14 stitches and 20 rows per 10 cm on 6 mm needles, measured relaxed. approximate dimensions are 19–21 cm wide, 18–20 cm deep, and 12–14 cm high before the stem. Overall height is approximately 16–18 cm. The green accents use smaller needles, with the stem judged by its finished ribbed width rather than a stockinette swatch.
Yarn quantities, needles, and notions
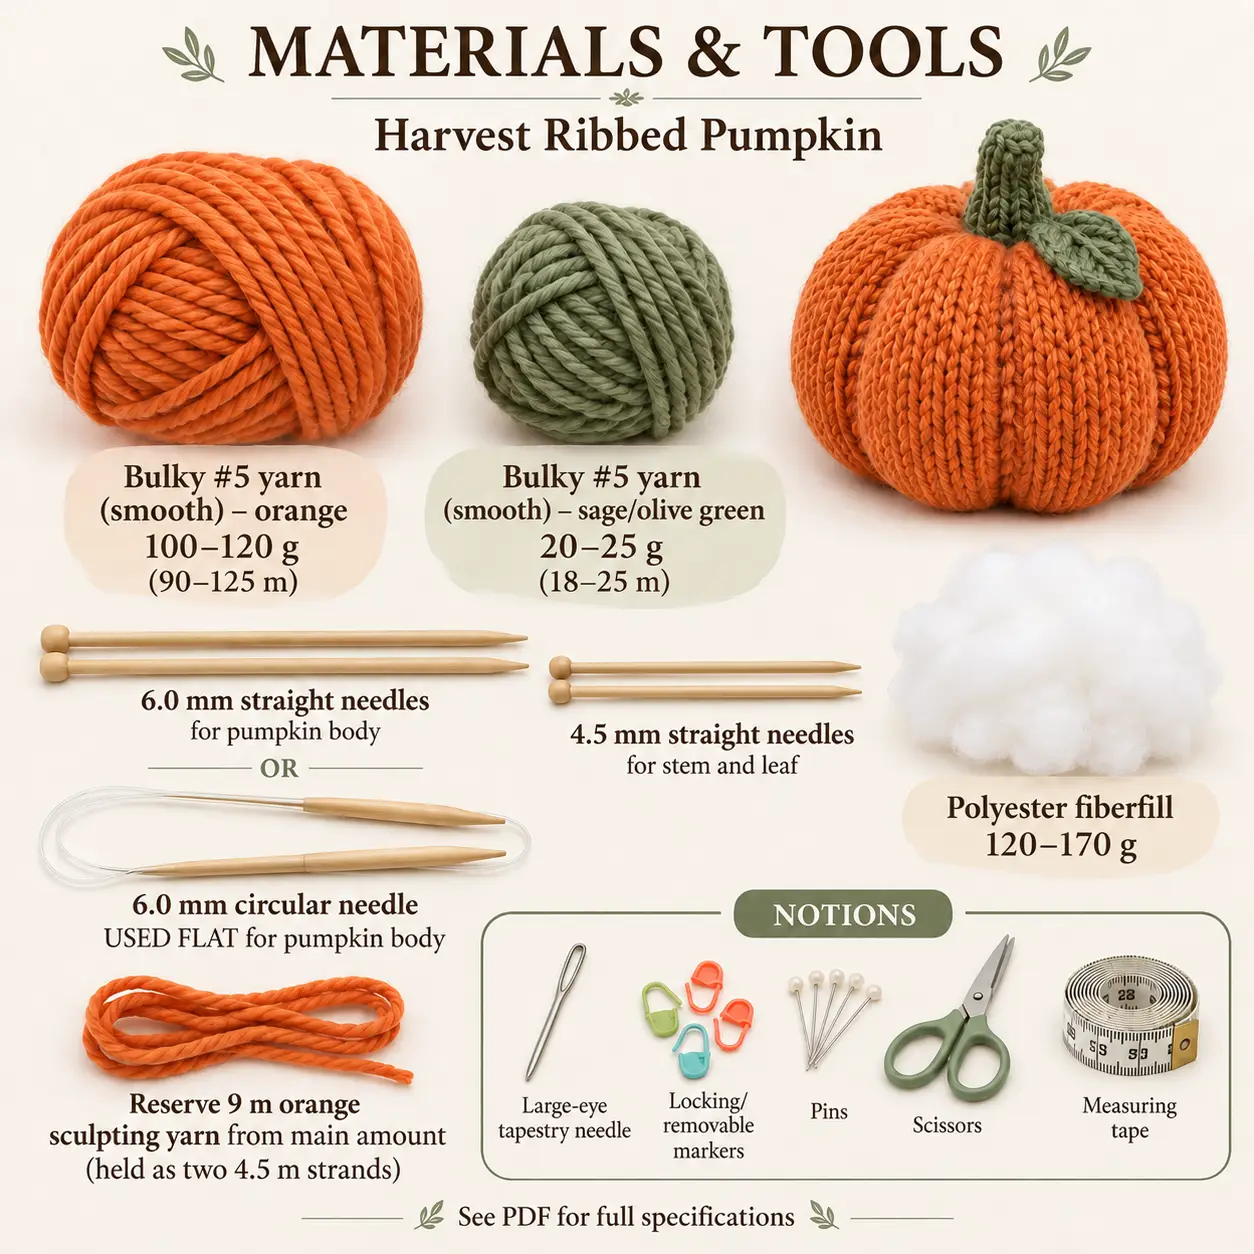
Use smooth bulky-weight yarn so the knitted panels and grooves remain visible. The PDF lists orange yarn at approximately 100–120 g, or 90–125 m, and sage or olive green at approximately 20–25 g, or 18–25 m.
Prepare 6 mm straight needles, or a circular needle used flat, for the body. The stem and leaf use 4.5 mm straight needles. Polyester fiberfill requirements are approximately 120–170 g. Keep a large-eye tapestry needle, locking or removable markers, pins, scissors, and measuring tape nearby.
The ribbed pumpkin knitting pattern reserves about 9 m of orange yarn from the stated main quantity for sculpting. This becomes two equal strands held together, rather than an additional yarn purchase. There are no eyes, buttons, or facial components to install.
Knit textures and small-piece techniques
The body alternates broad stockinette areas with reverse-stockinette gutters. Slipped edge stitches form the seam selvedges. Those edges are already part of the written count, so follow the PDF’s panel arrangement when preparing the side seam.
The ribbed pumpkin knitting pattern uses a flat-knitted 1 × 1 rib stem, which is seamed into a small tube. Light filling supports it without forcing the ribbing wide. The leaf widens and narrows through increases and decreases, with its centre slip stitch helping define the vein. Keep the edging relaxed when blocking or pinning so the pointed outline is not pulled out of shape.
From flat body panel to filled pumpkin
Seam the body’s vertical edges with the rows matched evenly. Gather the lower edge while the upper opening remains accessible, then distribute the filling through that opening. Only close the top after the body has enough stuffing and the silhouette has been assessed.
Shape the filled body into a low, wide form before beginning the eight exterior sculpting passes. The doubled orange strand travels through the centres and down the purl grooves, making the panel divisions more pronounced.
Finish the green stem separately, leaving its lower section unstuffed for attachment. Centre it over the top gather, then position the leaf at the pumpkin’s own left-front quadrant. Secure the leaf base while leaving the outer section free to rest naturally.
Balancing stuffing and sculpting tension
Fill the outer panel areas evenly, keeping the upper and lower centres slightly softer. This lets the gathers sink inward without crushing the surrounding lobes. Stop before the stitches stretch enough to reveal the fiberfill.
The ribbed pumpkin knitting pattern achieves its final proportions through gradual adjustments, not maximum tension. Tighten each groove only until it is defined, then compare the whole circumference. If one lobe shrinks noticeably, ease that pass before tightening neighbouring strands.
Use the centre-back seam as your orientation reference when placing the leaf. The stem can have a slight natural lean, but it should stay centred over the gather. Check the base on a flat surface before burying the last tails.
Troubleshooting the pumpkin’s silhouette
Why does this project look too tall?
Redistribute filling outward toward the lobes and gently bring the upper and lower centres closer together. Reassess the profile before adjusting the sculpting yarn. More tension alone can crush a panel without creating the intended squat proportions.
Why is the back seam creating an extra division?
Check that the two half-gutters meet as one groove. If the seam sits outside that channel, adjust its tension or resew the affected area. The PDF also suggests discreet orange duplicate stitches to soften a visible seam.
How can I stop the pumpkin rocking on its base?
Move filling away from the lower centre toward the surrounding lobes, then gently press that centre inward. Compare the lower profile from several angles. The base should feel softly flattened rather than sharply pointed by a bulky gather.
Caring for the knitted decoration
Follow the care label of the yarn used. The PDF notes that surface cleaning is usually easier than machine washing for a heavily stuffed pumpkin. Avoid pulling the leaf or stem when handling marks on the body.
If the leaf curls excessively, the pattern suggests dampening and pinning it flat until dry; check that your chosen yarn permits that treatment. A hidden matching tack can help keep the leaf from flipping. Preserve the rounded panels during cleaning, and allow the decoration to dry thoroughly before putting it away.
Download the complete Harvest pumpkin PDF
The ribbed pumpkin knitting pattern PDF includes the full body rows, stem and leaf instructions, placement map, and eight-lobe sculpting sequence. Keep it beside your work for the exact counts and access reminders.
DIGITAL DOWNLOAD ONLY — NO PHYSICAL ITEM WILL BE SHIPPED.
Leave a Reply