
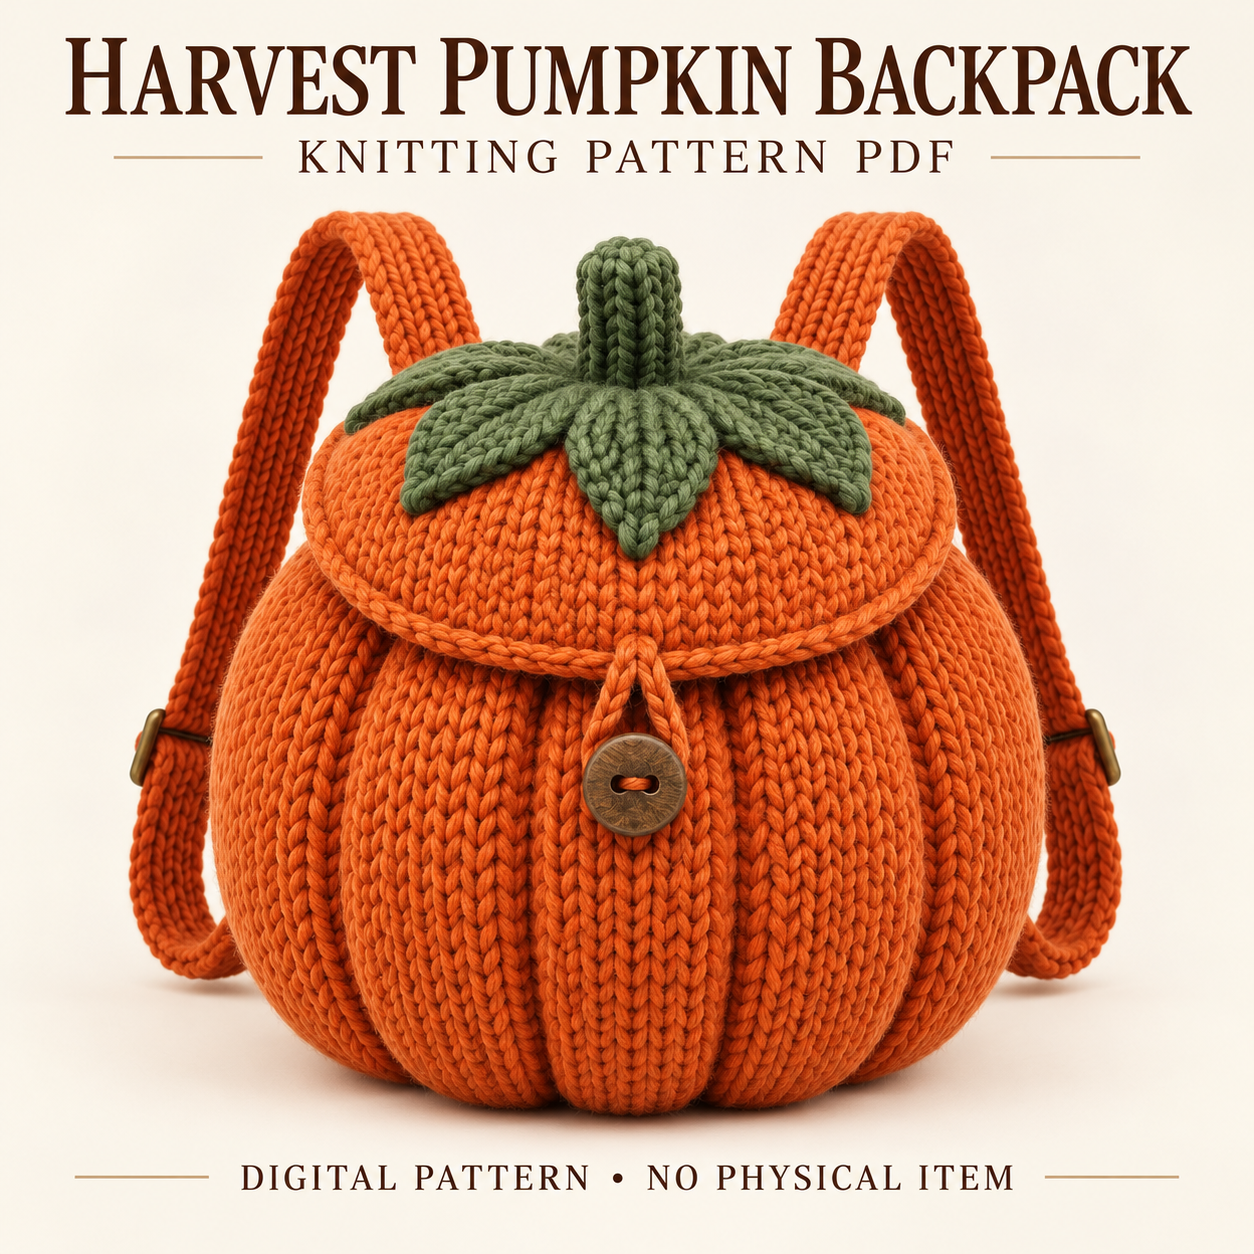
This pumpkin backpack knitting pattern turns a sculpted orange pumpkin into a functional bag with a leafy flap and two adjustable knitted shoulder straps. Ten raised ribs surround the hollow body, while a narrower garter rim keeps the opening defined. The rounded flap carries eight green leaves and an upright stem, so the pumpkin crown moves with the closure. A wooden or wood-look button finishes the front. The PDF combines circular knitting, flat accessories, I-cord finishing, and reinforced strap attachments. This guide explains how those parts work together and which supplies to prepare. Download the complete instructions for the detailed shaping, hardware installation, and assembly steps.
Features of the pumpkin backpack knitting pattern
The bag’s rounded outline comes from knitted ribs and optional internal shaping strands. Its body stays hollow: filling belongs only in the small stem. The flap has its own I-cord trim and button loop, and its leafy crown is attached to the flap rather than the stationary bag rim.
The straps include upper attachment tabs, lower anchor loops, and two tri-glide sliders. These details create an adjustable arrangement, but reinforcement remains an important part of the construction. The PDF recommends backing the knitted straps for a functional bag; it does not state a rated carrying capacity.
Experience, gauge, and approximate size
The project suits advanced beginners to intermediate knitters who can work in the round, shape pieces, seam flat accessories, and attach hardware. Read the strap-routing directions before assembly so you understand the relationship between sliders and lower loops.
The pumpkin backpack knitting pattern specifies 13 stitches and 18 rows or rounds per 10 cm on 6.5 mm needles for the main fabric. Accessories use 15 stitches and 20 rows or rounds per 10 cm on 5 mm needles, measured relaxed and lightly blocked.
approximate dimensions include 30–32 cm width, 25–27 cm height to the rim, and 17–19 cm depth. The planned opening circumference is 45–47 cm. These figures depend on matching gauge and finishing the shaping consistently.
Materials for the bag and hardware
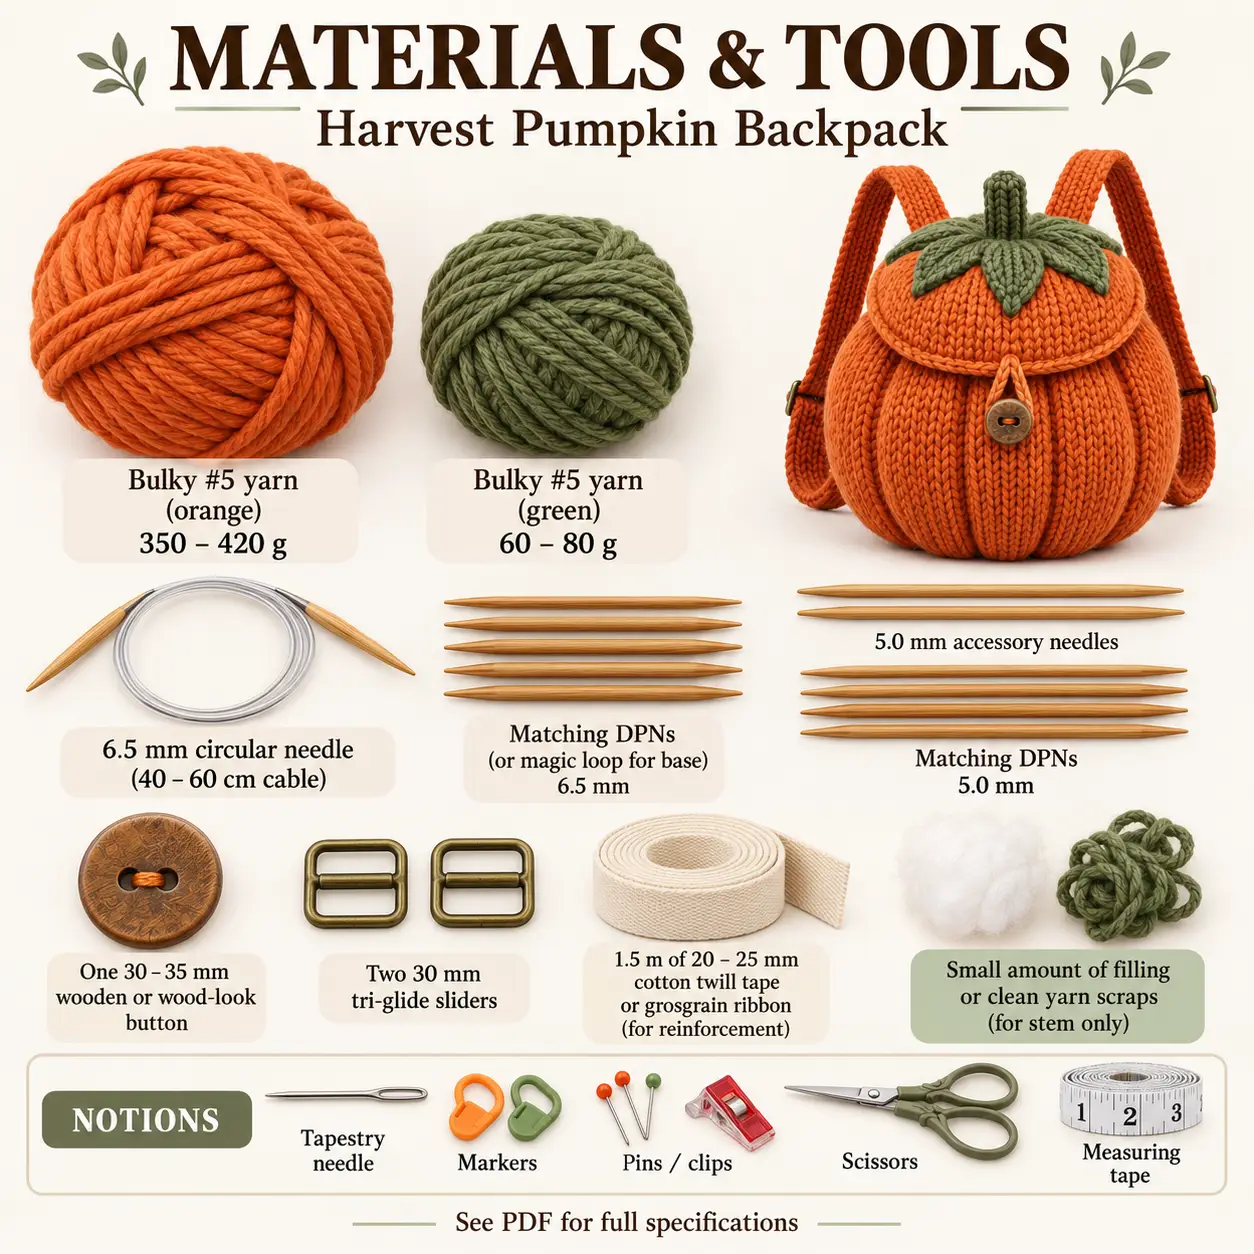
Gather bulky-weight yarn in orange, 350–420 g, and green, 60–80 g. A smooth, firm wool/acrylic blend or sturdy acrylic is suggested. Avoid chenille that hides the purl gutters or stretches unpredictably in this construction.
The main needles are 6.5 mm circulars with a 40–60 cm cable, plus double-pointed needles or a magic-loop arrangement for the base. Accessories use 5 mm needles, including suitable DPNs for the stem and I-cord.
For the pumpkin backpack knitting pattern, also prepare one 30–35 mm button, two 30 mm tri-glide sliders, and the recommended 1.5 m of 20–25 mm cotton twill tape or grosgrain ribbon. A tiny amount of fiberfill or clean yarn scraps fills the stem only. Add a tapestry needle, markers, pins or clips, scissors, and measuring tape.
Knitting techniques and orientation guides
The body grows in the round from the bottom centre toward the rim. Purl gutters separate the raised ribs, while the top narrows into the garter opening. The flap, leaves, tabs, and straps are worked flat; the stem is circular.
Orientation matters in the pumpkin backpack knitting pattern. At the 100-stitch body reference, the centre back is the raised first rib’s fifth stitch, and the centre front is the opposite sixth rib’s fifty-fifth stitch. The gutter immediately before the beginning of round is a rear reference, but it is not itself the centre-back raised rib. Keep those distinctions visible with removable markers during finishing.
Construction from hollow body to leafy flap
Complete the body and rim before arranging the closure. If using the ten internal shaping strands, adjust their tension evenly before attaching the straps. They should define the ribs without closing the bag or drawing the rim inward excessively.
Make the flap and its trim, then position eight leaf bases beneath the stem on the flap crown. Leave the outer leaf sections free. Attach the hinge across the rear half so the flap sits symmetrically when closed.
Fit the front button to the loop’s natural reach after the flap is attached. Stretching the loop to suit a preselected button position can distort the closure. Confirm that the opening remains usable and the leafy crown lifts with the flap.
Reinforcing and fitting the adjustable straps
Back the straps with the recommended tape or ribbon on their wrong sides. The PDF’s planned strap dimensions are approximately 2.6–2.8 cm wide and 70–74 cm long before adjustment, so measure the completed pieces before routing them through the hardware.
The pumpkin backpack knitting pattern uses upper tabs sewn with a square-and-X attachment through the strap and body. Lower U-shaped loops provide the lower anchor points. Route each strap through its tri-glide, through its lower loop, and back through the tri-glide, following the PDF’s orientation. Finish the ends with stops.
Check that both sides adjust in the same direction. Inspect attachment stitching before use, and avoid treating the knitted construction as a bag rated for heavy loads.
Troubleshooting shape, straps, and closure
Why is the flap off-centre on my pumpkin backpack knitting pattern project?
Recheck the raised centre-back rib and the opposite centre-front rib. Using a purl gutter as the main centre reference can shift the flap. Pin the hinge again with the bag upright, then check the front button position before permanent sewing.
Why do the straps stretch?
Knitted fabric can lengthen under use. Check that the recommended backing is attached securely and that the reinforcement reaches the relevant connection areas. Follow the supplied construction rather than adding unsupported carrying-capacity claims or relying on an unreinforced strap alone.
Why does the base pucker?
An over-tightened cast-on centre can draw the lower fabric into a tight point. Ease the centre tail slightly and reshape the base evenly before securing it again. Reassess the base with the bag open so you do not correct one area by over-tightening another.
Caring for the finished backpack
Follow the yarn’s care instructions while accounting for the button, sliders, reinforcement, and filled stem. Gentle surface cleaning limits unnecessary soaking of mixed materials. Avoid wringing the ribs or pulling on damp straps.
Let the bag dry fully in its intended shape, away from direct heat. Inspect the upper tabs, lower loops, slider routing, and button attachment periodically. If a connection loosens, repair it before further use. Choose handling appropriate to the finished bag and its actual materials; the PDF does not establish a tested load rating.
Download the Harvest backpack PDF
The pumpkin backpack knitting pattern PDF provides the full body shaping, flap construction, accessory instructions, and illustrated orientation guidance. Use it for stitch counts, strap routing, and the finishing sequence.
DIGITAL DOWNLOAD ONLY — NO PHYSICAL ITEM WILL BE SHIPPED.
Leave a Reply