
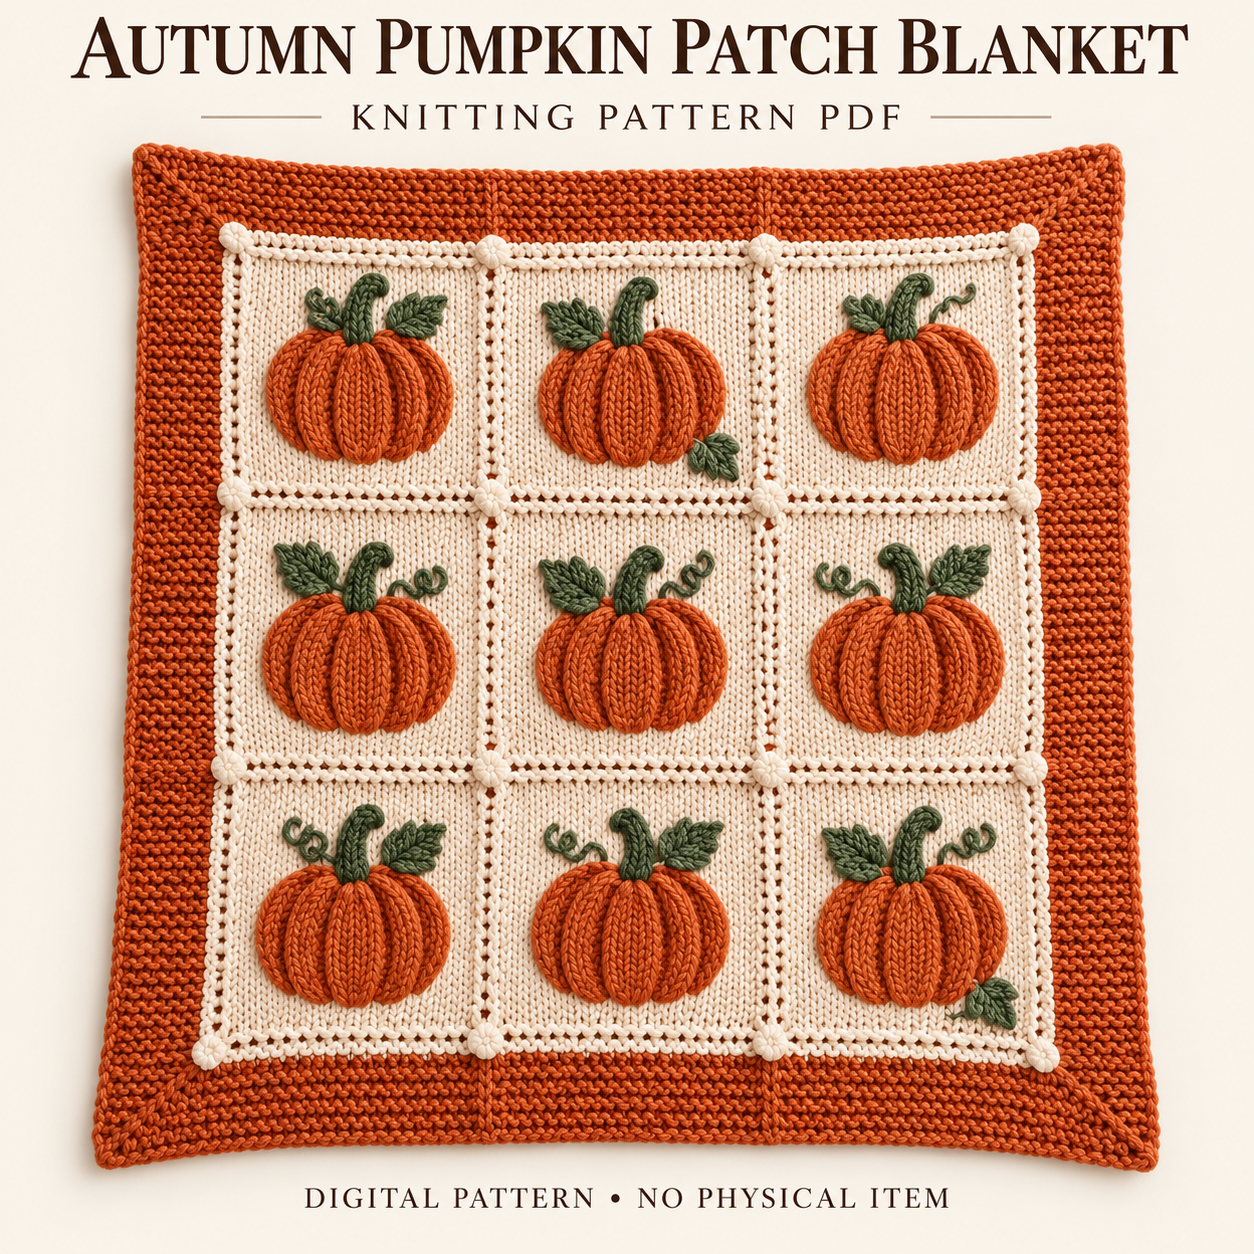
This pumpkin blanket knitting pattern creates a double-layer square blanket with nine raised orange pumpkins arranged across a cream grid. Olive-green stems, leaves, and curled tendrils bring small variations to the repeated motifs, while a broad burnt-orange border frames the front. The reverse is also knitted, using nine plain orange squares rather than a fabric lining. Everything is worked flat, including the border strips. The PDF describes the skill level as confident beginner to intermediate, with shaping and careful seaming alongside familiar knit and purl stitches. This overview explains the supplies, modular construction, and finishing points that affect the result. The complete pattern PDF is introduced near the bottom.
About this pumpkin blanket knitting pattern
The front contains a three-by-three arrangement of cream squares. Each pumpkin is a separate stockinette applique with gently tensioned channels that form five lobes. No stuffing is used anywhere in the blanket; the raised effect comes from shaping, seam ease, and the fabric itself.
The motif arrangement is deliberate: nine stems, eleven leaves, and eight tendrils are distributed according to the placement map. Cream decorative seams and sixteen seam buds emphasize the grid. In this pumpkin blanket knitting pattern, the all-orange reverse and matching borders conceal the applique backs and create a finished second face.
Skill level, finished targets, and gauge
- Craft and type: knitted double-layer blanket.
- Skill level: confident beginner/intermediate.
- Method: flat knitting, applique, seaming, and blocking.
- Calculated finished target: approximately 91 × 91 cm after blocking.
- Individual square target: approximately 23.3 × 23.3 cm.
- Border width target: approximately 10.5 cm per side.
Stockinette gauge is 18 stitches × 24 rows per 10 cm after blocking. Garter gauge is 18 stitches × 32 rows over the same area. All measurements are design targets, and the PDF gives no making-time estimate. The pumpkin blanket knitting pattern requires matching square sizes and matching finished layers; uneven gauge becomes particularly noticeable when the grid is assembled.
Materials and tools for the two layers
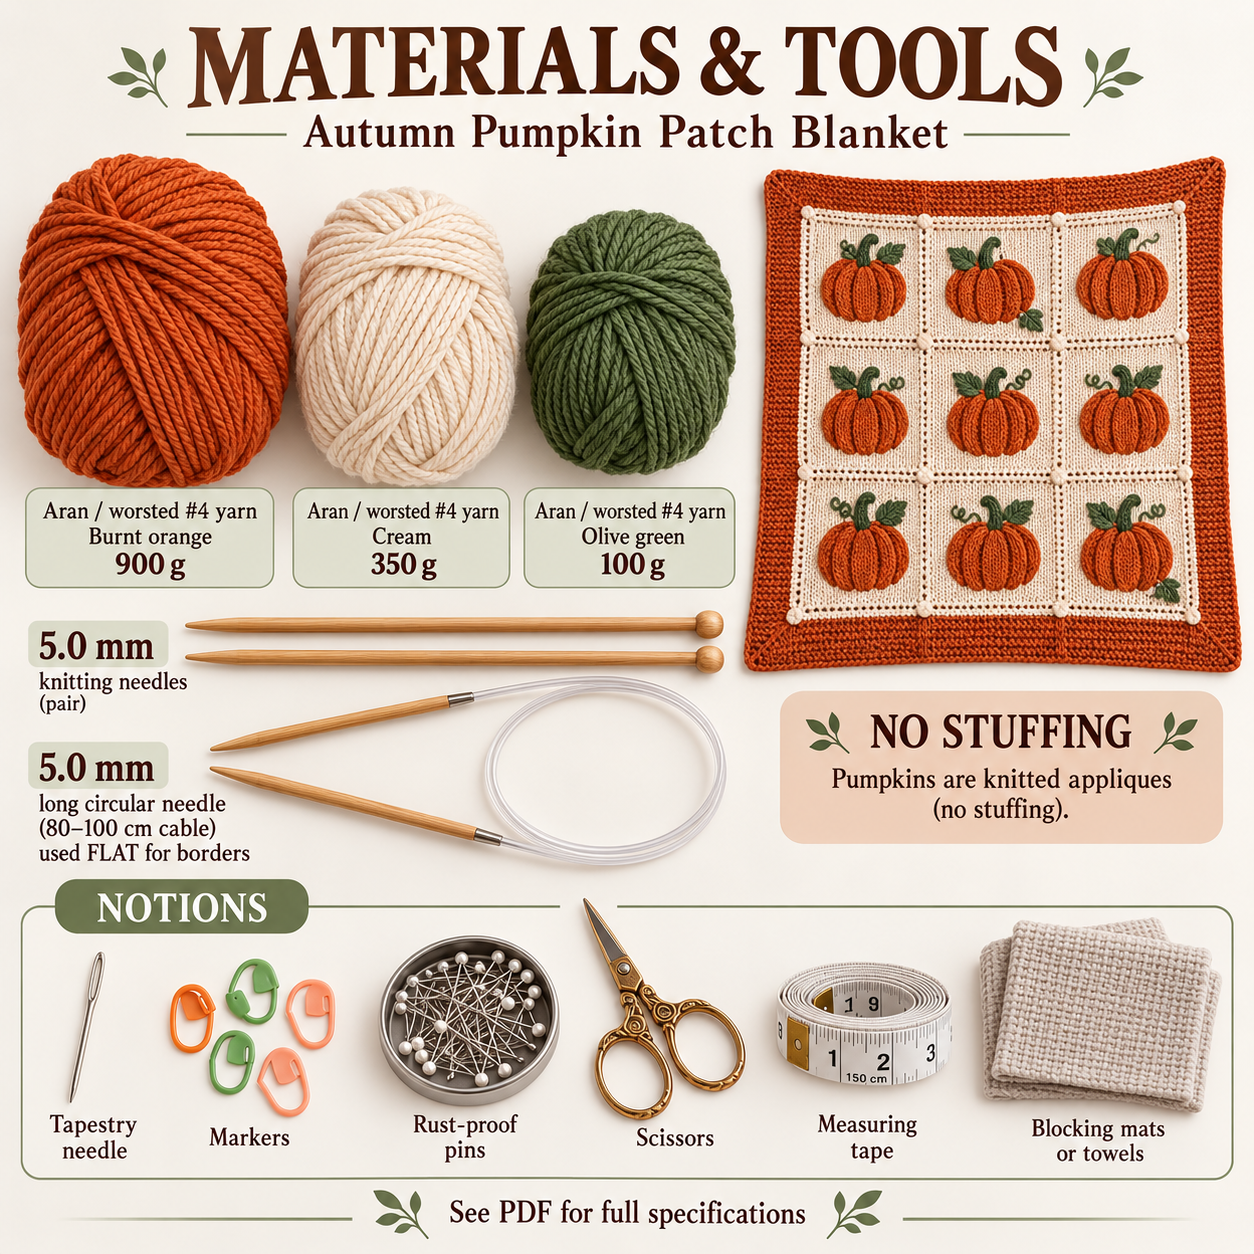
The PDF specifies smooth plied aran/worsted #4 yarn: approximately 900 g burnt orange, 350 g cream, and 100 g olive green. The listed meterages are about 1,620 m, 630 m, and 180 m respectively. These allowances include seaming and a reserve.
Use 5.0 mm needles. A long circular needle with an 80–100 cm cable is recommended for the wide border strips, but it is used back and forth. Gather a blunt tapestry needle, removable markers or scrap yarn, rust-proof pins, scissors, measuring tape, and blocking mats or clean towels.
The pumpkin blanket knitting pattern needs neither fiberfill nor eyes. Before substituting yarn, check blocked samples in both stitch textures so the border and center remain compatible.
Stitches and finishing techniques
The squares combine stockinette centers with garter edges. Shaped motifs use knit-front-and-back increases and knit-two-together, slip-slip-knit, and knit-three-together decreases. Casting on and binding off with suitable ease helps the squares and border strips settle after blocking.
The tendrils are made from twisted yarn strands rather than knitted tubes. Finishing includes applique stitching, decorative ladder seams, low-profile backing joins, diagonal miter seams, and hidden anchor stitches. For the pumpkin blanket knitting pattern, sewing tension is as important as stitch count: a tight join can ripple an otherwise correctly sized panel.
How the blanket is constructed
The written pattern begins with cream front squares, followed by the pumpkin motifs and green details. Block the squares to a consistent size before decorating them. The pumpkins are sewn around their edges and shaped with channels; leaves and tendrils follow the variation map.
The decorated squares are joined into the front grid, while the nine orange backing squares form a separate reverse. Each layer receives four shaped border strips with diagonal corner joins. Cream seam buds are added after the front border is attached.
Block the completed layers to the same outer dimensions, then join them wrong sides together. The pumpkin blanket knitting pattern uses hidden anchors at the grid nodes to limit shifting between layers. Finish internal tails and those anchors before sealing the last access opening.
Tips for even squares and dimensional pumpkins
- Block one trial square and confirm its dimensions before knitting the full set.
- Label decorated squares so the variation map remains easy to follow during assembly.
- Keep the pumpkin perimeter relaxed; stretching it flat removes the intended lift.
- Tighten shaping channels only enough to define the lobes without puckering the cream background.
- Mark border division points before joining stitch edges to row edges.
- Compare front and reverse after blocking, before the final outside seam.
The access sequence in the pumpkin blanket knitting pattern matters. Once the perimeter is fully closed, loose internal ends and unfinished anchors are harder to reach.
Troubleshooting the grid and layers
Why does my pumpkin blanket knitting pattern project ripple at the seams?
First compare the blocked square sizes. If those match, the join may be too tight. Open the affected seam and resew with enough ease for the garter edges to lie flat. Pulling the rest of the blanket harder will not correct a restrictive seam.
Why are the cream squares puckering under the pumpkins?
The shaping channels may be overtightened. Loosen them gradually until the background relaxes while the lobe divisions remain visible. The PDF also advises relaxing the perimeter slightly when a pumpkin looks too flat.
Why does the reverse shift away from the front?
Check the hidden anchors at the sixteen grid nodes. Add or adjust the specified tacks rather than inserting random visible stitches through the cream panels. Both layers should already have matching dimensions before joining.
Care and handling after finishing
Follow the chosen yarn’s care label. If washing is allowed, handle the wet blanket gently, avoid wringing, and reshape it flat to its proportions. Let both layers dry completely. Spot-cleaning may suit a small mark without requiring the whole blanket to be washed.
Keep direct heat away from the knitted texture. The PDF advises controlled steam hovering for acrylic rather than pressing with a hot iron. Check applique edges, tendrils, and seam buds for loose threads, particularly if the blanket will be used around a young child. These decorative pieces need secure attachments.
Download the Autumn Pumpkin Patch PDF
The complete PDF includes written row tables, yarn allowances, both gauges, calculated measurements, motif and variation maps, front and reverse assembly, border instructions, hidden anchoring, and troubleshooting. The article summarizes the construction without duplicating the full instructions. The PDF specifies personal handmade use unless separate commercial permission is granted.
DIGITAL DOWNLOAD ONLY — NO PHYSICAL ITEM WILL BE SHIPPED.
Leave a Reply