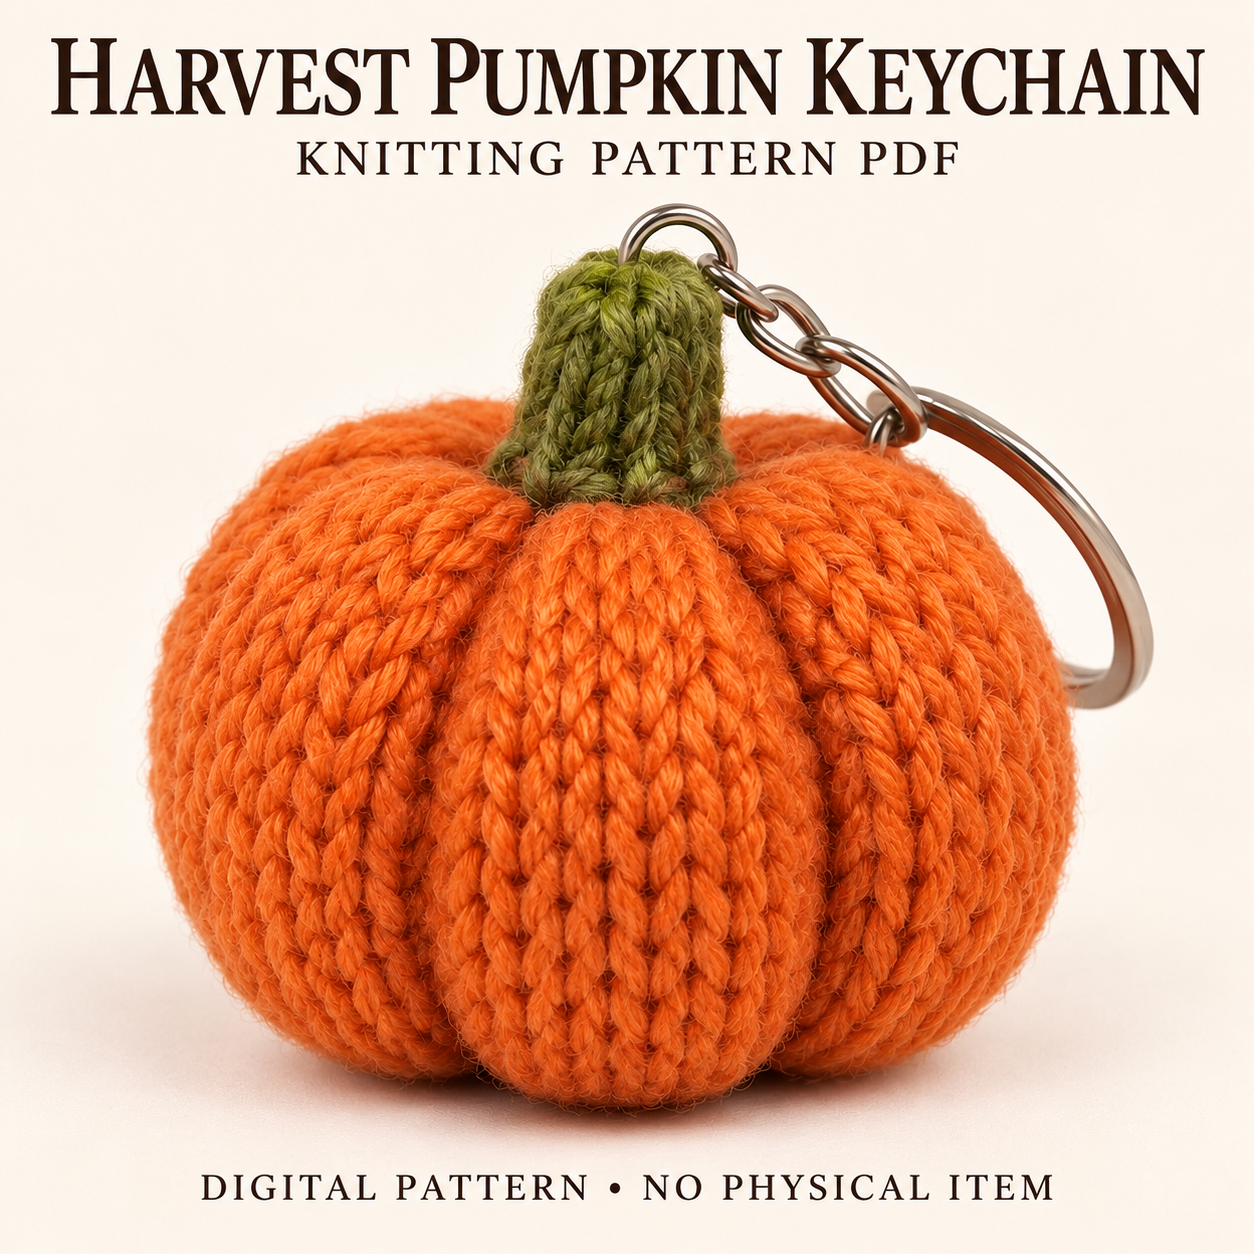
This pumpkin keychain knitting pattern creates a small orange pumpkin with eight sculpted lobes, a short olive-green stem, and a split ring on a short chain. The design keeps the details simple: there are no leaves or facial features, allowing the rounded shape and contrasting stem to define the accessory. The pumpkin is knitted in the round, filled, and shaped with exterior yarn wraps before the separately knitted stem and hardware are attached. This guide explains the supplies and construction decisions in the PDF, including the reinforcement inside the stem. Download the full instructions for the stitch counts, shaping sequence, and finishing details needed to complete the project.
Features of the pumpkin keychain knitting pattern
The miniature body is made as one circular piece, rather than assembled from separate pumpkin panels. Eight guide columns help establish the lobes, but the finished grooves are sculpted after stuffing. They are not simply a ribbed stitch pattern.
The short green stem carries the hardware connection. A split ring, short chain, and jump ring or equivalent connector complete the accessory. The internal reinforcement deserves attention because the connection needs to catch multiple knitted strands rather than depend on a single loose loop at the stem’s surface.
Gauge, skills, and finished measurements
You will use small-circumference knitting, increases, decreases, gathering, seaming, and yarn sculpting. The project also involves fitting keychain hardware, with small pliers when opening a connector is necessary. The PDF’s instructions suit knitters comfortable handling compact toy pieces; the small size does not remove the need for careful finishing.
The pumpkin keychain knitting pattern specifies 26 stitches and 34 rounds per 10 cm for a firm fabric. approximate dimensions are approximately 5.5–6 cm body width and 4.5–5 cm body height. The stem adds about 1.8–2 cm, bringing the planned textile height to 6.3–6.8 cm. These are target dimensions that depend on gauge and shaping, with hardware measured separately.
Yarn, needles, stuffing, and hardware
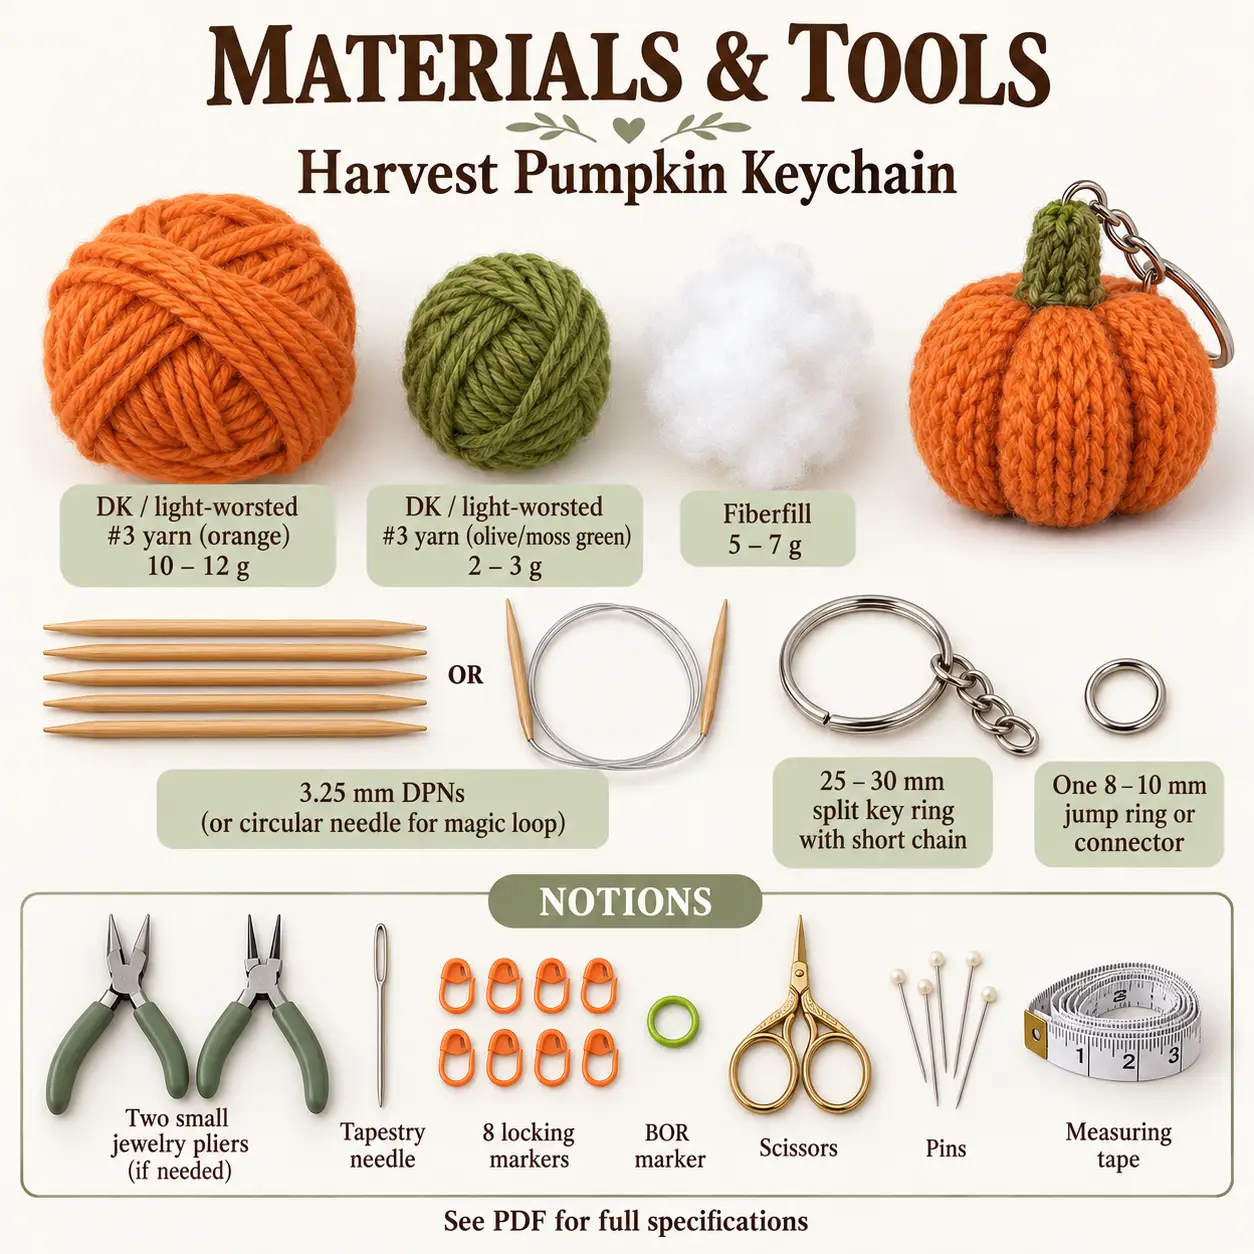
Prepare DK or light-worsted yarn in orange, 10–12 g, and olive or moss green, 2–3 g. The needle size is 3.25 mm, using double-pointed needles or a circular needle arranged for magic loop. Fiberfill requirements are 5–7 g.
The hardware list includes a 25–30 mm split key ring with a short chain and one 8–10 mm jump ring or equivalent connector. Keep two small jewellery pliers available if the connector needs opening.
For the pumpkin keychain knitting pattern, also gather a tapestry needle, eight locking markers plus a beginning-of-round marker, scissors, pins, and measuring tape. Separate the round-start marker from the lobe guides so each continues to communicate its own reference during shaping.
Techniques for the pumpkin’s rounded form
Circular stockinette creates the small cup from the bottom upward. Add stuffing before the final decreases make the opening too narrow, then close the ends according to the PDF. The body needs enough filling to support its outline while leaving the centres soft enough to indent during sculpting.
In the pumpkin keychain knitting pattern, eight exterior wraps pass through the centres after the body is stuffed. Their positions and tension create the lobes. Use the guide columns to keep the divisions organised, and check the shape from above as well as from the side. A wrap that twists across the body can shift the groove away from its intended line.
Assembly and reinforcing the stem connection
Make the stem as a separate small piece with a closed top and an open base. That open base gives access for reinforcing the hardware connection before the stem is attached to the pumpkin.
Fit the connector so it catches multiple knitted strands, then secure the reinforcement inside. Add only a tiny pinch of filling to the stem and sew its base onto the pumpkin’s upper centre. Check the stem angle with pins before completing the attachment.
Arrange the short chain so it hangs freely rather than becoming trapped under the seam. The PDF includes a gentle pull check as part of finishing, which is a practical inspection step rather than evidence of formal load testing.
Tips for even lobes and tidy finishing
Distribute the filling before tightening the sculpting wraps. Adjust neighbouring grooves together so one deep indentation does not leave the opposite side unexpectedly shallow. The overall shape should remain squat and rounded, with a clearly defined top beneath the stem.
The pumpkin keychain knitting pattern benefits from gradual tension adjustments. Pulling every strand tight immediately can make it harder to judge how the filling moves between lobes. Pause after each small change and compare the divisions around the circumference.
Keep the hardware connection accessible until it is reinforced. Once the stem is fully attached, correcting an internal connection may require reopening its base seam, so check that area before the final closing stitches.
Troubleshooting shaping and hardware
Why are the lobes uneven in my pumpkin keychain knitting pattern project?
A tighter sculpting wrap or uneven filling can make one lobe smaller than its neighbours. Ease the tight wrap, redistribute the filling where possible, and adjust adjacent grooves gradually. Follow the guide positions rather than placing extra wraps wherever the shape looks uneven.
Why does a groove twist across the body?
Check whether its exterior strand follows the intended axis between the upper and lower centres. Loosen and reposition a diagonal wrap before tightening it again. View the pumpkin from both ends to confirm the groove stays aligned.
What if the stem stretches at the connector?
Inspect the internal reinforcement and whether the hardware catches several knitted strands. If the stem is already sewn on, reopen the base carefully to access that area. Repair the connection before using the keychain, then resew and check the stem attachment.
Caring for the finished keychain
Follow the yarn label and use gentle surface cleaning that accounts for the metal hardware. Avoid twisting the filled body or pulling the stem while wet. Let the textile parts dry thoroughly before returning the accessory to use.
Check the chain, connector, and stem seam periodically, especially if the keychain catches on other objects. Repair loosened parts promptly. The PDF identifies this as a small accessory with hardware unsuitable for children under three; it should not be treated as an infant toy. A neat finish and gentle pull check do not replace that intended-use distinction.
Download the complete miniature pumpkin PDF
The pumpkin keychain knitting pattern PDF contains the detailed circular shaping, eight-lobe sculpting directions, stem instructions, and hardware-finishing steps. Keep the complete document beside your work for the exact counts and sequence.
DIGITAL DOWNLOAD ONLY — NO PHYSICAL ITEM WILL BE SHIPPED.
Leave a Reply