
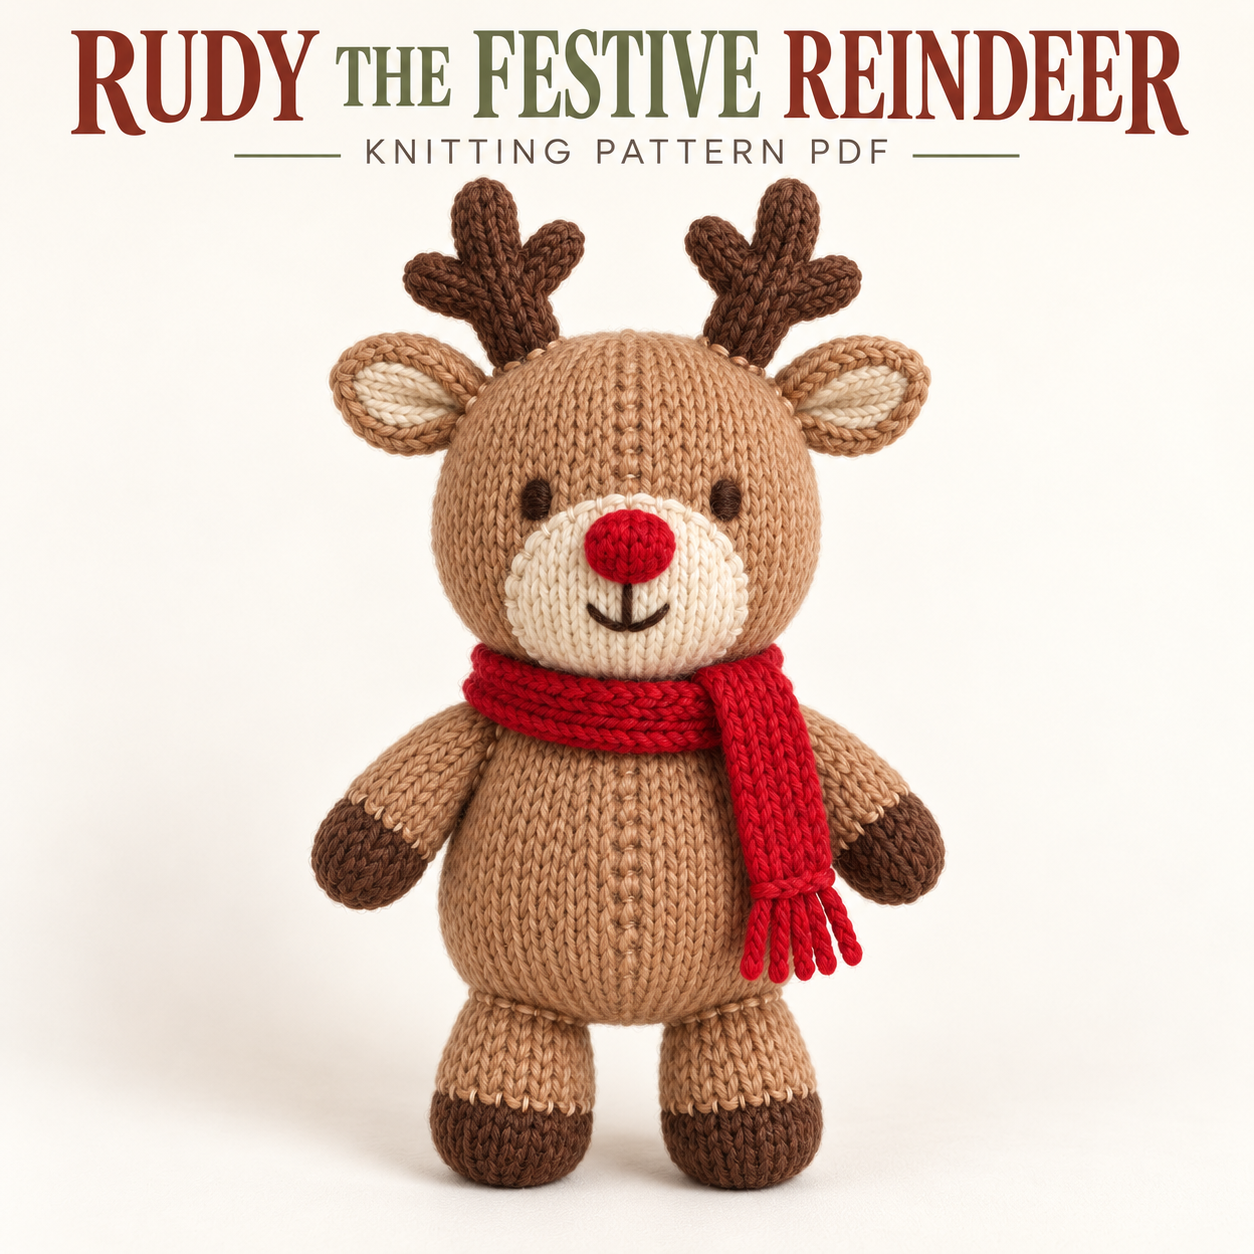
This reindeer plushie knitting pattern makes Rudy, a standing tan character with dark brown antlers and hoof tips, a cream muzzle, and a red nose. A red scarf wraps the neck, with one fringed end hanging down Rudy’s own left side. Small embroidered oval eyes and subtle tan centre-line stitching complete the reference look. The PDF lists beginner-intermediate difficulty and combines circular stockinette with flat ears, a bordered scarf, and firm I-cord antlers. This article explains the supplies, component construction, and alignment checks that help the reindeer stand with both feet flat. The complete instructions are available in the PDF download near the bottom.
About This Reindeer Plushie Knitting Pattern
Rudy has a round head over a softly tapered body, with short legs and arms angled slightly downward. The cream muzzle is shaped into a horizontal oval and lightly padded. Its red nose should remain a soft oval rather than a tall, hard ball.
The antlers form a mirrored pair, each made from one main stem and two smaller branches. Lower branches point outward, while upper branches angle slightly inward. The scarf has a smooth centre and garter edges, with five fringe bundles on one end. No tail is added. Matching tan chain embroidery runs along the head and body front and back as a subtle finishing detail.
Skills, Gauge, and Approximate Size
The reindeer plushie knitting pattern uses knitting in the round, increases and decreases, flat stockinette, I-cord, sewing, and embroidery. The antler junctions need secure stitching across several cord columns so the branches do not rotate.
approximate measurements are 31–33 cm overall height including antlers and 24–25 cm to the top of the head. Each antler is about 7–8 cm from head to tip. The scarf target is about 25–27 cm long and 4 cm wide before fringe, while depth is about 9.5–10.5 cm, largely determined by the head. Results vary with materials and filling.
Circular gauge is 20 stitches and 28 rounds per 10 cm on 4.0 mm needles. Flat stockinette should be approximately 20 stitches and 28 rows over the same area.
Materials and Tools
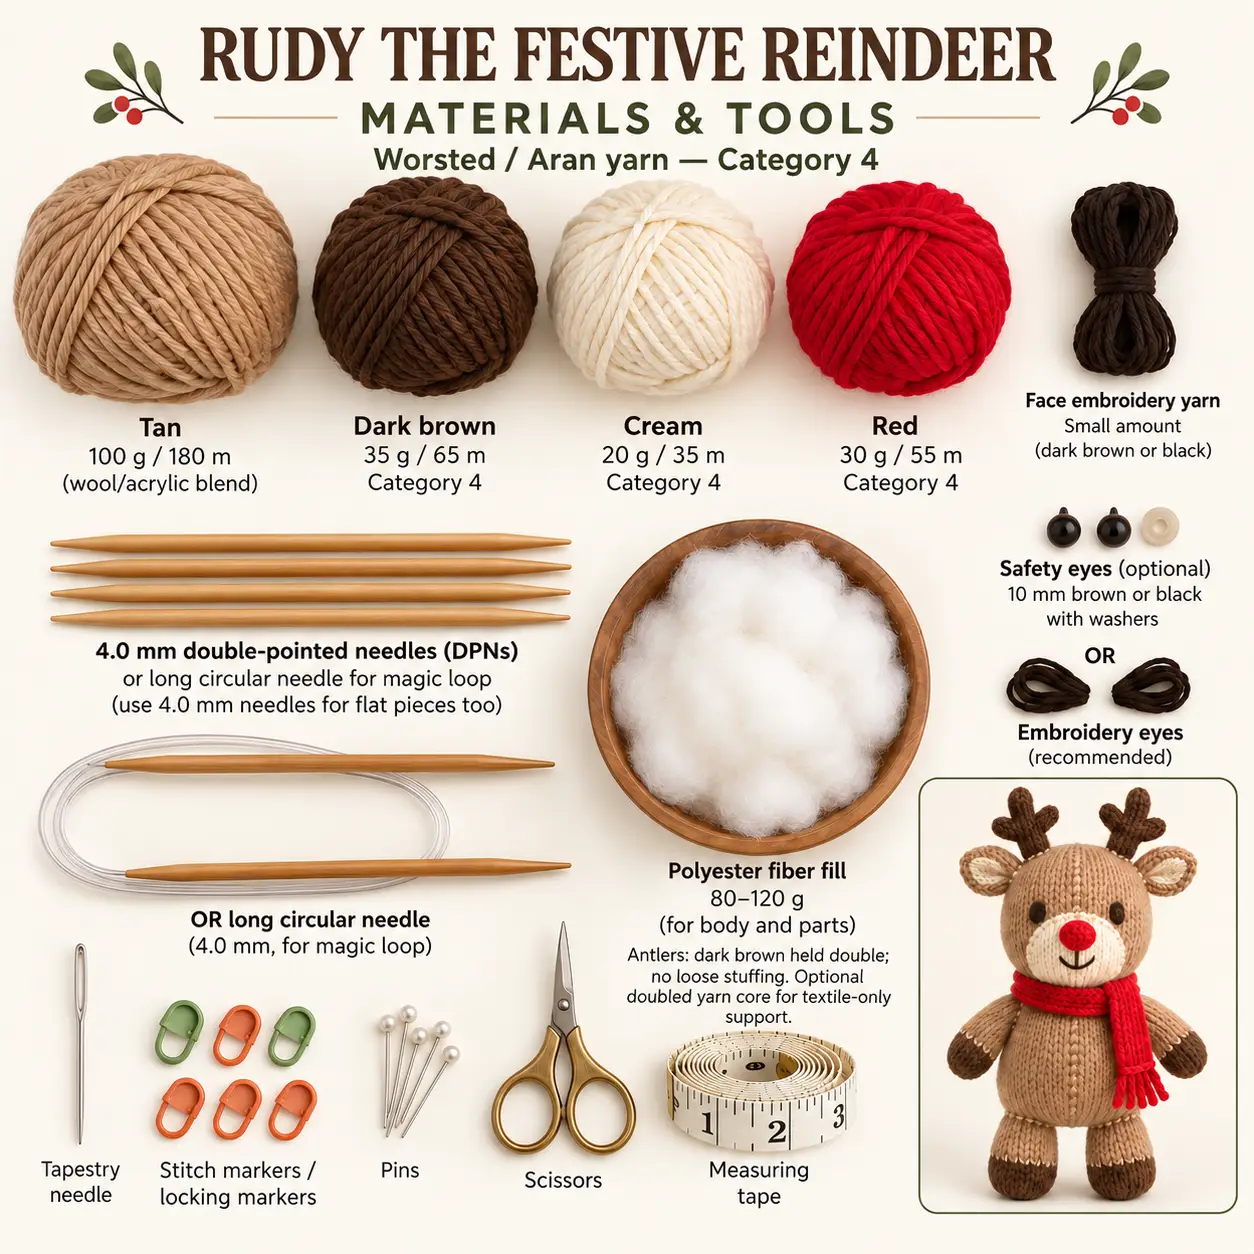
Use worsted or Aran category 4 yarn: approximately 100 g/180 m tan, 35 g/65 m dark brown, 20 g/35 m cream, and 30 g/55 m red. The source specifies smooth wool/acrylic blend yarn for the main colour. A small amount of dark brown or black makes the face embroidery.
Use 4.0 mm DPNs or a long circular needle for magic loop, with the same size for flat pieces. Allow approximately 80–120 g polyester fiberfill. Gather a tapestry needle, stitch and locking markers, pins, scissors, and measuring tape.
Embroidered eyes are recommended for the reference appearance. Optional hardware is a pair of 10 mm brown or black safety eyes with washers. The antlers use dark brown yarn held double, with no loose stuffing or wire insert.
Stitches and Textile Antler Support
The head, body, limbs, muzzle, and nose are knitted in the round. The ears are flat layered pieces, with cream fronts sewn onto tan backs. The scarf uses flat stockinette with knit edge stitches to form stable borders.
The reindeer plushie knitting pattern builds the antlers from compact I-cord sections. Holding two yarn strands together adds firmness; an extra doubled yarn strand through a cord is offered as additional textile-only support. Loose fiberfill is not used inside them.
The centre-line detail is chain-stitch embroidery added after the main assembly. Keep it relaxed and in the same tan yarn as the body. It stops above the cream muzzle on the front of the head rather than crossing the face applique.
Construction and Assembly Order
Prepare the layered ears and mirrored antlers first. Complete the head, installing optional safety eyes before the decrease section if selected. Stuff and close it, then attach the lightly padded cream muzzle and red nose. Embroider the mouth and default oval eyes at the mapped positions.
The body is filled firmly in the lower half and more moderately near the open neck rim. Add the legs and arms with their round upper openings kept intact. Pin the body on its legs and check both soles before securing the joins.
Attach the closed head to the body neck edge, aligning front and back guides. Add ears and antlers, wrap the scarf with its fringe on Rudy’s own left, then embroider the tan centre lines and bury all ends.
Tips for Antlers and a Standing Pose
- Build one antler first, then mirror both branch directions for its partner. Identical branch placement on both cords would not make a mirrored pair.
- Sew across multiple I-cord columns at each branch junction. This helps the branches resist rotation.
- Pin the ears with equal base cups. Their cream panels should face mostly forward, not turn toward the back.
- Keep the muzzle shallow and horizontal. Massage its tiny amount of filling sideways if it becomes too round.
- Flatten the brown foot sections against a surface while adjusting their filling. Avoid hard-packed ankles that prevent placement changes.
- Preserve the round arm and leg attachment openings. These joins are sewn around their rims rather than flattened into tabs.
These checks help the reindeer plushie knitting pattern retain its upright silhouette and balanced antler arrangement.
Troubleshooting
Why Does a Reindeer Plushie Knitting Pattern Antler lean?
The source suggests hidden anchoring stitches from the lower stem into the head above the base seam. Match their height on the opposite antler. Check cord firmness and branch-junction security as well. Extra loose stuffing is not the recommended solution; support comes from compact knitting, doubled yarn, and sound textile joins.
Why Will Rudy Not Stand Evenly?
Redistribute filling to flatten both dark brown soles, then adjust leg attachment angles so both contact the surface together. Compare the same body-round range on both sides before resewing. Keep the head visually centred above the body; an unequal limb pair can cause a lean even when the lower torso is firm.
Why Does the Muzzle look Off Centre or Too Round?
Repin the oval so centre front passes through the nose centre, releasing only the shifted seam section. For an overly domed muzzle, move filling toward its sides. The PDF allows small hidden lower-edge tacks to help maintain the horizontal shape without flattening the red nose completely.
Care and Eye Options
Follow the yarn and stuffing care labels. Gentle spot-cleaning helps preserve the antler junctions and fringe of this reindeer plushie knitting pattern. If washing is suitable, avoid twisting or wringing, reshape the limbs and scarf, and allow all filling to dry completely away from direct heat.
Check antlers, nose, fringe, and attachment seams before use. The reindeer plushie knitting pattern recommends embroidered eyes for recipients under three or whenever detachable eye parts are unsuitable. Small rigid components may be inappropriate for those uses. Secure embroidery and assembly remain necessary, along with the requirements relevant to the intended recipient.
Download Rudy’s Complete PDF
The complete reindeer plushie knitting pattern includes component tables, quantities, gauge, approximate measurements, orientation guidance, face and body placement maps, antler assembly, stuffing notes, scarf finishing, final checks, and troubleshooting. The source permits personal handmade creation and asks that the digital file or pages not be copied or redistributed. Consult the full PDF for the individual shaping counts and precise feature positions.
DIGITAL DOWNLOAD ONLY — NO PHYSICAL ITEM WILL BE SHIPPED.
Leave a Reply