
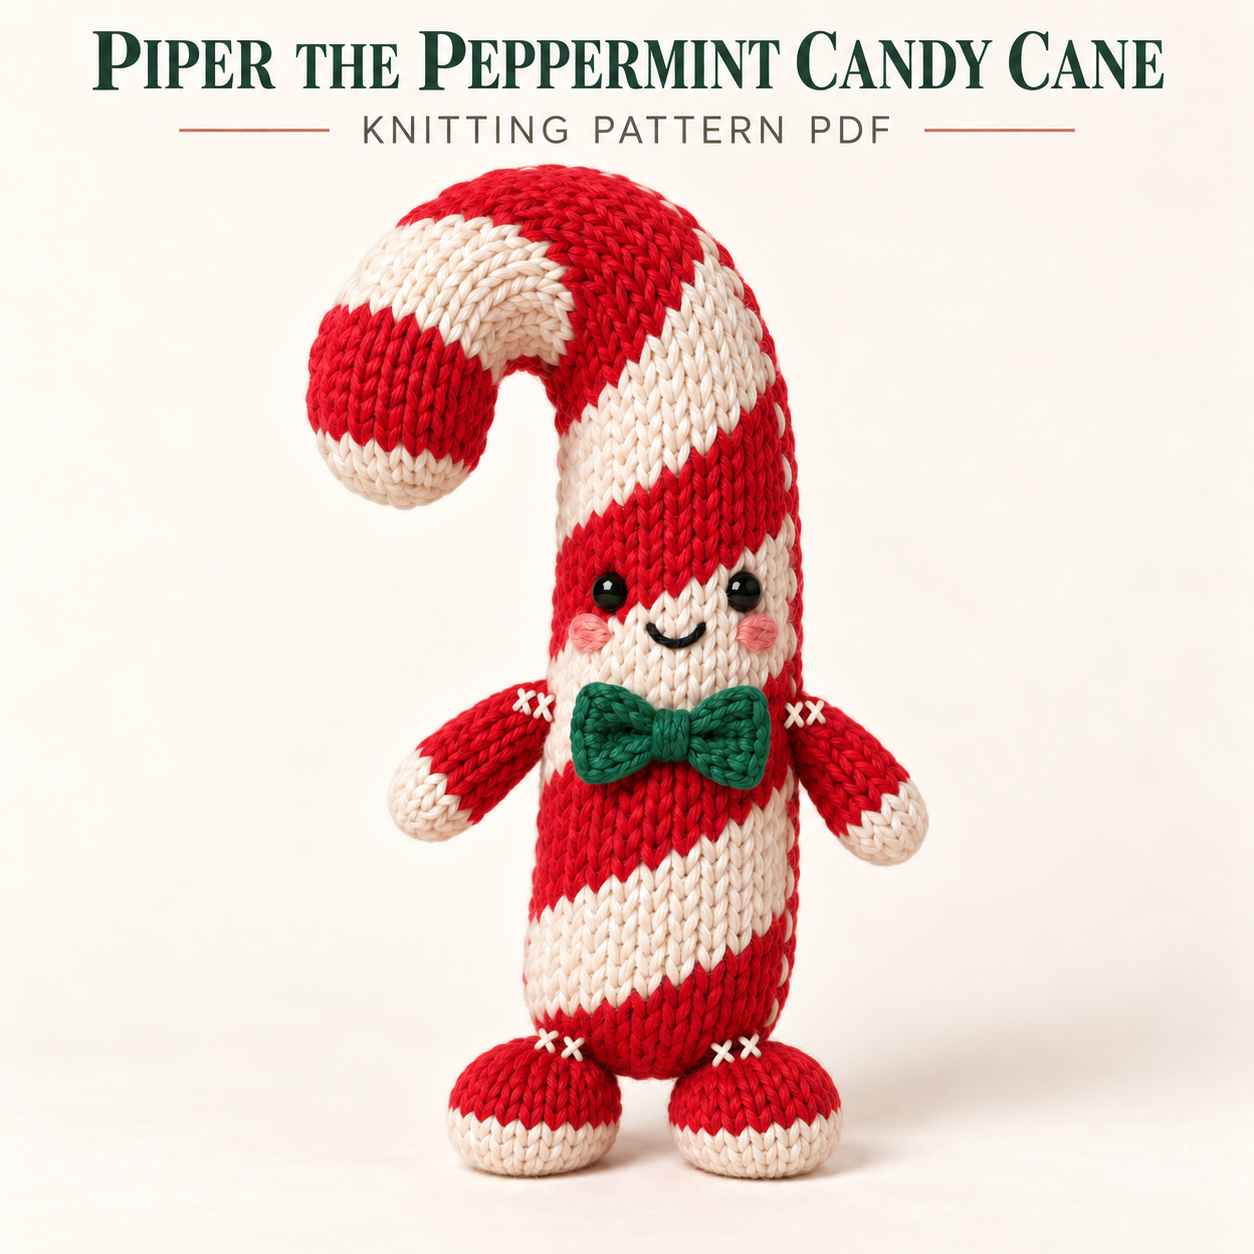
This candy cane knitting pattern makes Piper, a tall red-and-cream striped decoration with a smiling face, short arms, rounded feet, and a green bow tie. The peppermint bands spiral diagonally around the shaft and continue into a smooth hook. That hook bends toward Piper’s own right, appearing on the viewer’s left when the face points forward. The PDF describes the skill level as confident beginner/intermediate, but the stranded colourwork and sewn shaping need deliberate attention. This article explains the supplies, construction, and finishing checks that help the character take shape. Download the complete PDF near the bottom for the full stripe sequence, component instructions, placement coordinates, and corrected assembly order.
About This Candy Cane Knitting Pattern
Piper is a stuffed knitted plushie or decoration, with a cylindrical shaft and a continuous curved upper section. The hook is formed after knitting by gathering its inner curve. No wire insert is used.
The face has black eyes, pink embroidered cheeks, and a shallow smiling mouth. Cream hands finish the red arms, while the feet have red upper halves and cream lower soles. Two small cream X-shaped stitches decorate each shoulder join and each foot-to-body seam. The green bow sits across the front below the face, with a wrapped centre and dimensional wings.
Skills, Gauge, and approximate dimensions
The shaping uses familiar increases and decreases, but you also need to manage two-colour floats, maintain a repeating diagonal motif, and sew gradual gathers. Those steps make preparation valuable even for a confident knitter.
The candy cane knitting pattern gives a approximate height target of approximately 35–37 cm after hook shaping. Main body width is 7–8 cm, hook span is 12–14 cm, and arms are 5–6 cm long. Feet target about 6 × 3.5 cm; the bow is about 7.5 × 3.5 cm. Actual results vary with yarn, gauge, filling, and finishing.
Gauge is 20 stitches and 28 rounds per 10 cm in unstretched circular stockinette on 4.0 mm needles. Different gauge changes the size and yarn requirement.
Materials and Tools
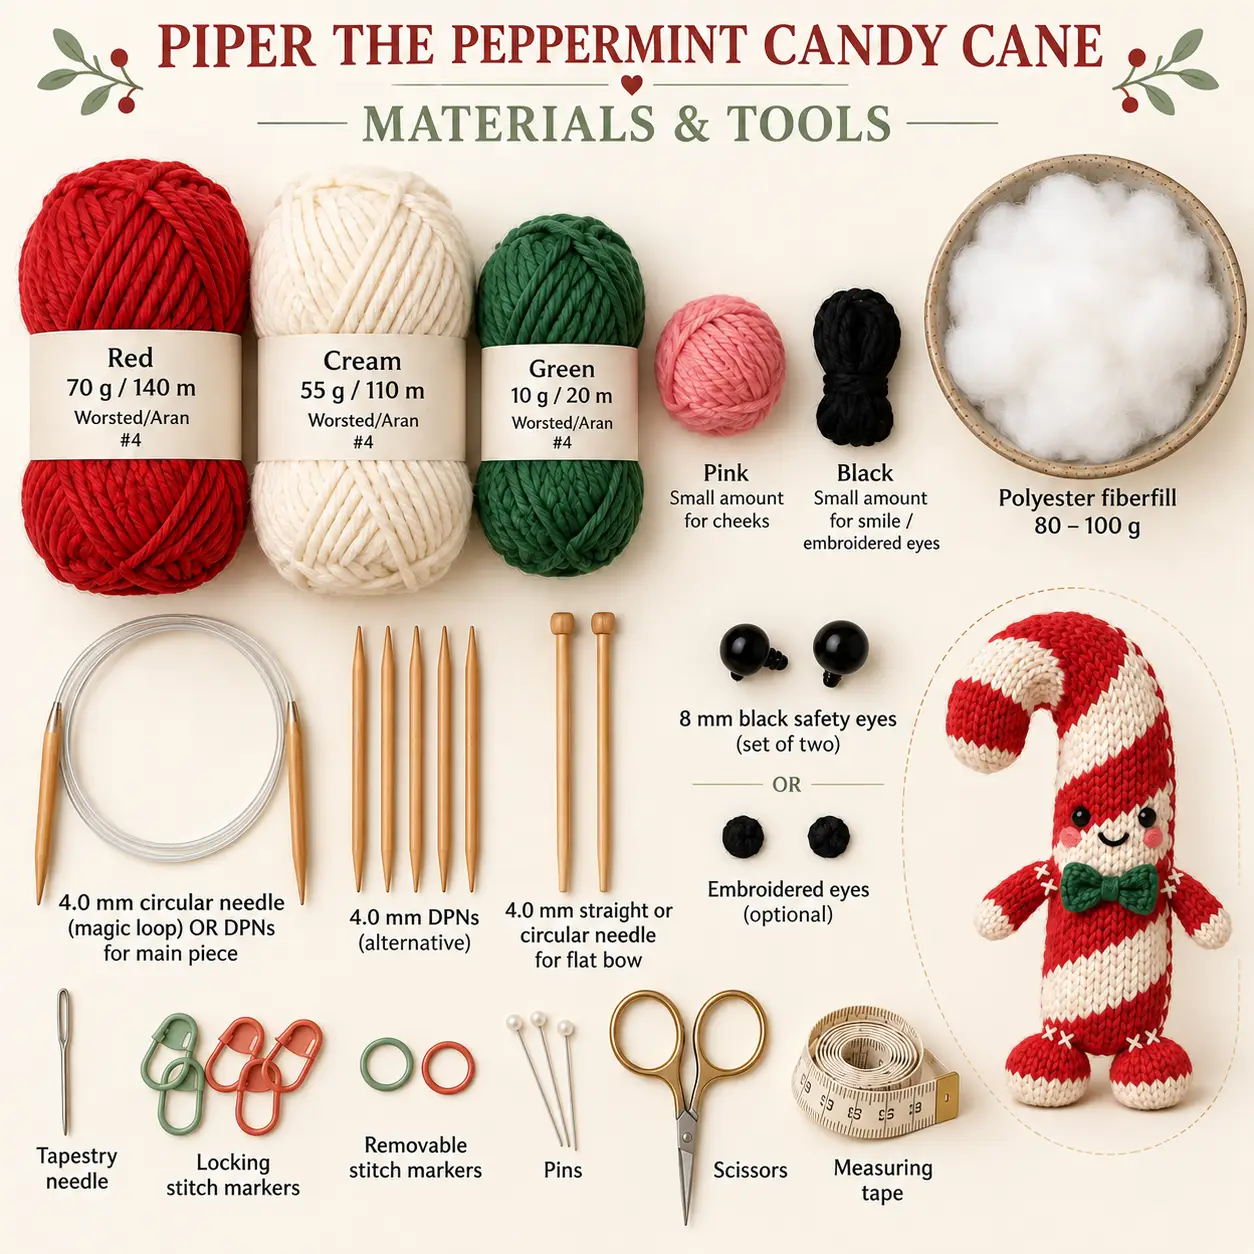
Use worsted/Aran category 4 yarn: approximately 70 g/140 m red, 55 g/110 m cream, and 10 g/20 m green. Small amounts of pink yarn make the cheeks; black yarn or embroidery floss forms the smile and optional embroidered eyes.
The needles are 4.0 mm circular needles for magic loop or matching DPNs, with 4.0 mm straight or circular needles used flat for the bow. Allow about 80–100 g polyester fiberfill. Gather a tapestry needle, locking and removable markers, pins, scissors, and measuring tape.
Eye options are two 8 mm safety eyes or embroidery. The hook uses matching yarn for its shaping stitches, so a wire, purchased support, or premade bow is not part of the supply list.
How the Spiral Stripes Are Made
The diagonal bands in the candy cane knitting pattern come from stranded colourwork in the round. The written repeat moves the colour boundaries around the tube, creating a spiral rather than stacked horizontal rings. Catching the unused colour within the longer blocks keeps the floats managed without drawing the fabric inward.
The candy cane knitting pattern keeps the beginning-of-round marker fixed at centre back throughout. Moving it to disguise a colourwork jog would lose the orientation reference needed for the face and hook.
The arms are simple two-colour tubes, while each foot preserves a red upper half and cream sole. The bow rectangle is knitted flat, then pinched across its centre; its short ends are not folded inward into loops.
Construction and Corrected Assembly Order
Start the main shaft at the lower base and close its cast-on centre before stuffing. Keep the tube open for the eye-access pause after round 71. Install safety-eye washers then if using them, before continuing the upper section.
Stuff the lower shaft firmly and the future hook more lightly. Continue the established stripe sequence through the extended upper section rather than restarting the motif. Add filling progressively and close the tip without packing it hard.
Shape the hook through four consecutive inner-curve gather zones. Once the curve is established, add embroidered facial details, attach the feet and arms, and sew on the bow. Close and secure each limb’s starting centre before filling it, then verify orientation before finishing its body join.
Tips for Smooth Colourwork and Hook Shaping
- Spread worked stitches along the needle before carrying the next colour. This gives the floats enough length to follow the tube’s circumference.
- Preserve the stripe sequence across section boundaries. The extended hook continues the existing motif.
- Keep the upper filling flexible. A densely packed hook resists the gradual sewn curve.
- Mark Piper’s own right side clearly before gathering. From a front view, that side is on your left.
- Tighten the four zones progressively. Aim for one continuous arc rather than four corners.
- Pin paired feet and shoulders before sewing either permanently. Compare the red foot tops, cream soles, and downward arm angles.
These checks keep the candy cane knitting pattern’s face, stripes, and hook working together in the same front-to-back plane.
Troubleshooting
Why Does My Candy Cane Knitting Pattern Hook Twist?
The PDF recommends loosening the gather zone responsible for the twist, realigning the shaft and curved section in one plane, and tightening gradually again. Massage filling toward the longer outer curve as needed. The tip should hang downward, with a clear opening, while the shaft below the bend stays upright.
Why Does the Striped Body Look Pinched?
Tight floats can pull the circumference inward. Gently spread the fabric sideways and redistribute the stranded yarn. On future rounds, separate the worked stitches before carrying the unused colour. Adding more stuffing to a pinched section increases pressure without correcting the float length.
Why Is the Hook Too Sharp or Too Shallow?
For a shallow curve, the source suggests gradually tightening the middle zones and moving filling outward. Avoid over-tightening the tip zone. For sharp puckers, release the tightest gather slightly and distribute the shaping across the adjacent area. Small adjustments preserve a smoother arc.
Why Does the Bow Curl or Tilt?
Finger-shape the knitted rectangle, centre the wrapped band, and add hidden support behind each wing. The full bow width should remain available after the centre pinch. Attach only the centre band and discreet wing points so the bow keeps some dimension.
Care and Secure Finishing
Follow the yarn and filling care instructions. Gentle spot-cleaning may help preserve the hook gathers and dimensional bow. If washing is suitable, avoid wringing or pulling the curve straight; reshape and allow the stuffing to dry completely.
Check the limb joins and facial features before handling or gifting. The candy cane knitting pattern offers embroidered eyes for situations where detachable safety-eye components are inappropriate, including projects for young children. Small rigid parts may be unsuitable for children under three. Use materials and finishing appropriate to the intended recipient without assuming a safety certification.
Download Piper’s Complete PDF
The complete candy cane knitting pattern includes the written stripe repeat, extended hook section, component tables, gauge, finished measurements, eye-access timing, placement guidance, stuffing notes, gathering diagrams, assembly, and troubleshooting. The source permits personal handmade creation and asks that the pattern file or pages not be resold or redistributed. Use the corrected assembly sequence for the required access checks.
DIGITAL DOWNLOAD ONLY — NO PHYSICAL ITEM WILL BE SHIPPED.
Leave a Reply