
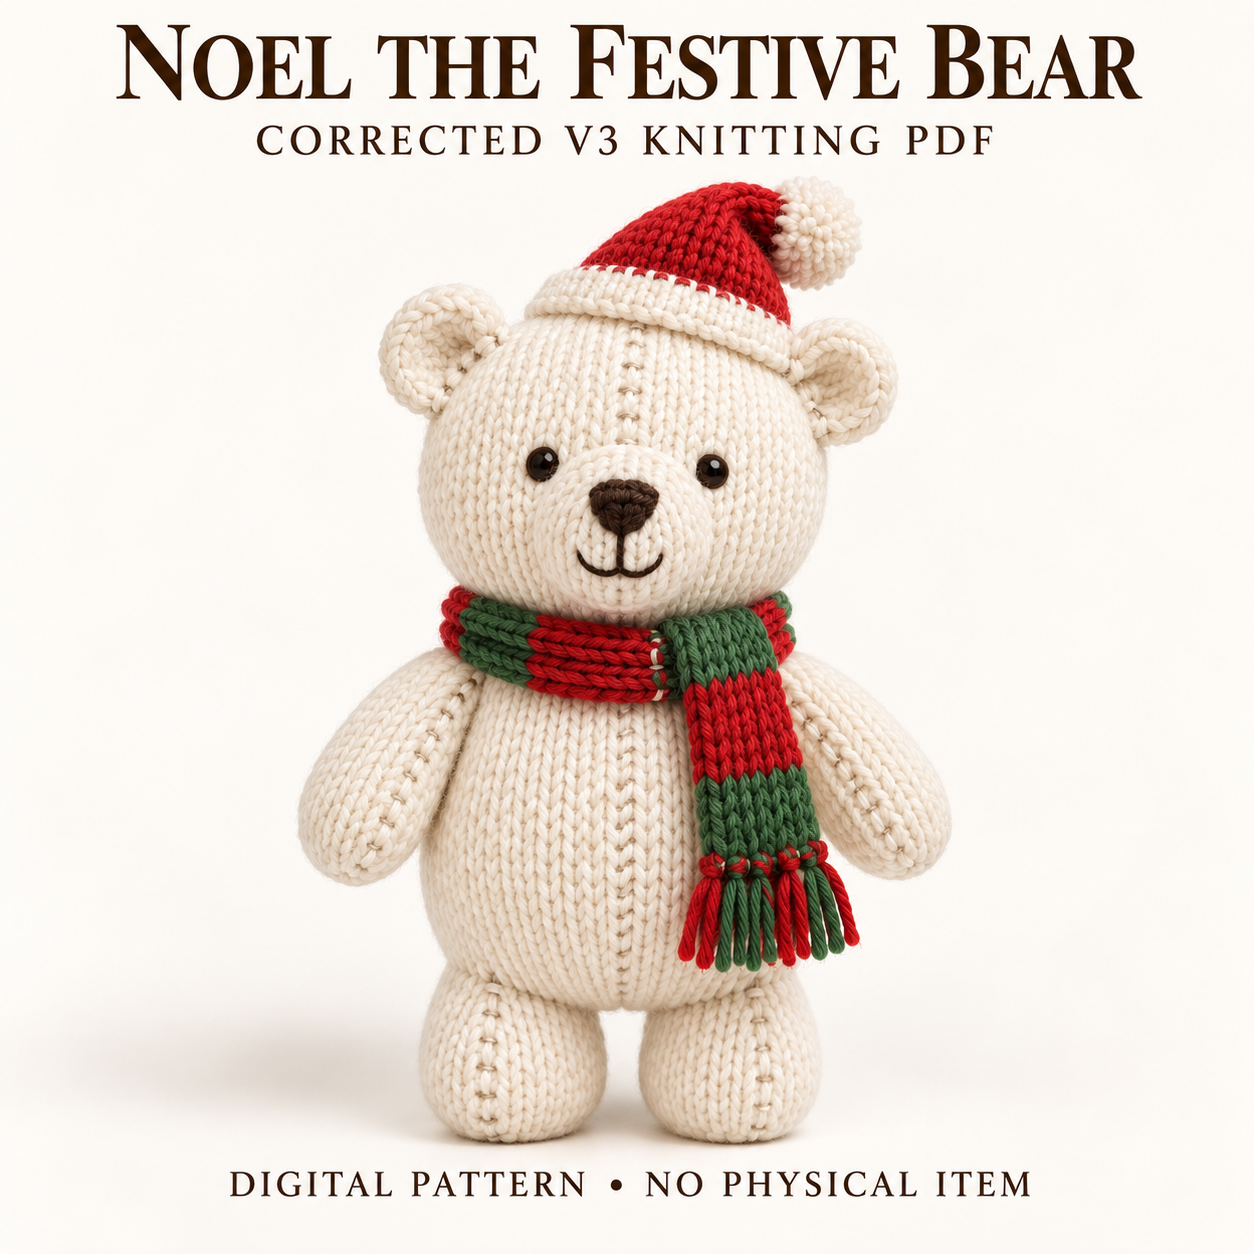
Noel’s Christmas bear knitting pattern creates an ivory bear wearing a short red Santa hat and a fringed red-and-green scarf. The corrected V3 file gives particular attention to the visible sewing details: the arms and legs face forward along their long seams, and matching surface stitches mark the head and body fronts. A round head, small cupped ears, and a softly padded muzzle retain the teddy-bear shape. The PDF describes confident-beginner to intermediate flat knitting with shaping, ribbing, seaming, and embroidery. This guide follows V3’s component and placement choices, including its smaller pom-pom and compact hat. Download the complete PDF near the bottom for the written instructions and assembly maps.
Features of the Christmas bear knitting pattern
Ivory yarn forms the whole bear, including the oval muzzle and plain rounded feet. Dark brown embroidery creates a triangular nose with a short stem and two gentle smile curves. The ears are small and unstuffed, cupped at their bases to face slightly forward.
The red hat’s tip bends to the bear’s own left, which appears on the viewer’s right. The striped scarf crosses on that same front side, with its green cast-on end hanging downward. Alternating fringe finishes the scarf, while subtle ivory ladder-style surface stitches reinforce the handcrafted appearance along the front of the head and body.
Flat-knitting skills, gauge, and planned dimensions
Expect stockinette, increases, decreases, binding off, one-by-one rib, mattress seaming, facial embroidery, and decorative surface sewing. The front lines require careful placement, but they are added after assembly and do not alter the knitted stitch counts.
The Christmas bear knitting pattern specifies 18 stitches and 26 rows per 10 cm in stockinette, measured on a firm swatch. Design targets are 24–26 cm for the bear without its hat and 31–33 cm including the relaxed hat or pom-pom. These are planned measurements that vary with yarn, tension, filling, and seaming.
V3’s hat target is approximately 10–11 cm before bending, and its cream pom-pom is about 3 cm across. The scarf target is 44–48 × 4–4.5 cm, plus fringe.
Yarn allowances and version-specific tools
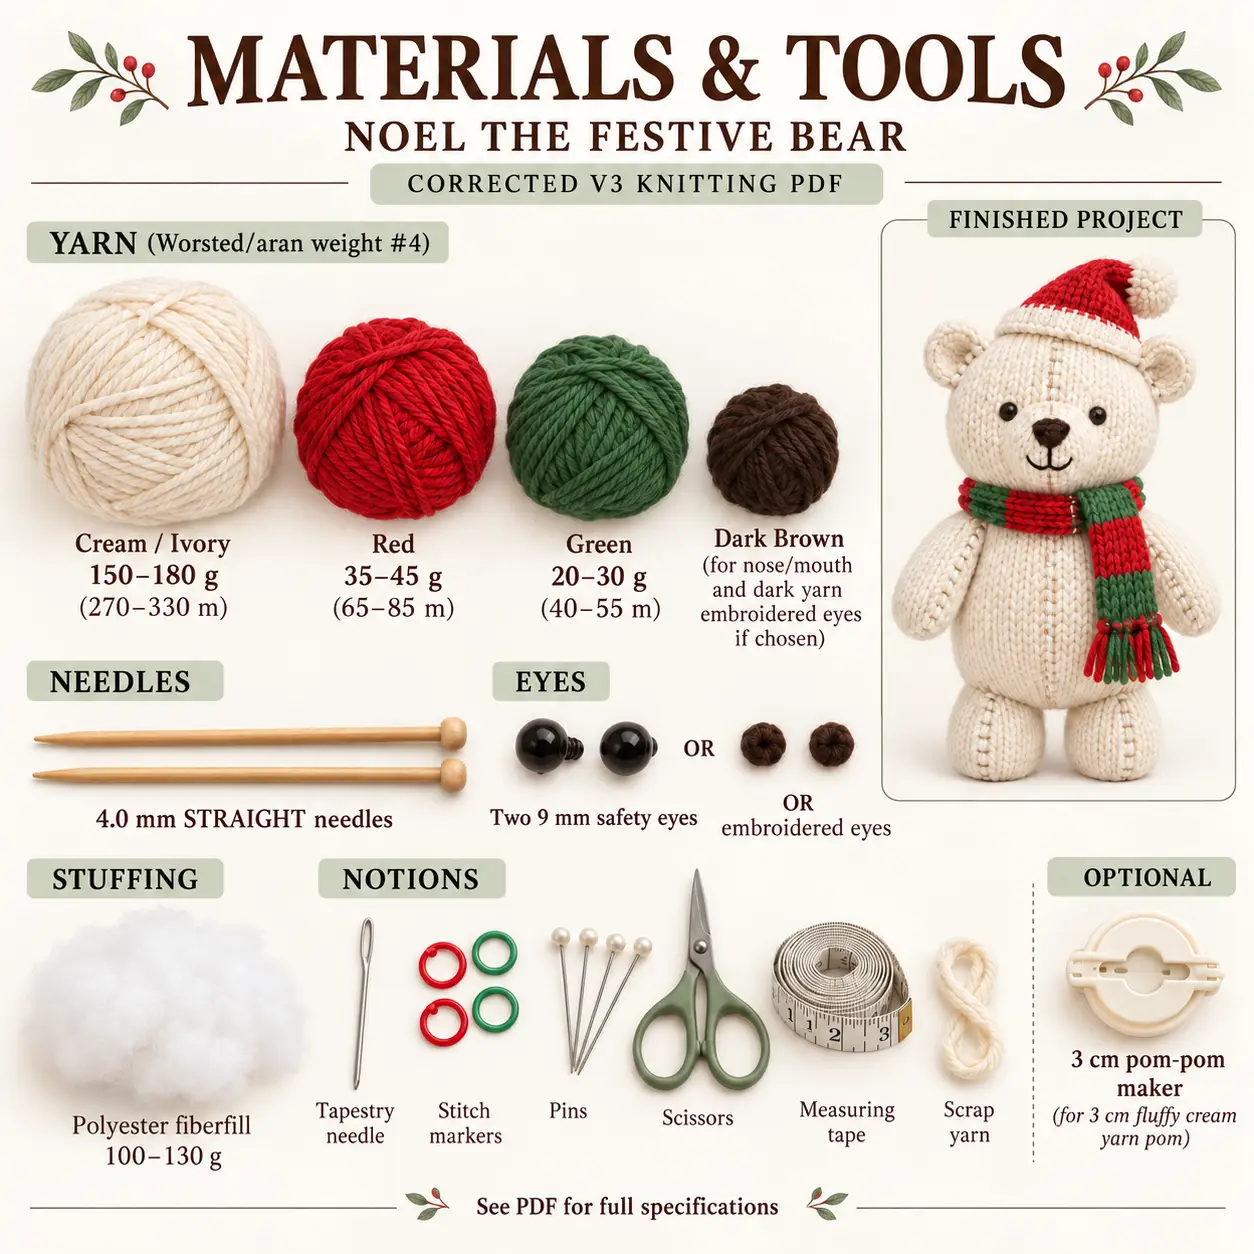
Use worsted or aran yarn: ivory at 150–180 g or 270–330 m, red at 35–45 g or 65–85 m, and green at 20–30 g or 40–55 m. A small amount of dark brown yarn is needed for the nose and mouth.
The Christmas bear knitting pattern uses 4 mm straight needles and two 9 mm eyes or dark yarn for embroidered eyes. Prepare approximately 100–130 g of polyester fiberfill, a tapestry needle, markers, pins, scissors, measuring tape, and scrap yarn.
A 3 cm pom-pom maker is optional for the corrected version. Keep its size distinct from the larger pom-pom specified in the original file. The ivory yarn supplies both structural seams and front surface detail; the green and red yarns also supply the scarf fringe.
Shaped panels, gathered ends, and seam orientation
The head panel is worked from its upper end toward the lower head, then gathered and seamed at the back. The body begins at its lower base and finishes with an open neckline. It is filled through that opening before the neck edge is drawn in gently for attachment.
The Christmas bear knitting pattern includes all edge stitches within its stated counts, so no extra seam-salvage stitches are added. The head and body mattress seams establish centre back; mark centre front directly opposite them.
Arms and legs are made as identical pairs. Rotate their completed tubes so the long mattress seams face forward before attaching them. That rotation is deliberate in V3 and should be checked separately from the mirrored limb angles.
Assembly and decorative front stitching
Fit eye hardware before closing the head, then fill it and finish its back seam. Embroider the muzzle while it is separate, keeping its cast-on edge at the top. Attach it with only a thin layer of padding, followed by the mirrored cupped ears.
Complete the body, legs, and arms, checking the forward-facing seams before permanent attachment. Align the head and body front and back references and sew their structural neck join before covering it with the scarf.
Finish the short cap, folded rib brim, and small pom-pom. Shape the cap to the planned side and wrap the scarf with its green end hanging at the left front. Add the loose decorative front seams to the head and body after they are filled and assembled, preserving a straight line without indenting the stuffing.
Tips for compact feet and balanced accessories
Pin both legs while the body rests on a flat surface. In this corrected file their centres are closer together than in the original placement guide. Use V3’s own map rather than transferring coordinates between versions.
The Christmas bear knitting pattern needs firmer filling in the lower body and legs, with a softer neck and upper arms. Keep the head broad by spreading filling toward the cheeks instead of lengthening it with a hard central clump. Leave the ears, cap, and scarf unstuffed.
Check the scarf’s cast-on end before wrapping, and compare both fringe ends for their alternating colour sequence. Keep the hat’s back seam aligned while pinning the brim. For the front decorative lines, use surface stitches with relaxed tension; they should resemble the limb seams without creating deep grooves.
Troubleshooting placement and scarf edges
Why does one limb sit higher in my Christmas bear knitting pattern project?
Remove only the attachment stitches on the higher piece and repin it using the same row range as its partner. Recheck the forward-facing long seam before sewing again. Match both filling volume and attachment height so the limbs look balanced from the front.
Why does the muzzle look off centre?
Release the upper part of the muzzle seam and align its midpoint with the front guide. Compare the distances beneath both eyes before resewing. Keep the cast-on edge at the top so the oval’s planned orientation is preserved.
Why does the scarf curl or twist?
Check that its narrow garter borders are visible rather than folded underneath. The PDF suggests lightly damp-blocking the scarf flat; follow the yarn’s blocking guidance. Smooth the colour blocks before wrapping, and avoid tightening the crossing until it compresses the neck.
Care and finishing the eye option
After completing the Christmas bear knitting pattern, follow the selected yarn’s care instructions for the assembled bear. Gentle surface cleaning may suit the filled form. Avoid wringing or pulling the fringe, pom-pom, and surface stitches while damp. Reshape gently and dry thoroughly.
The PDF advises securely embroidered eyes instead of detachable eye components for items intended for children under three, alongside applicable local requirements. Inspect the muzzle, ears, neck seam, limbs, and hat tacks. Ensure the temporary guides have been removed and the decorative front stitching remains loose enough to preserve the rounded silhouette.
Download Noel’s corrected V3 pattern PDF
The Christmas bear knitting pattern PDF includes V3’s component instructions, revised feature positions, filling guidance, and decorative front-seam finish. Use this file’s short cap, small pom-pom, and limb orientation details together.
DIGITAL DOWNLOAD ONLY — NO PHYSICAL ITEM WILL BE SHIPPED.
Leave a Reply