
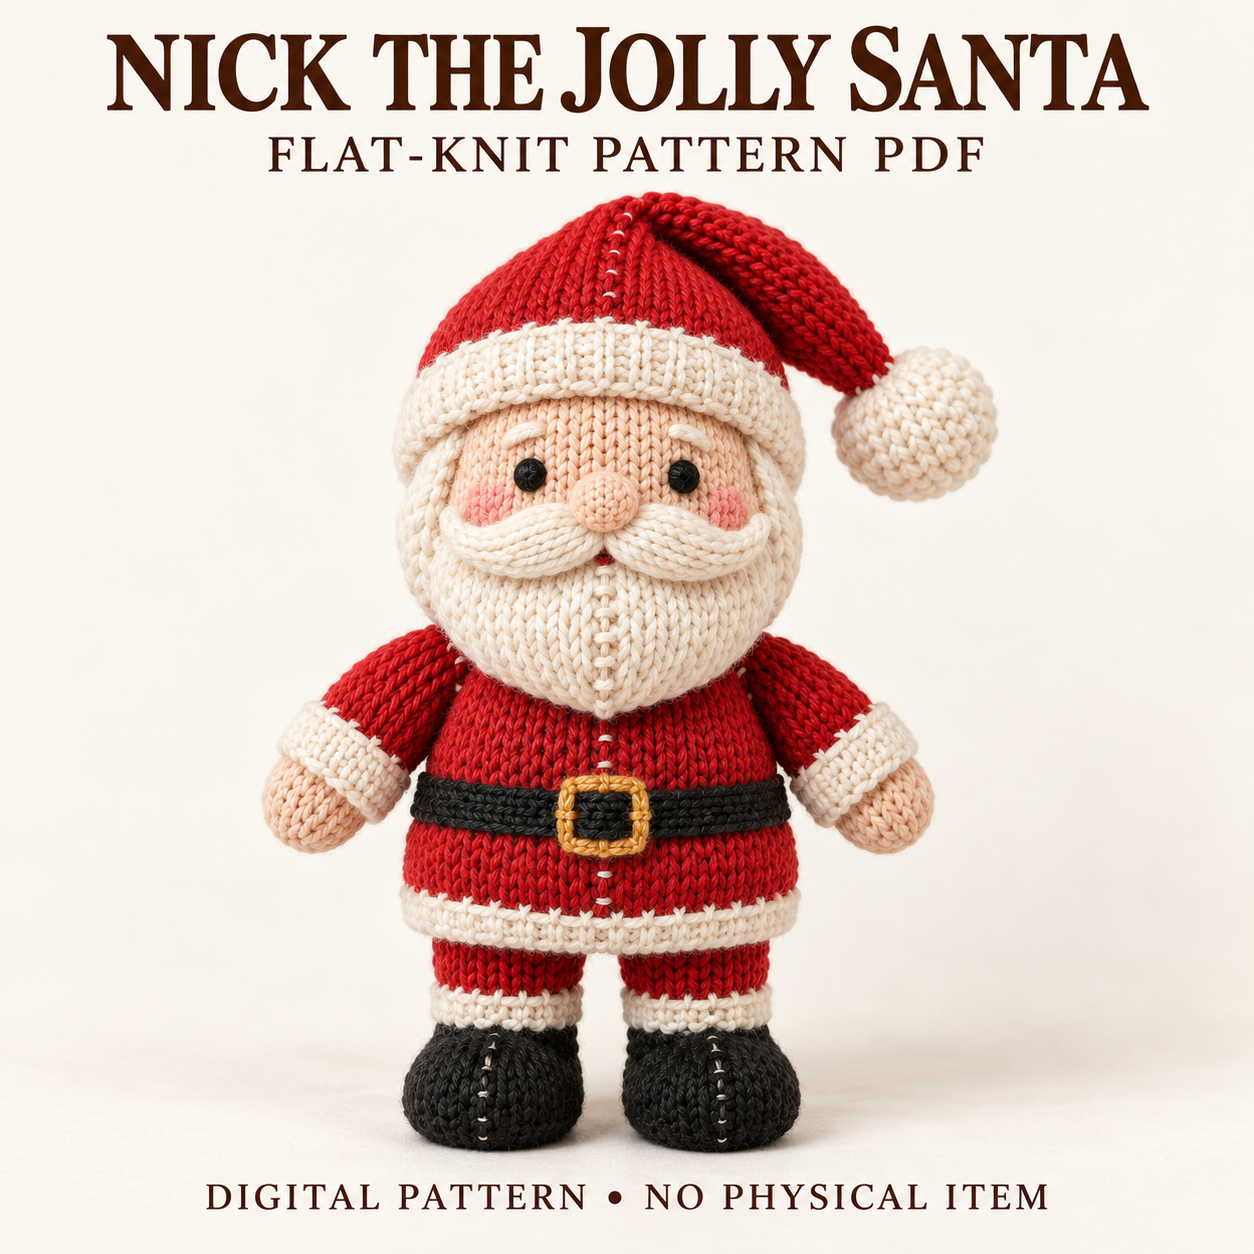
Nick’s Santa plushie knitting pattern creates a red-coated Santa with a cream beard, curled moustache, peach face, and black boots. An embroidered gold buckle sits on a knitted black belt, and a long red hat bends to the character’s left beneath a cream knitted pompom. All components are worked flat and seamed, including the head’s intarsia face panel. The project calls for care with colour joins, shaping, filling, and mirrored attachments, making it a suitable next step for makers already comfortable with basic flat knitting. This overview explains the supplies, construction, and feature placement. Download the complete PDF near the bottom for the written rows, face maps, and full assembly directions.
Features of the Santa plushie knitting pattern
The peach face sits between cream side sections that form the hair and back of the head. Cream eyebrows and pink cheeks sit above a softly rounded nose. A pointed beard and two tapered moustache halves are separate pieces, allowing their positions to be adjusted on the filled head.
The red coat has a knitted cream hem and black belt. The buckle is an embroidered outline, rather than purchased hardware. Small cream surface stitches decorate selected coat and boot areas. The doubled ribbed hat brim frames the face, while the cap drops toward the viewer’s right when seen from the front.
Techniques, gauge, and finished measurements
The main skills are flat stockinette, one-by-one rib, increases, decreases, intarsia, mattress seaming, and embroidery. Working the face with separate yarn sources avoids long floats behind its broad cream and peach sections.
The Santa plushie knitting pattern gives stockinette gauge as 20 stitches and 28 rows per 10 cm on 4 mm needles, measured relaxed. Rib gauge is approximately 22 stitches and 30 rows per 10 cm, unstretched.
approximate dimensions include 31–33 cm overall height to the head or hat crown, with the pompom possibly extending higher; 18–20 cm hand-to-hand width; and 8–9 cm depth. The hat cap is planned at 15–16 cm from brim to tip. These figures depend on gauge, filling, and final positioning.
Yarn colours and tools to prepare
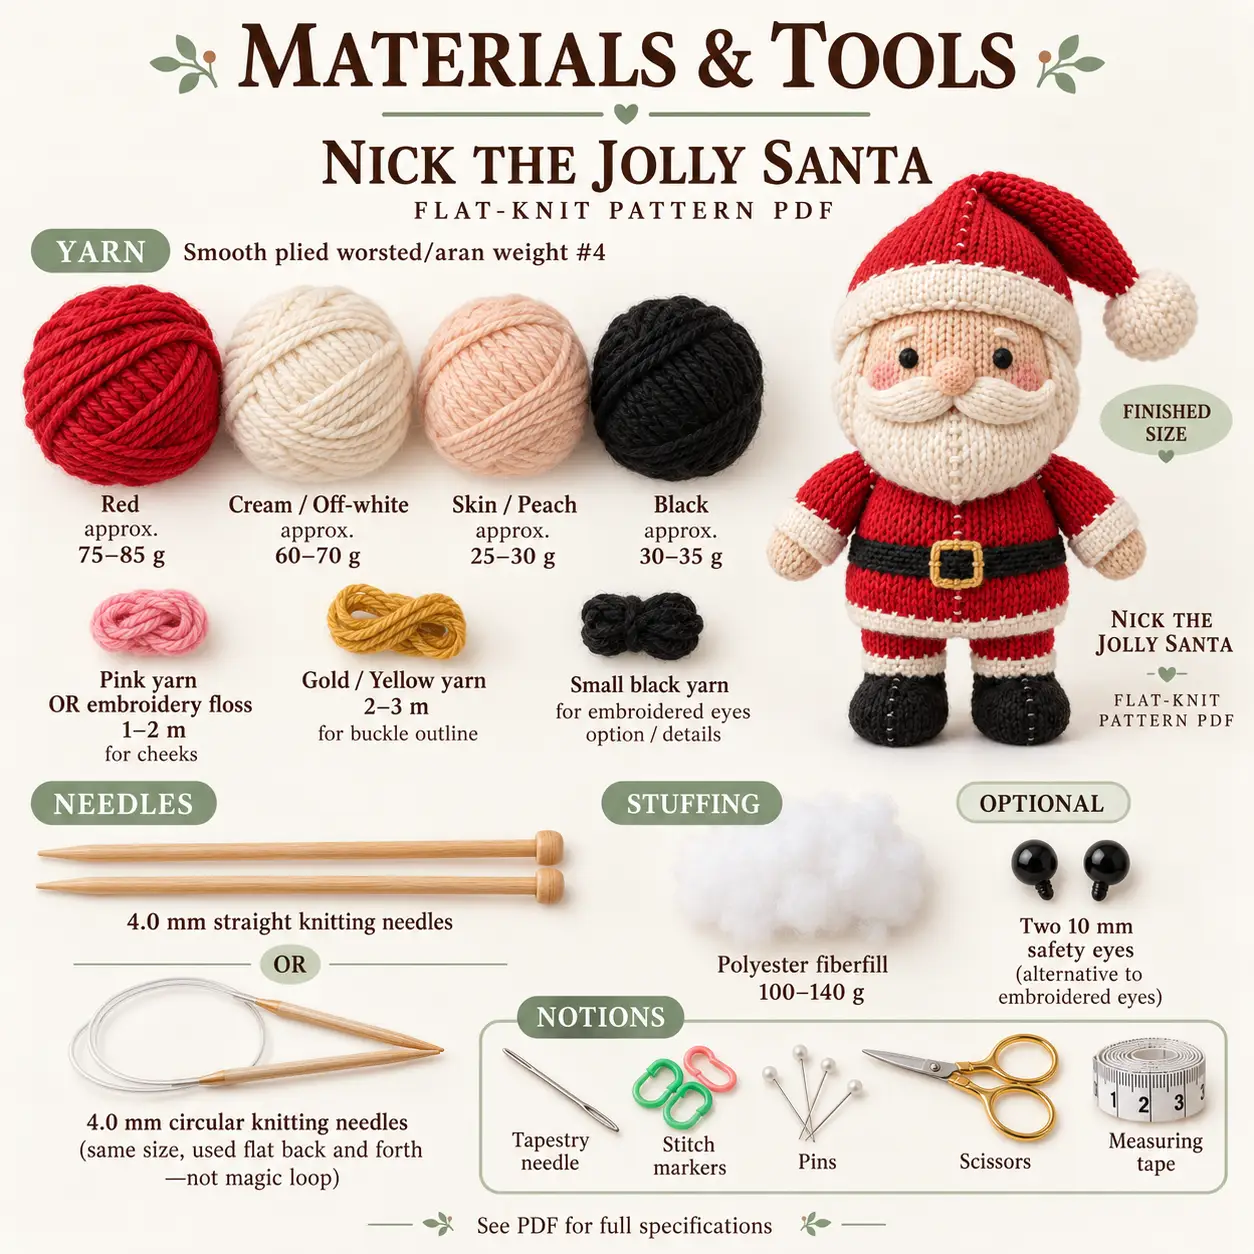
Choose smooth plied worsted or aran yarn, weight number four. The PDF lists red at approximately 75–85 g, cream or off-white at 60–70 g, skin or peach at 25–30 g, and black at 30–35 g.
The Santa plushie knitting pattern also requires 1–2 m of pink yarn or floss for cheeks and 2–3 m of gold or yellow yarn for the buckle. A small amount of black yarn supplies embroidered eyes or details if chosen.
Use 4 mm straight needles or a same-size circular needle worked back and forth. Prepare two optional 10 mm eyes or embroidered eyes, approximately 100–140 g of fiberfill, a tapestry needle, markers, pins, scissors, and measuring tape. The pompom is a knitted stuffed ball; there is no pom-pom maker or crochet hook in the supply list.
Flat knitting and the intarsia face
The head starts at its lower edge and closes at the crown. Its cream side edges meet at centre back, leaving the peach panel centred at the front. Use separate yarn sources for each cream side and the peach centre, twisting once at each join on the wrong side.
The Santa plushie knitting pattern includes all seaming edges in its stated counts. Do not add extra seam-salvage stitches. Keep the row ends even so the back seam can align without changing the face’s direction.
The body starts at the base and ends with an open neck. Boot-and-leg pieces and hand-and-arm pieces combine knitted colour sections. The hat cap, doubled brim, beard, moustache halves, nose, and pompom are made separately.
Assembly from coat details to layered face
Embroider the buckle and coat-front detail while the body is flat, with its wrong side accessible. Fit eye hardware before seaming the head, then fill the head through the remaining back opening and close it. Add embroidered eyes if chosen, eyebrows, and cheeks before attaching bulky facial layers.
Seam and fill the body, boots, legs, hands, and sleeves. Pin both boots on a flat surface and mirror the arms’ downward angles. Align the head and body back seams before attaching the open body neckline around the designated lower-head ring.
Add the centred beard, tiny mouth, nose, and mirrored moustache halves. Complete the hat with its doubled brim and knitted pompom, then position it with the back seams aligned. Secure the planned slouch with concealed tacks.
Tips for boots, moustache, and colour joins
Move more boot filling toward the toes and keep the ankles slightly flatter. Compare both boot soles before completing the leg attachments; a small positional adjustment can change whether the body leans.
The Santa plushie knitting pattern uses only a wisp of filling at each moustache’s thicker inner end. Leave the tapered tips almost unfilled so they can curve upward. Flip one finished half when pinning the pair, and compare the visible curves beneath the nose.
Keep cream coat embroidery within the red sections, stopping at the black belt and cream hem. Match every colour-change row across the body seam. Use relaxed surface stitches on the beard and hat so their fabric does not pucker around the decorative line.
Troubleshooting balance and facial layers
Why does this project lean after adding the legs?
Release one leg’s attachment before burying its tail and move the upper edge slightly. Repin both boots on a flat surface, checking their forward direction and contact areas. Resew once the lower body sits upright without twisting.
Why do the moustache halves look different?
Confirm that one piece is flipped to mirror the other. Use matching attachment lengths and equally light filling at their inner ends. Leave both outer tips free enough to curl rather than sewing one completely flat against the beard.
Why is there a small hole at the face colour join?
Use the colour-change tail on the wrong side to close the gap with a small matching pass. Keep the repair loose enough to preserve the face surface. When knitting another panel, check that the yarns twist once at each intarsia transition.
Care and eye-finishing choices
After completing the Santa plushie knitting pattern, follow the selected yarn’s care label for the assembled item. Gentle surface cleaning may suit the filled sections. Avoid wringing, tugging the moustache tips, or pulling the hat pompom while damp. Reshape the figure and allow it to dry thoroughly.
The PDF advises embroidered eyes instead of detachable eye components for items intended for children under three, alongside applicable local requirements. Check the eye finish, beard, nose, moustache, hat, and limb attachments. Treat the supplied dimensions as design targets; the pattern does not claim a physically tested prototype.
Download Nick’s complete pattern PDF
The Santa plushie knitting pattern PDF includes the written component instructions, intarsia notes, placement maps, filling guidance, and assembly sequence. Use the complete file for exact counts and the timing of eye installation before head closure.
DIGITAL DOWNLOAD ONLY — NO PHYSICAL ITEM WILL BE SHIPPED.
Leave a Reply