
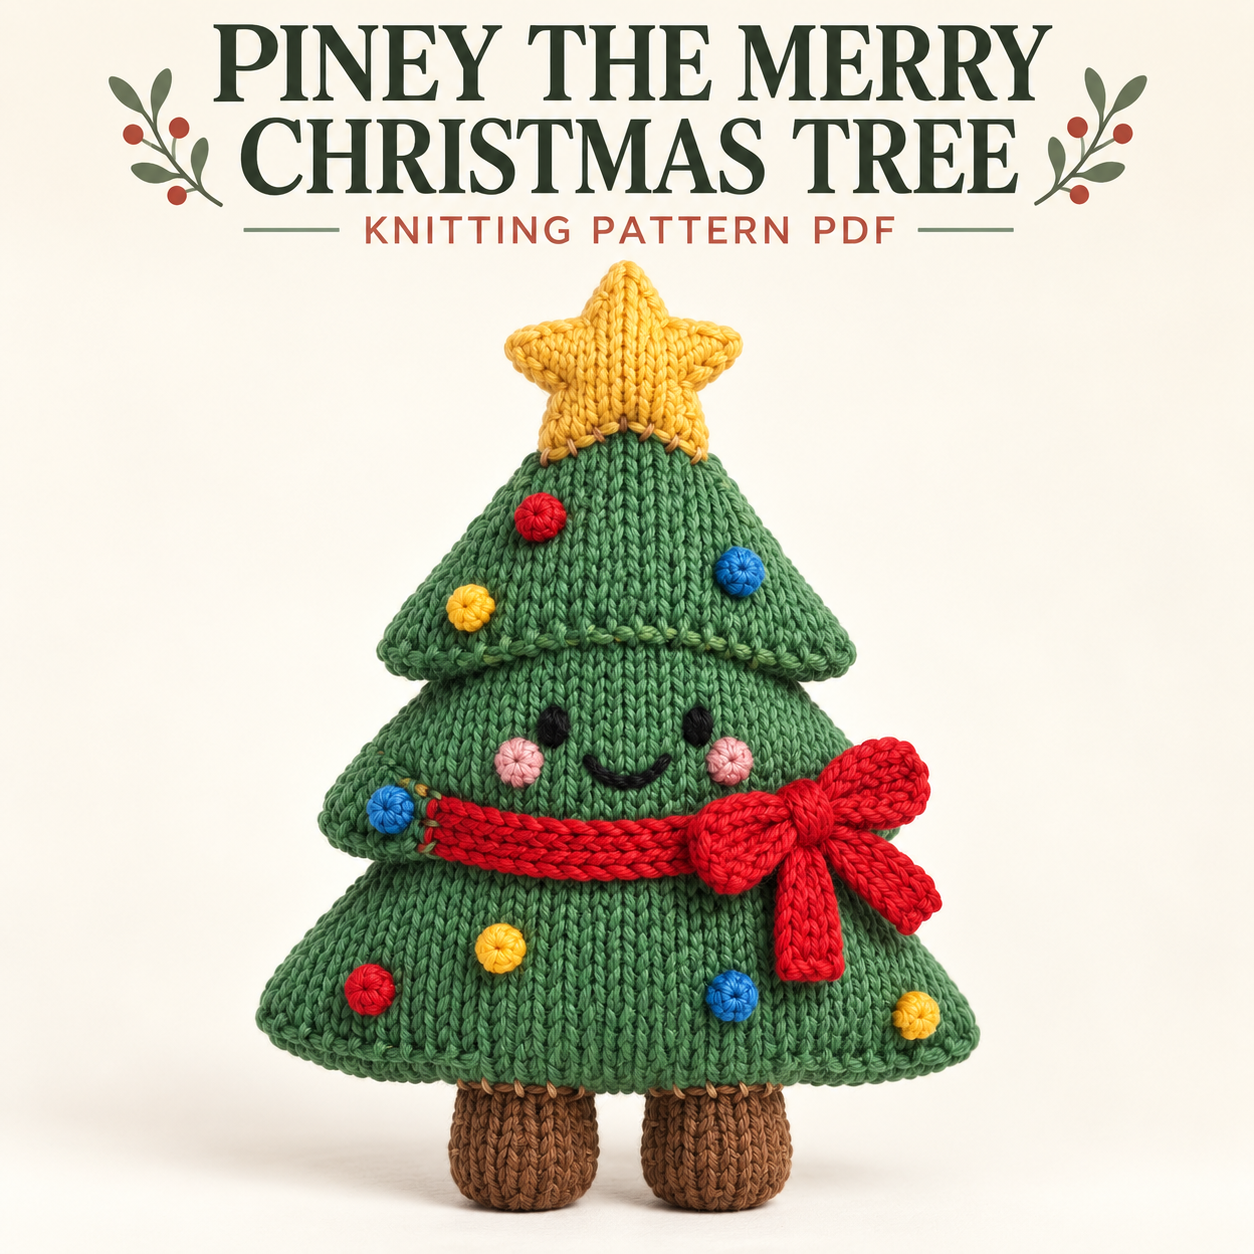
This Christmas tree plushie knitting pattern makes Piney, a standing holiday character with three layered green branch tiers, a yellow star, and two brown trunk-feet. A smiling embroidered face sits on the middle tier, with pink cheeks and a red scarf bow below it. Raised knitted ornaments carry red, blue, and yellow around the front, sides, and back. The PDF describes the skill level as advanced beginner to intermediate, combining knitting in the round, simple flat work, shaping, seaming, and embroidery. This article explains how the layers attach, which supplies to gather, and where careful positioning makes a difference. The complete instructions are available in the PDF download near the bottom.
About This Christmas Tree Plushie Knitting Pattern
Piney’s branches are separate flared skirts sewn around one stuffed body. Each tier ends in a purl ridge, defining its lower edge. The broad front silhouette is deliberately shallower from front to back, so the finished tree should not be shaped into a round cone.
The ornaments are knitted bobbles rather than purchased beads: twelve in total, four each in red, blue, and yellow. Two additional pink bobbles form flatter cheeks. The yellow topper has five points, and the red bow combines separate loop rings, pointed tails, and a centre band. It sits on Piney’s own left, which appears on the viewer’s right.
Skills, Gauge, and Design Targets
The main skills are small-circumference knitting, increases and decreases, flat stockinette, garter stitch, and sewing. The star begins with a circular centre, then its points are worked individually back and forth. Keeping track of those held groups needs more care than the plain body rounds.
The Christmas tree plushie knitting pattern gives design targets of 29–31 cm overall height including feet and star, 20–22 cm maximum width, and 13–15 cm depth. The star is about 7–8 cm point to point; the trunk-feet are about 5–6 cm long each. These are targets, with results varying by yarn, tension, stuffing, and blocking.
Gauge is 18 stitches and 26 rounds per 10 cm in circular stockinette, lightly stuffed. Dense fabric matters for containing filling.
Materials and Tools
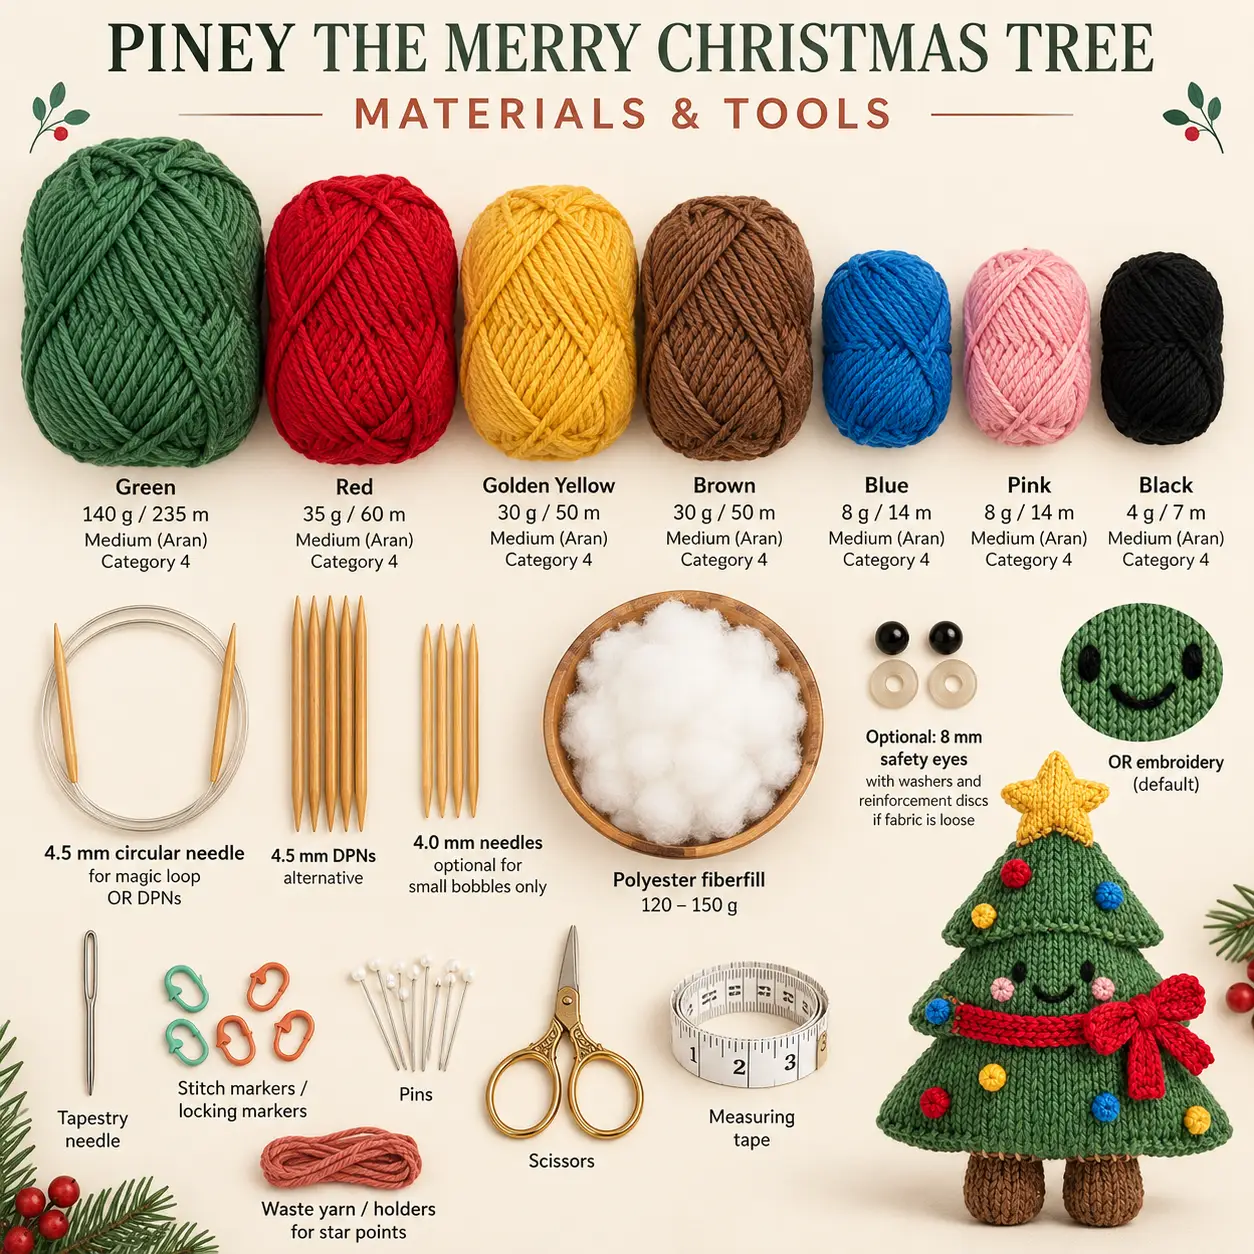
Use medium/Aran category 4 yarn. Approximate amounts are green 140 g/235 m, red 35 g/60 m, golden yellow 30 g/50 m, brown 30 g/50 m, blue 8 g/14 m, pink 8 g/14 m, and black 4 g/7 m.
The specified needles are 4.5 mm circular needles for magic loop or DPNs, with the same size for small pieces. The bobbles may use 4.0 mm needles if their fabric is loose. Allow 120–150 g polyester fiberfill, plus a tapestry needle, markers, pins, scissors, and measuring tape. Holders or waste yarn keep star-point groups available while another point is worked.
Embroidered eyes are the default. Optional two 8 mm safety eyes require washers; reinforcement discs are mentioned if the fabric is loose.
Techniques That Create the Branch Layers
The body increases from a closed lower centre, then narrows toward the tip. Each branch tier starts at its narrow top edge and expands outward. A loose bind-off helps the bottom ridge retain its flare.
The Christmas tree plushie knitting pattern uses matching stitch counts to join tier cast-on edges to specific body rounds. This one-to-one sewing is a useful alignment system: the narrow opening is attached without gathering it unevenly. Hidden tacks then stabilise the wider lower ridge.
Small bobbles are closed at one end, with their cast-on openings sewn against the tier fabric. The scarf, bow loops, tails, and centre band use garter stitch. Basic satin stitches and a shallow U-shaped smile complete the default face.
Construction and Assembly Sequence
Finish and stuff the main body first, preserving its centre-back marker. Add the brown feet before the lower tier, while the underside is accessible. Check that the body stands level before sewing them firmly.
Complete the face and ornaments while the tiers are separate. This hides embroidery ends and any optional eye washers between the tier and body. Attach the lower, middle, and upper tiers in sequence, matching their front and back landmarks to the body. Use only wisps of filling beneath the upper parts of the skirts, then tack their ridges discreetly.
Wrap the scarf below the smile, cover its join with the bow, and attach the lightly stuffed star with one point upward. Remove all temporary markers only after checking every layer.
Tips for Neat Tiers and Decorations
- Keep each beginning-of-round marker at centre back. Fold the finished tier to establish its exact opposite centre front.
- Leave the specified sewing tail at each tier’s cast-on edge. That edge becomes the attachment line, not the flared hem.
- Sew the face before mounting the middle tier. The reverse side is much easier to access at this stage.
- Distribute ornaments around all sides. Twelve bobbles belong across the whole tree, not crowded onto its face.
- Keep filling away from directly behind the face. Excess pressure there can distort the eyes and smile.
- Stuff the star points lightly. Too much filling rounds away their definition.
These steps preserve the intended proportions of the Christmas tree plushie knitting pattern while keeping the face visible between the branch edges.
Troubleshooting
Why Does a Christmas Tree Plushie Knitting Pattern Tier Twist?
Compare the tier’s centre-back marker with the body marker. If they do not align, release enough of the top-edge seam to rotate the skirt into place. Check centre front too before resewing. Pulling the bottom ridge sideways with stronger tacks will not correct a rotated top attachment.
Why Does a Branch Edge Droop?
The PDF allows one or two additional hidden tacks between the original tack points. Support the ridge while retaining its flare; do not pull it tightly against the body. Extra stuffing should be limited to the upper portion beneath the skirt.
Why Does the Star Lean?
Open a few attachment stitches and recenter the lower valley over the tree tip. The source suggests hidden stabilising stitches at the lower side points. Confirm that the star faces forward before securing them, with one point straight upward.
Care and Secure Attachments
Follow the yarn labels when choosing a cleaning method. Gentle spot-cleaning can help preserve the layered branches and small ornaments. If washing is suitable, avoid wringing, reshape the tiers and star, and allow the stuffing to dry completely away from direct heat.
Inspect every bobble, bow component, foot, and yarn end. The Christmas tree plushie knitting pattern recommends embroidered eyes when detachable components are inappropriate, including for children under three. Choosing that option does not replace secure assembly and the safety requirements relevant to the intended use.
Download Piney’s Complete PDF
The complete Christmas tree plushie knitting pattern includes yarn amounts, gauge, component tables, face and ornament coordinates, placement maps, stuffing guidance, assembly steps, final checks, and troubleshooting. Its written counts control construction; printed templates are not required. The source permits personal handmade creation and asks that the pattern file and instructions not be copied, redistributed, or resold.
DIGITAL DOWNLOAD ONLY — NO PHYSICAL ITEM WILL BE SHIPPED.
Leave a Reply