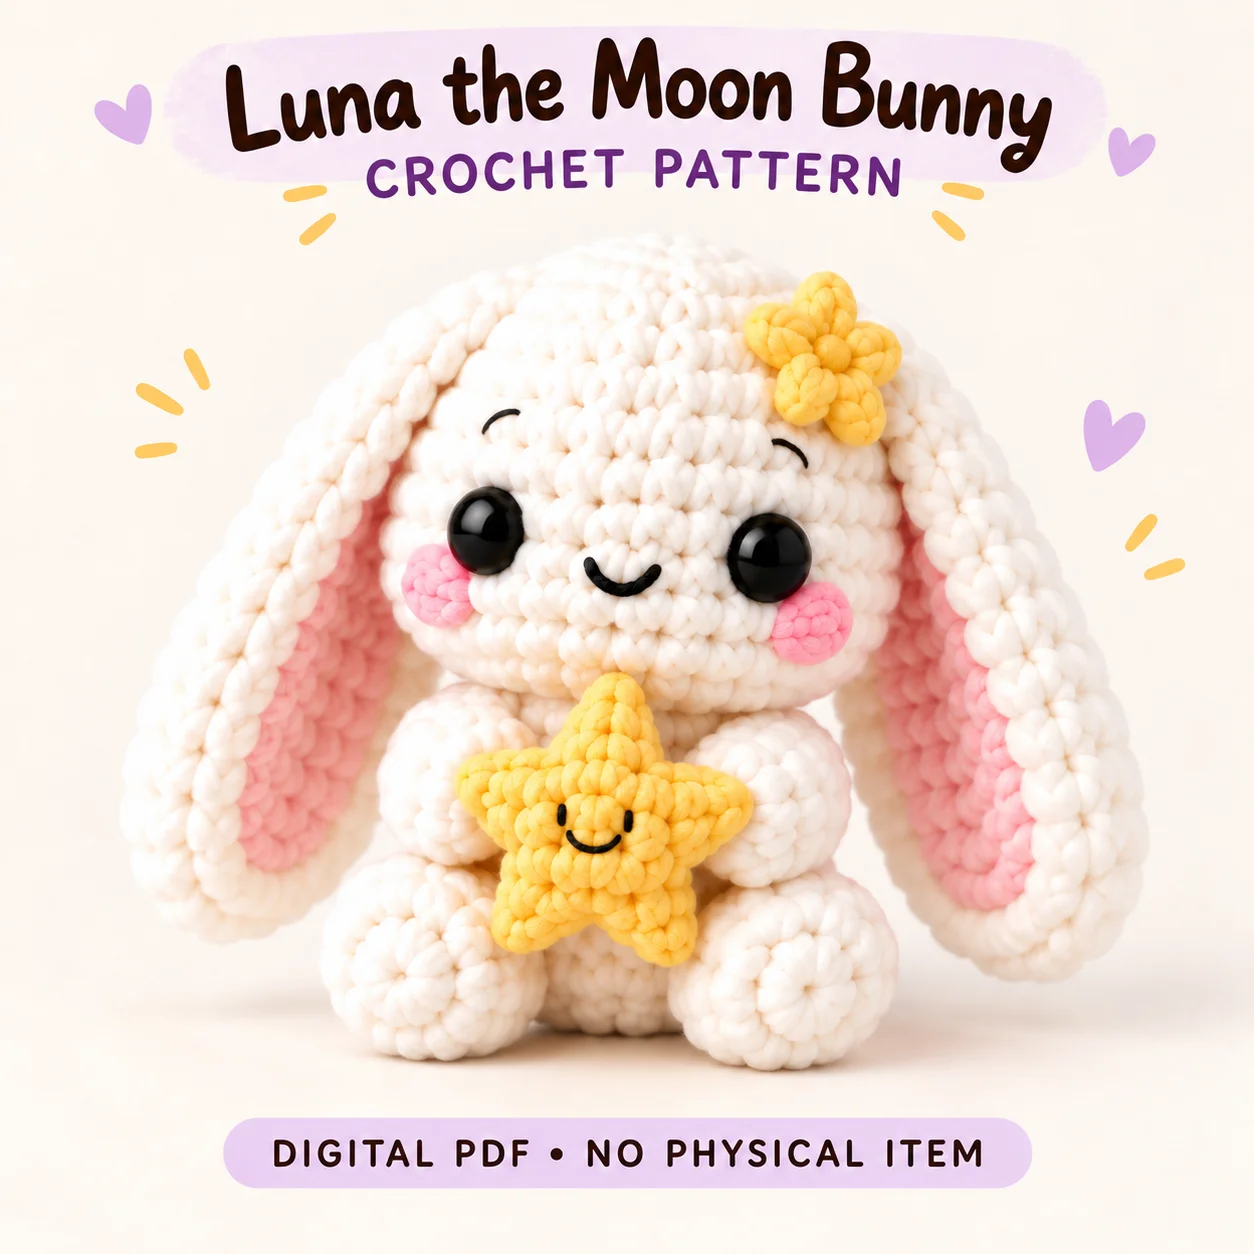
This moon bunny crochet pattern introduces Luna, a seated white amigurumi with long floppy ears, pink inner panels and a small yellow flower. Its arms curve inward around a smiling five-point star, while rounded feet remain visible on either side. The PDF uses US crochet terminology and combines spiral rounds, turned inner-ear rows and joined decorative rounds. All components are made separately and sewn together, with selected openings kept accessible for eye fitting, filling and final alignment. This overview explains the materials, shape targets and assembly checkpoints to consider before starting. Use the complete PDF alongside it for the working instructions, face positions and detailed ear and star attachment guidance.
Design Features of Luna the Moon Bunny
Luna’s large rounded head dominates its small seated body. The two outer ears remain unfilled and hang beside the cheeks rather than standing upright. Each pink panel has an even white border, defining the front of the flexible ear.
The yellow flower has five petals and sits on Luna’s left crown, which appears on the viewer’s right. The separate yellow star has five soft points and an embroidered face. A small crocheted white sphere forms the pom-pom-style tail at the lower back; it is not a loose yarn pom-pom.
Skills and Crochet Method
The PDF lists confident beginner or intermediate skill level. Prepare for magic rings, single crochet, half double crochet, increases, invisible decreases, a three-stitch decrease, applique sewing and simple embroidery. Mark the first stitch of every continuous round.
The moon bunny crochet pattern uses spiral rounds for the main stuffed shapes, turned rows for the pink ear panels, and joined rounds for cheeks, flower and star panels where stated. Read each component’s counting rule before beginning. Turning chains and joining slip stitches are excluded unless an instruction explicitly says otherwise.
Yarn, Filling and Tools
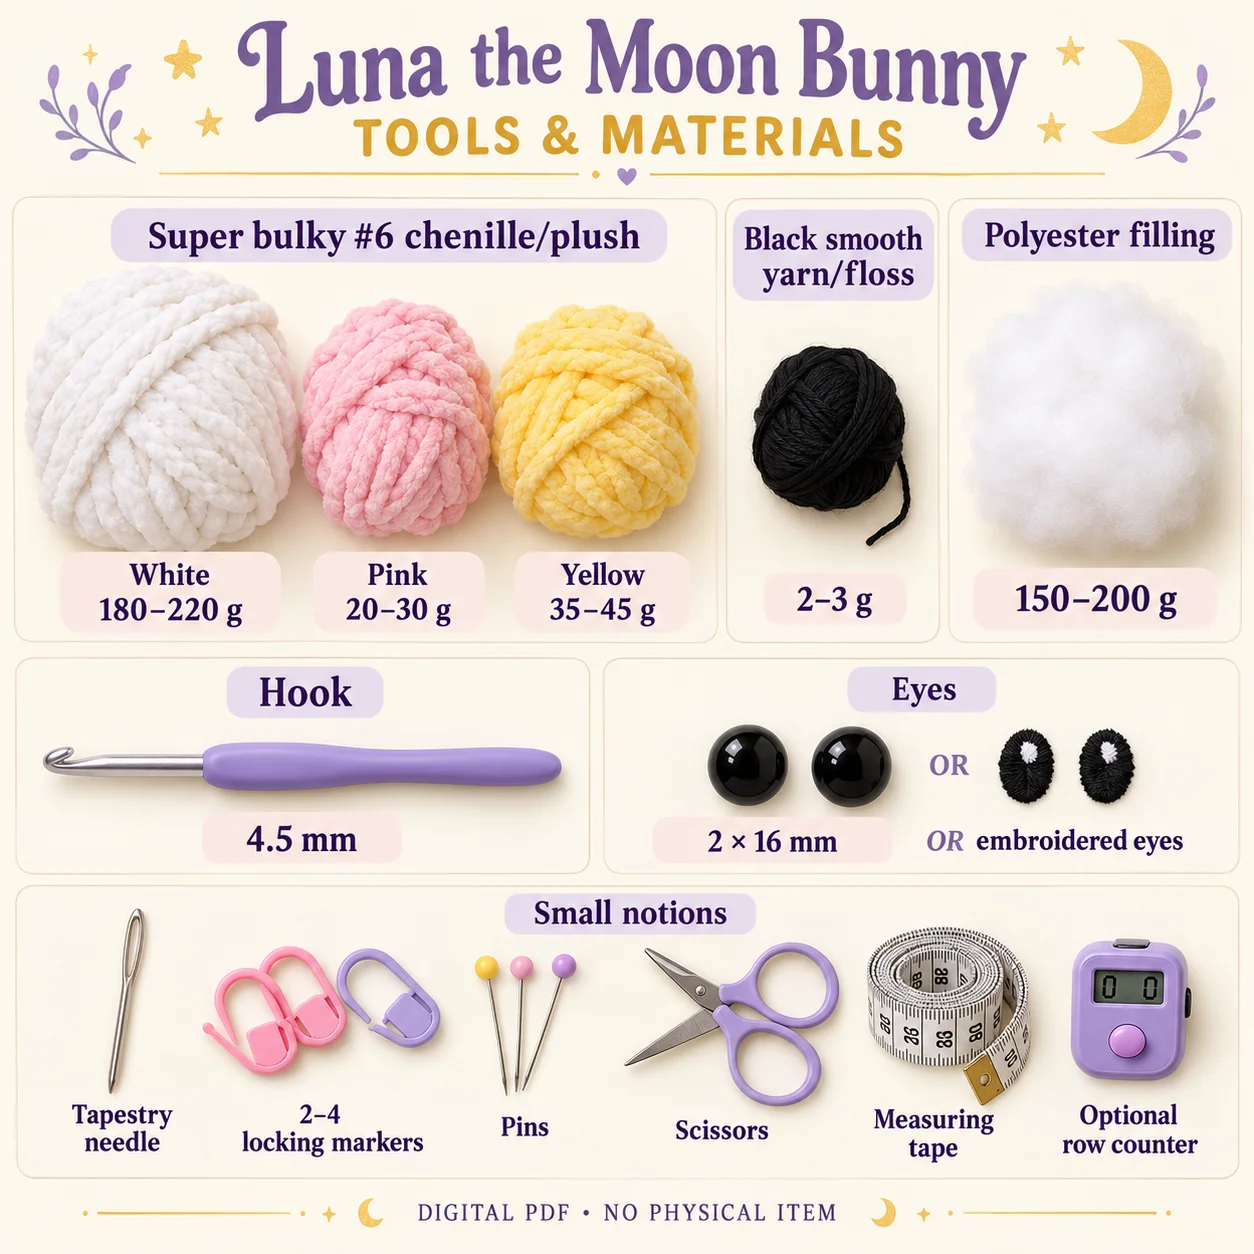
Choose super bulky number 6 chenille or plush yarn that is smooth enough for the stitches to remain visible. Pink and yellow should match the main yarn weight. Approximate amounts are:
- White: 180–220 g.
- Pink: 20–30 g.
- Yellow: 35–45 g.
- Smooth black yarn or embroidery floss: 2–3 g.
- Polyester fibre filling: 150–200 g.
Prepare a 4.5 mm hook, two 16 mm safety eyes or embroidered eyes, a tapestry needle, two to four locking markers, pins, scissors and measuring tape. A row counter is optional. No craft wire, pipe cleaners, felt inserts or internal reinforcement are required.
For an alternative without detachable safety-eye components, embroider the eyes securely. Choose the eye method and attachments for the intended use, following applicable local requirements.
Gauge and Finished Design Targets
The PDF’s practical gauge is approximately 12 single crochets and 13 rows per 10 cm, worked flat with the suggested hook. This is a flat-row sizing reference, not a stated round gauge. Aim for dense fabric that contains the filling without becoming excessively stiff.
The moon bunny crochet pattern gives a seated-height target to the crown of 23–25 cm and relaxed ear-to-ear width of 24–27 cm. Each outer ear is around 17–18.5 cm long, and the star is approximately 8.5–10 cm tip to tip. These are calculated design ranges; no physical prototype or test crochet was used.
Construction and Assembly Plan
Complete the head, fitting hardware eyes before its decreases close access, then fill and close it. The embroidered eye option and other face details are added afterward at the marked positions. Sew the pink panels onto the unfilled ears before attaching the ears and flower to the head.
The moon bunny crochet pattern leaves the body’s 24-stitch top opening available for a surface join around the lower closed head. Align the front and back guides and sew most of the seam before making the final body-filling adjustment. This is not a join between two open neck rings.
Attach the legs, then the arms. Embroider the star face on one panel before joining the two panels, and add light filling only to its centre. Secure the finished star to both arm tips plus the hidden body anchor. Attach the low back tail after the star arrangement is complete.
Tips for Floppy Ears and a Level Star
- Leave both outer ears completely unfilled.
- Sew each pink panel through the front ear layer only.
- Compare the two ear bases against the same head-round span.
- Keep the flower clear of the eyebrow and eye.
- Fill the star centre lightly and leave its points soft and flat.
- Use both palm attachments and the small body anchor for the star.
For the moon bunny crochet pattern, the accessory should remain close to the centre front with its face upright. Pin it between the hands before making the hidden tacks. Keep the arms flexible enough to curve inward, and check that the rounded feet are still visible beside the star after attachment.
Troubleshooting
Why Are the Ears Stiff or Too Broad?
Check that they contain no filling and that the pink applique seam is relaxed. Flatten the ears evenly by hand and gently roll them between your palms without steam. Tight sewing through both white layers can pull the ear into a rigid shape, so catch only its front layer when attaching the panel.
Why Does the Star Twist?
Check that both palm tacks and the hidden centre-front body anchor are present. Repin the star with its upper point just below the neck. Keep the centre anchor loose enough to preserve the padded centre rather than tightening it into a deep indentation.
Why Does the Head Lean?
Reopen a short accessible section of the neck seam, redistribute the body filling and realign the front/back guides. Repin the opening around the lower head and resew with even tension. Check from directly in front and the side before closing the last section.
Finishing and Care
Inspect both ear bases, the flower attachment, the star tacks and every limb seam. The face should remain centred, the ear borders even and the small tail low at the back. Remove all pins and temporary placement markers, secure the embroidery and bury remaining yarn tails.
Follow the actual chenille and filling care labels when cleaning the moon bunny crochet pattern project. Support the body rather than lifting it by an ear or the star. After handling, check the accessory attachments and gently restore the floppy ears without adding filling or using heat not approved for the chosen yarn.
Download the complete PDF pattern
This PDF contains the complete crochet pattern for Luna the Moon Bunny. Digital download only; no physical item will be shipped.
Related projects: Coco the Cat, Maple the Fox, Sunny the Sun, Finn the Turtle.
Browse the crochet pattern collection for more project overviews.
Leave a Reply