
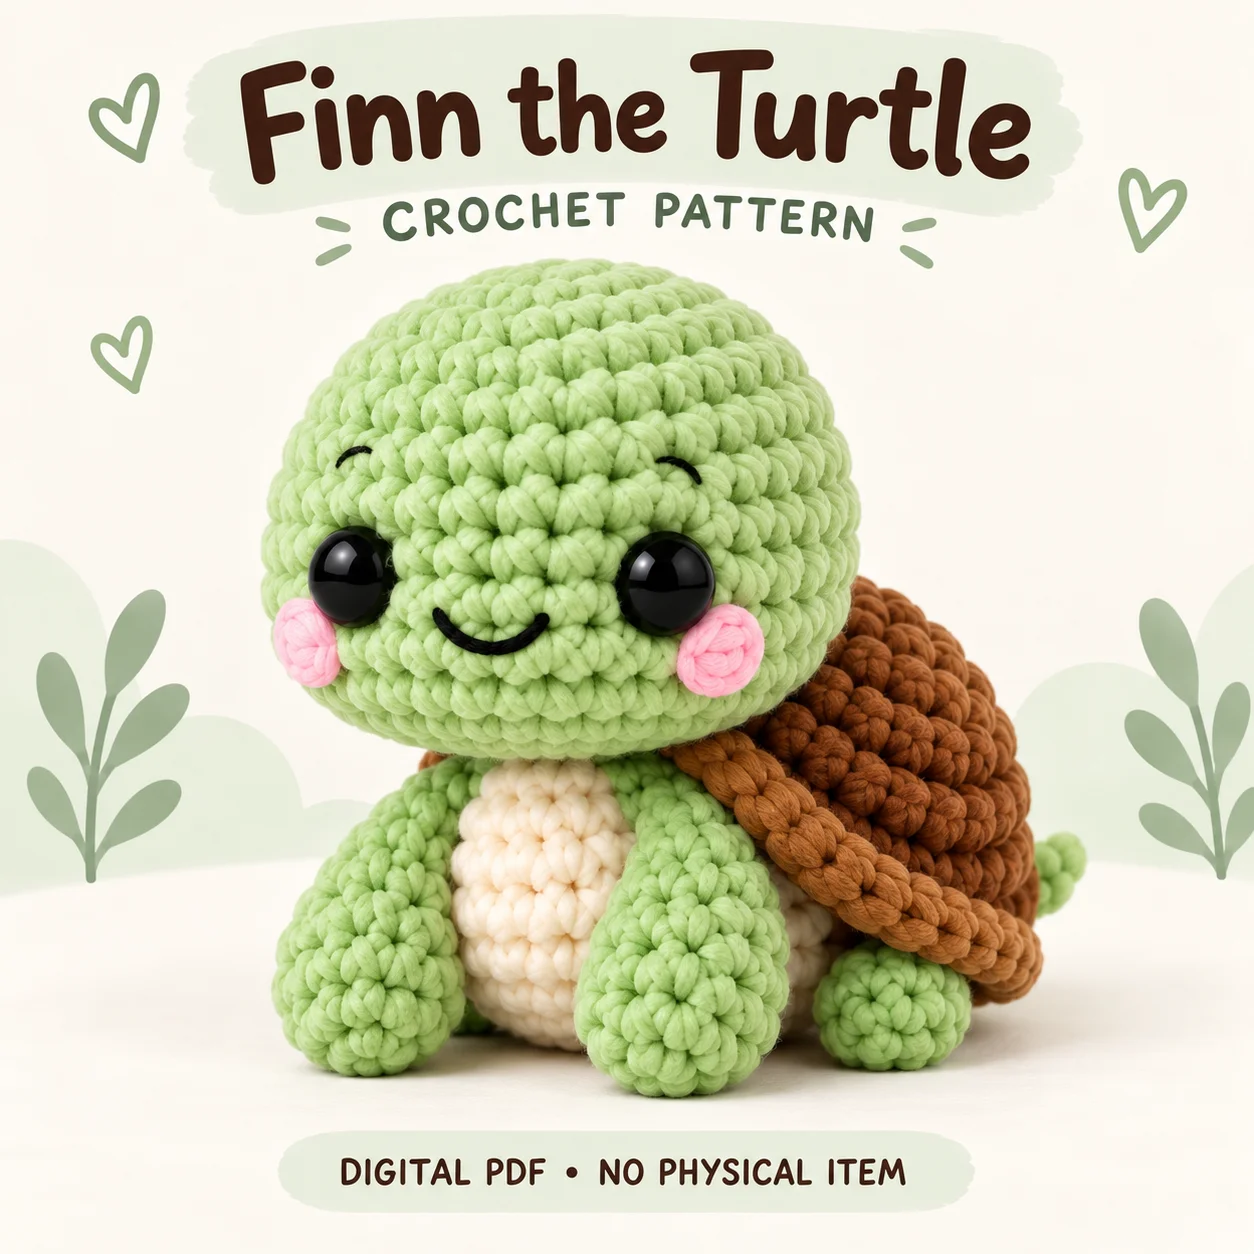
This crochet turtle pattern introduces Finn, a seated plush amigurumi with an oversized green head, a compact torso and a cream belly patch. Its brown shell has raised spiral or concentric ridges, while long front flippers, smaller hind feet and a tiny tail complete the silhouette. Pink cheek discs, embroidered brows and a small smile give the face its expression. The PDF uses US crochet terminology and mainly continuous spiral rounds, with separate components assembled by sewing. This overview explains the yarn choices, texture method and placement checks to consider before beginning. Use the complete PDF for the working rounds, shell-rim instructions and detailed front and back assembly guides.
Features of This crochet turtle pattern
Finn is a compact chibi turtle with a head noticeably wider than its green body. The cream belly is a vertical oval, stopping below the neck and above the lower edge. Its front flippers angle downward and forward, while smaller feet remain visible behind them.
The brown shell is a shallow dome attached to the back. It should appear wider than the torso from behind, with a raised outer rim and visible ridges. A small green tail sits below the shell. The construction does not require a rigid insert or wire framework.
Skills and Crochet Method
The PDF describes Finn as a confident-beginner project. Prepare for magic rings, single crochet, increases, invisible decreases, back-loop-only work, surface slip stitches and simple embroidery. The belly oval is worked around both sides of a foundation chain rather than in turned rows.
The crochet turtle pattern creates shell texture by leaving front loops exposed during its back-loop rounds. Keep those loops on the finished outside surface. The decorative rim stitches are separate from the live opening stitches and do not increase the opening’s count. Consistent counting helps distinguish texture from shaping.
Yarn, Filling and Tools
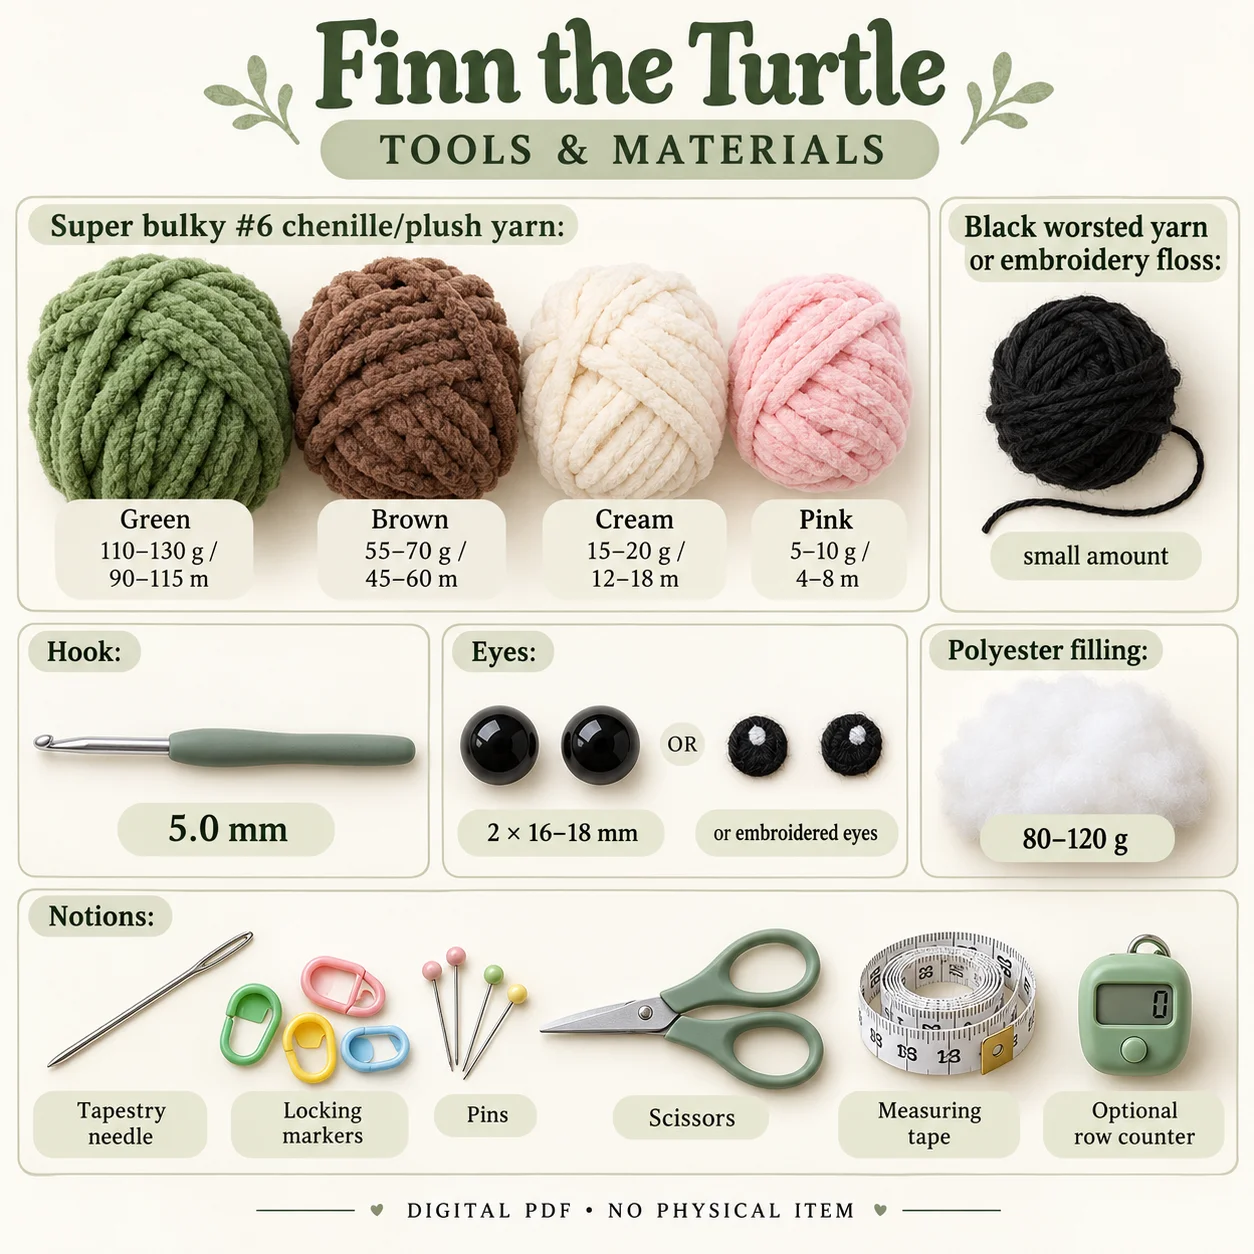
Use super bulky number 6 chenille or plush yarn. The approximate quantities are:
- Green: 110–130 g, or 90–115 m.
- Brown: 55–70 g, or 45–60 m.
- Cream: 15–20 g, or 12–18 m.
- Pink: 5–10 g, or 4–8 m.
- Black worsted yarn or embroidery floss: a small quantity.
- Polyester fibre filling: 80–120 g.
Prepare a 5.0 mm hook, two 16–18 mm safety eyes or embroidered eyes, a tapestry needle, locking markers, pins, scissors and measuring tape. A row counter is optional. No pipe cleaners, felt or internal reinforcement are required.
Embroidered eyes offer an alternative without detachable safety-eye components. Select materials and secure attachments for the intended use, following applicable local requirements rather than assuming a safety certification.
Gauge and Finished Design Targets
The practical target is approximately 14 single crochets and 15 rounds per 10 cm at dense amigurumi tension. The PDF suggests an unfilled spiral tube or the early head rounds as a practical check. Avoid stretching the fabric to reach a measurement.
The crochet turtle pattern gives seated-height targets of 20–22 cm, width of 17–19 cm and depth of 15–17 cm. The shell is around 11.5–13 cm across. These are calculated design ranges, affected by yarn, hook, tension and filling. The design has not been physically test crocheted or verified with a real prototype.
Construction and Assembly Plan
Make the head and body separately, keeping their matching neck openings accessible. Install hardware eyes before the head decreases restrict access, or embroider them after stuffing while the neck is still available for securing ends. Complete the brows, smile and cheek discs before the main neck join.
The crochet turtle pattern joins the two 18-stitch openings one-to-one with front and back aligned. Attach the cream belly first, then pause near the end of the neck seam to check filling and head angle. Keep the upper body softer than its broad lower base.
Attach the tail and hind feet before the shell. Pin the shell centrally, sew most of its live edge to the body, and add a thin filling layer beneath its centre before finishing. The rim stays nearly unfilled. Attach the long front flippers afterward and compare their resting positions with the hind feet.
Tips for Clear Shell Ridges
- Keep the shell’s exposed front loops facing outward.
- Work the decorative rim loosely enough to avoid inward curling.
- Pin the shell at the top, bottom and both sides first.
- Add shell filling only during attachment, concentrating it centrally.
- Keep the small tail visible below the lower rim.
- Match the two flipper attachment heights before sewing.
For the crochet turtle pattern, the shell should remain a shallow bowl rather than a hard ball. Add small tufts gradually and inspect the side profile while the seam is open. Keep the outer rim flexible so it follows the torso without collapsing or pulling the body backward.
Troubleshooting
Why are the shell Ridges Hard to See?
Check that the specified ridge rounds were worked through the back loops only. The unused front loops must remain on the outside. After adding light filling, gently lift the ridges with your fingers. Additional stuffing will not correct texture worked through the wrong loops.
Why Does the Shell Rim Curl Inward?
The decorative surface slip stitches may be too tight. Remove and rework that section more loosely, keeping the live opening separate from the decoration. The PDF permits a slightly larger hook for this decorative round if necessary, without changing the other component counts.
Why Does One Flipper Hang Higher?
Compare both flattened top seams against the same body-round range. Repin the pair before resewing the misplaced attachment. Check the front and side views and the lower tips on a flat surface, rather than judging alignment only from the upper shoulder seam.
Finishing and Care
Inspect the neck, belly edge, shell rim, feet and flipper attachments. The tail should remain centred, and the face should be level when viewed straight on. Remove pins and temporary guides after every seam is secure, then bury the remaining yarn tails.
Follow the care instructions for the actual chenille yarn and filling. Support the body when handling the crochet turtle pattern project rather than pulling the shell rim or a flipper. After cleaning, inspect the appliques and shell attachment, gently restore the seated shape and check that the raised loops remain on the outside.
Download the complete PDF pattern
This PDF contains the complete crochet pattern for Finn the Turtle. Digital download only; no physical item will be shipped.
Related projects: Kiwi the Little Dinosaur, Ollie the Octopus, Poppy the Penguin.
Browse the crochet pattern collection for more project overviews.
You can compare Finn with more projects in the free crochet animal pattern library. If changing yarn for the raised shell, consult the Craft Yarn Council standard yarn-weight chart and check the actual gauge before sewing the flippers and head.
Leave a Reply