
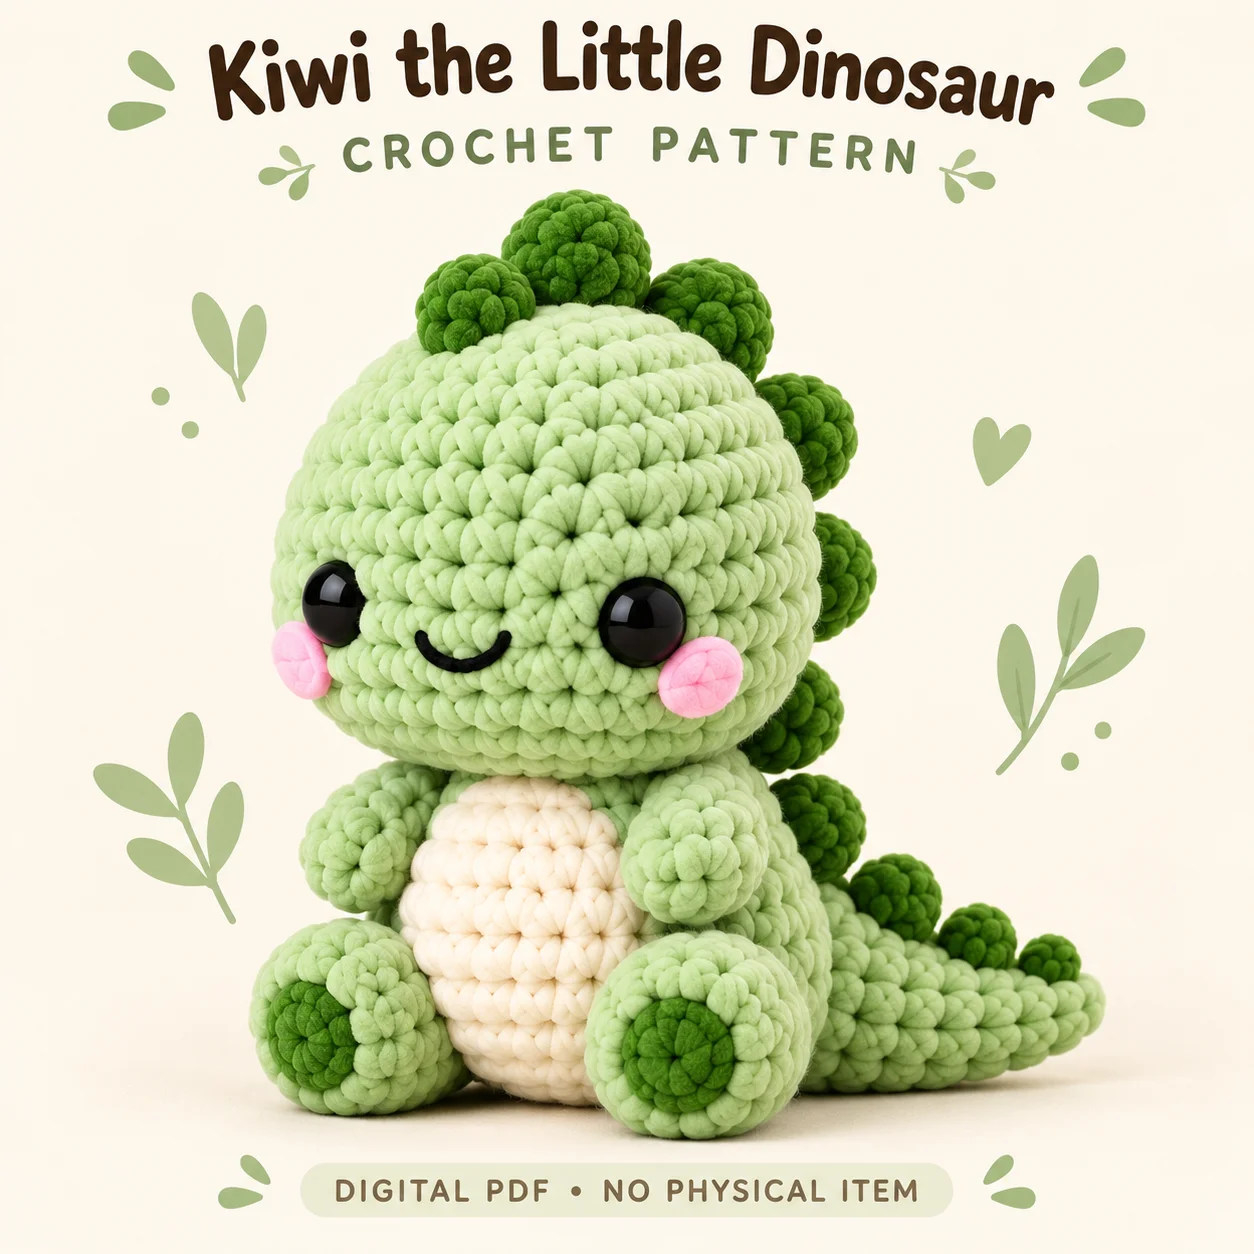
This crochet dinosaur pattern introduces Kiwi, a seated pale-green amigurumi with a large rounded head, short arms and broad forward-facing feet. A cream belly patch fills much of the front torso, while dark-green foot pads and ten rounded dorsal plates provide contrast. The tail tapers gently and rests low, continuing the ridge from the crown down the back. The PDF uses US crochet terminology and mainly continuous spiral rounds, with separate pieces joined by sewing. This overview explains the materials, design proportions and access checkpoints to consider before beginning. Keep the complete PDF beside your work for the individual rounds, component inventory and crown-to-tail placement maps during assembly.
Features of This crochet dinosaur pattern
Kiwi’s oversized head is wider than its compact torso. The arms are smaller than the legs, and the rounded feet point forward with one flat dark-green pad on each. The cream belly is a broad upright oval rather than a narrow strip.
The dorsal ridge contains three large plates, four medium plates and three small plates. These are softly filled domes, not sharp spikes. The largest pieces sit on the crown and rear head, medium pieces continue down the back, and small pieces finish the top of the low tail.
Skills and Crochet Method
The PDF lists confident beginner or intermediate skill level. Useful techniques include a magic ring, single crochet, increases, invisible decreases, flattened limb closures, surface attachment and facial embroidery. The oval belly is worked around both sides of its foundation chain without turning.
The crochet dinosaur pattern recommends yarn-under single crochet for a compact texture, while consistent yarn-over work is also acceptable. Use the round marker for counting. Establish separate visual centre-front and centre-back guides for assembly, because a drifting spiral marker is not a reliable anatomical centre line.
Yarn, Filling and Tools
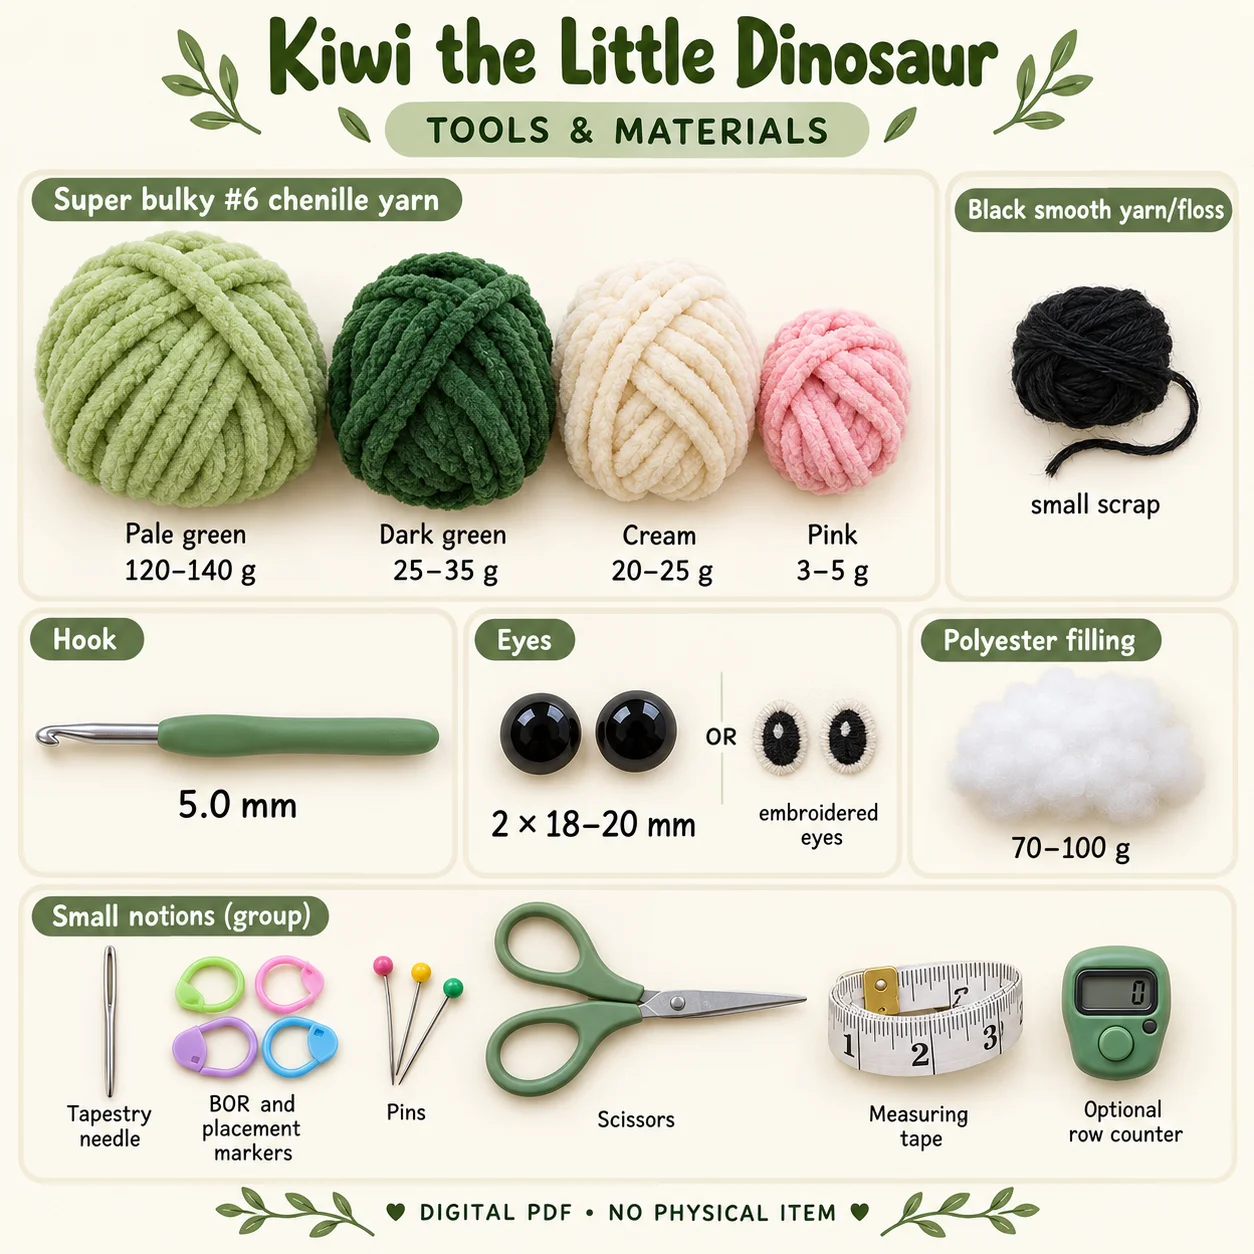
Use super bulky number 6 chenille or blanket yarn, preferably polyester, with matching dark-green and cream yarn. Pink may be the same or slightly lighter plush yarn. Approximate amounts are:
- Pale green: 120–140 g.
- Dark green: 25–35 g.
- Cream: 20–25 g.
- Pink: 3–5 g.
- Smooth black yarn or embroidery floss: a small scrap.
- Polyester fibre filling: 70–100 g.
Prepare a 5.0 mm hook, two 18–20 mm safety eyes or embroidered eyes, a chenille-suitable tapestry needle, round and placement markers, pins, scissors and measuring tape. A row counter is optional. The PDF provides yarn weights without corresponding metre quantities.
For an alternative without detachable safety-eye components, embroider the eyes securely. Choose the construction for the intended use and follow applicable local requirements.
Gauge and Finished Design Targets
The gauge target is approximately 15 single crochets and 17 rounds per 10 cm. Measure a gently flattened section without stretching it. Dense stitches are more useful than forcing an exact size by pulling the fabric around additional filling.
The crochet dinosaur pattern gives a seated-height target of 21–23 cm, width across the feet of approximately 13–15 cm, and depth including the tail of 22–25 cm. The tail is around 12–14 cm long. Finished measurements vary with gauge and materials. No physical prototype or test crochet was used, and materials and technique affect the finished proportions.
Construction and Assembly Plan
Make the head and body separately, leaving both 18-stitch neck openings accessible. Fit hardware eyes at the PDF’s checkpoint before the smaller head decreases. For embroidery, retain the eye markers and finish the eyes while the open neck still allows the ends to be secured inside.
The crochet dinosaur pattern completes the face before the neck join. Attach the cream belly to the body, then sew one foot pad to each leg. Pin and attach the legs and tail before joining the head and body with their front and back guides aligned.
Add the arms after the neck join. Pin the entire dorsal ridge before attaching any plate, arranging all ten pieces along the crown, centre back and tail-top route. Sew around each open plate base rather than anchoring it at only two points. Keep the face and forehead clear of the ridge.
Tips for a Smooth Crown-to-Tail Ridge
- Sort the plates into three size groups before assembly.
- Keep each dome lightly filled rather than hard and spherical.
- Establish the centre-back guide after shaping the stuffed pieces.
- Pin every plate before sewing the first base.
- Keep the lowest body plate above the tail attachment seam.
- Check the ridge from the back and both sides as you sew.
For the crochet dinosaur pattern, even visual spacing is more useful than forcing a bulky applique onto an awkward stitch coordinate. The PDF permits small placement adjustments to preserve symmetry. Keep the sizes tapering toward the tail and the base openings centred over the guide, then secure each dome with evenly distributed sewing stitches.
Troubleshooting
Why Do My crochet dinosaur pattern Dorsal Plates twist?
Their bases may not straddle the centre-back or tail-top guide evenly. Repin the affected piece and sew around its full opening. A seam fixed at only two points can leave a dome free to rotate. Avoid pulling so tightly that the soft plate collapses into the base fabric.
Why Does the Head lean?
Check the one-to-one 18-stitch neck join and the front/back alignment. Uneven filling or seam tension can tilt the large head. Adjust through the remaining opening before completing the join, keeping the lower head and upper body soft enough for a smooth seam.
Why Does Chenille Fray During Sewing?
Use shorter lengths of matching chenille and replace a strand when it begins to fray. Avoid repeatedly pulling through the same surface bar. Take small secure stitches and pull only until the gap closes; strong repeated tension can damage the plush strand without improving the attachment.
Finishing and Care
Check both feet on a flat surface, with their pads facing forward and their attachments level. Inspect the tail base, arms, belly edge and all ten plate seams. The tail may rest on the surface, but it should not be treated as a required support prop.
Follow the care labels for the chosen yarn and filling. Support the body when lifting the crochet dinosaur pattern project, and avoid pulling on the ridge or tail. After handling or cleaning, inspect the seams and gently redistribute the shape without stretching the chenille fabric. Remove all temporary pins and guide threads before use.
Download the complete PDF pattern
This PDF contains the complete crochet pattern for Kiwi the Little Dinosaur. Digital download only; no physical item will be shipped.
Browse the crochet pattern collection for more project overviews.
Compare Kiwi with more dragons, dinosaurs and soft toys in the free crochet animal pattern library. The Craft Yarn Council crochet hook size reference can help identify metric hook sizes, but the PDF’s yarn and gauge recommendations should determine the finished density.
Leave a Reply