
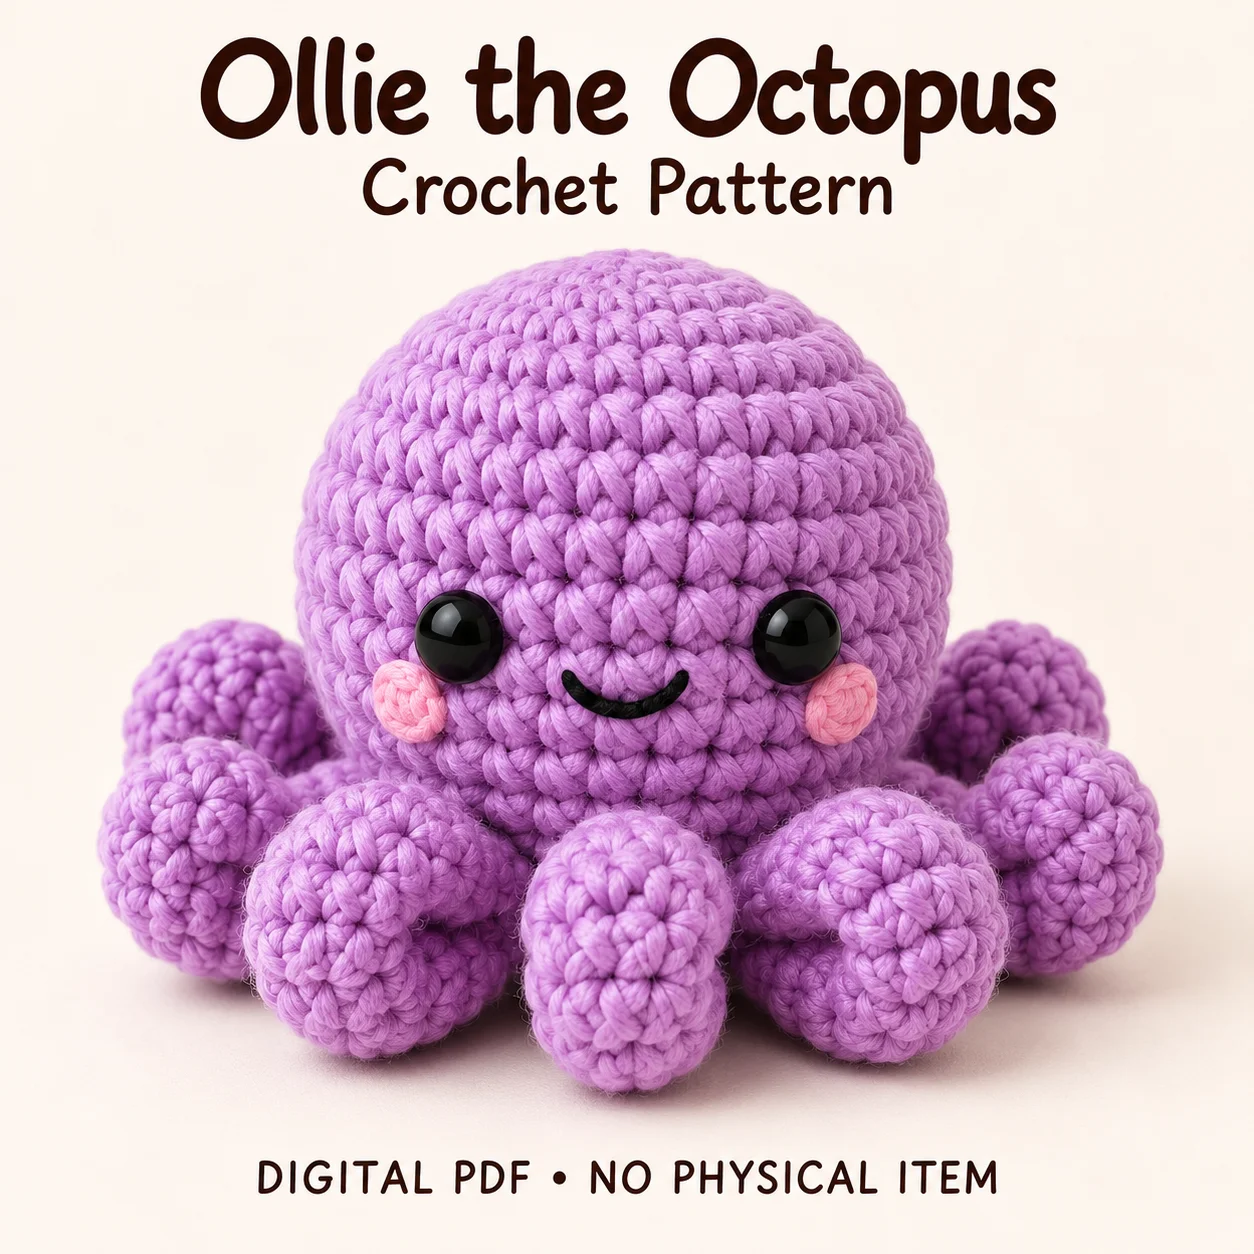
This crochet octopus pattern introduces Ollie, a lavender amigurumi with a rounded body and eight individually made tentacles. Each arm has a gentle upward curl, while small pink cheeks and a black embroidered smile give the face its friendly expression. The PDF uses US terminology and continuous spiral rounds, with separate pieces sewn together after their shaping is complete. Its placement guides distinguish the moving round marker from fixed assembly anchors, a useful detail when arranging a balanced ring of arms. This overview covers materials, design targets and the main finishing checkpoints. Use the complete PDF alongside it for the working rounds, numbered tentacle sectors and precise face positions.
Features of This crochet octopus pattern
Ollie’s head and body form one rounded lavender piece. There is no separate neck join. The lower portion is softened into a seated shape, with eight tentacles surrounding the base rather than hanging from a narrow attachment point.
Each tentacle is made from its tip toward its base. The final opening is flattened for sewing, and the curl direction is set by the shaping stitches. Two small, unfilled pink cheek circles sit below and outside the eyes. The smile is a laid black strand secured with small couching stitches.
Skills and Crochet Method
The PDF describes this as an advanced-beginner project. Prepare for magic rings, single crochet, increases, invisible decreases, flattened-piece attachment and simple embroidery. The tentacle shaping uses paired increases and decreases without changing the overall stitch count in those rounds.
The crochet octopus pattern relies on accurate markers as well as stitch counts. Keep the beginning-of-round marker for counting, but use additional removable guides for the face centre and the fixed assembly anchor. A spiral marker can move relative to the front as the rounds develop.
Yarn, Filling and Tools
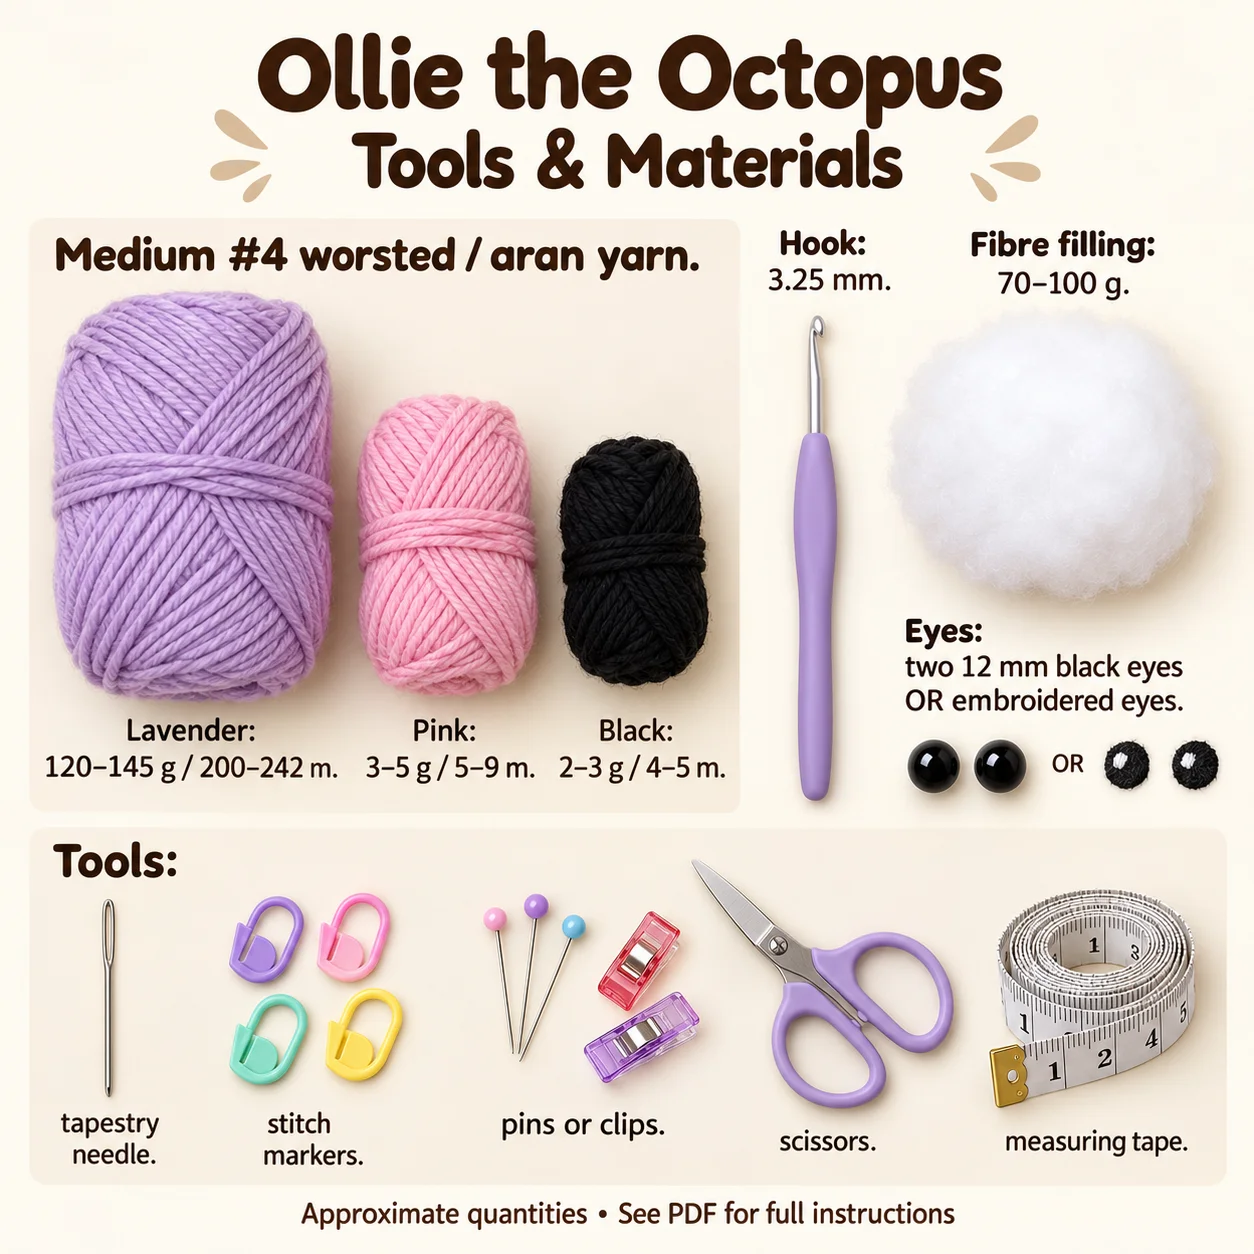
Choose medium-weight number 4 worsted or aran yarn. The PDF suggests smooth cotton-acrylic or low-fuzz acrylic so the stitch shapes remain visible. Approximate amounts are:
- Lavender: 120–145 g, or 200–242 m.
- Pink: 3–5 g, or 5–9 m.
- Black: 2–3 g, or 4–5 m.
- Polyester filling: 70–100 g.
Use a 3.25 mm hook, two 12 mm safety eyes or embroidered eyes, a tapestry needle, locking markers, pins or clips, scissors and a flexible measuring tape. A round counter is optional. No wire, felt, beads or internal reinforcement is specified.
Choose eye construction for the intended finished item and secure it carefully. If embroidering the eyes, follow the PDF’s open-body timing so the ends can be anchored inside.
Gauge and Finished Design Targets
The gauge target is approximately 18 single crochets and 20 rounds per 10 cm, measured on a crochet tube. Use a firm fabric without pulling it wider around the filling. A curved stuffed surface is not a reliable substitute for that tube measurement.
The crochet octopus pattern gives an overall seated-height target of 14–16.5 cm, width of 15.5–18 cm and depth of 14–16.5 cm. Tentacles are approximately 5.5–6.5 cm long. Finished measurements can vary with materials and finishing. Yarn choice, tension, filling and placement all affect the finished proportions.
Construction and Assembly Plan
Work the single body first, leaving it accessible for the eye stage. Both hardware and embroidered eye options are positioned before the later body decreases. Establish the fixed face centre independently of the round marker, then extend the assembly guide to the lower attachment round as directed.
The crochet octopus pattern uses a 48-stitch attachment ring divided into eight six-stitch sectors. Each tentacle’s 12-stitch opening is flattened into six paired positions; it is not sewn closed separately before attachment. Sewing through both layers places the base directly onto its allotted sector.
Make all eight tentacles and both cheeks before the final arrangement. Pin every arm around the body, orient the shaped side upward, and inspect the complete silhouette. Attach the arms while checking balance after every two, then finish the cheek and smile placement.
Tips for Even Curled Arms
- Keep tentacle tips lightly filled so they can curve.
- Leave the final centimetre near each base relatively soft.
- Compare all eight lengths before attaching the first arm.
- Mark the shaped side so every curl points upward and outward.
- Pin opposite tentacles before refining the remaining gaps.
- Keep the dedicated attachment anchor until all bases are sewn.
For the crochet octopus pattern, consistent filling matters as much as consistent stitches. A heavily packed arm can resist its planned curve even when the count is correct. Add small tufts and compare neighbouring tentacles from the front, side and overhead before securing their bases.
Troubleshooting
Why are the tentacles Unevenly Spaced?
Check the fixed attachment anchor and recount the six-stitch sectors. Using a moving round marker as the assembly reference can shift the arrangement. Repin all eight flattened bases together, then compare opposite pairs before sewing. Avoid stretching one base to compensate for a misplaced neighbour.
Why Do the Tentacle Tips Curl Inward?
The shaped side may face the wrong direction, or the base may have twisted during attachment. Check the PDF’s increase and decrease orientation and rotate the piece before resewing. Reduce dense filling near the tip if it prevents the intended gentle curl.
Why Does the Body Lean?
Inspect the lower filling and the positions of nearby bases. A densely packed lower bulge or uneven ring of tentacles can push the body sideways. Adjust accessible filling and repin the supporting arms before tightening the final attachment stitches.
Finishing and Care
Check all eight base seams, the eye anchors and the small cheek edges. Remove pins and temporary guides only after the placement is secure. The arms should read as separate curled pieces around a level face, with no loose embroidery strand across the surface.
Follow the actual yarn and filling labels for cleaning. Support the body when lifting the crochet octopus pattern project rather than pulling an individual tentacle. After handling or cleaning, inspect the attachments and gently restore the shape without forcing the stuffed fabric into a new outline.
Download the complete PDF pattern
This PDF contains the complete crochet pattern for Ollie the Octopus. Digital download only; no physical item will be shipped.
Related projects: Benny the Bee, Coco the Cat.
Browse the crochet pattern collection for more project overviews.
Leave a Reply