
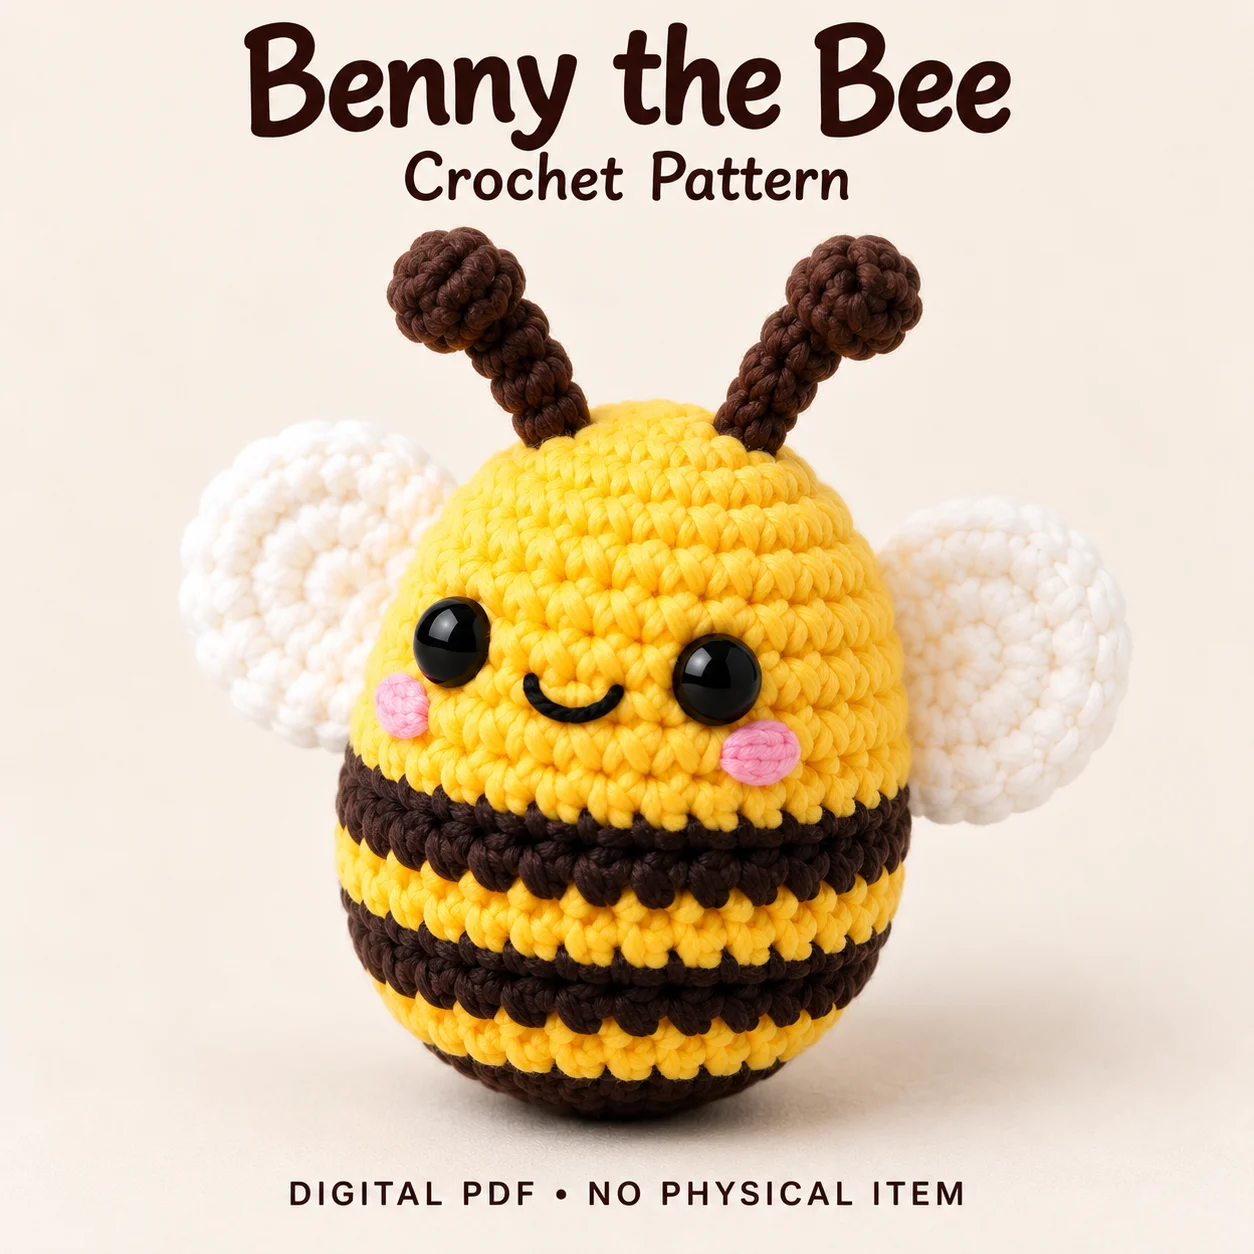
This crochet bee pattern introduces Benny, a rounded yellow amigurumi with dark-brown stripes, white wings and two soft antennae. The face has black eyes, a small curved smile and pink embroidered cheeks, while the integrated head and body keep the main construction in one piece. The PDF uses US terminology and continuous spiral rounds, with separate wings and antennae added after the body is complete. Bulky yarn gives the design its substantial stitch texture. This article explains the supplies, shaping decisions and assembly checkpoints that matter most before you begin. Keep the full pattern beside you for the round instructions, colour sequence and placement maps; the overview below does not replace them.
What Makes This crochet bee pattern Distinctive?
Benny has a generous yellow face above the striped lower body. Two brown middle bands alternate with yellow, and the final brown section forms the underside. There is no separate head seam, nose, stinger or set of legs in the written design.
The white wings are softly padded ovals with flattened attachment edges. The antennae have rounded tips and flexible stems, leaning outward from the crown. These features give the silhouette its character without requiring wire or other rigid reinforcement.
Skills and Crochet Method
The PDF describes the project as suitable for a confident beginner. You should be comfortable with a magic ring, single crochet, increases, invisible decreases, colour changes, simple sewing and facial embroidery. All crocheted components use spiral rounds without turning.
Keep a marker in the first stitch of every round. On the body, the beginning of round is treated as centre back, with centre front opposite it. The crochet bee pattern places colour changes at the back so the normal spiral step is less prominent from the front.
Yarn, Tools and Materials
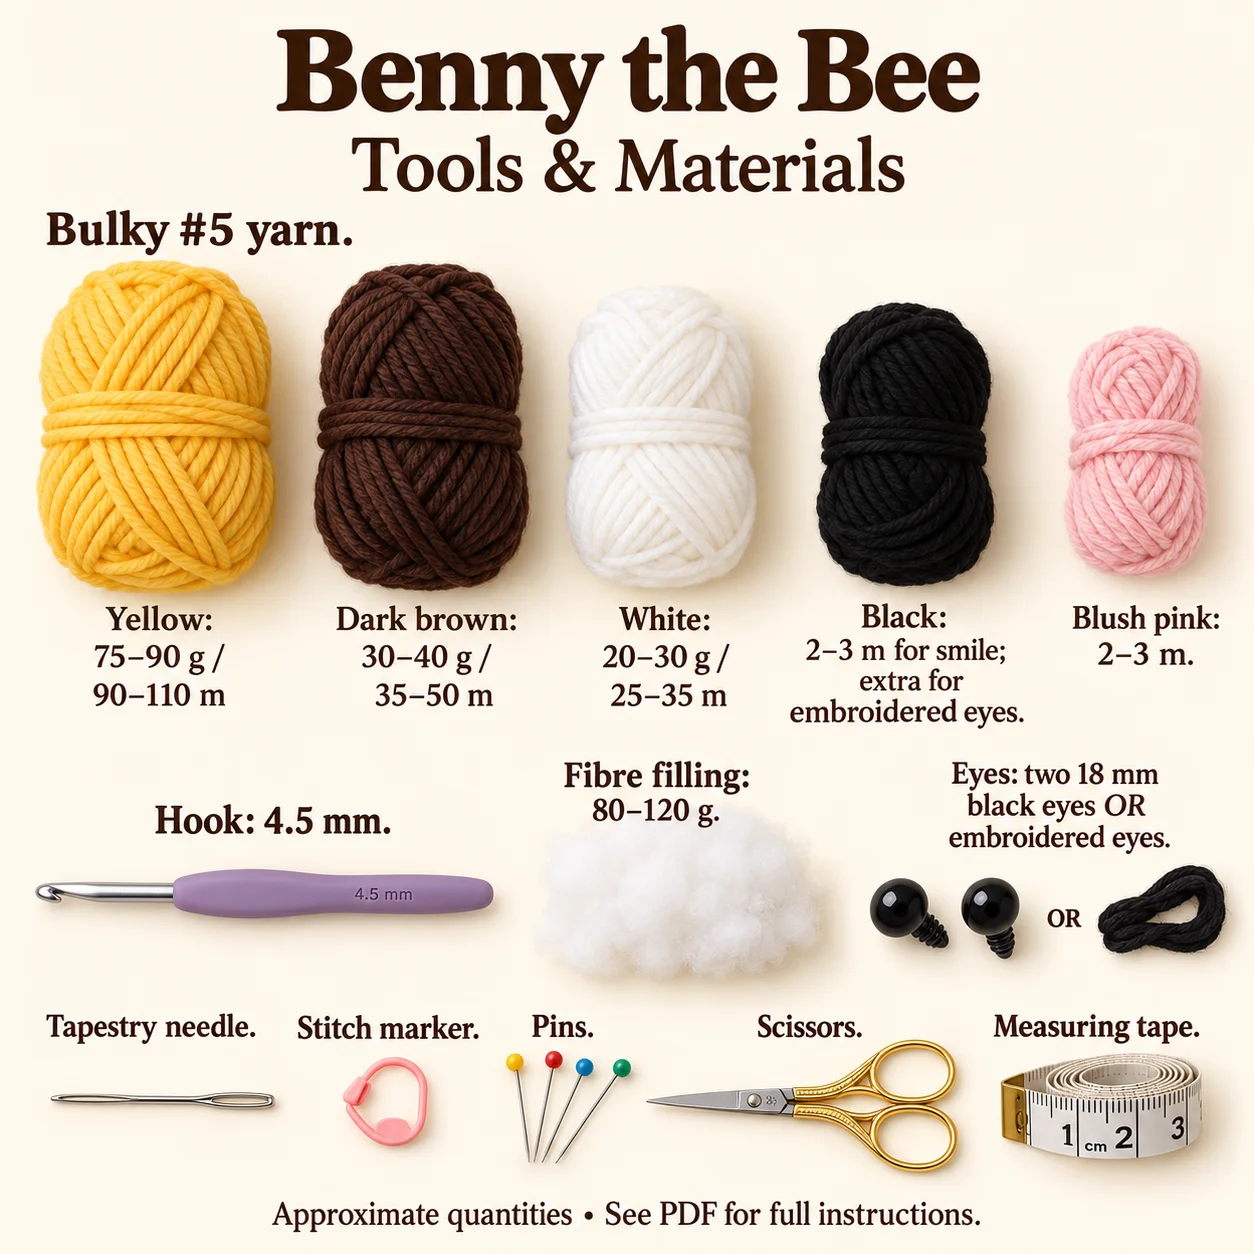
Use bulky Category 5 yarn. Plush or chenille yarn is recommended, while a smooth bulky acrylic or cotton blend may also be used if it produces dense fabric. Approximate quantities are:
- Yellow: 75–90 g, or 90–110 m.
- Dark brown: 30–40 g, or 35–50 m.
- White: 20–30 g, or 25–35 m.
- Black: 2–3 m for the mouth, with more if embroidering eyes.
- Blush pink: 2–3 m for the cheeks.
Have a 4.5 mm crochet hook, about 80–120 g of polyester filling, a tapestry needle, stitch marker, pins, scissors and measuring tape. A round counter is optional. Choose two 18 mm black safety eyes or the embroidered-eye alternative described in the PDF.
For an alternative without detachable safety-eye components, embroider the eyes securely. Follow the local safety requirements that apply to the finished item; the pattern does not provide toy-safety certification.
Gauge and Finished Design Targets
The suggested gauge is approximately 11 single crochets and 11 rounds per 10 cm. Measure the side of a small practice tube without stretching it. The fabric should hide the filling while remaining flexible enough to shape.
The crochet bee pattern gives a body-height target of 15–16 cm and a width of 13–14 cm. Including antennae, overall height is approximately 20–22 cm; wing-tip width is approximately 24–26 cm. Finished dimensions can vary with gauge and materials. Yarn thickness, tension and stuffing affect the actual result, and no physical test crochet was performed.
Construction and Assembly Overview
The main piece begins at the yellow crown and continues down through the stripes. Safety eyes are installed while the opening is accessible. Later, initial stuffing supports the face while the smile and cheeks are embroidered, with their tails secured before the underside closes.
Each white wing receives only a little filling toward its rounded outer half. The base is flattened and closed through both layers before sewing. Antennae are worked from tip to base, with firmer tips, lightly filled stems and flexible open bases.
Assembly finishes the body first, then attaches the wings and antennae. Pin both wings at matching heights before sewing. The crochet bee pattern uses the body orientation guides to keep the face, wings and crown attachments balanced from several viewing angles.
Practical Tips for a Balanced Bee
- Secure outgoing colour tails inside rather than carrying long floats around the body.
- Compare wing height from the back as well as the front.
- Keep the wing bases flatter than their outer ends.
- Fill antenna tips more firmly than stems, leaving the sewing bases flexible.
- Add filling in small tufts so the yellow face stays smooth.
- Finish the smile and cheeks while their tails remain accessible.
For the crochet bee pattern, equal antenna height and a gentle outward lean are useful final checks. Sew snugly enough to hold each base, but avoid pulling the crown into a dent. Remove every placement pin before the final inspection.
Troubleshooting
Why does this project have Uneven Wings?
Compare the placement on both side lines and the specified body-round range before tightening the seams. One base may be higher, or one wing may contain more filling. Repin the pair and check their angles from the front, top and back before completing the attachment.
Why Does Filling Show Between Stitches?
The fabric may be too loose or stretched by excess filling. Try a smaller hook or firmer tension for the crochet fabric, and reduce stuffing pressure instead of forcing additional filling into the piece.
Why Are the Antennae Floppy?
Check that their tips and stems have the different filling levels described in the PDF. Add narrow amounts gradually while the bases are accessible. A discreet stabilising stitch at the base can help, but the design does not require wire.
Finishing, Care and Display
Inspect all seams, embroidery and buried tails. The underside should be centred rather than pushed into a large round bulge. Gentle redistribution of the lower filling can improve the oval shape before closure.
Choose cleaning methods from the yarn and filling manufacturers’ instructions. Avoid assuming that every plush yarn tolerates machine washing or heat. The crochet bee pattern includes delicate embroidered features, so check their condition after handling and cleaning.
Download the complete PDF pattern
This PDF contains the complete crochet pattern for Benny the Bee. Digital download only; no physical item will be shipped.
Related projects: Boba the Bubble Tea.
Browse the crochet pattern collection for more project overviews.
Leave a Reply