
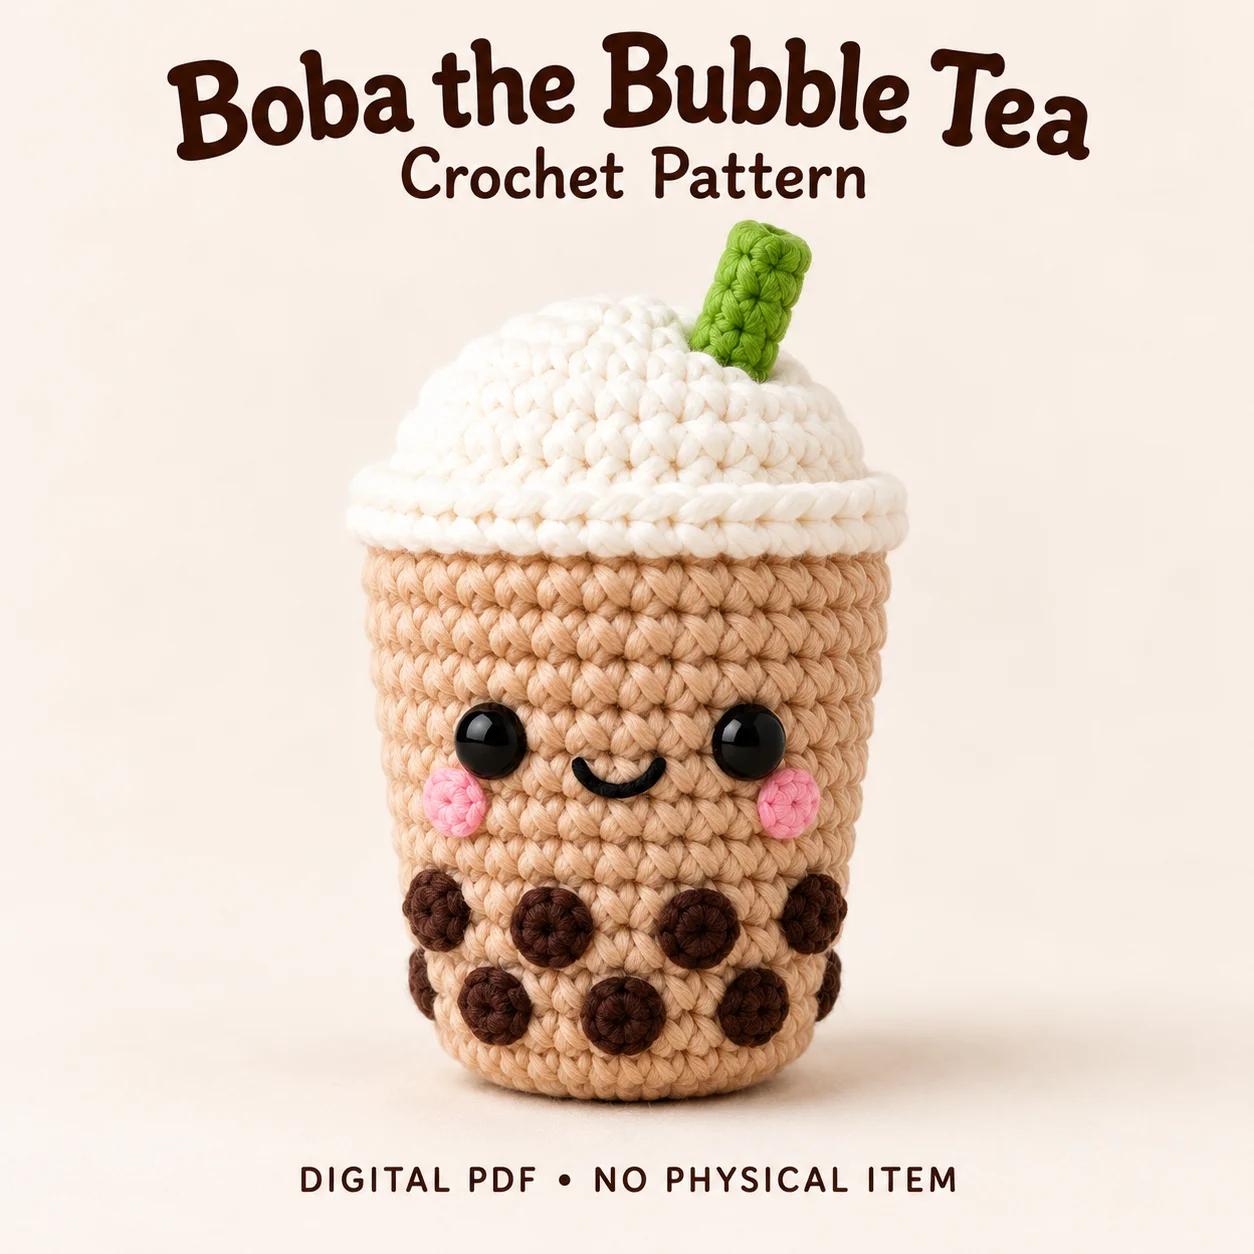
This bubble tea crochet pattern turns a milk-tea cup into an amigurumi character with a rounded cream foam top, green straw and smiling face. Twelve brown boba dots wrap around the lower cup in two staggered rows, while pink cheeks add contrast beside the black eyes. The written design combines continuous spiral rounds with a small rim strip worked in turned flat rows. Its separate components let you complete the face and appliques before closing the cup. Below, you will find a project overview, the recommended materials and practical checkpoints for shaping the base and joining the foam. Use the PDF for the complete instructions and placement maps as you work.
Features of This bubble tea crochet pattern
The tan cup has a flat base and a gentle outward taper. A separate foam dome sits above it, with a raised cream strip covering the joining seam. The short green straw is a soft crocheted tube with a closed top, positioned slightly behind the foam crown centre.
There are no arms, legs or rigid internal supports. The boba details are tiny unstuffed cup-shaped appliques, giving a raised effect when their open edges are sewn to the lower body. Their distribution continues around the back rather than stopping at the face.
Skill Level and Construction Methods
The PDF labels the project advanced beginner and uses US crochet terminology. Useful skills include a magic ring, single crochet, increases, back-loop-only work, flat rows, embroidery and applique sewing. This design does not use decrease rounds.
The bubble tea crochet pattern keeps the cup, foam, straw, dots and cheeks in spiral rounds. The cream rim is the exception: it is made as a flat strip and turned between its rows. Keep those methods distinct, and move your beginning-of-round marker after every spiral round.
Supplies to Gather
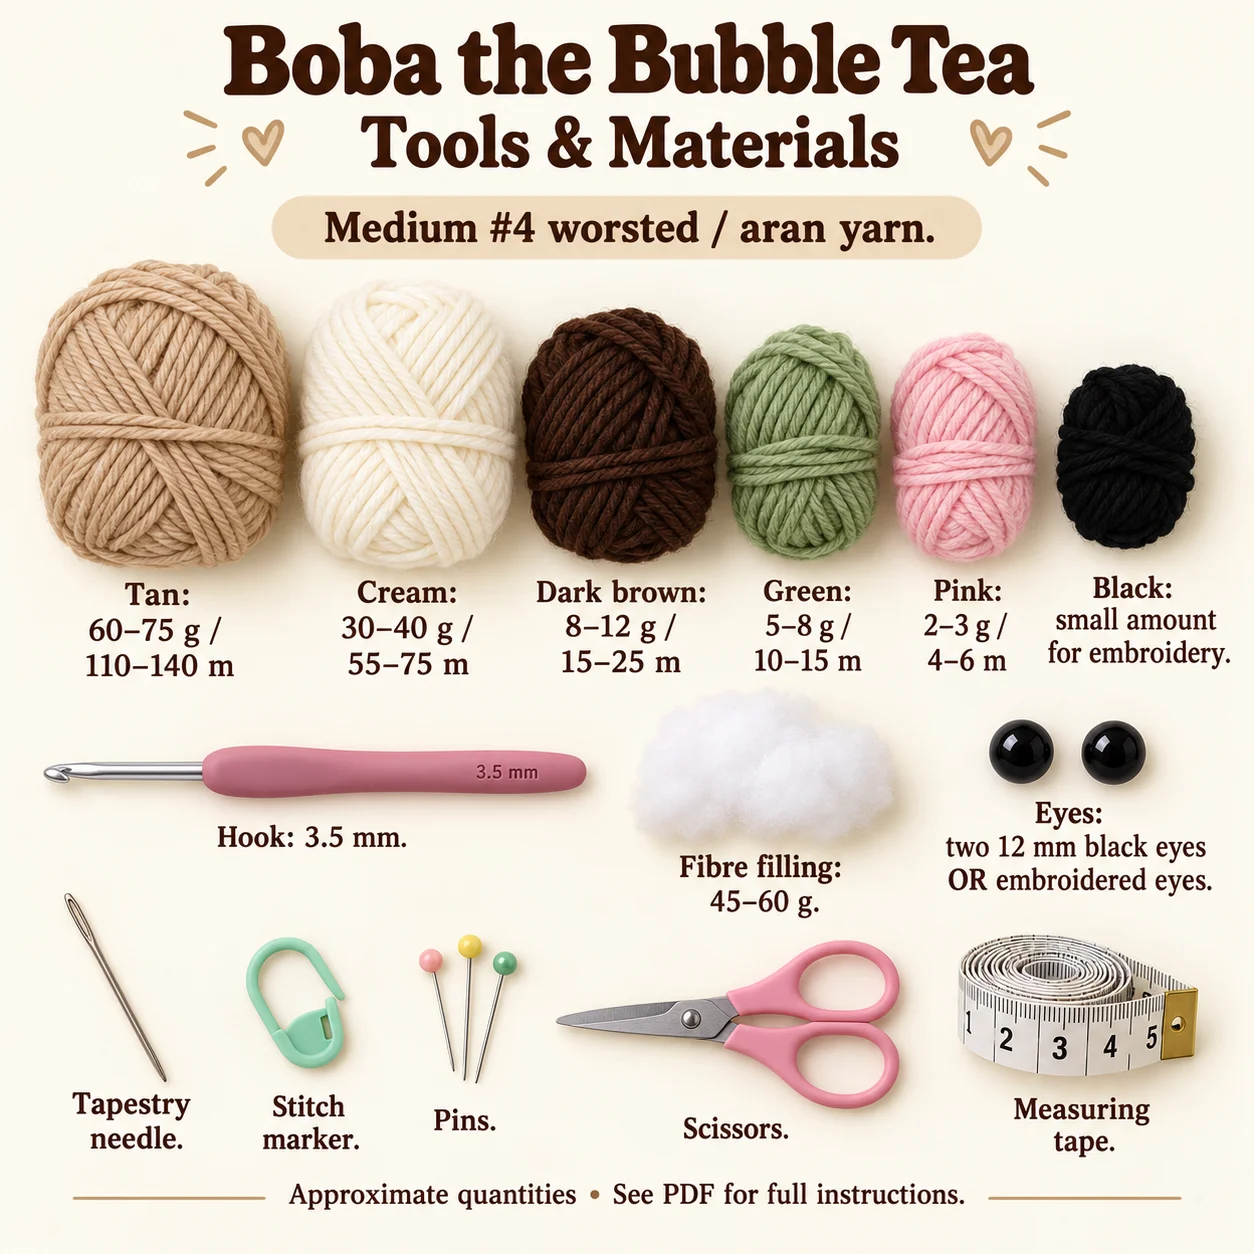
Choose medium Category 4 worsted or aran yarn. The PDF recommends cotton, cotton-acrylic or smooth anti-pilling acrylic. Approximate yarn amounts are:
- Tan: 60–75 g, or 110–140 m.
- Cream or white: 30–40 g, or 55–75 m.
- Dark brown: 8–12 g, or 15–25 m.
- Green: 5–8 g, or 10–15 m.
- Pink: 2–3 g, or 4–6 m.
- Black yarn or embroidery floss: a small amount for the face.
Prepare a 3.5 mm hook, about 45–60 g of polyester filling, two 12 mm black safety eyes or embroidery supplies, a tapestry needle, locking marker, pins, scissors and measuring tape. A row counter is optional. No wire, pipe cleaners or beads are required.
For an alternative without detachable eye components, use securely embroidered eyes. Follow the safety requirements relevant to the finished item’s intended use.
Gauge and Approximate Dimensions
The suggested flat gauge is approximately 17 single crochets and 18 rows per 10 cm. Work the practice swatch in turned single-crochet rows using the same yarn and hook. Aim for dense fabric without making the stitches uncomfortably rigid.
The bubble tea crochet pattern lists an overall height target of 15.5–18 cm, including the visible straw. The cup body is approximately 9–10 cm tall and 8.5–9.5 cm wide. These measurements are design targets, affected by yarn, tension and filling.
How the Cup Comes Together
The cup is worked upward from its base, using a back-loop-only transition to define the lower edge. Keep the top open while fitting the eyes, embroidering the smile and attaching the cheeks and all twelve boba dots. This preserves access for securing their tails.
The foam is made separately. Attach the straw before closing its lower opening, then add light filling so the top remains a soft dome. The body and foam finish with matching 48-stitch edges, joined evenly after aligning centre back, centre front and both sides.
Finally, the bubble tea crochet pattern places the cream strip over that seam. Join its short ends at the back and attach one long edge first. Check for twists and uneven overlap before sewing the remaining edge with the second yarn length specified in the PDF.
Tips for Neat Foam and Boba Details
- Pin all twelve dots before sewing any permanently.
- Keep the upper dot row offset from the lower row.
- Leave dots unstuffed so their small cup shapes supply the raised texture.
- Use temporary filling to check the eyes before locking their backs.
- Keep the last section near the foam edge lightly filled for sewing.
- Position the straw with a gentle backward lean rather than a sideways tilt.
For the bubble tea crochet pattern, the rim should cover the joining seam evenly. Tight stitching can compress the strip and produce a groove, so adjust seam tension in small sections while checking the cup from several angles.
Troubleshooting
Why does this project have a Rounded Base?
Too much filling at the bottom can push the sole outward. Reduce that pressure and gently press the base against a flat surface. Check that the back-loop-only transition remains clear instead of being stretched flat by the stuffing.
Why Does the Foam lean?
Realign the matching edges at the four main orientation points. Check whether filling beneath the foam is heavier on one side, and redistribute it before completing the seam. A tight section of stitching can also pull the dome off centre.
Why Are the Boba Rows Uneven?
Count the prescribed positions from the marker rather than judging only from the visible spiral slant. Pin the entire arrangement, including the back, and compare the stagger before sewing. Smaller surface stitches help each applique sit neatly.
Finishing and Care
Inspect the straw base, rim edges, appliques and facial embroidery. Remove all pins and temporary guides, then secure and bury the remaining tails. The cup should have smooth sides and a softly rounded top without exposed filling.
Follow the care labels for the actual yarn and filling you choose. Avoid unsupported assumptions about machine washing or heat. When handling the bubble tea crochet pattern project, support the cup body rather than pulling on the straw or raised appliques.
Download the complete PDF pattern
This PDF contains the complete crochet pattern for Boba the Bubble Tea. Digital download only; no physical item will be shipped.
Browse the crochet pattern collection for more project overviews.
Leave a Reply