
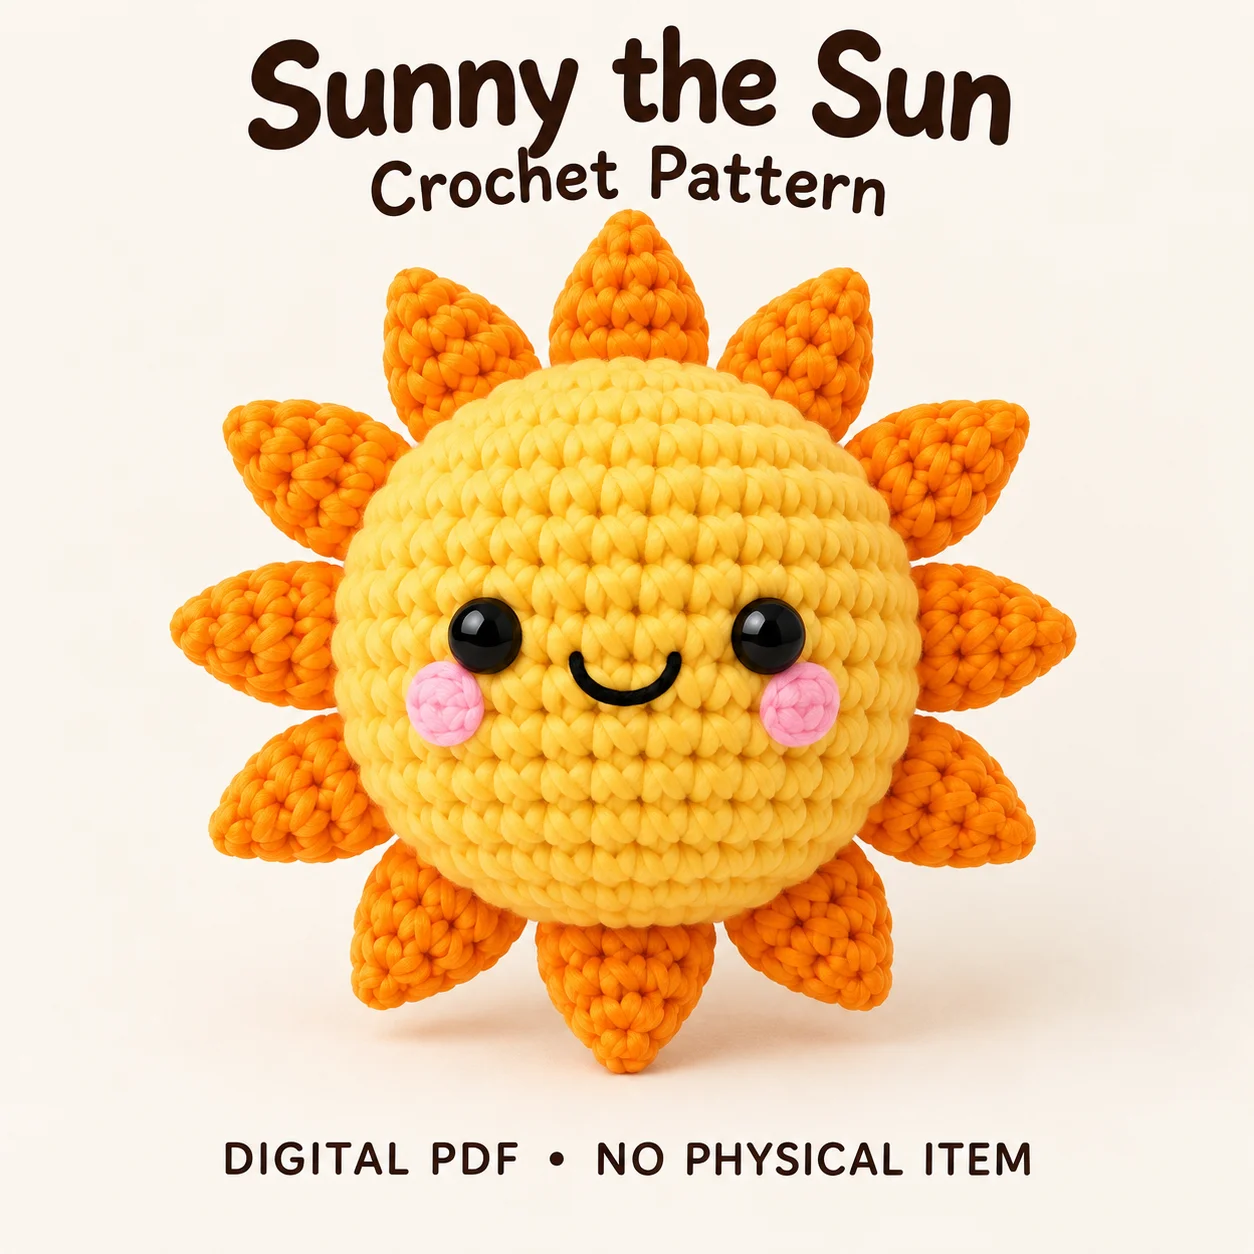
This crochet sun pattern introduces Sunny, a smiling amigurumi with a yellow centre and twelve separately crocheted orange rays. The front is nearly circular, but the stuffed body is deliberately shallower from front to back than a sphere. Pink cheek discs and a small black smile complete the face. The PDF uses US crochet terminology and continuous spiral rounds, with all rays pinned around the outline before they are sewn in place. This overview explains the materials, gauge targets and shaping checkpoints that help preserve those proportions. Keep the complete PDF nearby for the working rounds, numbered face positions and clock-style ray placement guide during construction and assembly.
Features of This crochet sun pattern
Sunny’s central body is one closed yellow piece, shaped and filled to look rounded from the front while remaining shallower in profile. It is not made from two flat panels. The twelve orange rays are separate soft points with flattened bases.
The rays follow the circular front outline, like the twelve positions on a clock. They do not form a horizontal belt around the middle of the body. Two unfilled pink cheek circles sit below the eyes, with a black U-shaped smile between them.
Skills and Crochet Method
The PDF describes this project as suitable for a confident beginner. Prepare for magic rings, single crochet, increases, invisible decreases, sewing through flattened openings and simple facial embroidery. All components use rounds rather than turned rows.
The crochet sun pattern asks for careful shaping with filling as well as stitches. Maintain the marked face orientation while working the body, then use pins to establish the whole ray arrangement. Count the completed points before sewing so the final outline contains all twelve.
Yarn, Filling and Tools
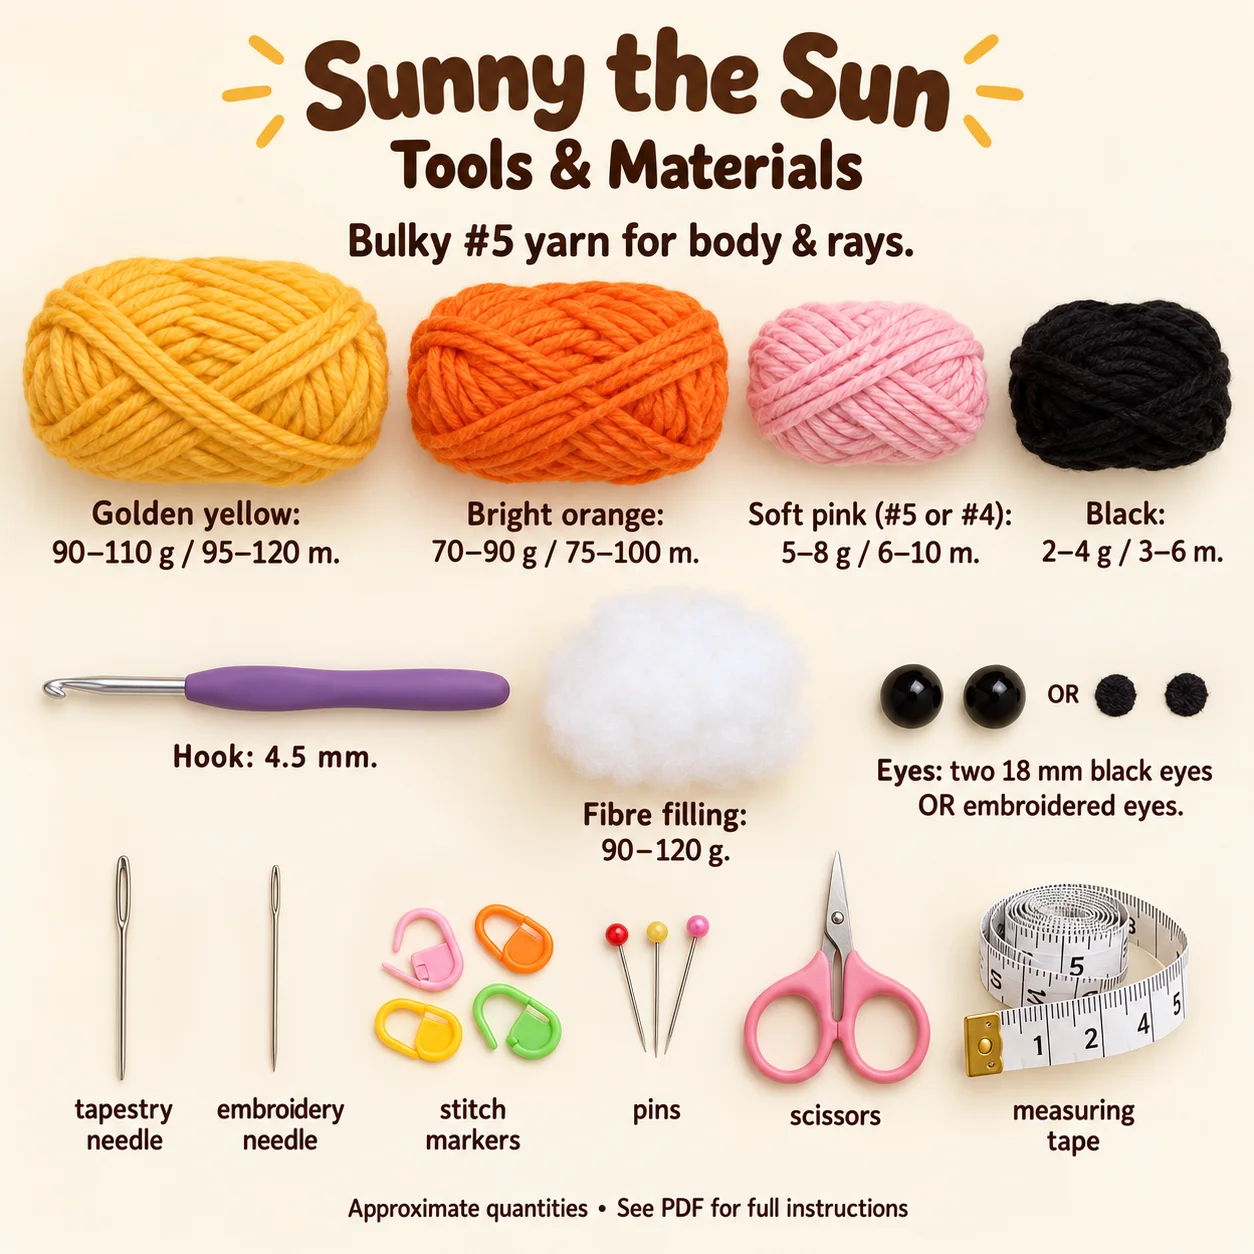
Choose bulky number 5 yarn, such as smooth tube yarn, cotton or cotton-acrylic. Pink may be number 4 or 5. Approximate amounts are:
- Yellow: 90–110 g, or 95–120 m.
- Orange: 70–90 g, or 75–100 m.
- Pink: 5–8 g, or 6–10 m.
- Black: 2–4 g, or 3–6 m.
- Polyester filling: 90–120 g.
Use a 4.5 mm hook, two 18 mm safety eyes or embroidered eyes approximately 16–18 mm wide, a tapestry needle, an embroidery needle, markers, pins, scissors and measuring tape. A round counter is optional. Black yarn provides the smile and can also provide the embroidered eye option.
Choose and secure the eye construction for the intended item. Hardware is fitted while the body remains open; the embroidered option is completed after closure at the same mapped face positions.
Gauge and Finished Design Targets
The target gauge is approximately 12 single crochets and 13 rounds per 10 cm on a firm crochet tube. This tube measurement is distinct from measuring across the stuffed circular face. Use a hook and tension that keep filling contained without stretching the stitches apart.
The crochet sun pattern gives overall ray-tip dimensions of approximately 21–23 cm across and high. The yellow centre is around 14–15 cm across, with a body depth of 9.5–10.5 cm. Each ray is approximately 3.5–4 cm long. These are approximate finished dimensions, not measurements from a physically tested sample.
Construction and Assembly Plan
Work the yellow body as a single rounded shape, fitting hardware at the PDF’s eye checkpoint if that option is chosen. Add filling during the later decreases, placing it around the crown and perimeter while keeping the centre front and back moderately filled.
The crochet sun pattern uses twelve orange rays worked from tip to base. Each final eight-stitch opening is flattened into four paired sewing positions. Keep these openings available for direct attachment instead of closing them as a separate seam first. Use only a small wisp of filling in the ray middle.
Close and shape the yellow body before adding the cheeks and smile. Pin all twelve rays around the front/back boundary, checking the profile as well as the front view. Sew the main opposite clock positions first, then finish the remaining matched pairs in the PDF’s recommended order.
Tips for a Clear Twelve-Ray Outline
- Check body depth before closing the final opening.
- Distribute filling around the perimeter rather than packing the centre.
- Keep ray tips and bases soft so they retain their pointed shape.
- Flatten every ray base in the same orientation.
- Pin all twelve positions before attaching any of them.
- Inspect the side view to keep the rays on the outline boundary.
For the crochet sun pattern, a front view alone can hide misplaced rays. Turn the body sideways and check that the bases follow the vertical outline ridge. Keep each point directed outward from the centre, and compare opposite positions before securing the sewing tails.
Troubleshooting
Why does the Body Look Like a Ball?
The centre may be too densely filled. While the opening remains accessible, move some filling toward the perimeter and soften the front and back. Gently compress the body into its intended shallower profile before completing the closure. No additional needle sculpting is required by the PDF.
Why Do the Rays Form a Belt?
Their bases may be attached around a horizontal middle line instead of the front outline. Repin them at the front/back boundary using the clock guide. Check from the side: the rays should radiate around the visible circular outline, rather than surround the body like a waist band.
Why Do the Rays Twist or Leave Gaps?
Check the flattened base orientation and reduce overly dense filling in the small pieces. Sew through both layers of each paired opening, keeping all four positions anchored to the body. Repin a twisted point so its tip faces radially outward before reattaching it.
Finishing and Care
Count twelve rays once more and inspect every base attachment. The yellow face should remain level, the cheek discs flat and the smile securely anchored. Remove pins and temporary guides, then bury all remaining tails without tightening the outline.
Follow the labels for the yarn and filling when cleaning the crochet sun pattern project. Support the central body when moving it, and avoid lifting it by a single ray. After handling, inspect the ray seams and gently restore the shallow profile. The design does not promise that the lower rays will support an upright standing position.
Download the complete PDF pattern
This PDF contains the complete crochet pattern for Sunny the Sun. Digital download only; no physical item will be shipped.
Related projects: Boba the Bubble Tea, Benny the Bee, Mimi the Mushroom.
Browse the crochet pattern collection for more project overviews.
Leave a Reply