
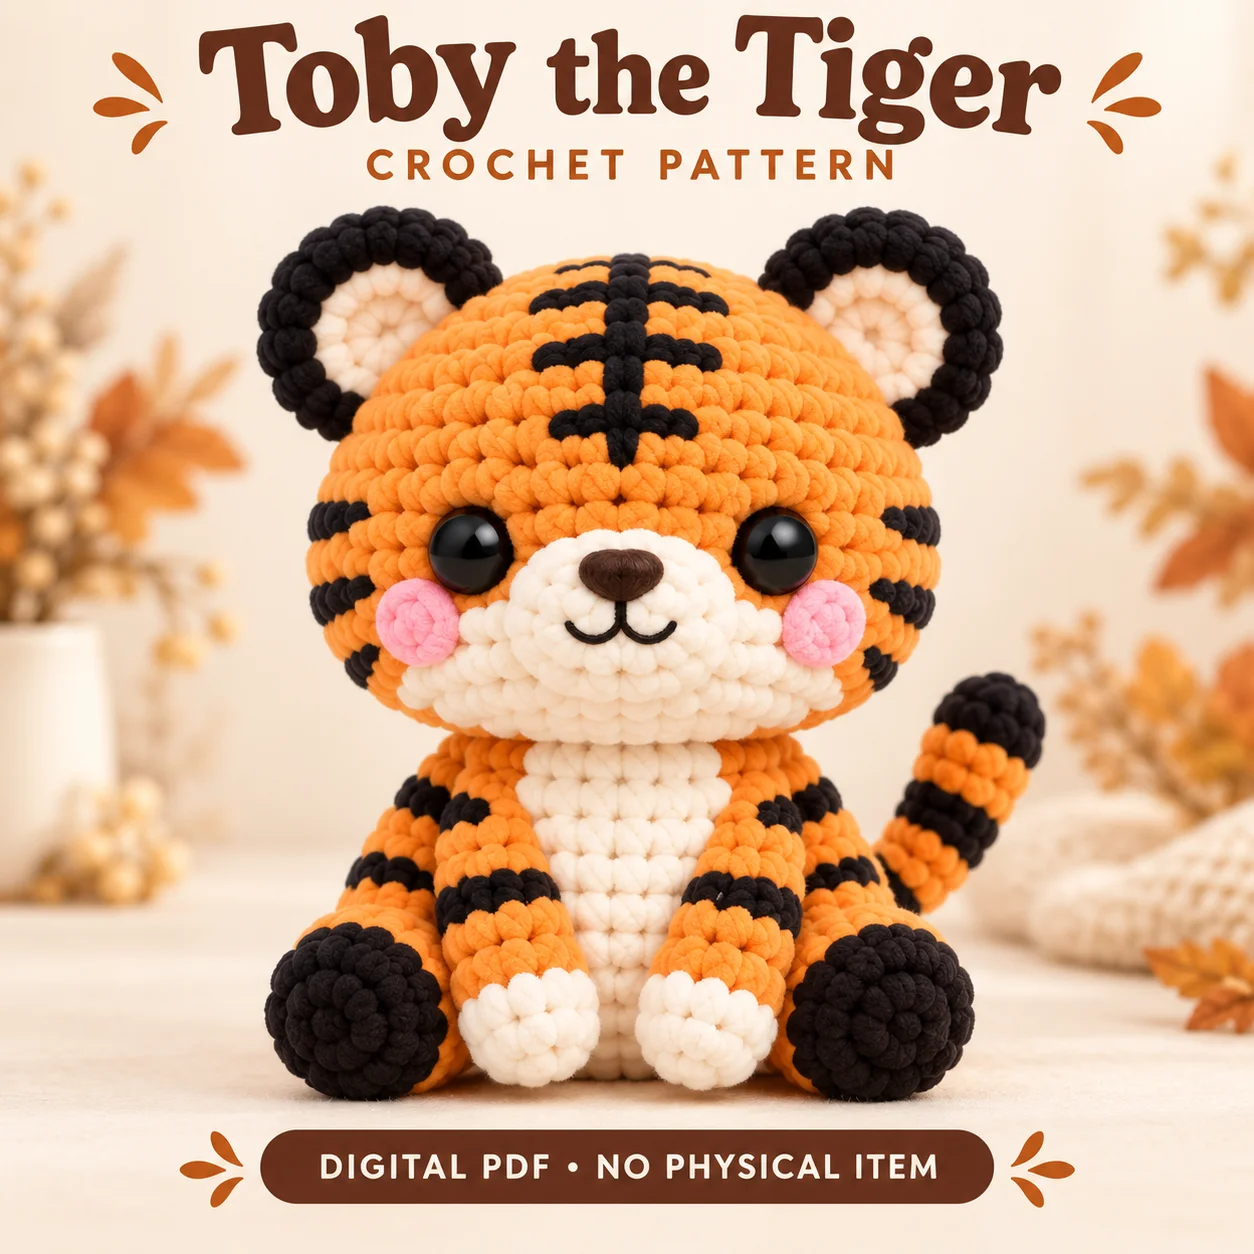
Toby is a chunky seated tiger with orange plush fur, cream facial details and raised black stripes. This crochet tiger pattern uses separate flat patches alongside striped limbs, combining several finishing methods in one character. The supplied PDF is written for intermediate makers using standard US terminology. Cream front paws contrast with broad black hind paws, while a curved tail rises beside the body. The face has a dark brown embroidered nose, a fine black smile and pink cheek circles. Read the stripe map and physical placement notes before assembling the pieces so the forehead markings, belly patch and neck seam stay centered.
Features of this crochet tiger pattern
The large orange head has black outer ears with cream inner circles, leaving a clear dark border. A soft horizontal cream muzzle sits below the eyes. The forehead has one vertical stripe crossed by three horizontal bars; three short side-face bars appear on each side. Additional raised stripes decorate the back and body sides. The cream belly is a vertical unfilled oval. Arms have cream paw ends, while the hind feet begin in black and point forward in the seated pose.
Preserve the PDF’s distinctions between flat, lightly padded and firmly stuffed pieces.
Skills and stitch methods
Main pieces use continuous spiral rounds without routine joining or turning. Oval muzzle and belly pieces begin around both sides of foundation chains. Standard yarn-over single crochet is the intended method, with invisible decreases through the front loops for shaping. Color changes on limbs and tail use the new shade on the previous stitch’s final pull-through. Raised head and torso stripes are surface embroidery in black plush yarn. Keep round-start tracking independent from the physical front and back guide threads.
Before beginning this crochet tiger pattern, identify which sections are flat and which are stuffed. Read each section heading before continuing, and check the stitch totals at the end of shaping rounds. Counting early is easier than finding a missing increase beneath several completed rounds.
Yarn, tools and filling
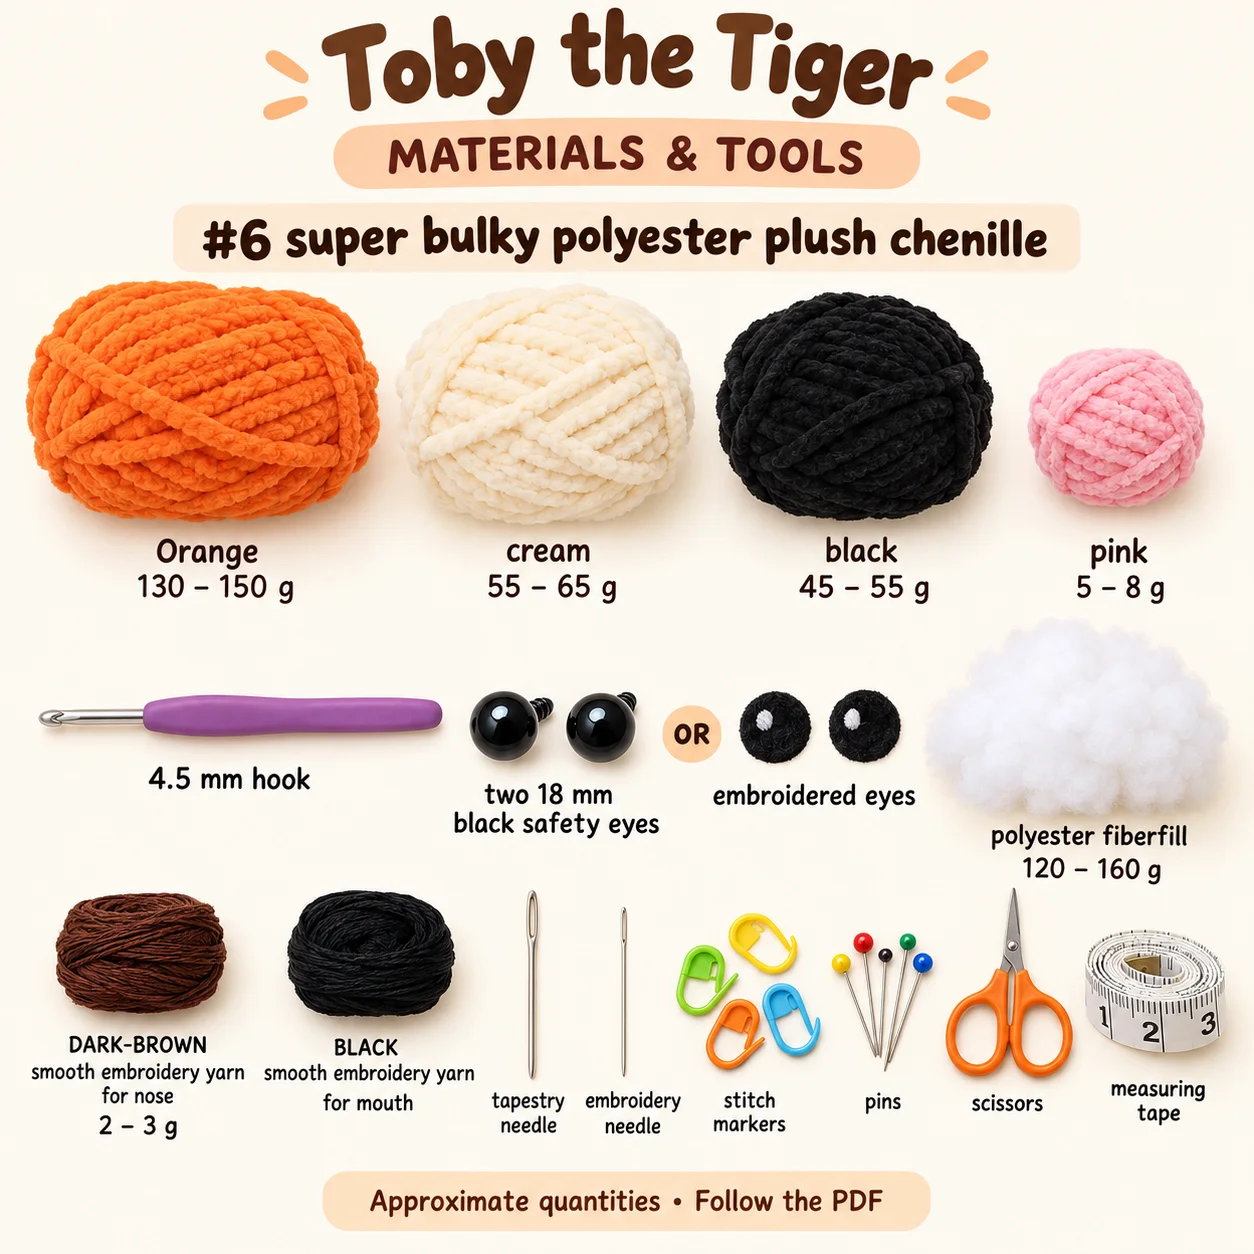
Use #6 super bulky polyester plush chenille. The approximate supplies listed in the PDF are:
Orange 130–150 g; cream 55–65 g; black 45–55 g; pink 5–8 g. 4.5 mm hook; two 18 mm black safety eyes OR embroidered eyes; polyester fiberfill 120–160 g; required DARK-BROWN smooth embroidery yarn 2–3 g for nose; required BLACK smooth embroidery yarn for mouth; tapestry needle, embroidery needle, stitch markers, pins, scissors, measuring tape.
Quantities vary with substitutes. Use pins and separate placement markers during assembly.
Gauge and finished proportions
The reference flat-swatch gauge is approximately seven single crochet stitches and seven rows over 5 cm using a 4.5 mm hook and category 6 chenille. The approximate dimensions target is 24–27 cm, with a width including hind paws of 20–23 cm. These are design ranges rather than guaranteed sampled dimensions. Use compatible yarn thickness and tension across the colors. A looser substitute affects all the pieces, including the wide muzzle and comparatively narrow tail.
For this crochet tiger pattern, compare the fabric and proportions together. A swatch with visible gaps needs attention before stuffing, while a much denser substitute can change the size of every paired component. Recheck the main shapes before attaching the smaller details.
Construction and assembly order
The head and body finish with matching twenty-four-stitch neck openings. Pause the head for eye placement while the inside remains accessible, using temporary filling to check the face. Finish the muzzle with only a tiny pinch of padding beneath its center, then add the brown nose and separate black mouth embroidery. Layer the cream inner ears onto the black outer circles and pinch their lower edges into mirrored shallow cups without stuffing them.
Add the head stripes using the written map before joining the torso. Sew the cream belly flat on the stuffed body and add its side and back stripes. Align physical front and back at the twenty-four-to-twenty-four neck seam. Attach the hind legs, then angle the arms forward toward the belly. Sew the striped tail at lower center back, curve it toward Toby’s own left and add the small hidden orange shaping tack. From the front, that curve appears on the viewer’s right.
The crochet tiger pattern is easier to assemble when all paired pieces are laid out together. Keep the PDF open at its placement notes, pin before sewing and pause to compare front, side and back views. Small corrections at this stage prevent larger changes after the seams are secured.
Practical tips for neat details
- Mark all forehead and side-face stripes before embroidering them.
- Keep a black border visible around both cream inner ears.
- Use brown smooth yarn for the nose and black smooth yarn for the mouth.
- Fill the tail lightly enough to keep its curved pose flexible.
- Pin both broad hind paws on a level surface before securing them.
When working from the crochet tiger pattern, leave the recommended sewing tails and keep the attachment order visible beside your work. Avoid tightening a seam so strongly that it dents the stuffed shape. If a piece rotates while sewing, stop, re-pin it and check the reference markers before continuing.
Troubleshooting
Why does this project have a tail pointing the wrong way?
Check the base at physical center back, then inspect the small shaping tack on Toby’s own left-back side. The tail should rise toward the viewer’s right in a front view. Release or move the tack if it pulls in another direction. Recurve the lightly filled tube and retack gently without flattening it. The PDF does not require wire to hold this pose.
Why do the raised stripes pucker the orange fabric?
The black plush yarn should lie relaxed across the marked surface gaps. Pulling it too tightly can draw the head or body inward. Loosen the affected passes and check the physical front or back guide before restitching. Repeat the same path once only if a fuller stripe is needed, rather than tightening one thick pass.
Why does one black hind paw sit higher?
Compare the attachment round ranges and distances from the physical front line. Pin both legs while the broad body base rests on a level surface. Adjust the higher attachment before tying the final knot, and compare filling in the paw ends. The flexible upper sections should allow both black feet to contact the surface without lifting the torso.
Finishing and care
Inspect the surface-stripe ends, layered ear seams and flexible tail tack during the final check. Remove temporary guides only after confirming head and body alignment. Bury every remaining yarn tail using the PDF’s method and avoid lifting the character by its ears or narrow tail. Select cleaning methods from the actual chenille and filling labels. The digital size targets do not establish a tested washing method or guarantee exact finished measurements.
Before calling your crochet tiger pattern project complete, inspect the hidden joins as well as the visible face. Secure loose ends using the PDF’s finishing method and confirm that all small details are firmly attached. The design dimensions are estimates; record your own finished measurements if you plan another version with the same yarn.
Download the complete PDF pattern
This PDF contains the complete crochet pattern for Toby the Tiger. Digital download only; no physical item will be shipped.
Related projects: Bruno the Bear, Coco the Cat, Taro the Cow.
Browse the crochet pattern collection for more project overviews.
If you enjoy working with animal faces and contrasting patches, the free crochet animal pattern library includes more downloadable designs. For help reading the increases and shaping terms, see the Craft Yarn Council standard crochet abbreviations; always follow the definitions in Toby’s PDF where they differ.
Leave a Reply