
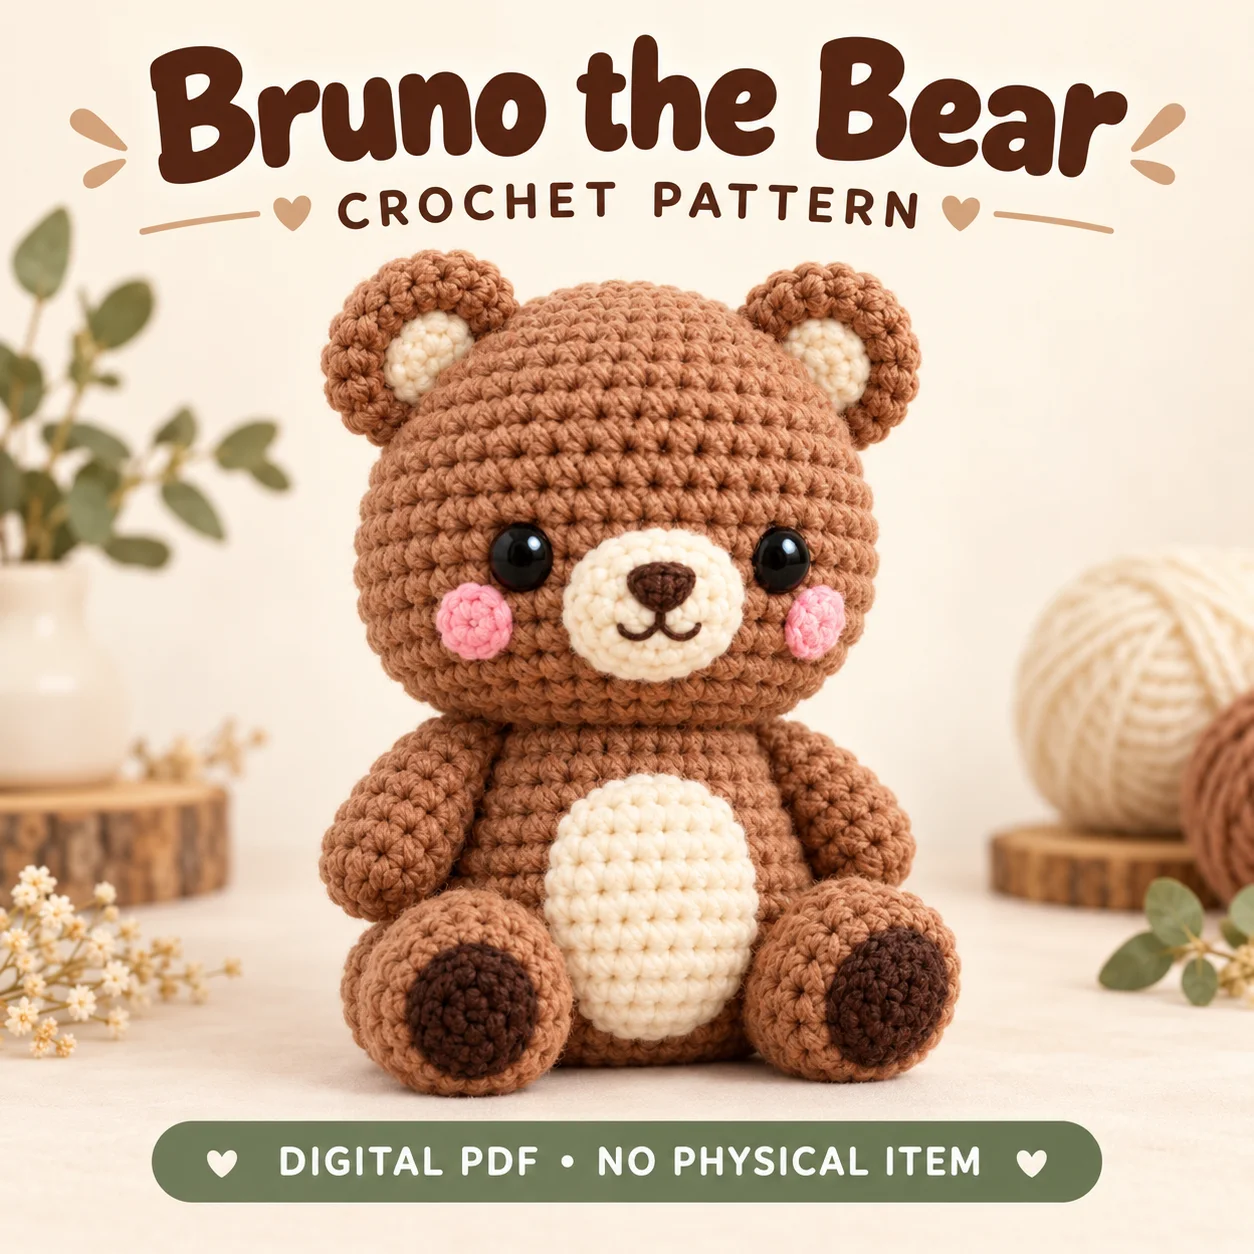
Bruno is a chubby seated teddy bear with a round brown head, cream muzzle and forward-facing feet. This crochet bear pattern uses separate contrasting appliques for the belly, inner ears, cheeks and paw pads, keeping the main shapes free from in-round colorwork. The supplied PDF suits confident beginners and easy intermediate makers who enjoy careful stuffing and assembly. A small embroidered nose and smile create the expression without a separate plastic nose. The design is intended to sit, with a broad lower body and flexible limb attachment areas. Reading the filling and neck-join notes before beginning will help you plan which pieces remain flat and which need support.
Features of this crochet bear pattern
Warm medium brown forms the head, body, arms, legs and small round tail. Cream appears on the muzzle, slightly vertical belly patch and inner-ear circles. Each forward foot has one flat dark brown paw pad; the arms do not use matching pads. Pink cheek circles sit beside the muzzle below the eye line. The ears are unfilled and cupped by pinching their lower stitches, rather than filled into balls. These simple color zones keep the familiar teddy silhouette clear.
Flat, lightly padded and firmly stuffed pieces serve different purposes. Preserve those distinctions for a recognizable silhouette.
Skills and stitch methods
All crocheted pieces are worked in continuous spiral rounds unless the PDF explicitly directs otherwise. There is no routine slip-stitch join or starting chain between rounds. Yarn-under single crochet is intended for the compact stitch appearance; a consistent yarn-over method is permitted with possible size changes. Be comfortable with single crochet increases, invisible decreases, magic rings and attaching flat circles to shaped fabric. Contrast pieces are sewn on separately, so no yarn needs to be carried inside the main shapes.
Before beginning this crochet bear pattern, identify which sections are flat and which are stuffed. Read each section heading before continuing, and check the stitch totals at the end of shaping rounds. Counting early is easier than finding a missing increase beneath several layers of plush stitches.
Yarn, tools and filling
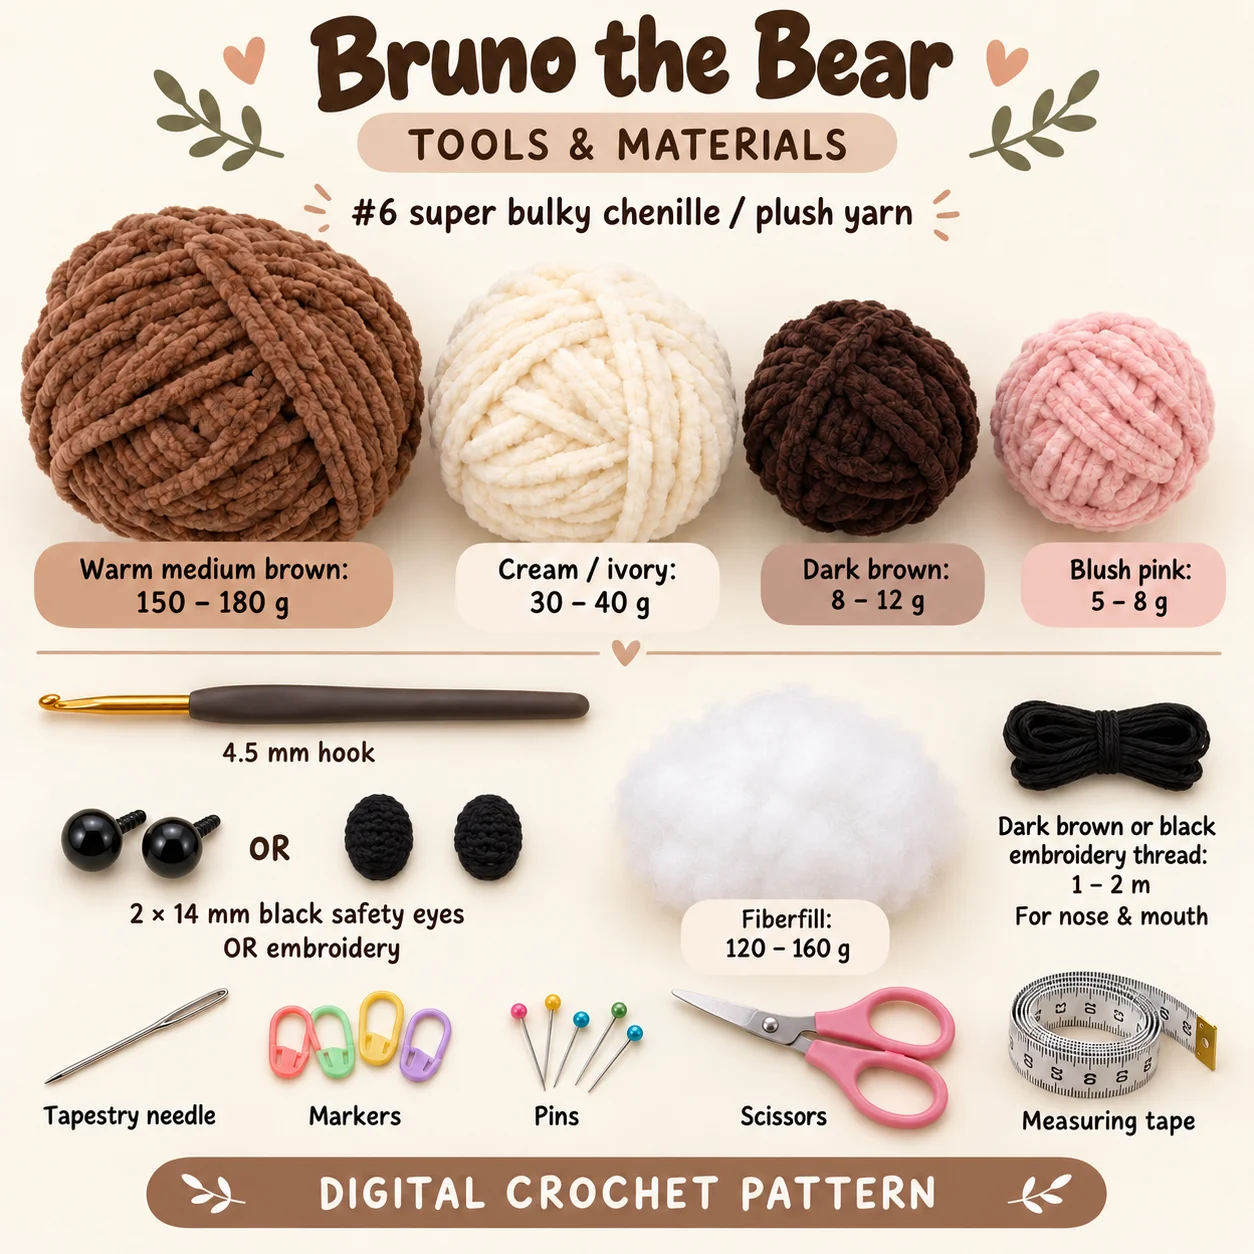
Use #6 super bulky chenille / plush yarn. The approximate supplies listed in the PDF are:
Warm medium brown: 150–180 g; Cream / ivory: 30–40 g; Dark brown: 8–12 g; Blush pink: 5–8 g. 4.5 mm hook; 2 × 14 mm black safety eyes OR embroidery; Fiberfill: 120–160 g; Dark brown or black embroidery thread: 1–2 m; Tapestry needle, markers, pins, scissors, measuring tape.
Quantities are approximate and change with substitute yarns. Keep embroidery supplies separate from main yarn colors. Use pins for placement and locking markers for face and back references.
Gauge and finished proportions
The target gauge is approximately ten single crochet stitches and ten rounds over 10 cm, measured on unstuffed fabric with a 4.5 mm hook. The seated height target is 24–26 cm, and the width across the feet is 20–22 cm. Bruno is designed to sit rather than stand, so the PDF does not specify a standing height. All dimensions are approximate dimensions and may vary with plush-yarn thickness, hook choice, tension and filling density.
For this crochet bear pattern, compare the fabric and proportions together. A swatch with visible gaps needs attention before stuffing, while a much denser substitute can change the size of every paired component. Recheck the main shapes before attaching the smaller details.
Construction and assembly order
The head and body finish with matching open 18-stitch neck edges. Keep both openings accessible for the direct join rather than closing them individually. Hardware eyes are installed at the head’s stated pause before the decreases narrow access. For embroidered eyes, follow the later stuffed-head option while preserving the same placement. Pin the cream muzzle as a horizontal oval, lightly fill it and add its dark embroidered triangular nose and softly curved mouth.
Add the pink cheeks and assembled cupped ears to the completed face. Sew the flat cream belly patch onto the stuffed body before joining head and torso. Match the 18 neck stitches one-to-one and align the front and back references, adjusting filling through the remaining seam gap. Attach the legs with their pads facing forward and slightly outward, then position the short arms. The small closed brown tail is sewn low at center back and points directly backward.
The crochet bear pattern is easier to assemble when all paired pieces are laid out together. Keep the PDF open at its placement notes, pin before sewing and pause to compare front, side and back views. Small corrections at this stage prevent larger changes after the seams are secured.
Practical tips for neat details
- Keep the muzzle soft and oval rather than filling it into a hard ball.
- Leave the belly, cheek, inner-ear and paw-pad pieces unfilled.
- Keep the top of each arm nearly flat so it follows the body curve.
- Add firm filling to the foot ends but less at the upper leg attachments.
- Use small, even applique stitches to keep the cream belly edge smooth.
When working from the crochet bear pattern, leave the recommended sewing tails and keep the attachment order visible beside your work. Avoid tightening a seam so strongly that it dents the stuffed shape. If a piece rotates while sewing, stop, re-pin it and check the reference markers before continuing.
Troubleshooting
Why does this project lean at the neck?
Check the matching 18-stitch join and compare seam tension on both sides. A hollow or unevenly filled neck can let the large head tilt. Adjust a small amount of filling through an accessible seam, then re-pin the front, back and quarter points before resewing. Do not cinch the entire seam narrower to hide the lean.
Why does the bear roll backward?
Check the broad lower base and both leg positions on a level surface. Excess central base filling can round the underside, while high leg attachments fail to support the seated shape. Redistribute filling toward the sides while access remains, then compare the leg attachment heights and forward-facing pads before securing them.
Why does the cream belly edge pucker?
The belly is an unfilled applique. Pin it centered and slightly taller than wide, then sew with small stitches around the edge. Pull only enough to bring the fabrics together. If the torso dents or the patch ripples, loosen the affected seam rather than adding stuffing behind the patch.
Finishing and care
Inspect the flattened limb seams, ear bases and small tail attachment during the final finish. Remove temporary pins and markers, and bury the remaining tails using the PDF’s method. Chenille can shed when repeatedly pulled through tight fabric, so handle seam ends gently. Choose cleaning methods from the actual yarn and filling labels; no physical test crochet or wash test is claimed.
Before calling your crochet bear pattern project complete, inspect the hidden joins as well as the visible face. Secure loose ends using the PDF’s finishing method and confirm that all small details are firmly attached. The design dimensions are estimates; record your own finished measurements if you plan another version with the same yarn.
Download the complete PDF pattern
This PDF contains the complete crochet pattern for Bruno the Bear. Digital download only; no physical item will be shipped.
Browse the crochet pattern collection for more project overviews.
Leave a Reply