
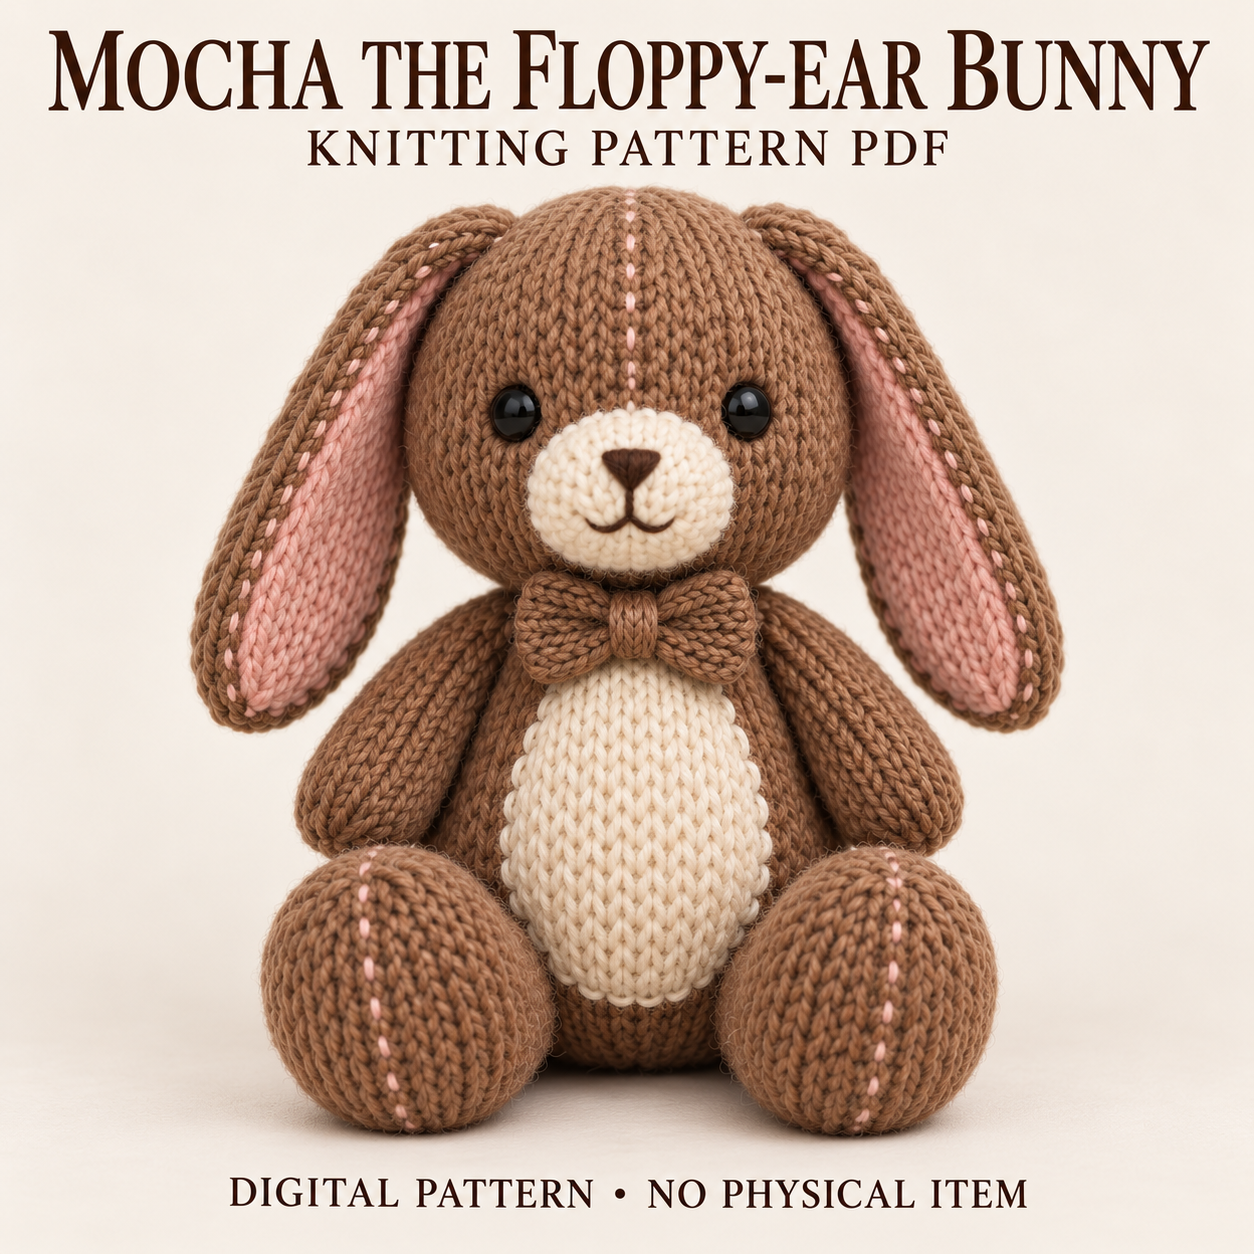
Mocha’s floppy ear bunny knitting pattern pairs warm brown yarn with long pink-lined ears, a cream muzzle, and a flat cream belly patch. Large brown feet support the seated shape, while a small cream knitted tail completes the rear view. A brown bow sits beneath the chin, and dusty-rose running stitches decorate selected lines on the head, ears, and feet. The PDF describes a confident-beginner to intermediate project combining circular knitting with flat panels, shaping, sewing, and embroidery. This overview explains how those different pieces fit together and why the filling levels matter. Download the complete PDF near the bottom for the written component instructions, placement maps, and detailed finishing sequence.
Details of the floppy ear bunny knitting pattern
The long ears remain unstuffed and hang beside the head, slightly forward. Each pink inner panel is smaller than its brown outer ear, leaving a visible border around the sides and rounded tip. The muzzle projects gently, while the belly patch stays flat against the body.
The arms and feet are brown throughout, without separate coloured pads. The bow’s garter-stitch lobes are held by a smooth stockinette centre band. Decorative dusty-rose running stitches follow the head’s front and back lines, body back, foot tops, and outer ear perimeters. These details are embroidery rather than knitted stripes.
Skills, gauge, and approximate proportions
You will need circular stockinette, knit and purl rows for the flat pieces, increases, decreases, binding off, seaming, and facial embroidery. Mirroring happens mainly during attachment: matching pieces are knitted alike and positioned at opposite angles.
The floppy ear bunny knitting pattern specifies 16 stitches and 22 rows or rounds per 10 cm on 4.5 mm needles, measured before stuffing after light blocking. Its design targets include 28–30 cm seated height, 22–24 cm across the feet, and 15–17 cm front-to-back depth.
Each ear is planned at 15–16 cm long, with feet about 9–10 cm long and a bow approximately 7–8 cm wide. Gauge, yarn, and filling affect these proportions.
Bulky yarn and knitting supplies
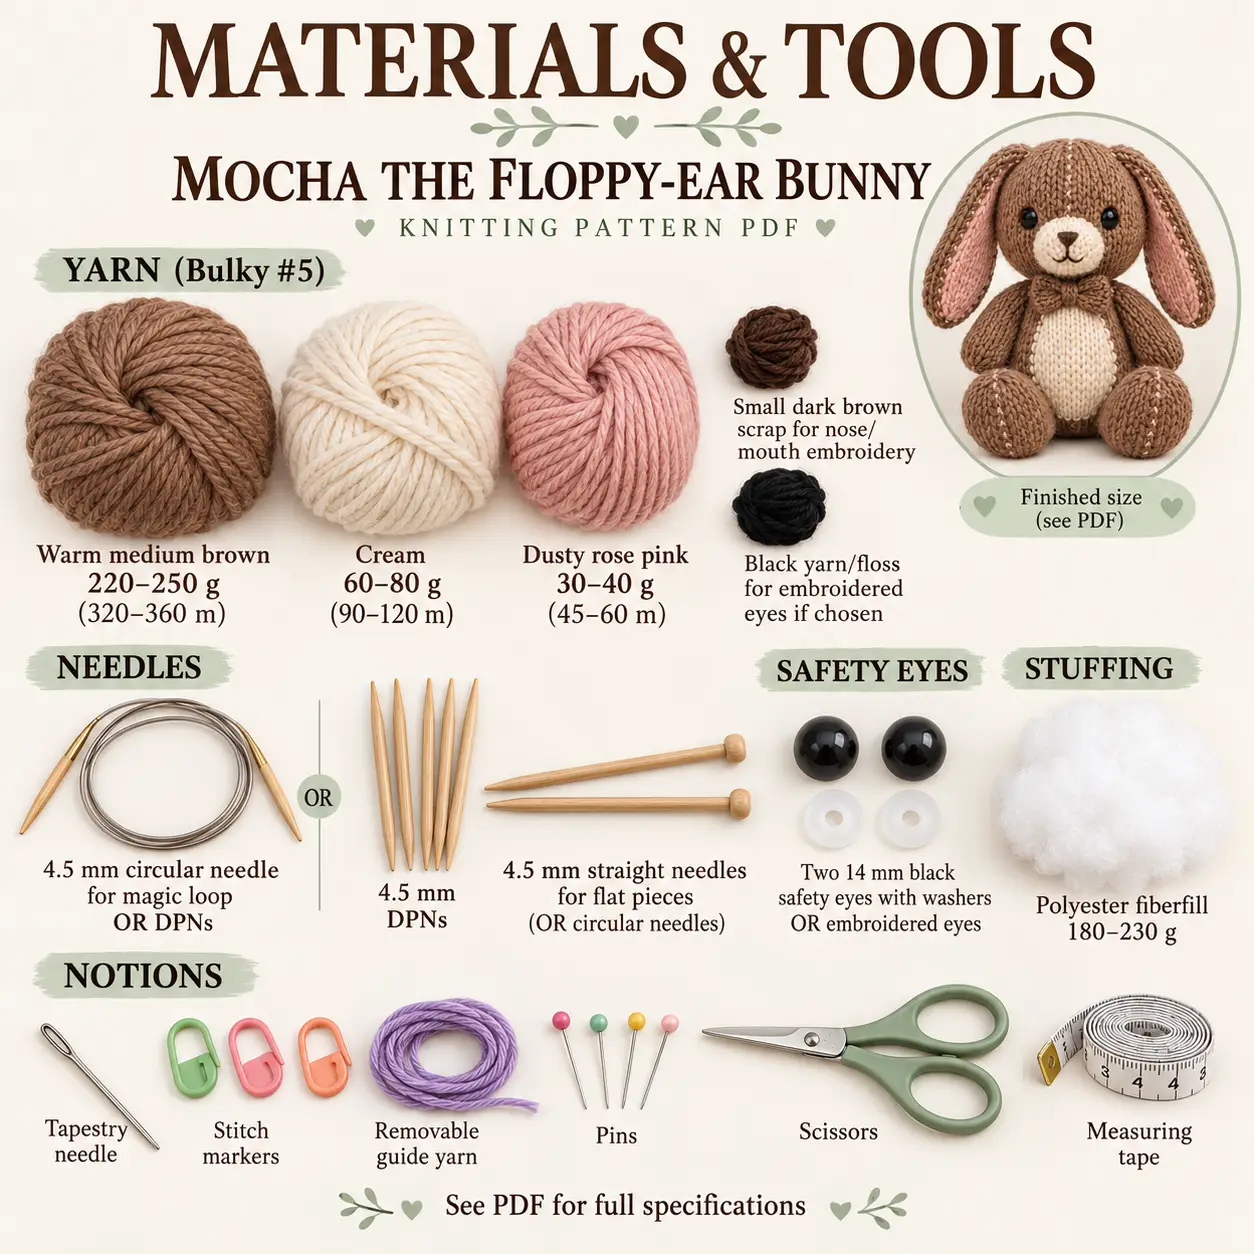
Use bulky yarn, weight number five. The PDF lists warm medium brown at 220–250 g or 320–360 m, cream at 60–80 g or 90–120 m, and dusty rose pink at 30–40 g or 45–60 m. A small dark brown scrap supplies the nose and mouth.
The floppy ear bunny knitting pattern uses 4.5 mm circular needles for magic loop or DPNs, with same-size straight or circular needles for flat pieces. Prepare two 14 mm eyes with washers or black embroidery yarn or floss.
Stuffing is approximately 180–230 g of polyester fiberfill. Other supplies include a tapestry needle, stitch markers, removable guide yarn, pins, scissors, and measuring tape. The compact rear tail is knitted and stuffed, so it does not require a pom-pom maker.
Circular pieces and flexible flat panels
The head is worked from crown toward chin and closes fully after the eyes and filling are secured. The body is worked from its lower base toward an open neck. The muzzle, arms, feet, and tail are also circular pieces; the ears, inner panels, belly, and bow are flat.
The floppy ear bunny knitting pattern deliberately places the beginning of the head and body rounds at centre back. Separate front and side guides provide the face and limb references. Carry those physical lines through the changing circumference rather than retaining one numerical stitch position everywhere.
The body’s neck edge attaches around a designated ring on the closed lower head. Keep the head’s underside distinct from an open neck tube when arranging the pieces for assembly.
Face preparation and assembly sequence
Install or embroider the eyes while the head is still accessible, then fill and close it. Close the muzzle’s tiny front-centre opening before embroidering its nose and mouth. Secure those ends through its open back, then add light filling and sew the muzzle beneath the eyes.
Sew the pink panels to the brown ears and check their droop together. Complete the body and flat belly patch, align the head and body guides, and sew the neck join evenly.
Attach the arms with mirrored forward angles, position both feet low enough to support the seated form, and centre the cream tail at the back. Sew the bow through its centre band, leaving its lobes dimensional. Finish the decorative running stitches before removing the guides and burying the remaining tails.
Tips for ear drape and even stuffing
Lightly block the ear layers before sewing so both borders have the same width. Keep the pink panels equally distant from the attachment bases; otherwise one finished ear may appear shorter even when both outer pieces match.
For the floppy ear bunny knitting pattern, firm head filling supports the rounded cheeks, while the body needs moderate firmness with a softer neck. Fill the foot toes firmly and the ankle areas slightly more softly. The arms need more filling at the paws than at their shoulders.
Give the muzzle enough padding to dome gently without turning it into a ball. Leave the belly and bow unfilled. Match the dusty-rose embroidery’s spacing on paired ears and feet, keeping the stitches loose enough to preserve the fabric surface.
Troubleshooting ear shape and seated balance
Why do the ears twist on my floppy ear bunny knitting pattern project?
Block both ears flat and compare the inner panels’ distance from the brown borders. Repin the attachment bases with mirrored angles before resewing. The long ears should bend naturally from their bases, rather than being pulled into a twist by an uneven panel seam.
Why does Mocha tip backward?
Shift the foot attachment slightly forward or redistribute a small amount of filling into the lower front of the body. Pin both feet together on a flat surface before completing either seam. Check their toe direction as well as their height.
Why does the belly or bow face to one side?
Check the front and back guides at the neck join. If they have rotated, release the affected sewing stitches and repin before resewing. Straightening the head-to-body connection gives a clearer result than moving the bow alone to disguise the twist.
Care and finishing the eyes
After completing the floppy ear bunny knitting pattern, follow the chosen yarn’s care label. Gentle surface cleaning may suit the filled project. Avoid wringing the ears or pulling the embroidered lines and bow; reshape carefully and allow the stuffing to dry thoroughly.
For items intended for children under three, the PDF advises an eye option without detachable components, alongside applicable local requirements. Secure the eyes and facial embroidery according to the chosen method, then inspect the muzzle, neck, limb, tail, and bow attachments. Remove temporary guide yarn after the placement work is complete.
Download Mocha’s complete pattern PDF
The floppy ear bunny knitting pattern PDF includes all component instructions, placement maps, stuffing notes, decorative embroidery, and assembly guidance. Use the full file for exact counts and the eye-access checkpoints before closing the head.
DIGITAL DOWNLOAD ONLY — NO PHYSICAL ITEM WILL BE SHIPPED.
Leave a Reply