
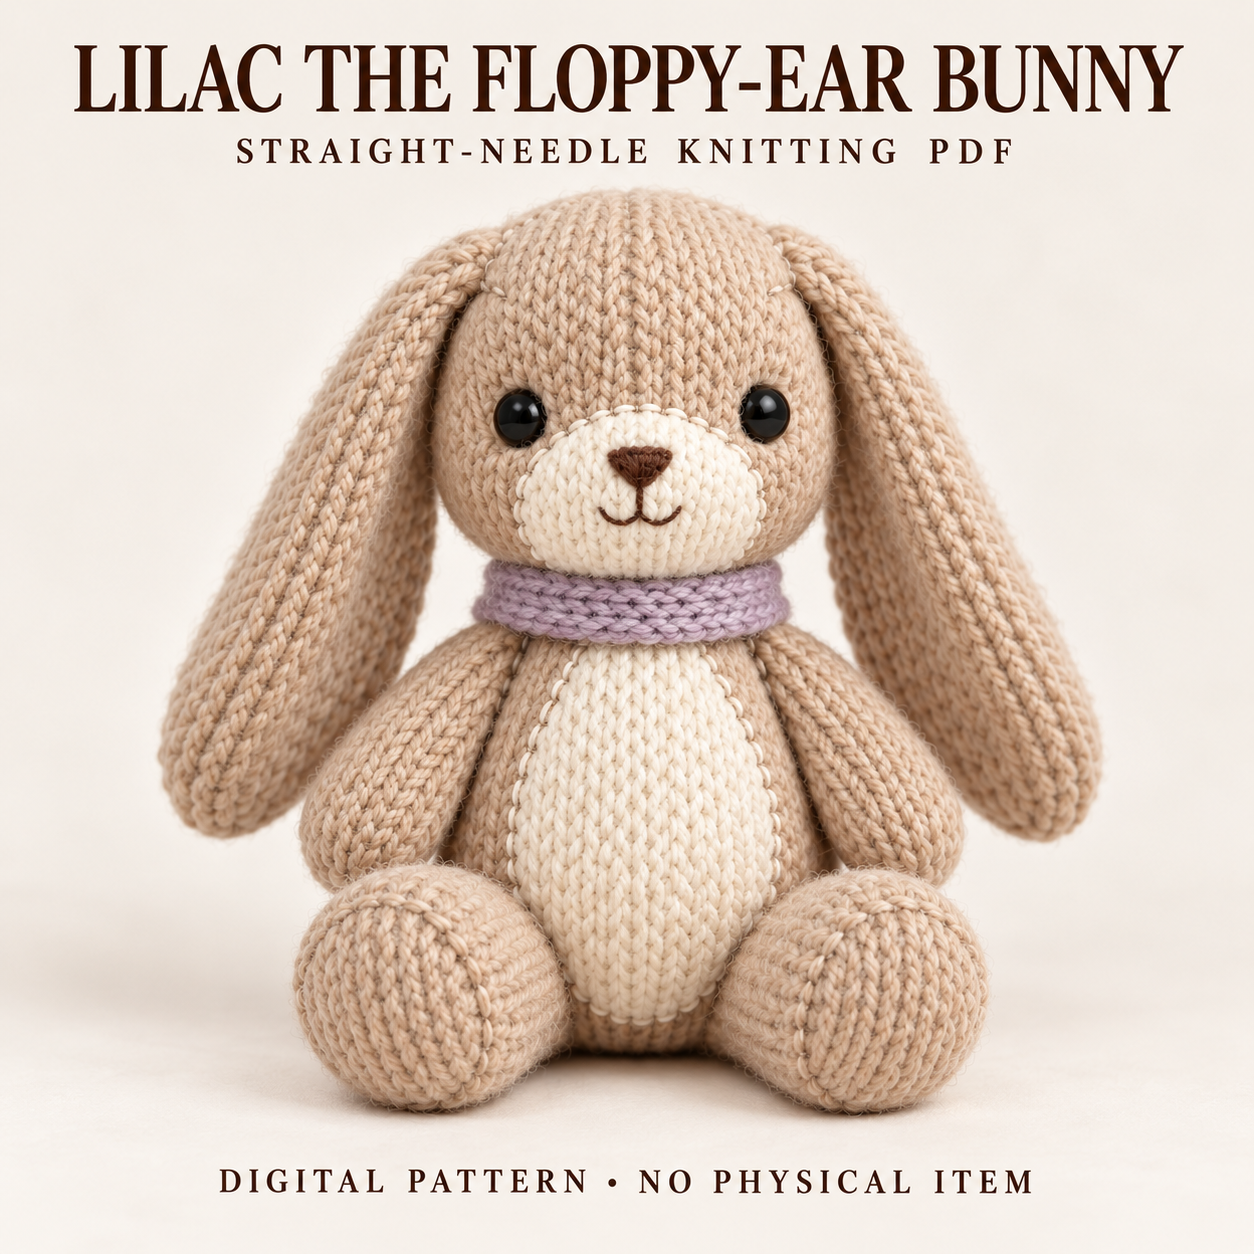
This floppy ear bunny knitting pattern introduces Lilac, an oatmeal-coloured seated bunny with a cream muzzle, cream tummy patch, and a narrow dusty-lilac collar. Long drooping ears frame the rounded face, while large forward feet support the intended seated silhouette. Despite the name, the main body is oatmeal beige; lilac appears only in the neck band. Every component is knitted flat on straight needles, making this a project for confident beginners or intermediate knitters comfortable with shaping and sewing. This guide explains the yarn, construction, and finishing choices described in the PDF, especially the work that needs to happen before seams close. Download the full instructions near the bottom for the exact rows and placement guidance.
Features of the floppy ear bunny knitting pattern
The cream oval muzzle and long tummy patch contrast with the oatmeal stockinette body. A small cream pom-shaped knitted tail sits low on the back. The feet remain oatmeal, without contrasting paw pads, and the collar is a short garter band rather than a hanging scarf.
The ears are identical pieces that become a mirrored pair during attachment. They are seamed, turned, flattened, and left unstuffed so they can hang beside the cheeks. Their long seams face toward the back or inside edge, giving the front a cleaner appearance.
Skill level, gauge, and finished measurements
The PDF describes confident-beginner to intermediate flat knitting. Techniques include stockinette, garter stitch, increases, decreases, gathering, mattress seaming, and embroidered facial details. Placement and access order require as much attention as the knitting itself.
The floppy ear bunny knitting pattern uses 20 stitches and 28 rows per 10 cm in flat stockinette before stuffing. approximate dimensions are approximately 26–28 cm seated height, 21–23 cm width across the feet, and 13–15 cm front-to-back depth. The planned ears are 13–14 cm long, and the feet about 9–10 cm long. Gauge, seam depth, filling, and yarn choice can all affect the finished proportions.
Yarn, needles, and supplies
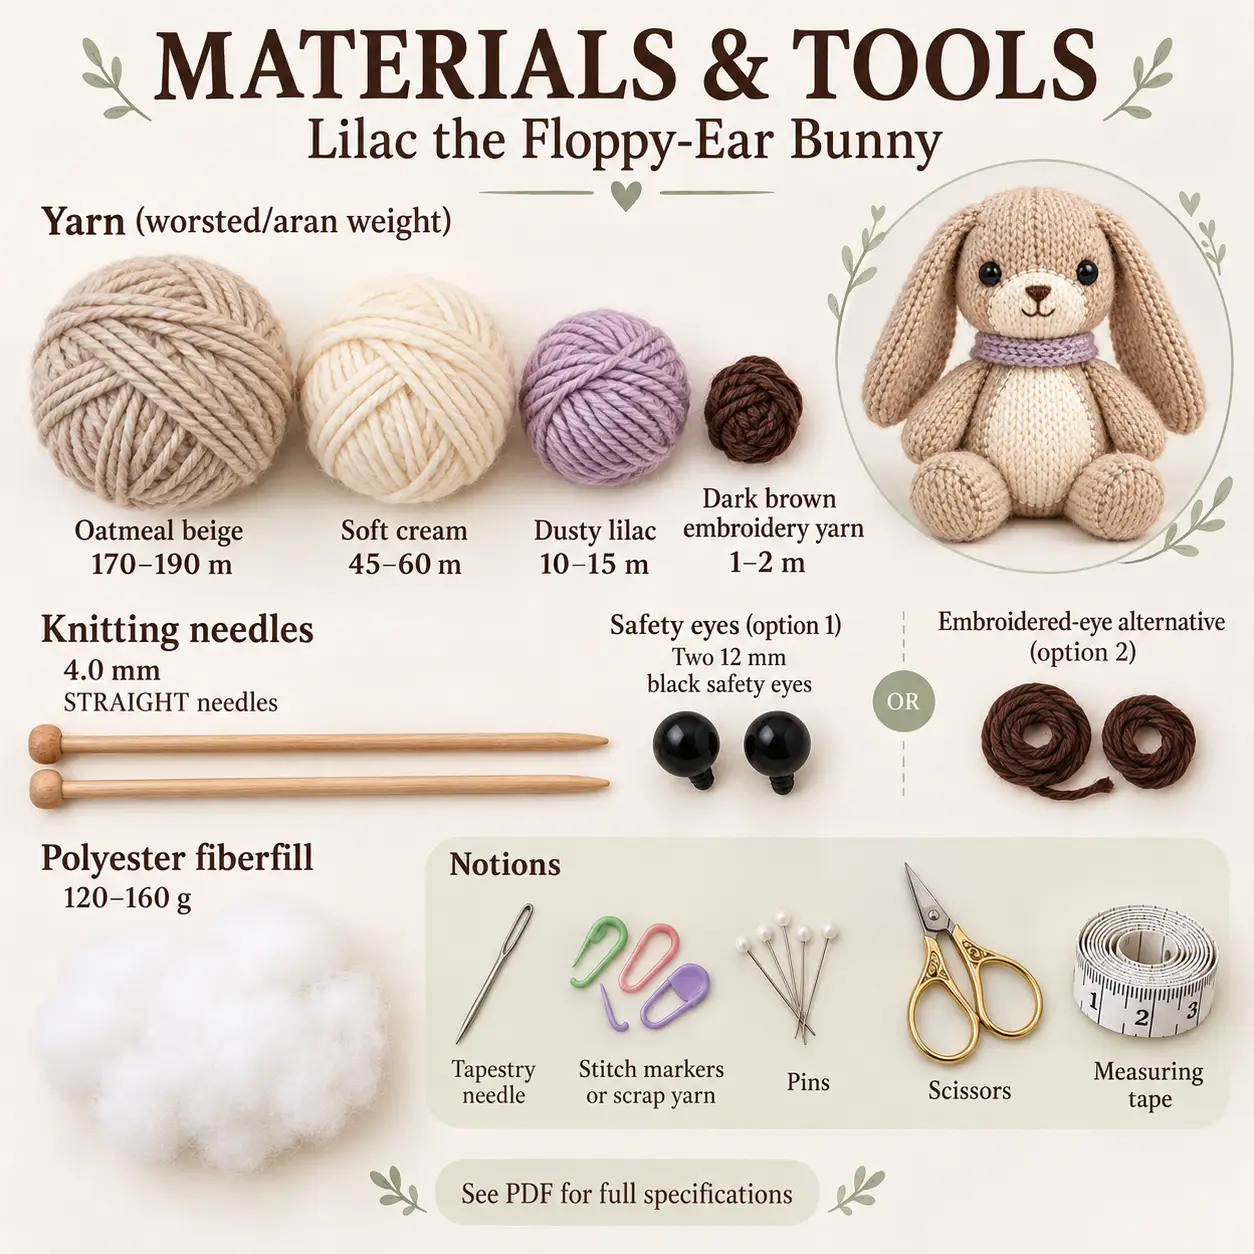
Prepare worsted or aran yarn in oatmeal beige, approximately 170–190 m; soft cream, approximately 45–60 m; and dusty lilac, approximately 10–15 m. The dark brown nose and mouth use about 1–2 m of embroidery yarn. These supply amounts are given in length, so check each ball’s meterage rather than converting them to an assumed weight.
The floppy ear bunny knitting pattern uses 4 mm straight needles, or the size needed to achieve its gauge. Fiberfill requirements are approximately 120–160 g. Eye choices are two 12 mm black eyes or an embroidered-eye alternative.
Keep a tapestry needle, stitch markers or scrap yarn, pins, scissors, and measuring tape nearby. Use a dense fabric that contains the filling without relying on excessive seam tension to hide gaps.
Flat shaping and seam-count rules
The head starts at its neck opening and grows toward the gathered crown. The body starts at the base and narrows toward its upper neck edge. Both become rounded forms when their long edges join at the centre back.
All counts in the floppy ear bunny knitting pattern include the edge stitches used for seaming. Do not cast on extra selvedges. With a panel lying right side up, the midpoint of each row is centre front, and the two side edges meet at centre back.
The ears have a closed cast-on tip and an open bound-off base for attachment. Keep those ends identified during finishing; reversing them changes how the ears hang from the head.
Preparing the face and tummy before seaming
Complete the head’s face work while the panel is still open. Install eye washers if using them, sew and lightly fill the cream muzzle, and embroider the brown nose and mouth. Secure the face tails on the wrong side before closing the back seam.
Attach the cream tummy patch while the body also lies flat. Centre its long axis on the front reference and sew it without stuffing. Having access to the wrong side makes securing the tails easier and helps avoid trapping unfinished work inside a filled body.
Seam and stuff the head and body through their neck openings. Join those matching edges with the front references and back seams aligned, checking quarter points before completing the final section.
Stuffing and attaching the paired pieces
Fill the lower body firmly enough to form a seated base and keep the upper chest more moderate. In the head, distribute small tufts evenly around the crown and cheeks, leaving the neck zone slightly softer for a smooth join.
The floppy ear bunny knitting pattern uses firmer but compressible feet, moderate lower arms, and lighter shoulders. Match filling across each pair before sewing. Attach the feet so their upper-back areas sit against the body and their toes remain free to project forward.
Pin the ear bases at matching side positions, mirroring their slant. Add the arms, low back tail, and collar in the PDF’s sequence. Keep the collar overlap at the centre back and use the specified hidden tacks to prevent rotation. Neither ears nor collar need filling.
Troubleshooting ears, posture, and collar
Why does one ear hang differently in my floppy ear bunny knitting pattern project?
Check that both long seams face backward or inward and that the bases span matching head rows. Re-pin the bases with mirrored slants before resewing. Identical knitting can still produce different drapes if the attachment angle or seam orientation changes.
Why does the bunny tip forward?
Set the feet a little farther forward and keep their upper-back attachment areas flat against the lower body. Redistribute lower-body filling toward the base, then reassess the pose on a flat surface. Adjust the attachments before deciding that a correctly knitted foot needs remaking.
Why does the collar rotate around the neck?
Keep its overlap at the back seam and add a few tiny hidden tacks through the collar and neck join. The band should cover the seam without pulling so tightly that it distorts the head or chest.
Care and eye-finishing choices
Follow the yarn’s care label and handle the unstuffed ears gently. The PDF permits light relaxation of the ear fabric when the yarn allows it, rather than pressing the knitting with an iron. Surface cleaning may suit the assembled plushie; avoid wringing the stuffed parts or pulling the collar while damp.
Dry the bunny thoroughly in its intended shape. The pattern specifies an embroidered-eye alternative without detachable eye components for items intended for children under three, alongside applicable local requirements. Check attachment seams during ordinary handling and repair loose stitching before further use. A softly filled muzzle and flat tummy patch should retain their different profiles after cleaning.
Download Lilac’s complete pattern PDF
The floppy ear bunny knitting pattern PDF includes the full component rows, face preparation, tummy-patch placement, seam guidance, and assembly maps. Use the complete document for stitch counts and the access checks before closing seams.
DIGITAL DOWNLOAD ONLY — NO PHYSICAL ITEM WILL BE SHIPPED.
Leave a Reply