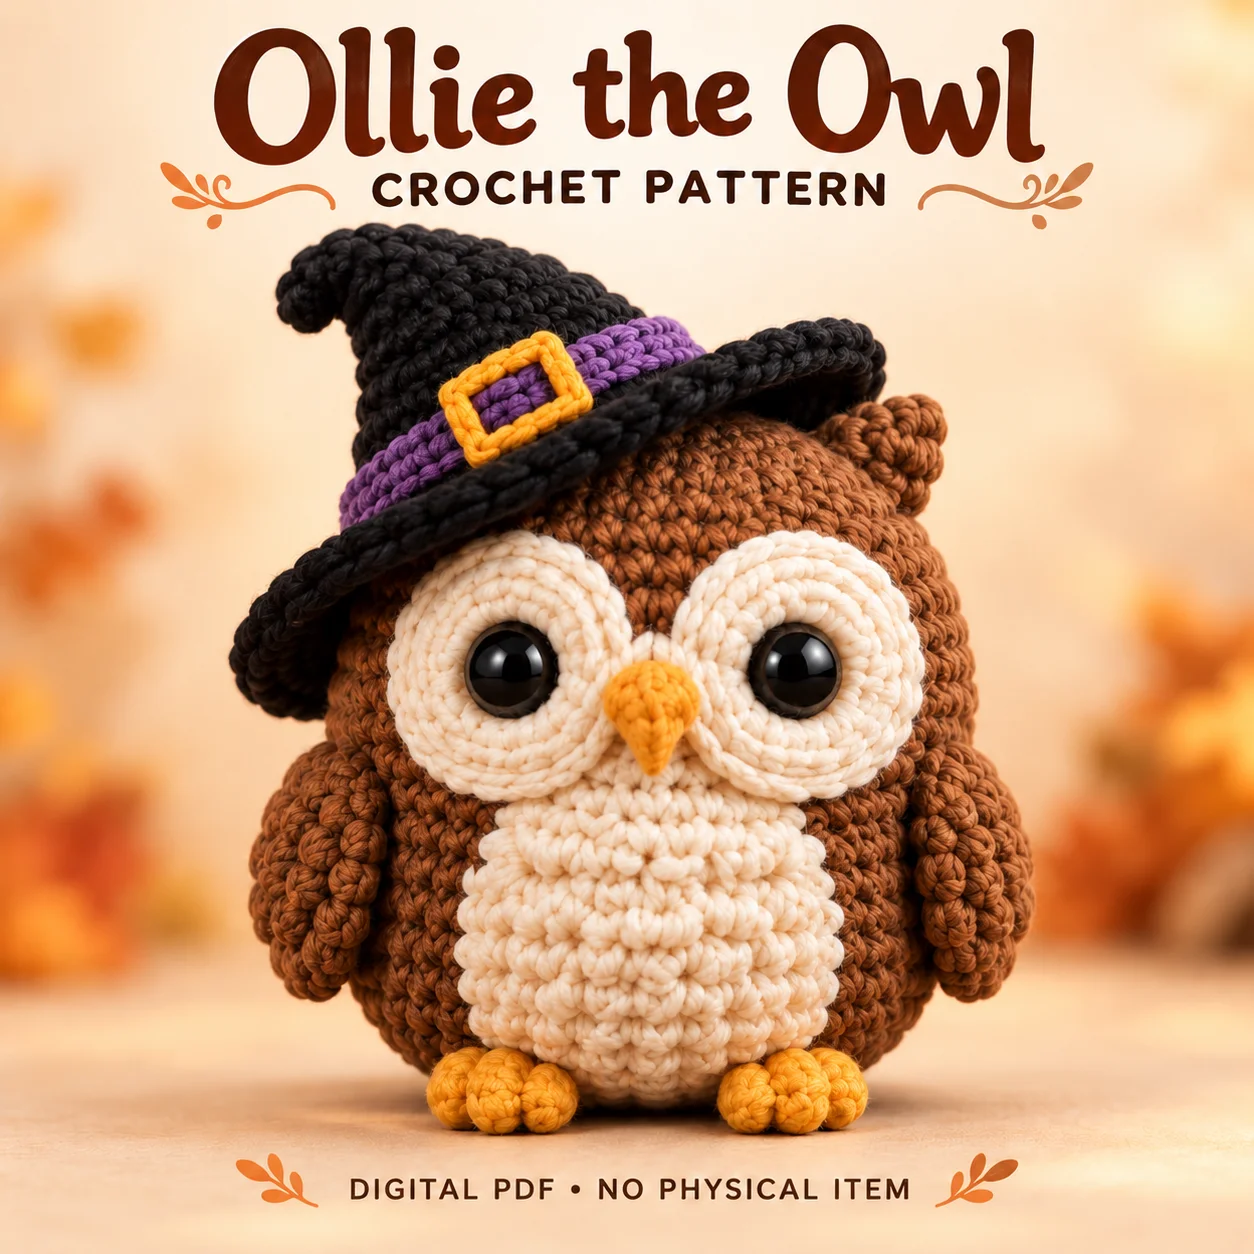
Ollie is a round brown owl wearing a black witch hat with a purple band and gold buckle. This crochet witch owl pattern combines large cream eye patches with a textured belly and feather-like wing columns. The supplied PDF is written for confident beginners or intermediate makers using standard US terminology. Small ochre feet and a downward-pointing beak keep the front compact beneath the wide brim. The body is made as one continuous stuffed shape, with the eye patches installed before the top opening becomes too small. Review that access step and the hat fitting notes before starting the main brown body.
Features of this crochet witch owl pattern
Two oversized cream circles nearly meet across the upper face, with black eyes centered in them. Raised bobbles decorate the broad cream belly and form three columns on each brown wing. The brown ear tufts have three softly sculpted lobes, while the tiny ochre feet each show three toes. A flat six-petal brown rosette forms the rear tail. The wide black hat tilts lower toward the viewer’s left, with a softly bent cone, purple band and open rectangular gold buckle.
Preserve the PDF’s distinctions between flat, lightly padded and firmly stuffed pieces.
Skills and stitch methods
Most pieces use continuous spiral rounds, including the body, flat circular patches and hat sections. The band and buckle use turned rows, and the tail rosette has its specified joined start. Four-double-crochet bobbles create the raised texture and must be pushed toward the visible side. Standard yarn-over single crochet is assumed, with a consistent yarn-under alternative allowed. Keep round tracking distinct from the physical center-front and center-back guide strands used for facial patches, wings and hat placement.
Before beginning this crochet witch owl pattern, identify which sections are flat and which are stuffed. Read each section heading before continuing, and check the stitch totals at the end of shaping rounds. Counting early is easier than finding a missing increase beneath several completed rounds.
Yarn, tools and filling
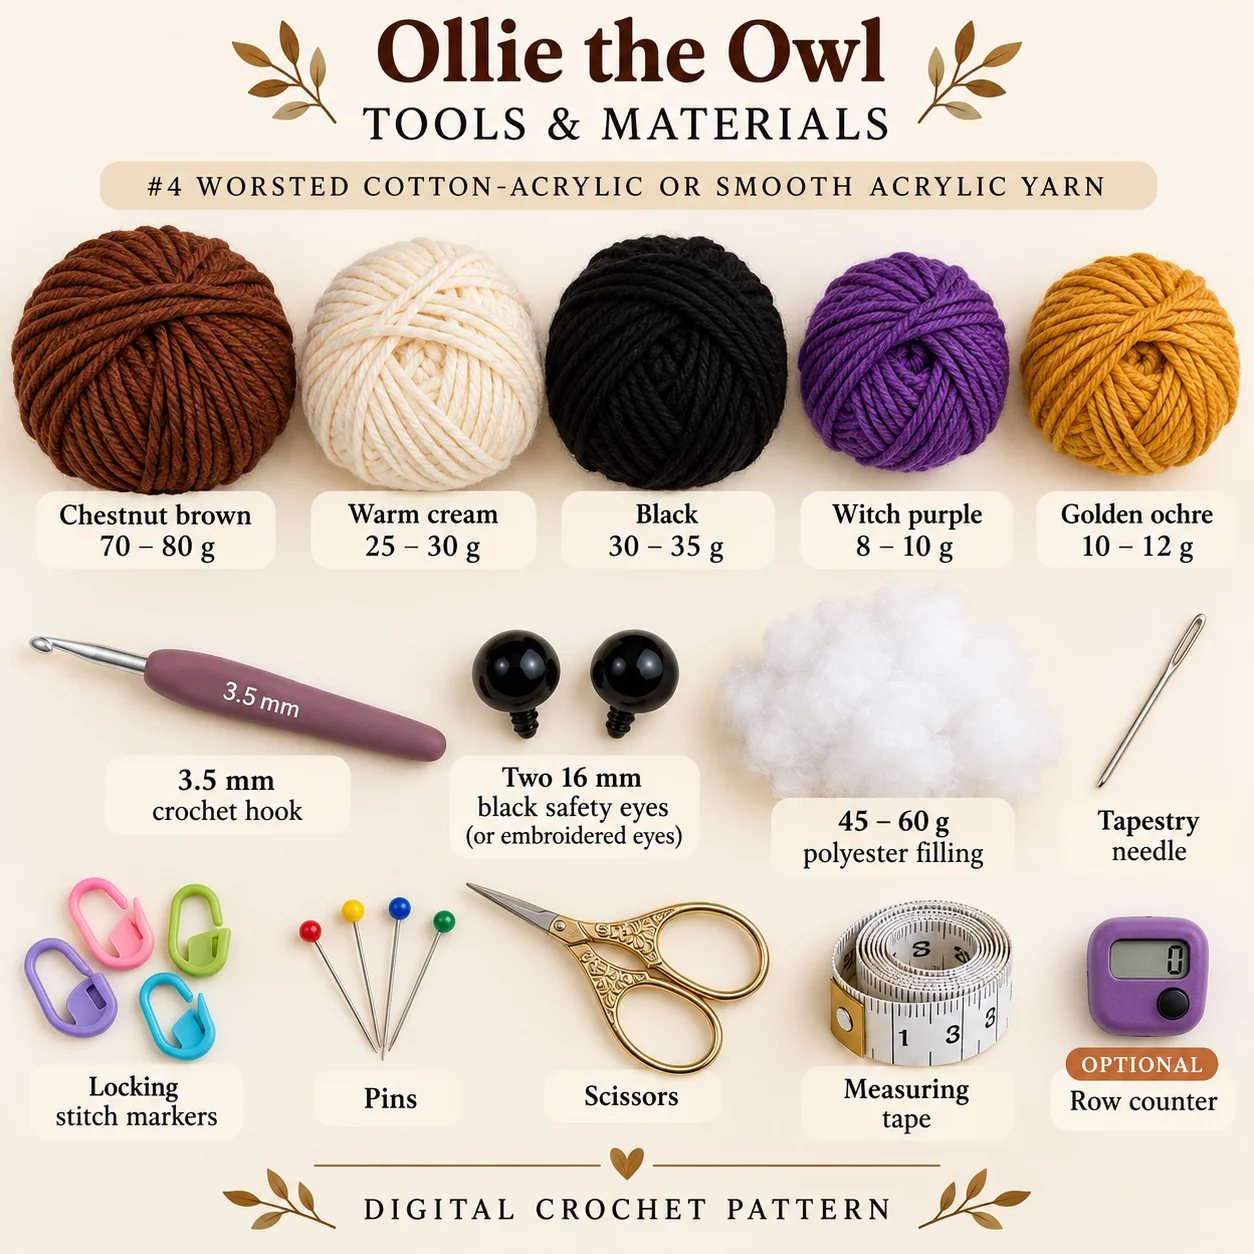
Use #4 worsted cotton-acrylic or smooth acrylic yarn. The approximate supplies listed in the PDF are:
Chestnut brown 70–80 g; warm cream 25–30 g; black 30–35 g; witch purple 8–10 g; golden ochre 10–12 g. 3.5 mm hook; two 16 mm black safety eyes or embroidered eyes; 45–60 g polyester filling; tapestry needle, locking stitch markers, pins, scissors and measuring tape. Optional row counter.
Quantities vary with substitutes. Use pins and separate placement markers during assembly.
Gauge and finished proportions
The practical target is approximately eighteen single crochet stitches and twenty rounds over 10 cm using a 3.5 mm hook. Smooth category 4 cotton-acrylic or acrylic yarn keeps the bobbles and cream patch edges distinct. The approximate dimensions including the hat is 21–22 cm, while the owl body is 14–15 cm high. The body should remain a broad rounded oval. These dimensions are finished-size guidelines, and a different yarn or stuffing density can change both scale and balance.
For this crochet witch owl pattern, compare the fabric and proportions together. A swatch with visible gaps needs attention before stuffing, while a much denser substitute can change the size of every paired component. Recheck the main shapes before attaching the smaller details.
Construction and assembly order
Crochet both cream eye patches first. Pause the body at the stated access point and pin the circles on a physical front line while the inside remains reachable. Fit hardware eyes through the patch centers and brown body before securing the washers. Sew the patch edges flat, then continue the body’s shaping, filling and closure. The embroidered-eye alternative allows the black ovals to be added after filling, using the same patch centers as positioning guides.
Attach the unfilled bobble belly, lightly padded pointed beak, rounded ear tufts and small sculpted feet. Match the wing shoulder heights and leave their upper edges unfilled for clean seams. Add the flat tail rosette at center back. Assemble the separate brim, unfilled cone, purple strip and open gold buckle away from the owl. Fit the finished hat last, preserving clear eyes and at least one visible ear tuft. Confirm its tilt before adding hidden crown tacks.
The crochet witch owl pattern is easier to assemble when all paired pieces are laid out together. Keep the PDF open at its placement notes, pin before sewing and pause to compare front, side and back views. Small corrections at this stage prevent larger changes after the seams are secured.
Practical tips for neat details
- Make the eye patches before beginning the main body.
- Keep both cream circles flat and nearly meeting at center front.
- Push the wing and belly bobbles toward the visible side.
- Leave the witch-hat cone unstuffed for a soft bend.
- Fit the completed hat last and check that both eyes remain visible.
When working from the crochet witch owl pattern, leave the recommended sewing tails and keep the attachment order visible beside your work. Avoid tightening a seam so strongly that it dents the stuffed shape. If a piece rotates while sewing, stop, re-pin it and check the reference markers before continuing.
Troubleshooting
Why does this project have uneven eye patches?
If the eye centers are correct, release only the uneven outer patch-edge stitches. Keep the hardware eye fixed, repin the cream circle and sew the perimeter with relaxed, evenly spaced stitches. Tight edge sewing can cup a patch or pull it out of round. If the locked hardware centers themselves are uneven, the PDF notes that repositioning requires reopening rather than simply moving the edge.
Why does the hat brim form a deep bowl?
Check the flat circle before assembling the cone. The PDF permits a slightly larger hook for the brim alone or a relaxation of tension if it cups strongly. Its loose slip-stitch edge may create a small natural curl, but the brim should remain broadly flat. Do not pack the cone with filling to compensate for a distorted brim.
Why does one wing sit higher?
Compare both shoulder seams from the back using physical side and back markers. Repin the higher wing before adding any extra stabilizing stitch. Match the shoulder height, lower endpoint and visible bobble direction. Light filling belongs only in the lower wing, leaving the upper attachment flexible enough to sit cleanly against the body.
Finishing and care
Inspect the patch edges, bobble surfaces, tail petals and hidden hat tacks during the final check. Make sure the buckle opening remains visible and the brim does not cover either eye. Remove guides and bury every remaining yarn tail before securing the last hat anchors. Choose cleaning methods from the actual yarn and filling labels.
Before calling your crochet witch owl pattern project complete, inspect the hidden joins as well as the visible face. Secure loose ends using the PDF’s finishing method and confirm that all small details are firmly attached. The design dimensions are estimates; record your own finished measurements if you plan another version with the same yarn.
Download the complete PDF pattern
This PDF contains the complete crochet pattern for Ollie the Owl. Digital download only; no physical item will be shipped.
Related projects: Cora the Cauldron Witch, Olive the Owl, Willa the Witch Bunny.
Browse the crochet pattern collection for more project overviews.
Leave a Reply