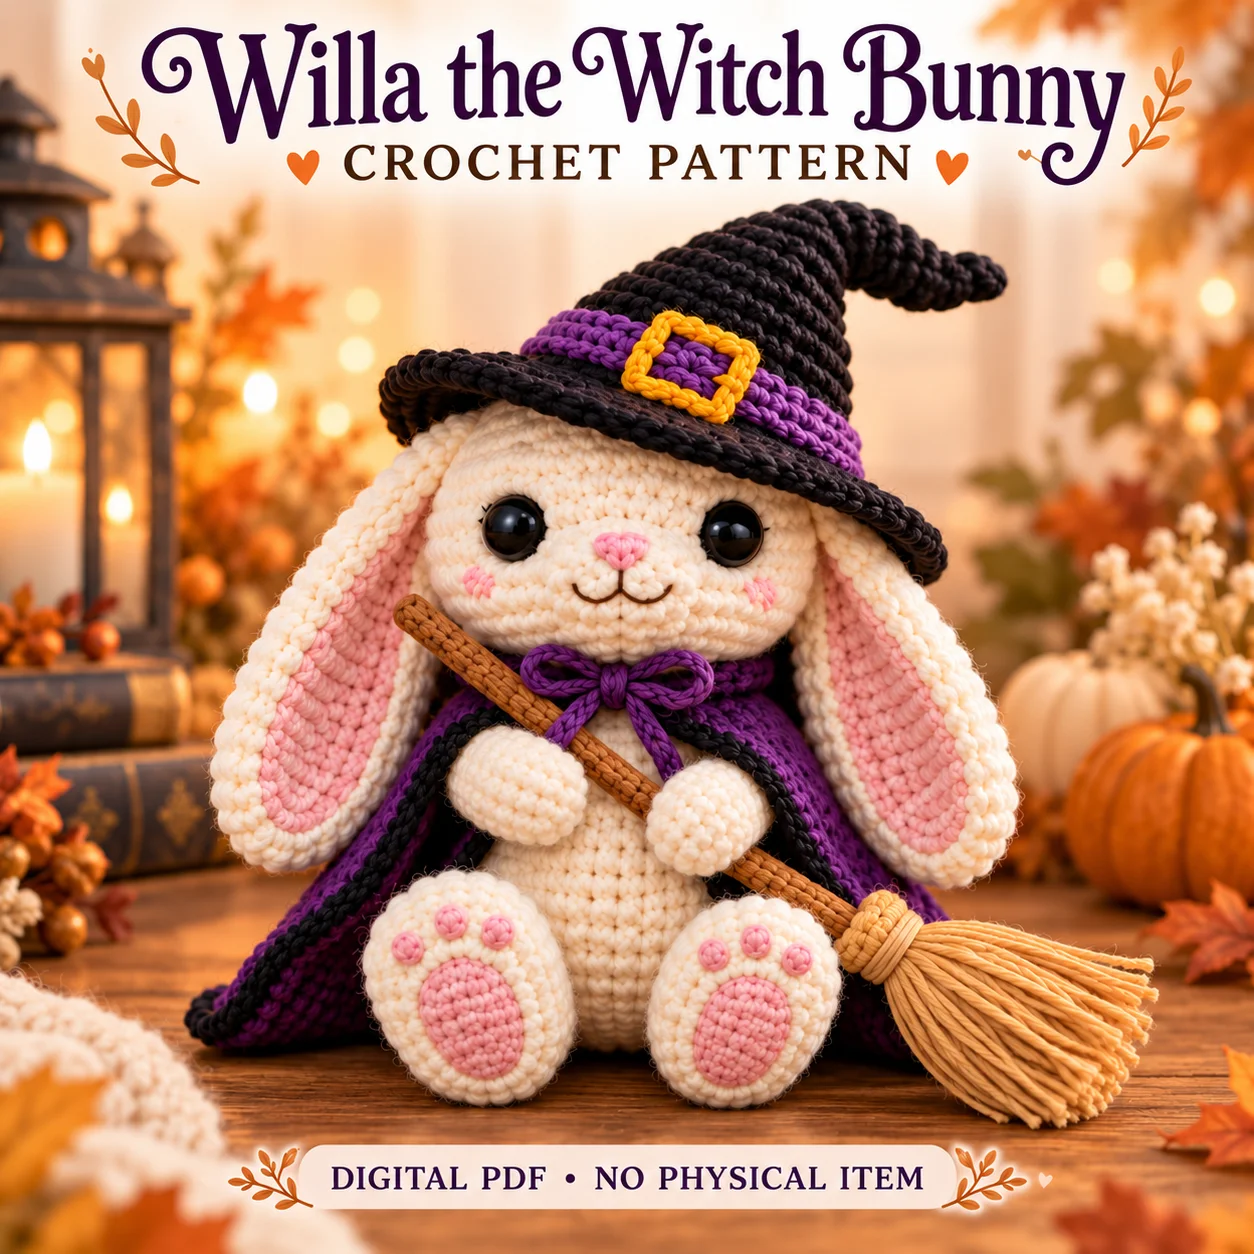
Willa is a cream bunny dressed in a purple cape and black witch hat, holding a small yarn broom. This crochet witch bunny pattern combines a seated animal with separate costume pieces and a softly bent hat tip. The supplied final PDF is intended for intermediate makers using standard US terminology. Long pink-lined ears drape beside the cheeks, while chunky feet show pink sole embroidery. The cape sits behind the arms, leaving the hands free to rest around the diagonal broom. Read the eye-installation pause and accessory fitting notes before starting so the head, body and costume can be assembled with access preserved.
Features of this crochet witch bunny pattern
The round cream head has a shallow horizontal muzzle, pink nose, brown mouth and mirrored blush stitches. Long unfilled outer ears frame the face with pink oval panels inside an even cream border. Every hand and foot has one central pink pad and three smaller pads. The purple cape has black edging and matching neckline ties. A low purple hat band carries an open rectangular gold chain-frame buckle. The brown broom ends in tied tan bristles and a crocheted collar.
Skills and stitch methods
Head, body and most animal pieces use continuous spiral rounds. Oval muzzle and inner-ear panels begin around both sides of foundation chains. The cape uses turned half-double-crochet rows, while the band and broom collar are flat strips. Back-loop-only stitches define the body base, and front-loop-only work begins the hat brim. Use either yarn-over or yarn-under single crochet consistently. Physical front and back guide threads determine placement, independently of the round-start marker that moves as the spiral progresses.
Before beginning this crochet witch bunny pattern, identify which sections are flat and which are stuffed. Read each section heading before continuing, and check the stitch totals at the end of shaping rounds. Counting early is easier than finding a missing increase beneath several completed rounds.
Yarn, tools and filling
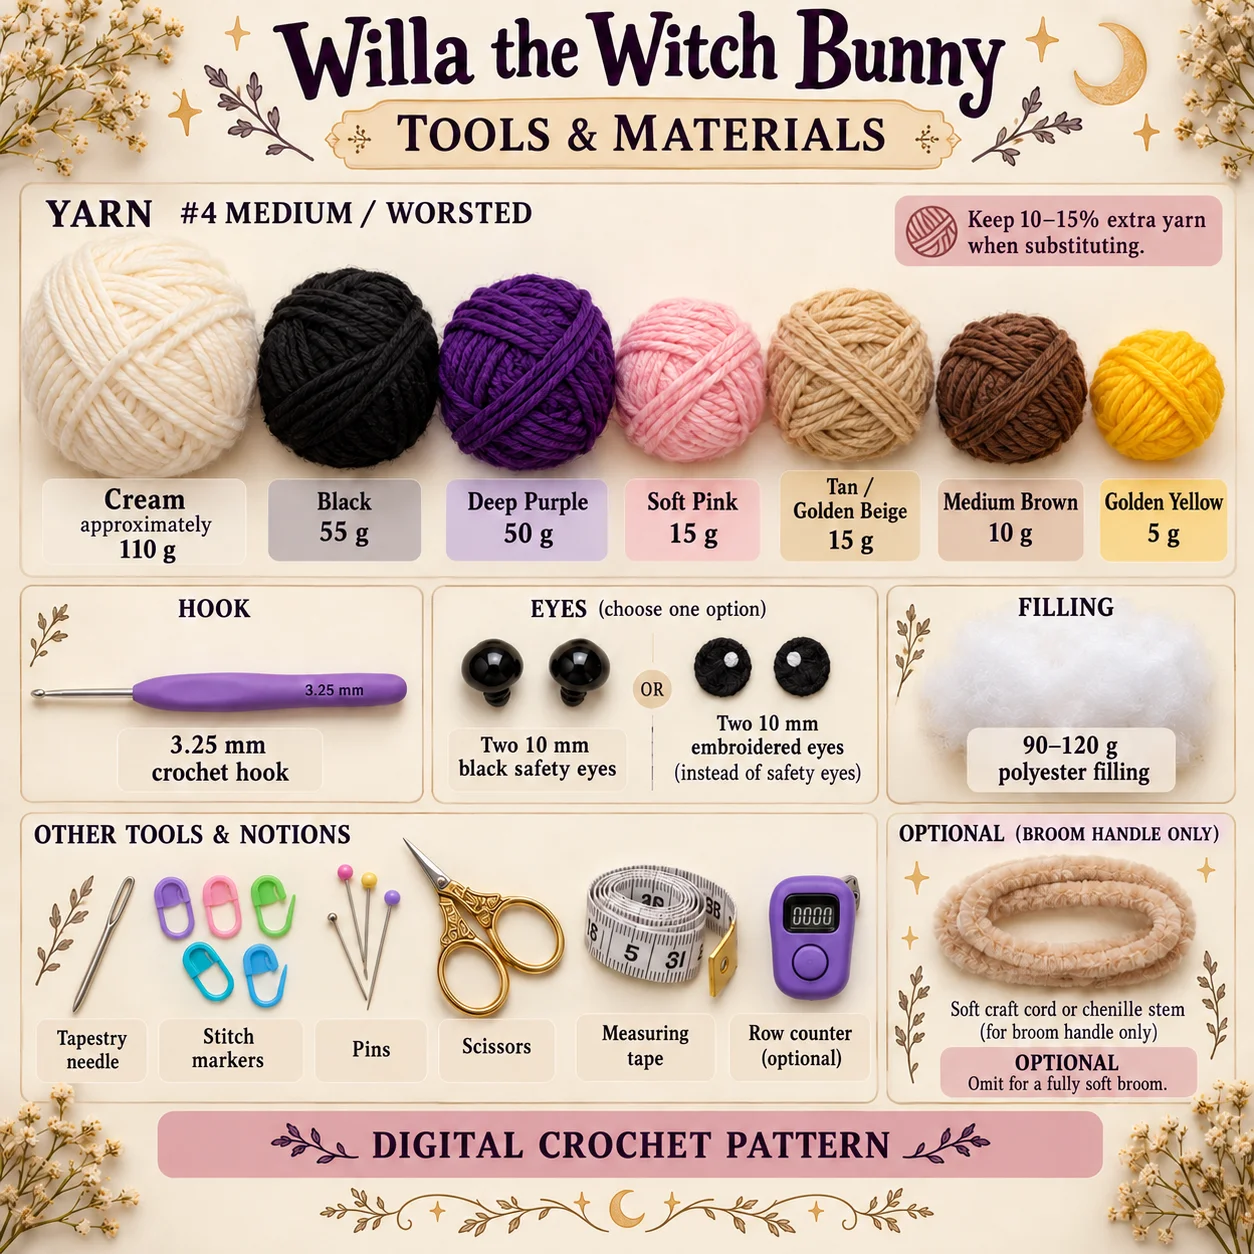
Use #4 medium/worsted yarn. The approximate supplies listed in the PDF are:
Cream approximately 110 g; black 55 g; deep purple 50 g; soft pink 15 g; tan/golden beige 15 g; medium brown 10 g; golden yellow 5 g. 3.25 mm hook; two 10 mm black safety eyes or embroidered eyes; 90–120 g polyester filling; tapestry needle, stitch markers, pins, scissors and measuring tape. Optional row counter. Optional fully enclosed soft craft cord or chenille stem for the broom handle only; omit for a fully soft broom.
Quantities vary with substitutes. Use separate placement markers.
Gauge and finished proportions
The reference target is approximately seventeen single crochet stitches and eighteen spiral rounds over 10 cm with a 3.25 mm hook and category 4 yarn. Measure a stuffed or gently blocked amigurumi fabric sample without forcing it. The approximate dimensions without the hat is 20–22 cm, rising to 29–32 cm with the hat. These are finished-size guidelines. Use compatible yarn thickness across the bunny, cape and accessories so a change of scale does not leave the costume oversized.
For this crochet witch bunny pattern, compare the fabric and proportions together. A swatch with visible gaps needs attention before stuffing, while a much denser substitute can change the size of every paired component. Recheck the main shapes before attaching the smaller details.
Construction and assembly order
Pause the head after its eye-access round, add enough filling to judge the face and compare both eye centers before locking hardware washers. Finish filling and close the head completely. Sew the muzzle horizontally, adding only a small pinch of padding as the seam closes, then embroider the nose, mouth and blush. Layer the pink panels onto the unfilled ears before attaching their bases. The body retains a twenty-four-stitch neck opening for a circular seam against the closed lower head.
Align physical head and body front guides, pin the neck at quarter-points and adjust upper-body filling before the last seam section closes. Add mirrored feet and arms with their pink pads prepared. Hands face inward and slightly downward around the broom. Attach the round rear tail before fitting the cape so its hem clears the tail. Finish the hat with its tip bent toward Willa’s own left, or the viewer’s right. Lay the broom from upper viewer-left to lower viewer-right.
The crochet witch bunny pattern is easier to assemble when all paired pieces are laid out together. Keep the PDF open at its placement notes, pin before sewing and pause to compare front, side and back views. Small corrections at this stage prevent larger changes after the seams are secured.
Practical tips for neat details
- Install hardware eyes before the head opening becomes too small.
- Leave the long ears unstuffed so they drape beside the cheeks.
- Embroider three small pads beside each central hand or foot pad.
- Fit the cape behind the arms and keep its hem clear of the tail.
- Place broom bristles at the lower viewer-right end of the diagonal handle.
When working from the crochet witch bunny pattern, leave the recommended sewing tails and keep the attachment order visible beside your work. Avoid tightening a seam so strongly that it dents the stuffed shape. If a piece rotates while sewing, stop, re-pin it and check the reference markers before continuing.
Troubleshooting
Why does this project have a leaning head?
Compare the circular neck seam against the physical front and back guides. The PDF directs you to open the last small seam section if needed, redistribute upper-body filling and recenter the closed head over the torso. Reseal the opening evenly once the face sits upright. Pulling only one side tighter can create a dent or twist rather than correcting the underlying alignment.
Why does the cape flare too strongly?
Hand-shape the flat purple panel and check whether its black edge is pulling unevenly. Reduce edging tension where it distorts the drape. If your half double crochet is unusually tall, the PDF suggests a slightly smaller hook for the cape. Steam is not required. Fit the neckline below the head and let the panel fall behind the arms.
Why does the broom handle bend too much?
The fully soft version uses small brown yarn strands inside the narrow crochet tube. Add that filling progressively while the handle is accessible. The PDF also lists an optional fully enclosed soft craft-cord or chenille-stem insert for the handle only. Keep both ends enclosed if choosing it, and do not sew the hand tacks through an internal insert.
Finishing and care
Inspect the muzzle, inner-ear seams, paw embroidery and costume ties during the final check. Confirm the broom binding and collar cannot slide. The cape and hat can remain removable, or be secured using the stated small hidden tacks. Remove temporary pins and guides, then bury all remaining yarn tails. Follow the actual yarn and filling labels for cleaning.
Before calling your crochet witch bunny pattern project complete, inspect the hidden joins as well as the visible face. Secure loose ends using the PDF’s finishing method and confirm that all small details are firmly attached. The design dimensions are estimates; record your own finished measurements if you plan another version with the same yarn.
Download the complete PDF pattern
This PDF contains the complete crochet pattern for Willa the Witch Bunny. Digital download only; no physical item will be shipped.
Related projects: Cora the Cauldron Witch.
Browse the crochet pattern collection for more project overviews.
Leave a Reply