
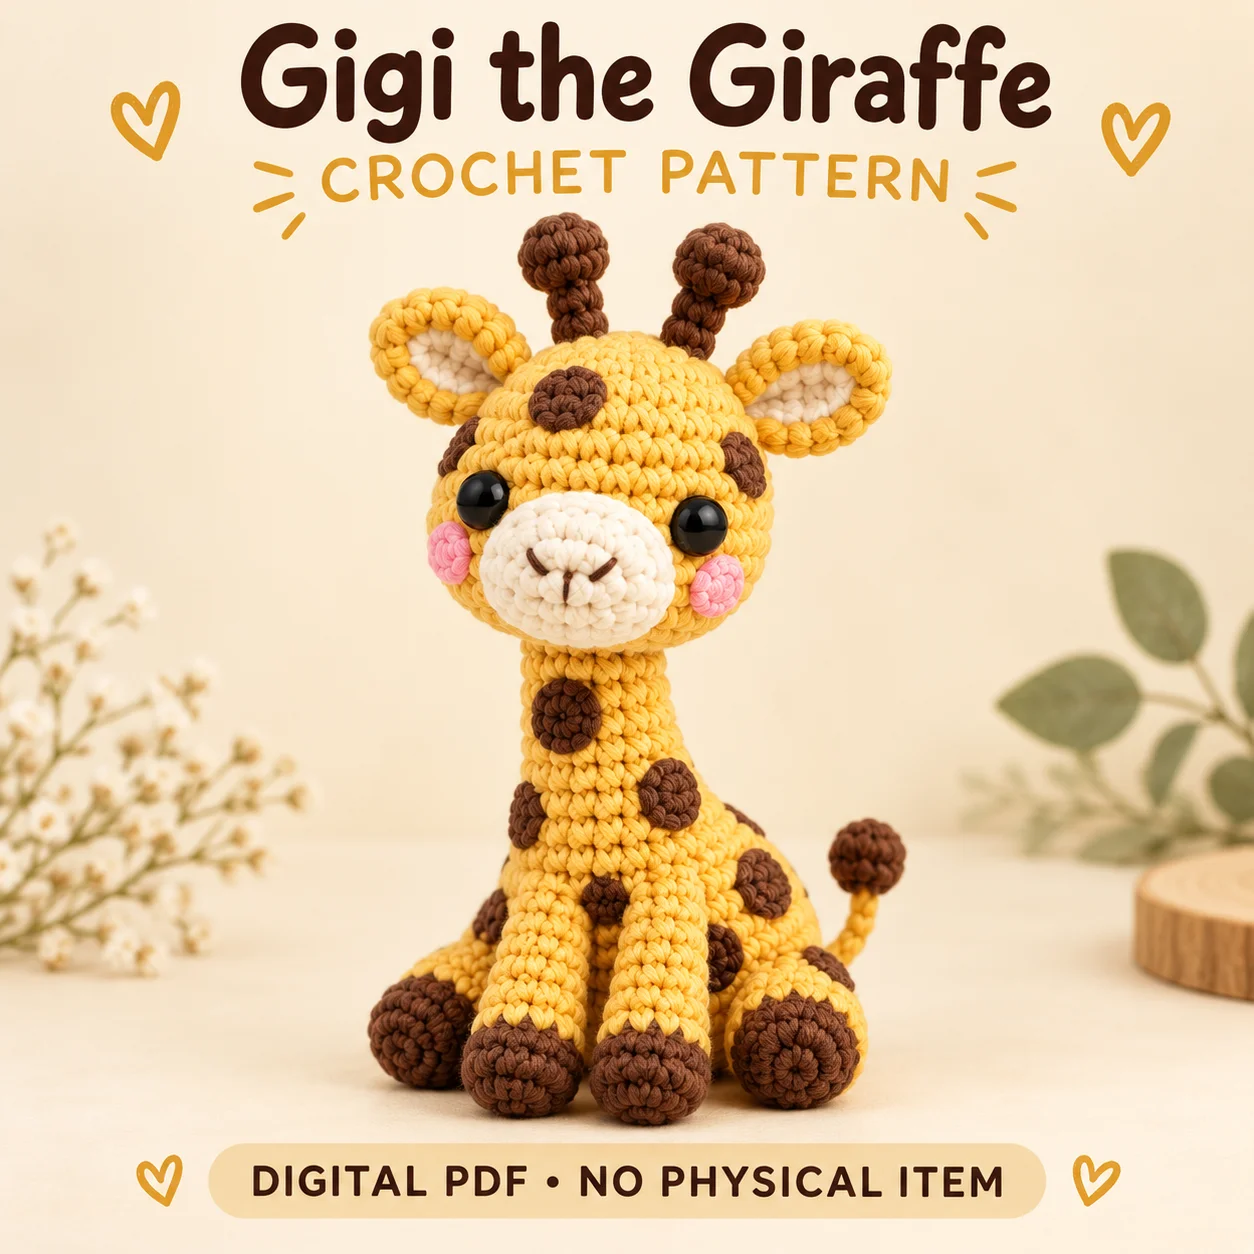
Gigi is a golden yellow giraffe with a long neck, rounded hooves and a large expressive head. This crochet giraffe pattern uses worsted cotton or a cotton-acrylic blend, giving it a finer stitch texture than the collection’s chenille animals. The supplied PDF is intended for confident beginners and intermediate crocheters who can track long spiral sections and sew multiple flat spots. Cream inner ears and a softly padded muzzle contrast with brown ossicones and pink cheeks. Fourteen spot appliques are distributed across the head, neck and body. Review the spot allocation and assembly order first, because the long neck and final head join require careful filling and orientation.
Features of this crochet giraffe pattern
The body and long neck are crocheted as one piece, narrowing from a pear-shaped seated base into a cylindrical tube. Two brown ossicones have rounded tips above narrow stems. The front legs are longer and slimmer than the hind legs, with all four brown hooves visible in the seated pose. Fourteen brown spots comprise four small, six medium and four large pieces. The cream muzzle uses short embroidered markings rather than a separate crocheted nose or broad smiling mouth.
Flat, lightly padded and firmly stuffed pieces serve different purposes. Preserve those distinctions for a recognizable silhouette.
Skills and stitch methods
Main pieces use continuous spiral rounds, and no component requires routine turning. The leg closure rows are single passes across flattened openings. Oval ears and muzzle begin around both sides of foundation chains. Back-loop-only rounds define the hoof color transitions. Use the compact yarn-under method described in the PDF, or a consistent yarn-over alternative. Establish physical front and back guide threads independently of the round-start marker so the spots, muzzle and neck seam keep their orientation.
Before beginning this crochet giraffe pattern, identify which sections are flat and which are stuffed. Read each section heading before continuing, and check the stitch totals at the end of shaping rounds. Counting early is easier than finding a missing increase beneath several layers of plush stitches.
Yarn, tools and filling
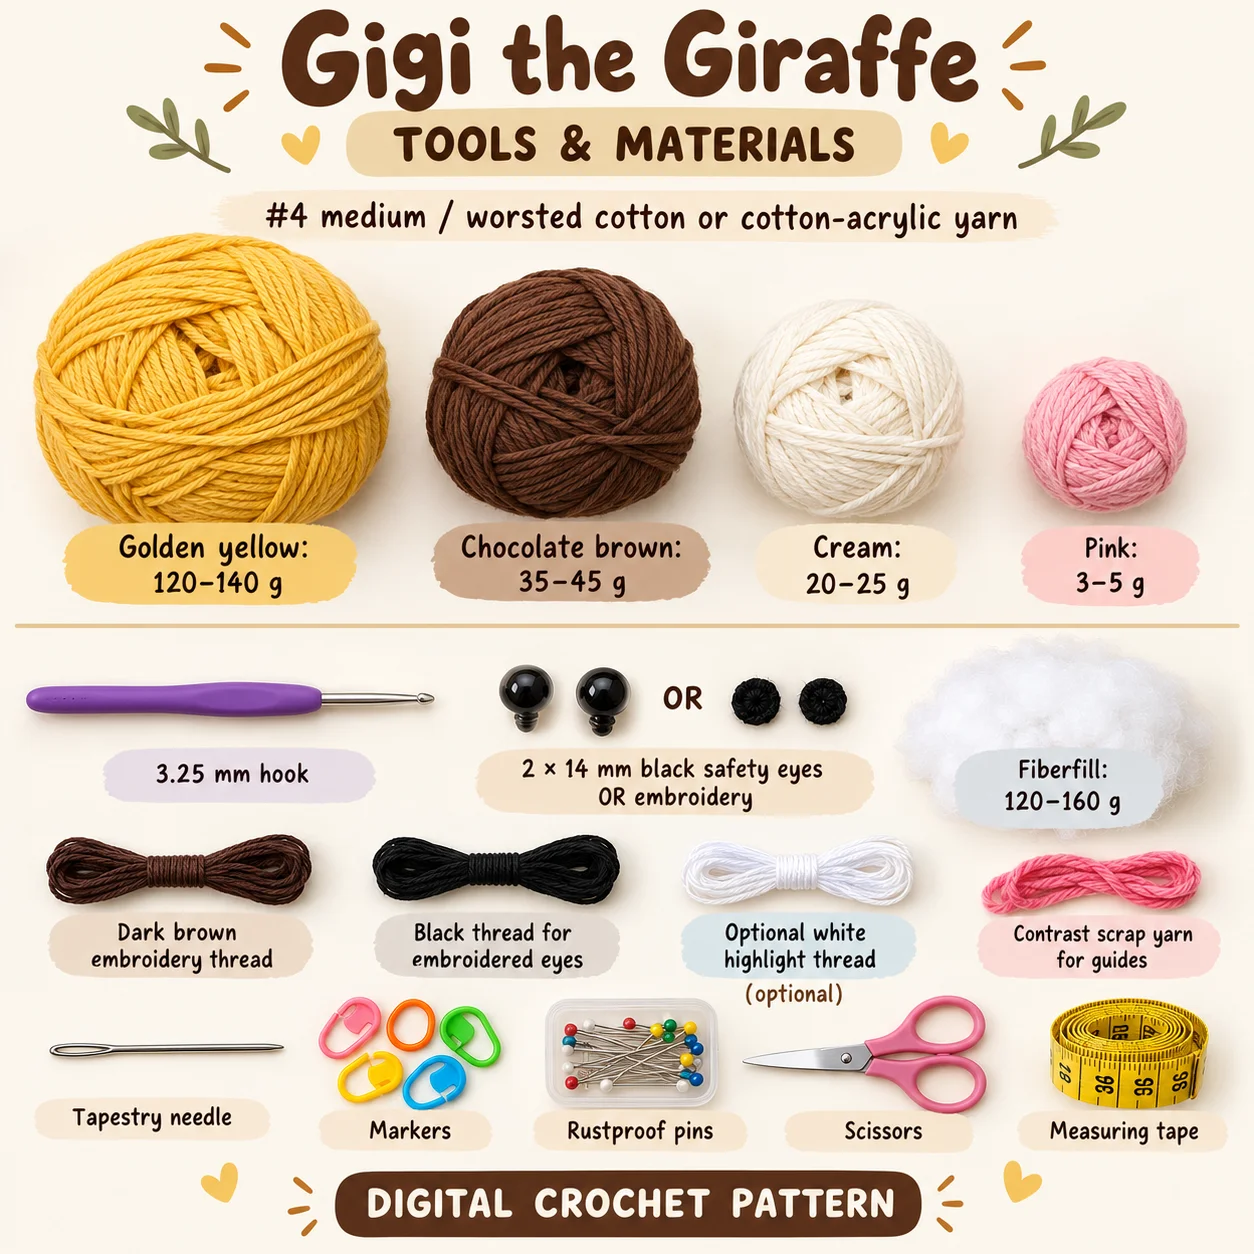
Use #4 medium / worsted cotton or cotton-acrylic yarn. The approximate supplies listed in the PDF are:
Golden yellow: 120–140 g; Chocolate brown: 35–45 g; Cream: 20–25 g; Pink: 3–5 g. 3.25 mm hook; 2 × 14 mm black safety eyes OR embroidery; Fiberfill: 120–160 g; Dark brown embroidery thread; Black thread for embroidered eyes; Optional white highlight thread; Contrast scrap yarn for guides; Tapestry needle, markers, rustproof pins, scissors, measuring tape.
Quantities are approximate and change with substitute yarns. Keep embroidery supplies separate from main yarn colors. Use pins for placement and locking markers for face and back references.
Gauge and finished proportions
The target gauge is approximately twenty-two single crochet stitches and twenty-four rounds over 10 cm using a 3.25 mm hook. All main colors should be medium category 4 cotton or cotton-acrylic yarn of compatible thickness. The seated height including ossicones is designed to be 29–31 cm, with a head width of 9–10 cm. Finished measurements vary with gauge and materials. Switching to plush chenille changes the fabric, scale and yarn use, so it should not be assumed to reproduce the stated measurements.
For this crochet giraffe pattern, compare the fabric and proportions together. A swatch with visible gaps needs attention before stuffing, while a much denser substitute can change the size of every paired component. Recheck the main shapes before attaching the smaller details.
Construction and assembly order
The integrated body and neck finish with an open 24-stitch top, matching the head’s open 24-stitch base. Install hardware eyes at the stated head pause, or mark the embroidered-eye positions before completing the decreases. Finish the cream muzzle, cheeks, ears, ossicones and facial embroidery while the head opening remains accessible. The nose-and-mouth detail is two short mirrored dark brown marks meeting at the center, followed by one short vertical stitch downward.
Pin the four head spots at the forehead, paired temples and upper back. Add the four neck spots and six body spots before the limb seams crowd those areas. Keep the arrangement balanced without making every body spot a mirrored pair. Attach the hind legs, flexible brown-tipped tail and long front legs to the filled body. Join the head last, matching the two 24-stitch openings with physical front and back guides aligned and adjusting neck filling through the remaining seam gap.
The crochet giraffe pattern is easier to assemble when all paired pieces are laid out together. Keep the PDF open at its placement notes, pin before sewing and pause to compare front, side and back views. Small corrections at this stage prevent larger changes after the seams are secured.
Practical tips for neat details
- Use compatible category 4 yarn across every main color.
- Count fourteen spots by size before starting their placement.
- Keep spot edges clear of the major limb seams.
- Fill the neck in small sections rather than packing one hard lump.
- Leave the yellow tail stem flexible and fill mainly the brown tip.
When working from the crochet giraffe pattern, leave the recommended sewing tails and keep the attachment order visible beside your work. Avoid tightening a seam so strongly that it dents the stuffed shape. If a piece rotates while sewing, stop, re-pin it and check the reference markers before continuing.
Troubleshooting
Why does this project lean at the neck?
Check filling along the long tube and compare the tension around the 24-to-24 head join. A hollow section can let the head tip even when stitch counts are correct. Redistribute small amounts of filling through the remaining seam access, align the physical guides and resew evenly. The intended neck remains moderately firm and soft rather than rigid.
Why does one ossicone lean outward?
The round tip needs light filling, while the slender stem uses very little. Excess filling can twist the stalk. Re-pin its six-stitch base flat against the crown and compare the other side. The PDF permits small reinforcement stitches on the leaning side after the heights and angles are checked.
Why does one front leg look longer?
Compare the attachment-round heights before altering the crocheted legs. Both long front legs should hang nearly parallel with matching hoof levels. Release and reposition a seam if one top edge sits higher. Keep the upper filling light enough for the leg to lie naturally against the body.
Finishing and care
Check every spot edge, the long-neck join and all four hoof directions during finishing. Keep the brown tail tip visible without stitching along the flexible yellow stem. Remove the contrast guide threads and secure the internal ends before the last seam closes. Use care instructions from the actual cotton or blend labels and filling packaging; the PDF does not establish physical testing or a guaranteed cleaning method.
Before calling your crochet giraffe pattern project complete, inspect the hidden joins as well as the visible face. Secure loose ends using the PDF’s finishing method and confirm that all small details are firmly attached. The design dimensions are estimates; record your own finished measurements if you plan another version with the same yarn.
Download the complete PDF pattern
This PDF contains the complete crochet pattern for Gigi the Giraffe. Digital download only; no physical item will be shipped.
Related projects: Taro the Cow, Daisy the Deer.
Browse the crochet pattern collection for more project overviews.
Leave a Reply