
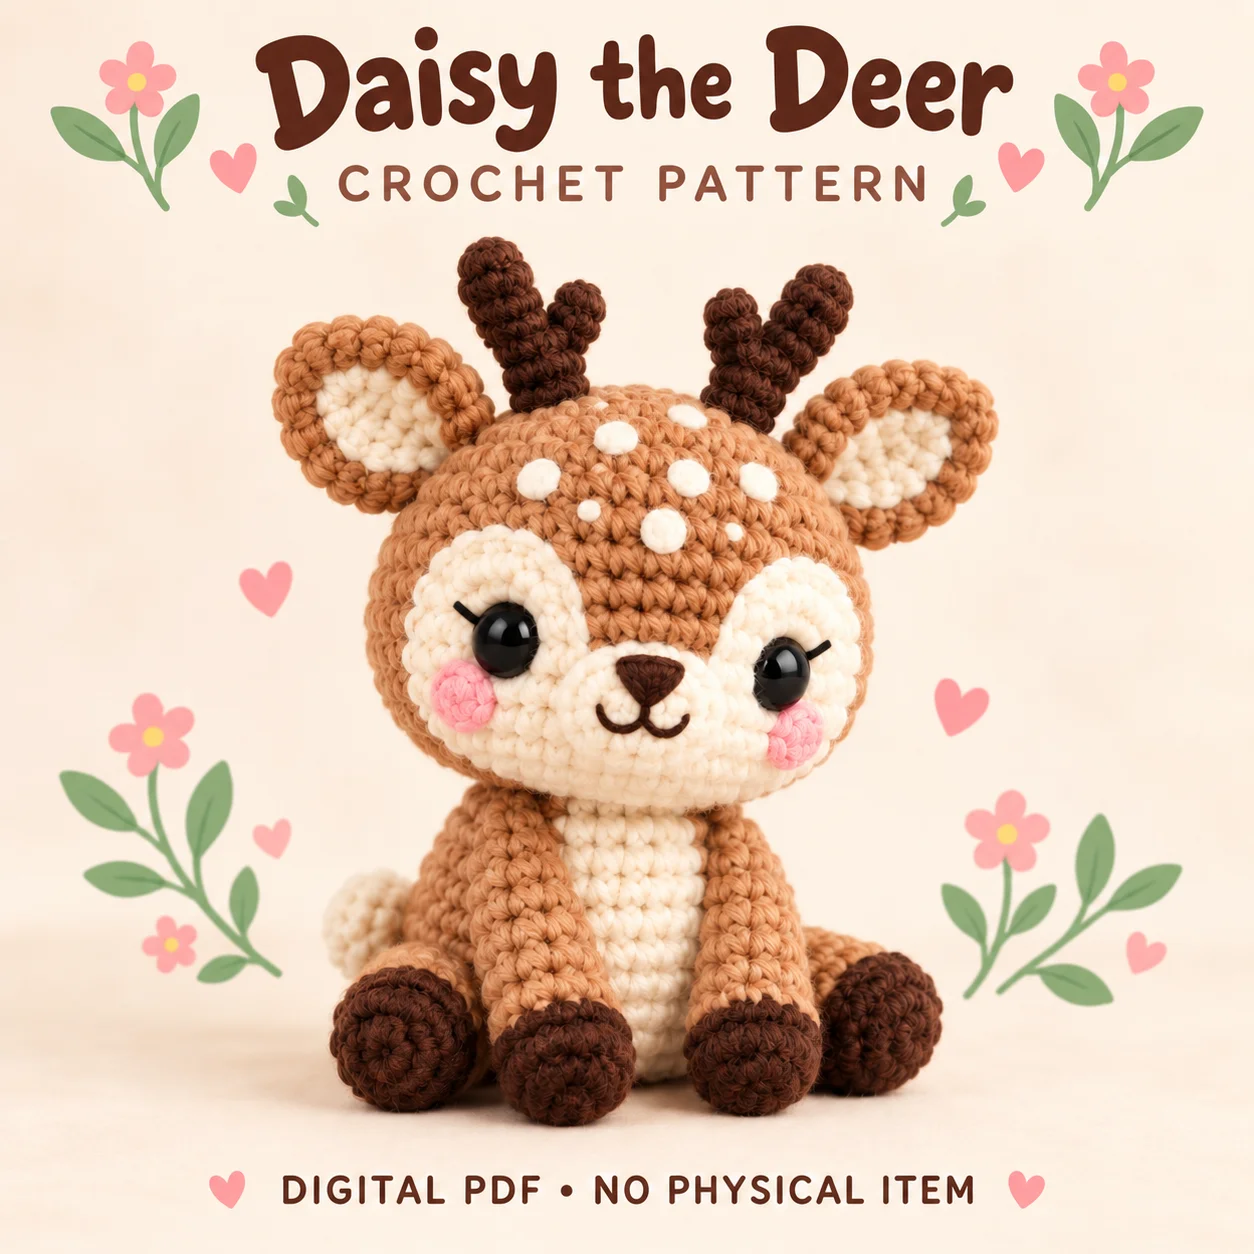
Daisy is a seated tan deer with cream face patches, dark hooves and softly branching antlers. This crochet deer pattern combines round stuffed shapes with flat turned-row details, creating a woodland character with a large head and short body. The supplied PDF is aimed at advanced beginners and intermediate makers who can manage layered eye placement and mirrored attachments. Eight white spots form an irregular forehead-and-crown cluster, while pink cheeks and one outer eyelash per eye soften the face. The antlers are made from separate stalks and branches rather than wire. Plan the physical front and back guides before assembly so the facial layers and neck join stay aligned.
Features of this crochet deer pattern
Each antler has one main stalk and one smaller branch on its inner side, giving two tips per antler. The pair mirrors across the head with branches angled upward toward the center. Broad tan ears have cream inner patches and lightly pinched bases. Two cream eye patches sit beneath the eyes, while a separate shallow cream muzzle carries the embroidered nose and smile. Five small and three medium white spots make eight in total. The tail has a cream pom with a short tan connector.
Flat, lightly padded and firmly stuffed pieces serve different purposes. Preserve those distinctions for a recognizable silhouette.
Skills and stitch methods
Three-dimensional pieces use continuous spiral rounds. The cream face patches, inner ears and belly patch use turned rows, with a turning chain that does not count as a stitch. The PDF distinguishes invisible front-loop decreases in spiral pieces from standard single crochet decreases through both loops in flat rows. Use the round marker only to count rounds. Establish separate physical center-front and center-back guide threads for placement because a spiral beginning can drift around the fabric.
Before beginning this crochet deer pattern, identify which sections are flat and which are stuffed. Read each section heading before continuing, and check the stitch totals at the end of shaping rounds. Counting early is easier than finding a missing increase beneath several layers of plush stitches.
Yarn, tools and filling
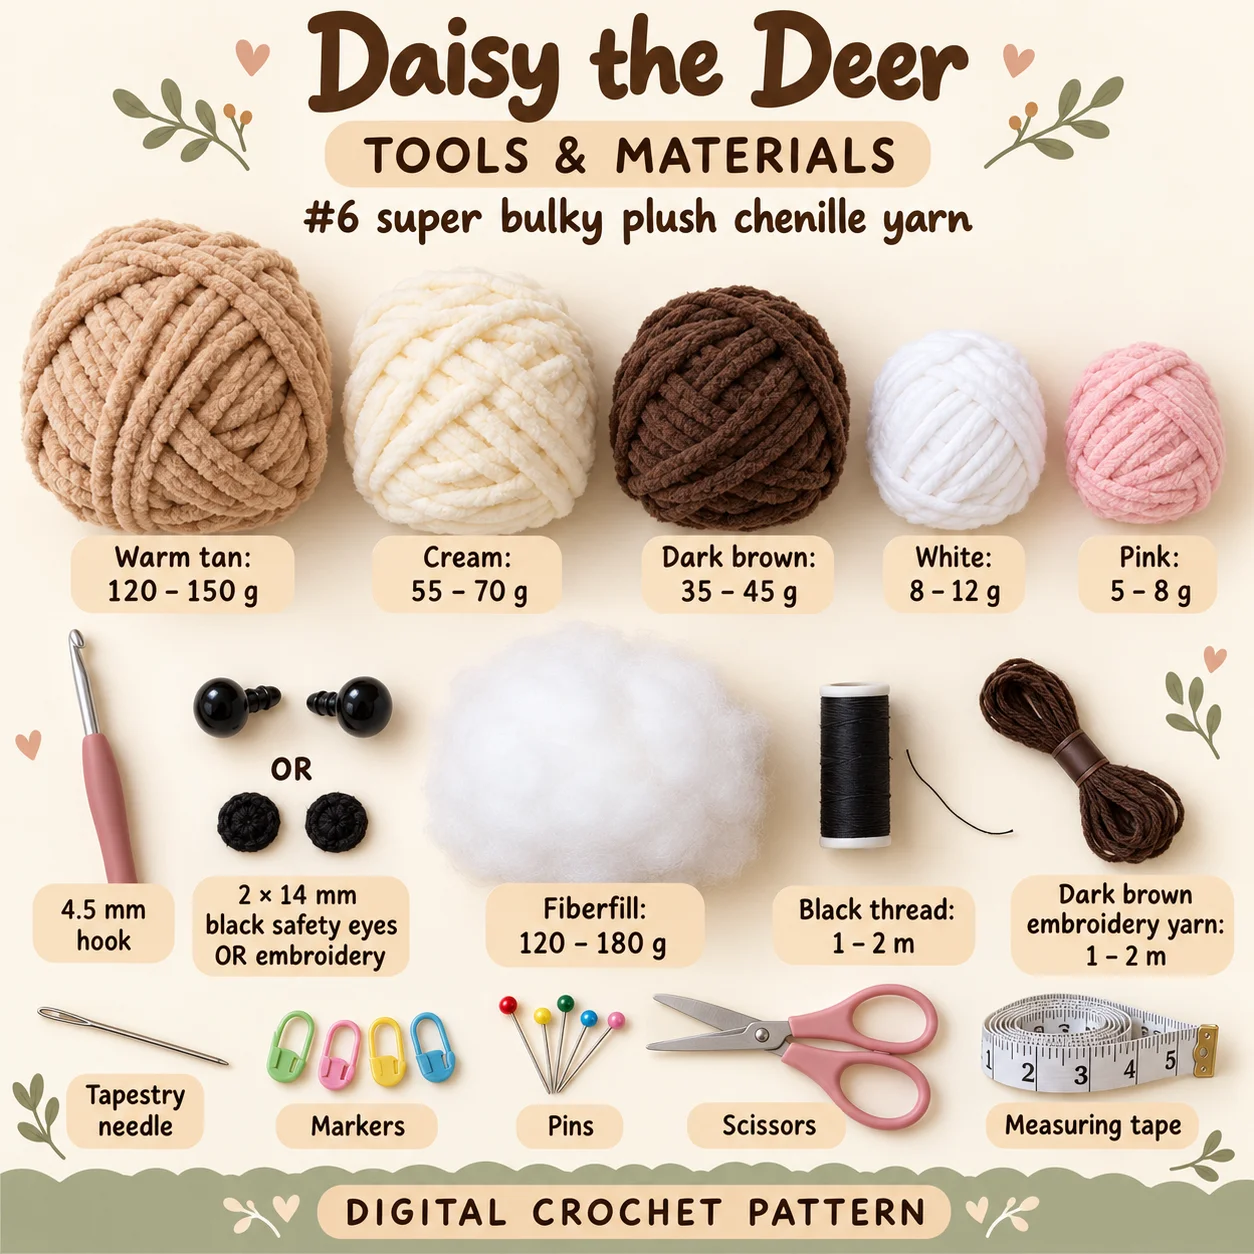
Use #6 super bulky plush chenille yarn. The approximate supplies listed in the PDF are:
Warm tan: 120–150 g; Cream: 55–70 g; Dark brown: 35–45 g; White: 8–12 g; Pink: 5–8 g. 4.5 mm hook; 2 × 14 mm black safety eyes OR embroidery; Fiberfill: 120–180 g; Black thread: 1–2 m; Dark brown embroidery yarn: 1–2 m; Tapestry needle, markers, pins, scissors, measuring tape.
Quantities are approximate and change with substitute yarns. Keep embroidery supplies separate from main yarn colors. Use pins for placement and locking markers for face and back references.
Gauge and finished proportions
The target gauge is approximately eight single crochet stitches and eight rounds over 5 cm, measured on a straight-sided tube section without stretching. The recommended hook is 4.5 mm with category 6 plush chenille. The seated height including antlers is designed to be 22–25 cm; the crown without antlers is approximately 17–19 cm high. These are digital design ranges rather than guaranteed sampled measurements. Consistent yarn thickness across colors helps the flat face pieces remain proportionate.
For this crochet deer pattern, compare the fabric and proportions together. A swatch with visible gaps needs attention before stuffing, while a much denser substitute can change the size of every paired component. Recheck the main shapes before attaching the smaller details.
Construction and assembly order
The head pauses before the lower decreases so the cream patches and hardware eyes can be positioned together. Each eye post passes through its cream patch and the tan head. The patches are secured flat before completing the head shaping. For the embroidered option, sew the patches first and add the eye embroidery later as directed. Leave the head’s 24-stitch base open and prepare the body’s matching 24-stitch opening for the neck join.
Complete the muzzle, cheeks, mirrored single eyelashes and eight white spots. Assemble the ears and antlers before attaching them to the head, keeping the branch directions mirrored. Add the cream belly patch to the stuffed body. Match the physical front and back guides at the 24-to-24 neck seam; the round-start markers do not need to align. Attach the hind legs, then the forelegs, with the dark brown hooves facing forward. Finish the short cream-tipped tail at center back.
The crochet deer pattern is easier to assemble when all paired pieces are laid out together. Keep the PDF open at its placement notes, pin before sewing and pause to compare front, side and back views. Small corrections at this stage prevent larger changes after the seams are secured.
Practical tips for neat details
- Mark physical front and back separately from the beginning-of-round marker.
- Check both cream face patches before fixing the hardware-eye washers.
- Keep the white crown spots irregular rather than arranging mirrored rows.
- Use one short outer eyelash stitch per eye, angled upward and outward.
- Lightly fill the antler tubes without adding wire or rigid inserts.
When working from the crochet deer pattern, leave the recommended sewing tails and keep the attachment order visible beside your work. Avoid tightening a seam so strongly that it dents the stuffed shape. If a piece rotates while sewing, stop, re-pin it and check the reference markers before continuing.
Troubleshooting
Why does this project have twisting antler branches?
Compare the assembled antlers before attaching their stalk bases to the head. Each smaller branch belongs on the inner side of its stalk and should point upward toward the centerline. If a branch collapses, the PDF recommends a small amount of filling at its base and a hidden stabilizing stitch through the branch and stalk. Preserve the soft construction rather than adding wire.
Why do the face patches look uneven?
Use the physical face-center guide and compare both patch angles at the eye line. Hardware posts pass through the patches, so check placement before fitting washers. Smooth the flat outer edges and use shallow, evenly spaced applique stitches. Extra filling behind one patch can distort the face instead of balancing the layers.
Why does the neck seam twist the head?
Match the two 24-stitch openings one-to-one using the physical front and back guides. Aligning drifting round-start markers instead can rotate the face relative to the belly. Pin four reference points before sewing, adjust the neck filling through the last gap, and keep the seam tension even around the join.
Finishing and care
Inspect the small white spot edges, antler branches and ear bases after removing temporary guides. Check the foreleg hoof heights and hind-leg seating support from both front and back. Follow the labels for your actual yarn and filling when cleaning, and handle the antlers gently. The stated dimensions and seated stability remain design targets because the PDF does not claim a physical prototype.
Before calling your crochet deer pattern project complete, inspect the hidden joins as well as the visible face. Secure loose ends using the PDF’s finishing method and confirm that all small details are firmly attached. The design dimensions are estimates; record your own finished measurements if you plan another version with the same yarn.
Download the complete PDF pattern
This PDF contains the complete crochet pattern for Daisy the Deer. Digital download only; no physical item will be shipped.
Browse the crochet pattern collection for more project overviews.
Leave a Reply