
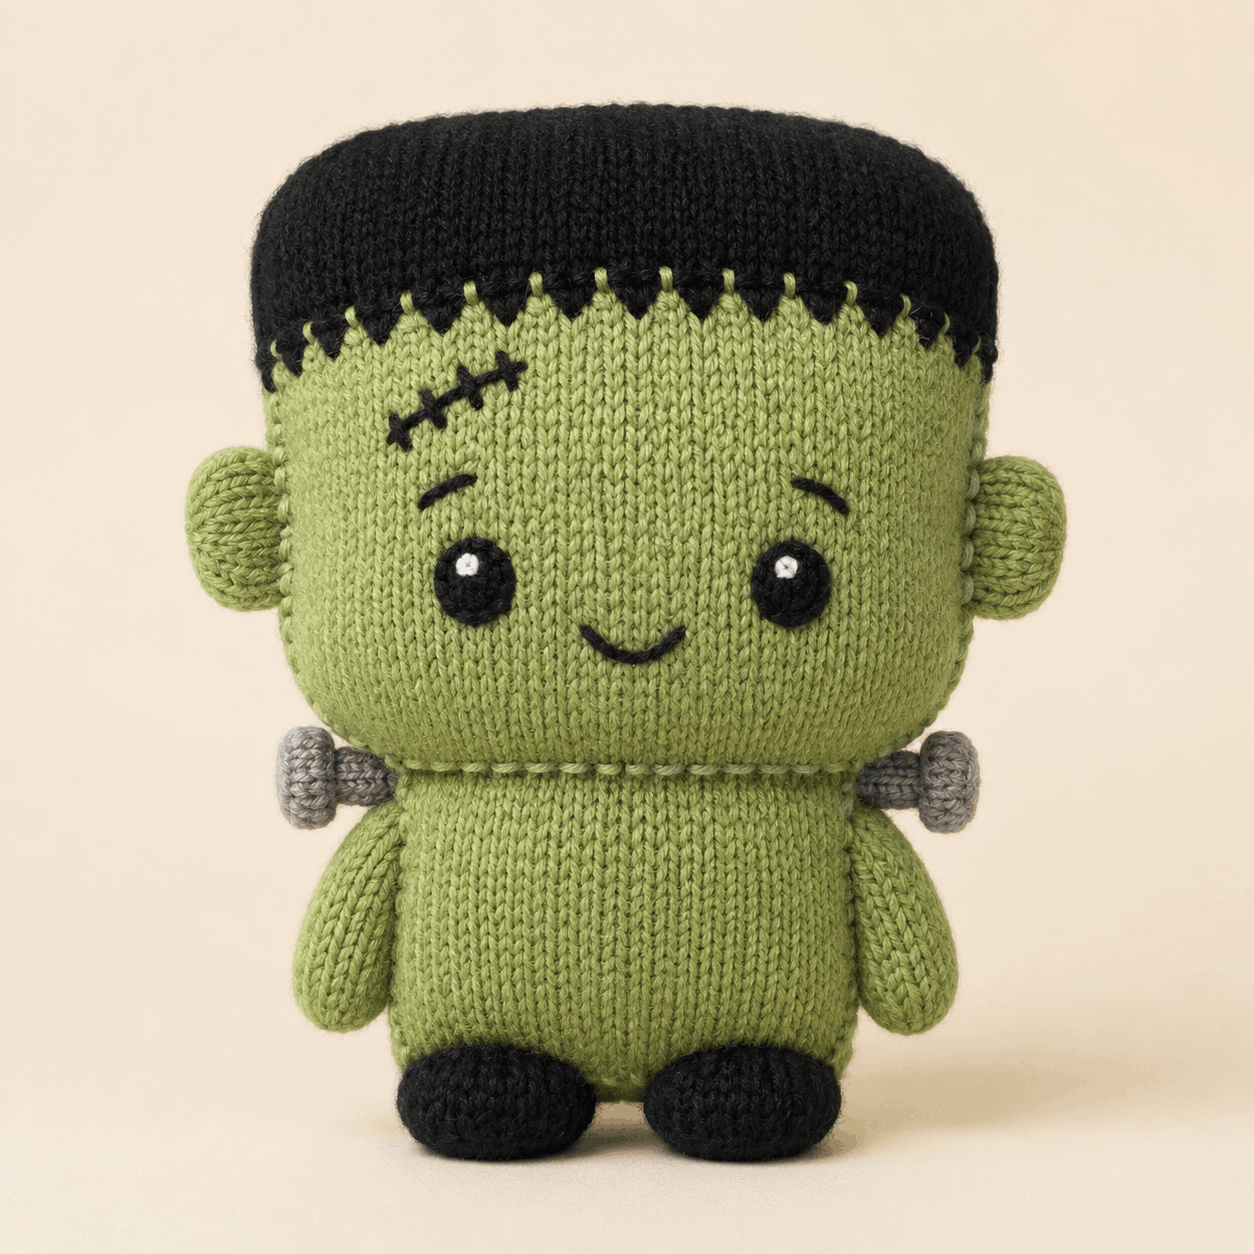
This monster knitting pattern makes Frankie, a soft green plushie with a rounded-square head, pointed black hairline, embroidered face, grey neck bolts, hanging arms and black feet. The project is knitted flat on straight needles, then seamed, stuffed and assembled by hand. It is rated intermediate because the shaping is simple but the stranded colourwork, facial placement, neck join and finishing need careful counting. This overview covers the materials, techniques and construction so you can decide whether the project suits you before using the complete PDF pattern near the bottom of the page.
About This Monster Knitting Pattern
Frankie has a blocky silhouette with a head that is noticeably wider than the short torso. The ears sit vertically at the side folds, while the small oval feet keep the body low and compact. Smooth green stockinette gives a clear surface for the black embroidered eyes, brows, smile and forehead scar.
The black cap is built directly into the head rather than sewn on separately. A short section of flat stranded colourwork creates the pointed hairline before the knitting continues in solid black. Small grey knitted stems and padded caps form the neck bolts. These details give the monster knitting pattern its distinctive look without adding rigid facial parts.
Skill Level, Construction and Finished Size
- Craft: Knitting
- Project type: Stuffed plushie
- Skill level: Intermediate
- Construction: All pieces worked flat on two straight needles
- Terminology: Standard knitting terminology
- Gauge: 21 sts × 29 rows = 10 × 10 cm / 4 × 4 in with 3.5 mm needles
- Overall height: Approximately 21-23 cm / 8.25-9 in
- Head: About 14 cm / 5.5 in high and 14-14.5 cm / 5.5-5.75 in wide
- Body: About 6-6.5 cm / 2.4-2.6 in high and 9-10 cm / 3.5-4 in wide
The pointed hairline, face placement and neck seam deserve the most attention. The monster knitting pattern joins a wider head opening to a narrower body opening, so the neck is eased evenly rather than matched one stitch to one stitch.
Materials and Tools You Will Need
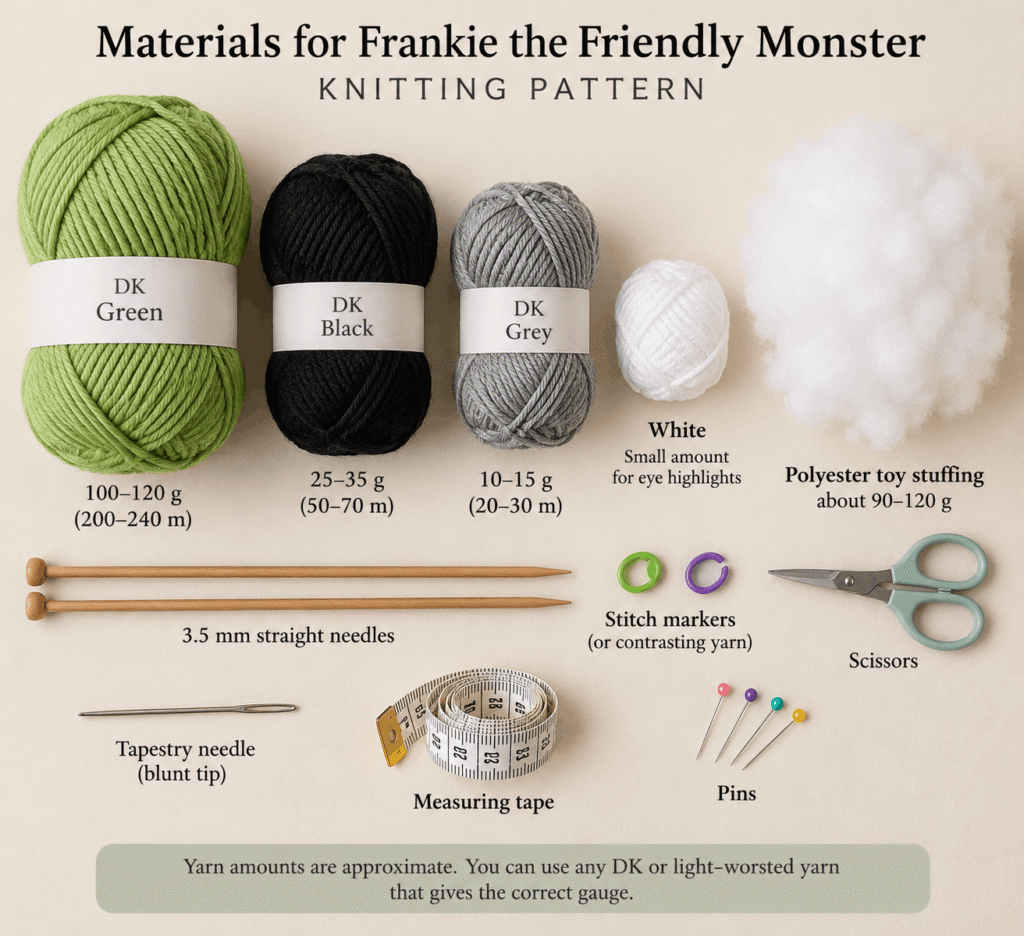
Use DK or light-worsted yarn: approximately 100-120 g / 200-240 m of green, 25-35 g / 50-70 m of black, 10-15 g / 20-30 m of grey, and a small scrap of white for the eye highlights.
You will also need 3.5 mm straight needles, about 90-120 g of polyester toy stuffing, a blunt tapestry needle, removable stitch markers or contrasting yarn markers, pins, scissors and a measuring tape.
Firm fabric matters on a stuffed project. If your stockinette is too loose, stuffing may show and the squared head shape can lose definition, so check the stated gauge before beginning the main pieces.
Stitches and Techniques Used
You should be comfortable casting on, knitting and purling, binding off, working kfb, M1L and M1R increases, and using k2tog and ssk decreases. The head also uses flat stranded colourwork to create the pointed black hairline.
Finishing is an important part of this monster knitting pattern. The PDF uses edge-to-edge whipstitch for the centre-back seams, backstitch for closing the head top and body base, whipstitch for attached pieces, and a flattened two-layer shoulder attachment for the arms. The face is embroidered while the head is still flat, making its counted placement easier to manage.
How Frankie Is Constructed
The head is made first as a flat sleeve, beginning at the green neck edge and finishing with the black crown. Before seaming, centre-front and side-fold positions are marked and the eyes, brows, smile and scar are embroidered. The head is then seamed at centre back, closed across the top and firmly stuffed.
The body is knitted separately from the neck downward, shaped symmetrically, seamed at centre back and closed across the base. After stuffing, the wider head opening is eased onto the body.
Separate pieces include four ear panels for two ears, two arms, four black foot panels for two feet, and the grey bolt stems and caps. Assembly proceeds with the head/body join, ears, neck bolts, arms and feet, followed by final shaping.
Helpful Tips for Making Frankie
Mark the centre front and side folds before embroidery. Those guides help keep the eyes, mouth and ears balanced.
Keep the hairline floats relaxed. Even short floats can pucker if pulled tight, so spread the worked stitches along the right needle before carrying the unused colour.
Pin before sewing. Frankie relies on symmetry, so check both ears, bolts, arms and feet from the front, sides and back before making the seams permanent.
Add stuffing gradually. Move filling into the head corners first, keep the body base broad, and avoid stretching the stockinette. The monster knitting pattern looks cleaner when the fabric remains dense and the seams are not distorted by overstuffing.
Troubleshooting Common Problems
Why Does My Monster Knitting Pattern Head Look Too Round?
The head should look like a rounded square rather than a ball. If it becomes too spherical, move stuffing from the centre toward the upper corners and side edges, then gently flatten the front and back. Avoid adding so much filling that the stitches open.
Why Is the Pointed Hairline Puckering?
Tight carried strands are the usual cause. Ease the colourwork sideways and loosen accessible floats from the wrong side. Keep the unused yarn relaxed while working the hairline so the black-and-green section stays the same width as the plain green fabric.
Why Do the Face or Ears Look Uneven?
Use the centre-front marker, row columns and side-fold positions instead of judging placement by eye alone. If an eye or ear is visibly higher, remove only the necessary stitches, repin the area and compare both sides before resewing.
Why Does the Body Rock Instead of Standing Evenly?
Check the base seam, foot stuffing and foot placement. Redistribute filling so both feet contact a flat surface. The feet should point forward with a small central gap, while their rounded front portions remain free rather than fully stitched to the body.
Care Instructions for the Finished Project
Spot-cleaning is the gentlest option. If more cleaning is needed, follow the care instructions for the yarn you used. Avoid twisting or wringing the plushie, reshape it while damp, and air-dry completely away from direct heat.
Check the seams and embroidered details occasionally, especially around the ears, arms, feet and neck bolts. The face is embroidered, so this design does not use rigid safety eyes.
Leave a Reply