
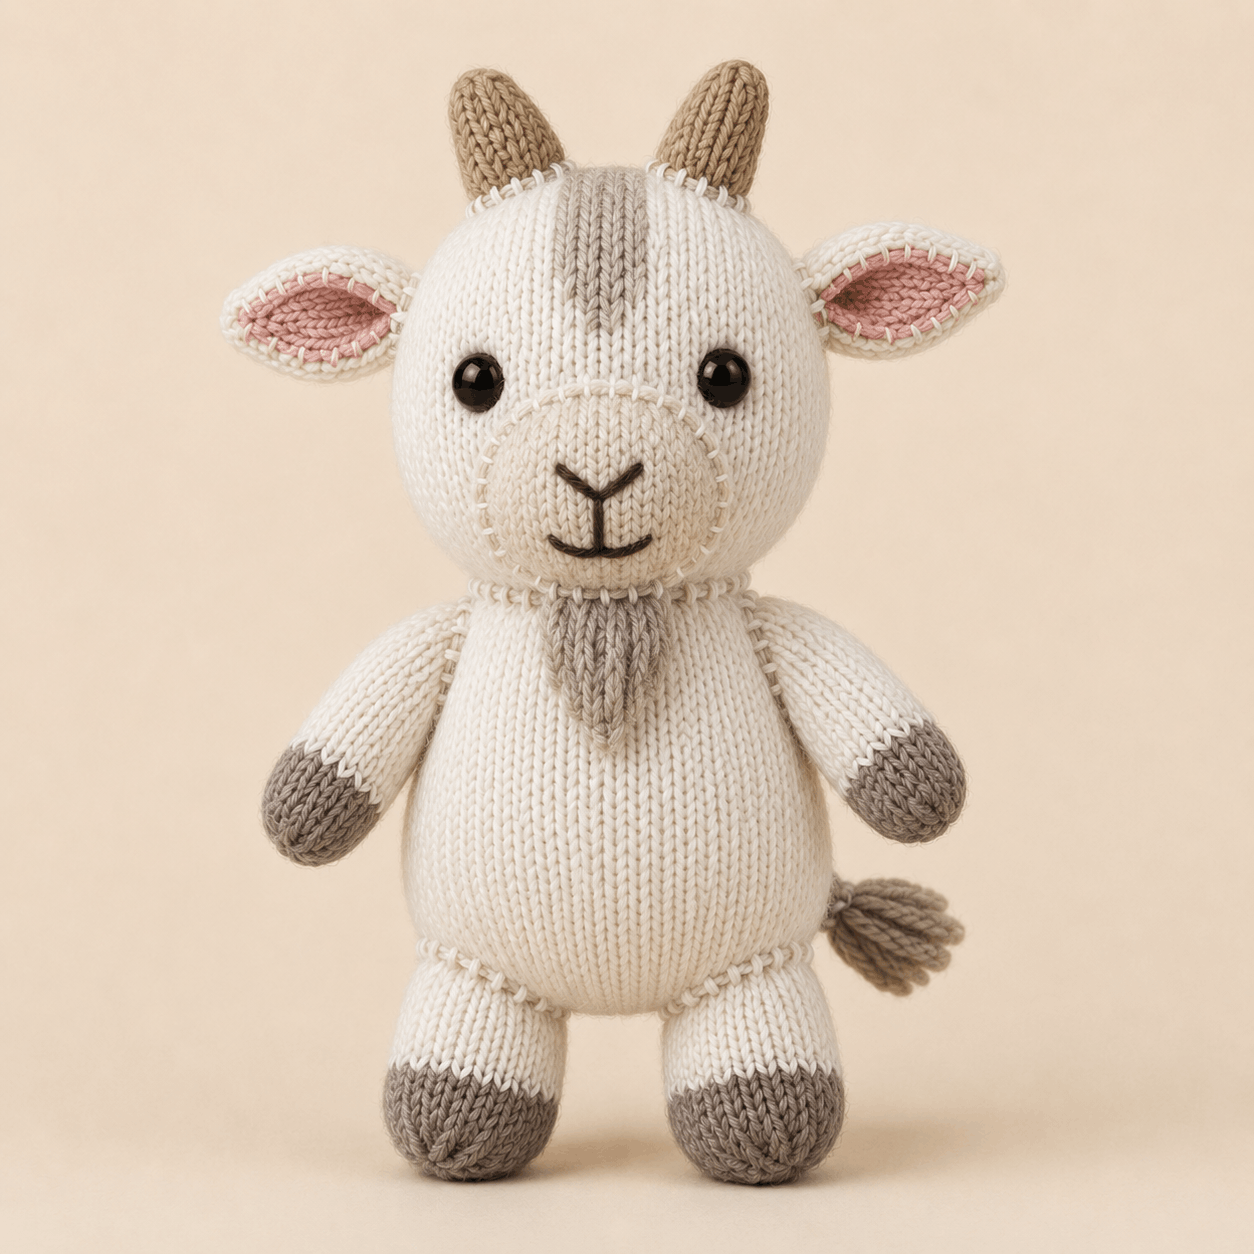
Mabel is a standing knitted goat plush with a rounded cream body, taupe-grey hoof and hand tips, warm beige horns, pink-lined ears, a padded muzzle, a pointed beard and a tasselled tail. This goat knitting pattern is aimed at a confident beginner or intermediate knitter who is comfortable working small circumferences and assembling separate pieces. Most main components are knitted in the round, while the muzzle, ears and beard are worked flat. Below is a practical overview of the materials, techniques, construction, shaping and finishing so you can decide whether the full PDF suits your skills. The complete instructions are available near the bottom of this page.
About This Goat Knitting Pattern
Mabel is a standing stuffed plush rather than a flat decoration. Distinctive details include the rounded head and belly, short limbs, contrasting taupe-grey hands and hooves, blush-pink inner ears, beige horns, a cream muzzle and a narrow taupe-grey stripe down the front of the head. A second stripe runs down the back of the head to the neck, and a small knitted beard hangs at the front neck join.
This goat knitting pattern also includes a short I-cord tail finished with a tassel. The placement and stuffing instructions are designed to help the finished plush stand steadily.
Skill Level, Making Time and Finished Size
The PDF lists the skill level as confident beginner / intermediate. The shaping uses straightforward increases and decreases, but accurate stitch counts, small-circumference knitting, duplicate stitch, flat stockinette and careful assembly all matter.
- Craft: Knitting
- Project type: Standing stuffed goat plush
- Skill level: Confident beginner / intermediate
- Construction: Knitting in the round, flat knitting and I-cord
- Terminology: Standard knitting terminology
- Standing height to horn tips: 29–31 cm / 11.5–12.25 in
- Head width: 10–11 cm / 4–4.25 in
- Body width: 9–10 cm / 3.5–4 in
- Estimated making time: Not specified in the PDF
The goat knitting pattern requires extra care during feature placement, the neck join and limb attachment. Centre-front, centre-back and side-axis markers help keep paired features symmetrical.
Materials and Tools You Will Need
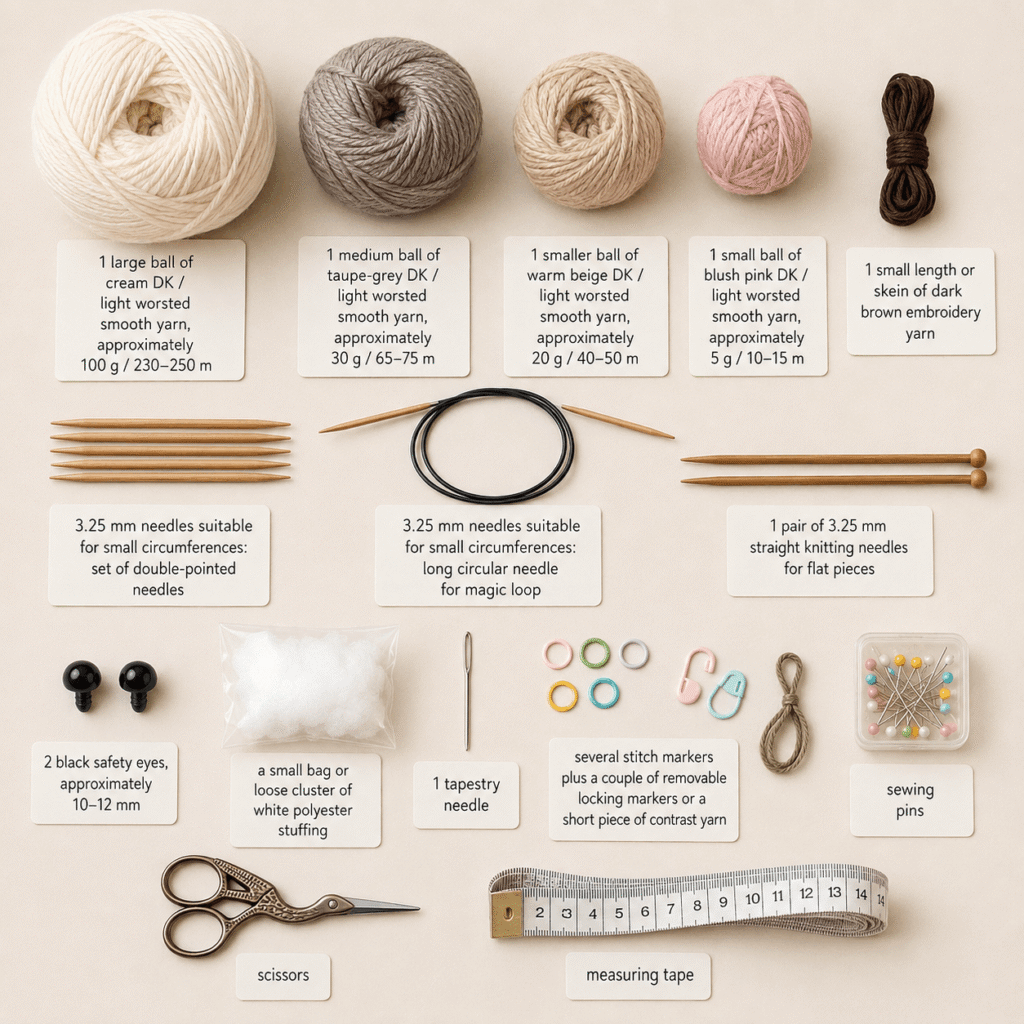
The pattern uses smooth DK or light worsted yarn: about 100 g / 230–250 m of cream, 30 g / 65–75 m of taupe-grey, 20 g / 40–50 m of warm beige and 5 g / 10–15 m of blush pink. A small amount of dark brown embroidery yarn, or a split strand of smooth yarn, is used for the face.
You will need 3.25 mm needles suitable for small circumferences, such as DPNs or a long circular needle for magic loop, plus 3.25 mm needles for flat pieces. Other supplies include polyester stuffing, a tapestry needle, stitch markers, removable markers or contrast yarn, pins, scissors, measuring tape and two black safety eyes approximately 10–12 mm. Embroidered eyes are an alternative.
Smooth yarn is useful because the design includes duplicate-stitch stripes, visible cream whip stitching around the inner ears and several carefully placed seams.
Stitches and Techniques Used
Mabel uses casting on, binding off, knit and purl stitches, kfb increases, k2tog and ssk decreases, stockinette stitch, circular knitting, flat knitting and a short I-cord. Finishing techniques include mattress stitch, whip stitch, duplicate stitch and simple facial embroidery.
The shaping is manageable, but this goat knitting pattern depends on consistent tension and neat finishing. The arms and legs are closed into flattened two-layer edges before attachment, while the horns are only lightly stuffed so they can angle slightly backward.
How Mabel the Little Goat Is Constructed
The body and head are made separately in the round and finish with matching 40-stitch neck openings. The body is worked from the lower centre upward and stuffed through the neck. The head is worked from the crown downward, with the eyes and head stripes added before final stuffing and joining.
The muzzle, outer ears, inner ears and beard are knitted flat. The pink ear panels are sewn to the cream outer ears with the purl side facing outward and a visible cream whip-stitch outline. Horns, arms and legs are worked in the round, while the tail begins as a four-stitch I-cord and ends in a taupe-grey tassel.
During assembly, the goat knitting pattern joins the head and body, then adds the muzzle, facial embroidery, horns, ears, beard, legs, arms and tail. Placement maps give round and stitch references for alignment.
Helpful Tips for Making This Project
Keep the centre-back/beginning-of-round and centre-front markers in place until final finishing. They are used for the stripes, muzzle, beard, tail and mirrored placements.
Pin paired pieces before sewing either one permanently. This is especially useful for the eyes, horns, ears, arms and legs because small shifts can change the expression or standing balance.
Add stuffing gradually. The body is moderately firm with extra support near the neck, while upper limbs stay softer for flatter joins. The horns need only a very small amount.
When making this goat knitting pattern, keep limb colour changes at the beginning of round on the inner or rear side to make the jog less noticeable. Check the plush from the front, back, sides and top before burying the final yarn tails.
Troubleshooting Common Problems
Why Does My Goat Knitting Pattern Project Not Stand Steadily?
Check that both leg tops are level and equally spaced from the centre front. Redistribute hoof stuffing so each foot has a broad contact area. If a thigh seam sits at the wrong angle, repin it along the intended shallow horizontal line before securing it.
Why Are the Eyes or Muzzle Uneven?
Recheck the counted eye positions before securing safety-eye washers. For the muzzle, use the marked centre-front line because the head circumference changes through the shaping area. If the muzzle drifts sideways, remove only the displaced part of the seam, repin and resew.
Why Is Stuffing Showing Between the Stitches?
The gauge is 24 stitches by 34 rounds over 10 cm / 4 in in firm stockinette. If the fabric is loose, use a smaller needle. If gaps appear after stuffing, remove a little filling and redistribute it instead of tightening seams around an overfilled section.
Care Instructions for the Finished Project
The PDF does not specify washing instructions, so follow the care directions for your chosen yarn. Gentle spot-cleaning is a cautious option for a stuffed plush with embroidery and attached features. Avoid twisting or wringing, reshape while damp if needed, and air-dry completely away from direct heat.
The pattern uses 10–12 mm safety eyes and notes that safety eyes and other small or rigid components may not be suitable for children under three years old. Embroidered eyes can be used instead.
Leave a Reply