
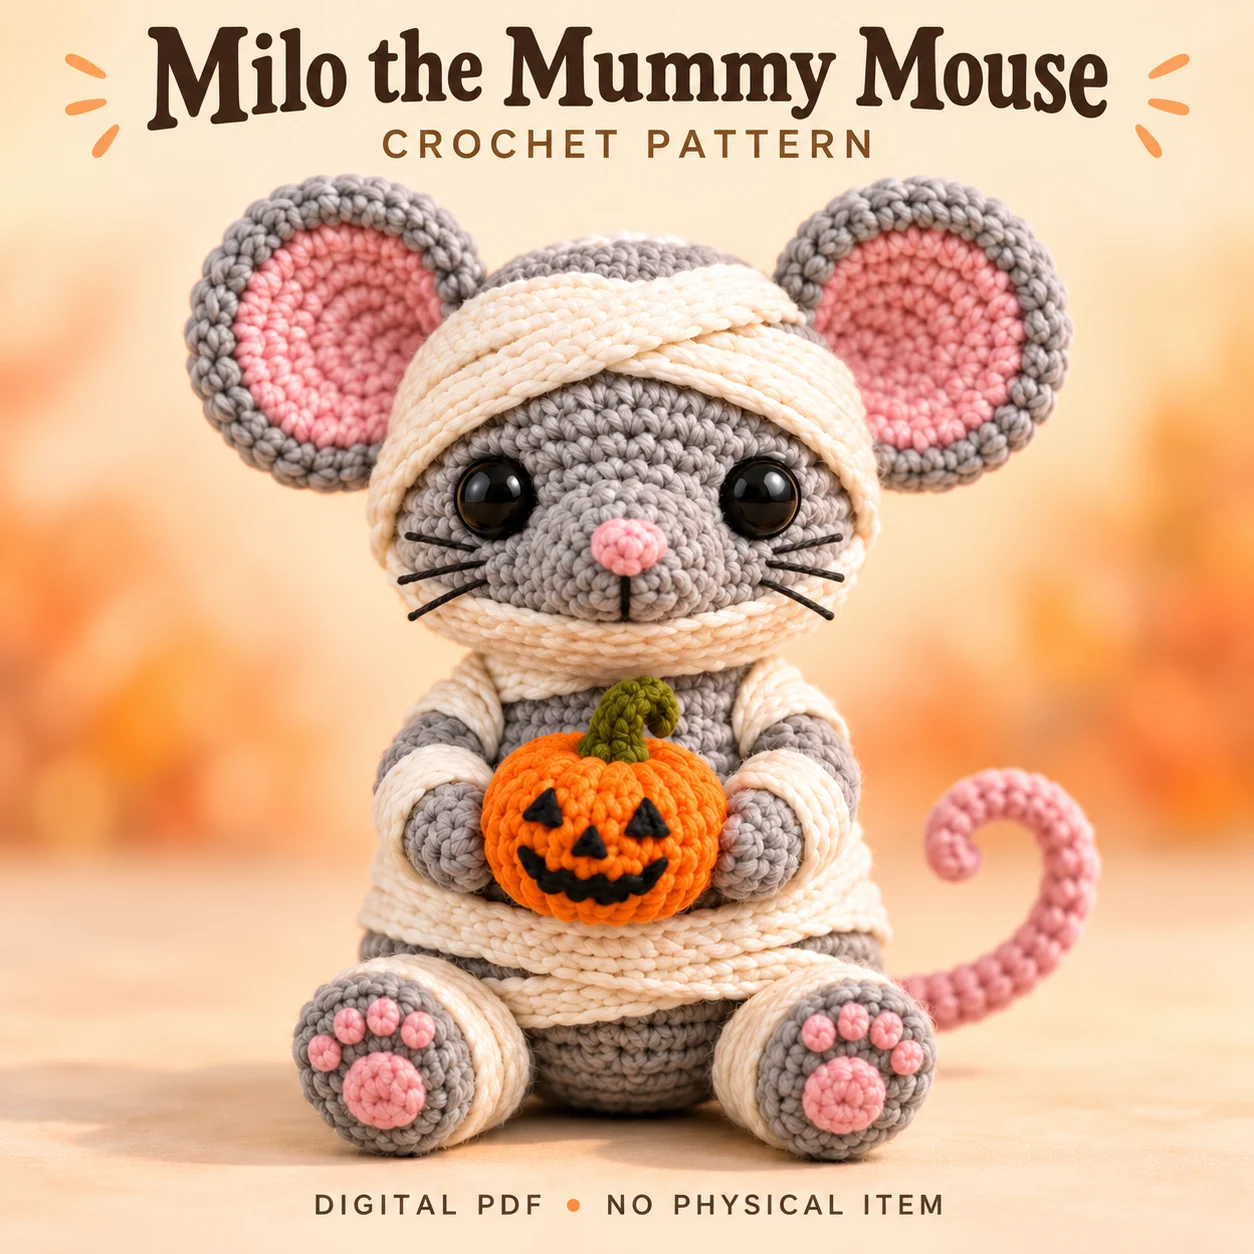
Milo is a gray seated mouse wrapped in cream mummy bandages and holding a small jack-o’-lantern. This crochet mummy mouse pattern combines smooth worsted yarn, stuffed animal pieces and flat costume strips. The supplied corrected PDF is intended for confident beginners or intermediate makers using US terminology. Large pink-lined ears, a crocheted pink nose and a curling pink tail soften the Halloween look. The eight separate bandages are fitted after the mouse is assembled, so the eyes and muzzle remain exposed. Read the head attachment and bandage placement notes before starting, and plan the small face details alongside the larger gray pieces.
Features of this crochet mummy mouse pattern
The round head carries a projecting gray muzzle, short vertical mouth line and three whiskers on each cheek. The broad ears have dusty-pink inner circles and lightly cupped lower edges. Both feet show a pink center pad with four embroidered toe beans. The unfilled pink tail curves toward the viewer’s right. A small orange pumpkin has six shaping grooves, an olive stem and black facial embroidery. Eight ivory strips cross the crown, chin, torso, arms and ankles without concealing the main face.
Preserve the PDF’s distinctions between flat, lightly padded and firmly stuffed pieces.
Skills and stitch methods
Most stuffed pieces use continuous spiral rounds, while the bandages are flat strips worked in turned rows. The PDF assumes ordinary yarn-over single crochet and allows a consistent yarn-under alternative. Magic rings, increases, invisible decreases, embroidery and small applique seams form the main technique set. Keep the finished side of the crochet outward and separate round-start markers from physical face and back guides. The bandage stage depends on fitting the completed shape rather than treating every wrap as an identical horizontal stripe.
Before beginning this crochet mummy mouse pattern, identify which sections are flat and which are stuffed. Read each section heading before continuing, and check the stitch totals at the end of shaping rounds. Counting early is easier than finding a missing increase beneath several completed rounds.
Yarn, tools and filling
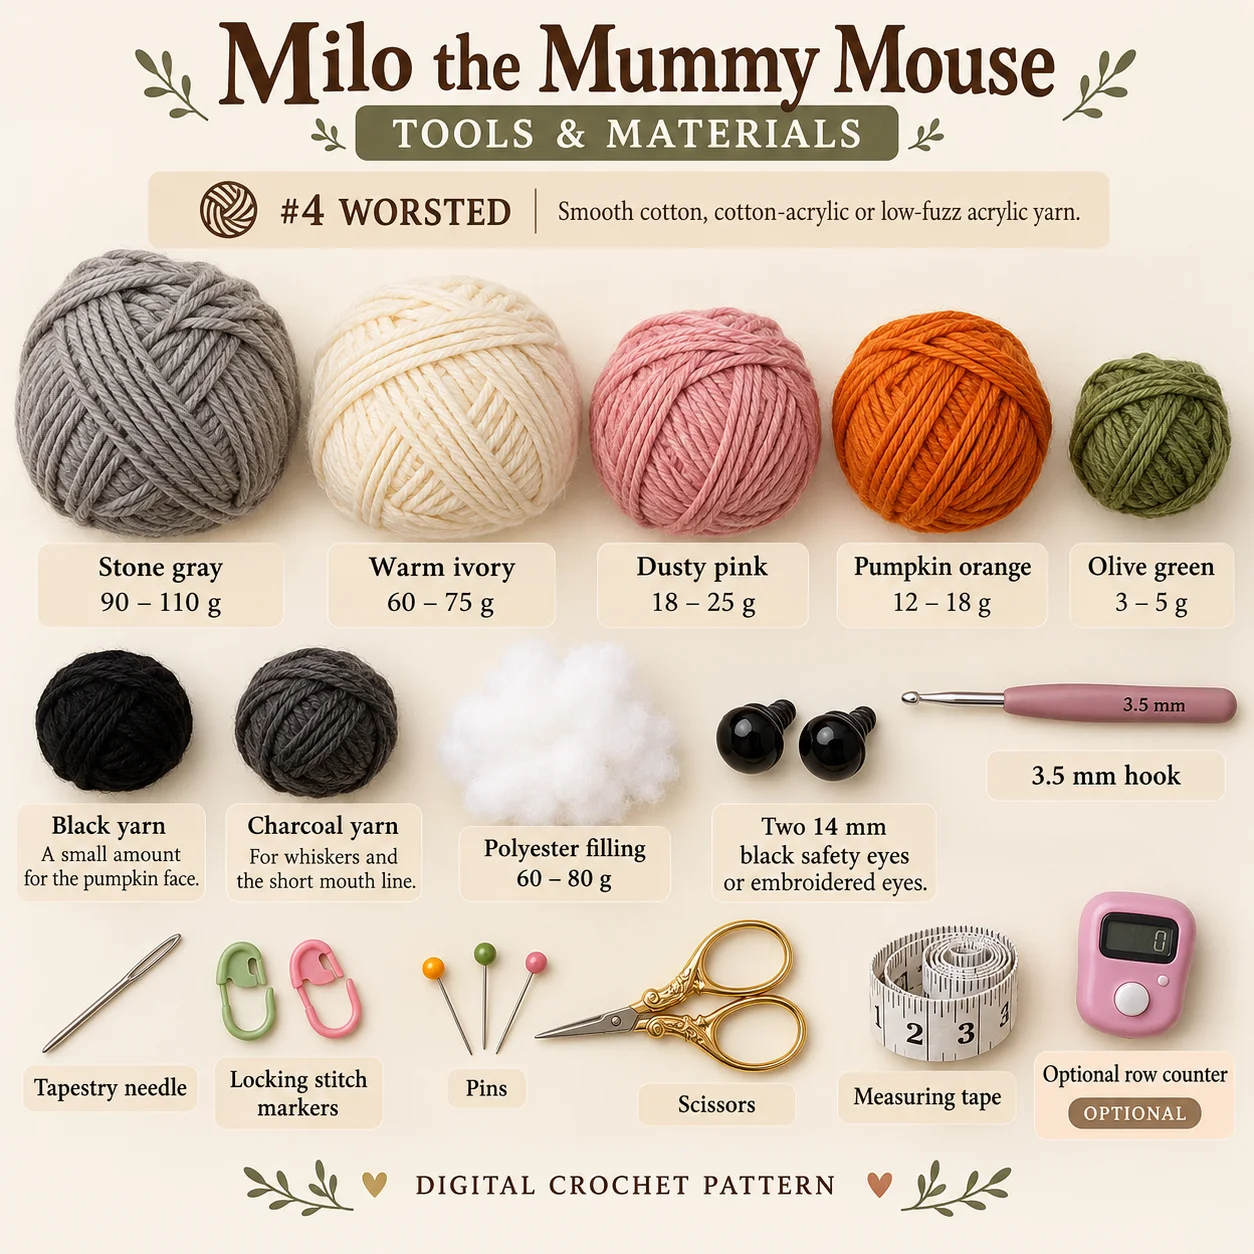
Use #4 worsted smooth cotton, cotton-acrylic or low-fuzz acrylic yarn. The approximate supplies listed in the PDF are:
Stone gray 90–110 g; warm ivory 60–75 g; dusty pink 18–25 g; pumpkin orange 12–18 g; olive green 3–5 g; a small amount of black yarn for the pumpkin face; charcoal yarn for whiskers and the short mouth line. 3.5 mm hook; two 14 mm black safety eyes or embroidered eyes; 60–80 g polyester filling; tapestry needle, locking stitch markers, pins, scissors and measuring tape. Optional row counter.
Quantities vary with substitutes. Use pins and separate placement markers during assembly.
Gauge and finished proportions
The PDF emphasizes firm, dense amigurumi tension without specifying a numerical gauge target. Do not invent a stitch-and-round swatch value for this design. The approximate dimensions range is 18–20 cm, with an ear-to-ear width of 14–16 cm. The recommended 3.5 mm hook is a starting point for the listed smooth worsted yarn. Aim for closed stitch gaps while keeping the flat bandages flexible enough to fit. Yarn thickness, filling and individual tension affect both size and costume coverage.
For this crochet mummy mouse pattern, compare the fabric and proportions together. A swatch with visible gaps needs attention before stuffing, while a much denser substitute can change the size of every paired component. Recheck the main shapes before attaching the smaller details.
Construction and assembly order
Finish and close the head after installing the eyes while access remains open. Add the crocheted nose, short vertical muzzle line and charcoal or brown whiskers. Prepare the layered ears without filling them. The body retains an eighteen-stitch opening that is sewn against the closed head surface; this is not a join between two matching open neck edges. Keep the arm openings softly oval and the upper sections flexible so the hands can angle inward around the pumpkin.
Attach the feet, arms and unfilled pink tail after centering the head on the stuffed torso. Each foot receives a central pink pad and four small toe stitches, oriented forward and slightly upward. Pin all eight cream strips only after the gray seams and sitting balance are checked. Tack the strips at intervals and crossings without compressing the body. Finish the pumpkin’s grooves, stem and black face, then place it between the two hands beneath the muzzle.
The crochet mummy mouse pattern is easier to assemble when all paired pieces are laid out together. Keep the PDF open at its placement notes, pin before sewing and pause to compare front, side and back views. Small corrections at this stage prevent larger changes after the seams are secured.
Practical tips for neat details
- Leave most of the gray muzzle visible between the facial wraps.
- Keep three whiskers on each cheek and the mouth line short and vertical.
- Add four toe beans above each pink foot pad.
- Curve the unfilled tail with small tacks rather than wire.
- Fit and tack the eight separate bandages after structural assembly.
When working from the crochet mummy mouse pattern, leave the recommended sewing tails and keep the attachment order visible beside your work. Avoid tightening a seam so strongly that it dents the stuffed shape. If a piece rotates while sewing, stop, re-pin it and check the reference markers before continuing.
Troubleshooting
Why does this project have sliding bandages?
The PDF uses small securing tacks rather than tightly wound compression to hold the cream strips. Add discreet stitches at crossings and along loose sections, catching stable gray crochet beneath them. Recheck the face opening before securing the head strips. Tightening a wrap can flatten the mouse or pull it across an eye, so reposition the strip and add an anchor instead.
Why do the wraps cover the nose or eyes?
Check the crown and chin strips against the completed face. Lift a misplaced section and repin it along the intended diagonal route, leaving the eyes, nose and most of the projecting muzzle exposed. The lower strip frames the chin rather than covering the facial embroidery. Compare both sides before adding the final anchors.
Why does the pink tail curve the wrong way?
Inspect the low left-back attachment and the small curve-setting tacks. From the front, the loose curve should appear on the viewer’s right. Move a tack that pulls the tube inward or to the opposite side. Keep the tail unfilled and flexible, preserving a soft curve rather than a stiff reinforced loop.
Finishing and care
Inspect the bandage crossings, pink pads, pumpkin attachment and tail tacks during the final check. Confirm that every whisker end and small facial detail is secured. Remove all temporary pins and guides, then bury the remaining tails. Choose cleaning methods from the actual yarn and filling labels.
Before calling your crochet mummy mouse pattern project complete, inspect the hidden joins as well as the visible face. Secure loose ends using the PDF’s finishing method and confirm that all small details are firmly attached. The design dimensions are estimates; record your own finished measurements if you plan another version with the same yarn.
Download the complete PDF pattern
This PDF contains the complete crochet pattern for Milo the Mummy Mouse. Digital download only; no physical item will be shipped.
Related projects: Boo the Ghost Cat, Millie the Mouse.
Browse the crochet pattern collection for more project overviews.
Leave a Reply