
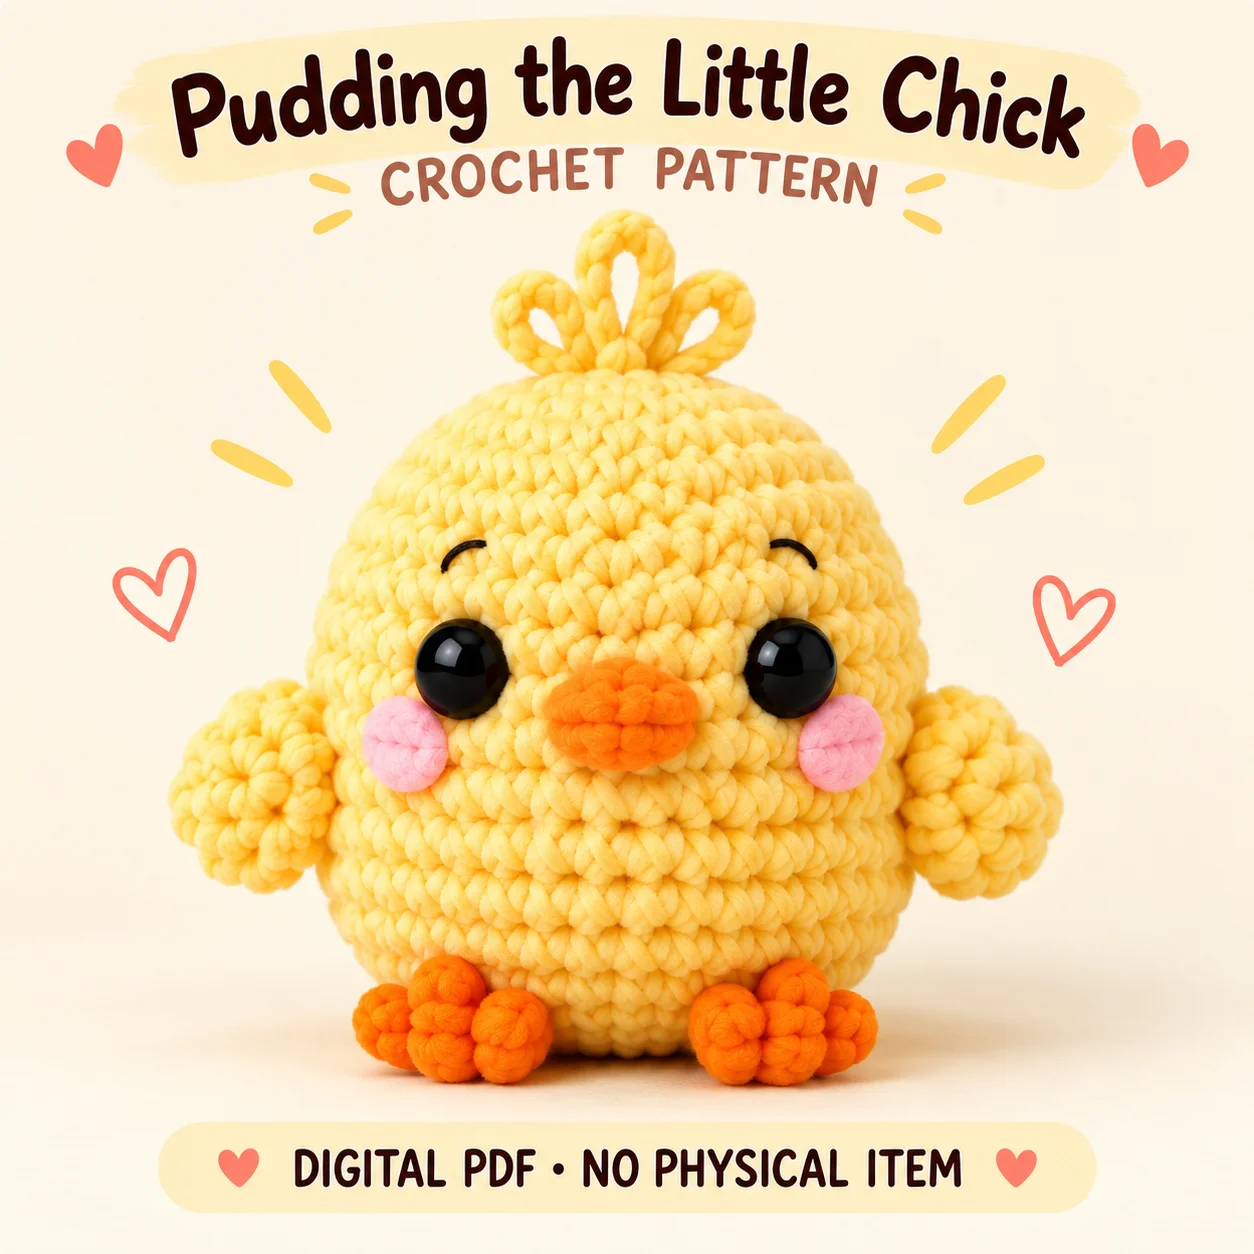
Pudding is a small yellow chick with an egg-shaped body, tiny wings and orange feet that help define a cheerful seated pose. This crochet chick pattern creates the head and body as one continuous shape, so there is no separate neck seam to align. The supplied PDF is suitable for confident beginners and easy intermediate makers who can work spiral rounds, attach small details and add simple embroidery. Three open chain loops form the crest, with a taller loop in the middle. Pink cheeks and short brows complete the face. Plan the eye placement and stuffing stages before closing the crown, because the finishing details are added around an already formed body.
Features of this crochet chick pattern
A horizontal oval orange beak sits between the cheeks, without an extra black mouth. The wings are folded, unfilled yellow pieces angled slightly outward and down. Each orange foot uses two shallow sculpted grooves to suggest three rounded toes. These are not separate toe tubes. The crown crest is surface crochet with three unfilled loops, and the written pattern does not add a separate tail. The simplicity of the silhouette keeps attention on the face.
Flat, lightly padded and firmly stuffed pieces serve different purposes. Preserve those distinctions for a recognizable silhouette.
Skills and stitch methods
The main crochet is worked in continuous spiral rounds. Keep track of the base shaping and the decreases near the crown with a stitch marker. The little cheek pieces have a finishing slip stitch, but the body is not worked in joined rounds. You will also use chains for the crest, light stuffing for the beak and feet, and a tapestry needle to attach the wings and sculpt the toe grooves.
Before beginning this crochet chick pattern, identify which sections are flat and which are stuffed. Read each section heading before continuing, and check the stitch totals at the end of shaping rounds. Counting early is easier than finding a missing increase beneath several layers of plush stitches.
Yarn, tools and filling
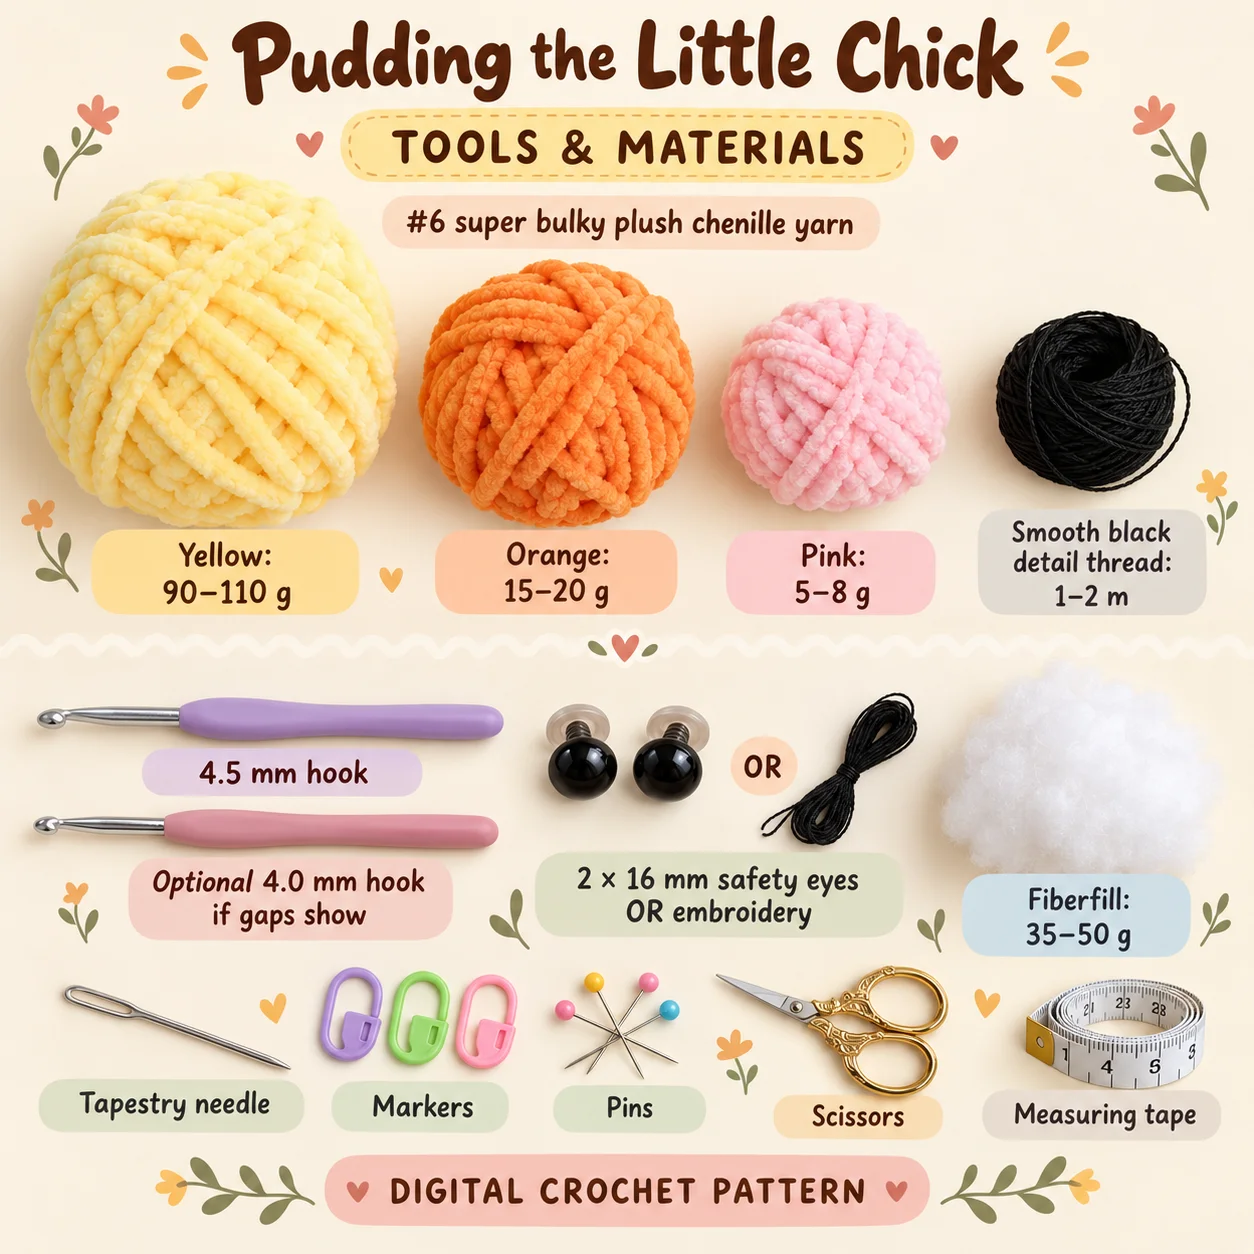
Use #6 super bulky plush chenille yarn. The approximate supplies listed in the PDF are:
Yellow: 90–110 g; Orange: 15–20 g; Pink: 5–8 g; Smooth black detail thread: 1–2 m. 4.5 mm hook; Optional 4.0 mm hook if gaps show; 2 × 16 mm safety eyes OR embroidery; Fiberfill: 35–50 g; Tapestry needle, markers, pins, scissors, measuring tape.
Quantities are approximate and change with substitute yarns. Keep embroidery supplies separate from plush colors. Use pins for placement and locking markers for face and back references.
Gauge and finished proportions
The supplied gauge is 10 single crochet stitches and 10 rounds measuring 6.5 cm wide by 6.0 cm high. It is not a 10 cm square gauge. The full height target, including the crest, is 13.5–15.5 cm; the body alone is approximately 11–12.5 cm high. Treat these as digital design estimates. Use the recommended 4.5 mm hook initially, with the PDF’s 4.0 mm alternative if the fabric has visible gaps.
For this crochet chick pattern, compare the fabric and proportions together. A swatch with visible gaps needs attention before stuffing, while a much denser substitute can change the size of every paired component. Recheck the main shapes before attaching the smaller details.
Construction and assembly order
Work upward from the underside into the single egg-shaped body, preserving the flatter base section. Hardware eyes are installed at the designated pause before the upper rounds reduce access. For the embroidered version, follow the PDF’s later face-finishing stage. Add filling in small portions, keeping the base balanced, the face full and the final crown area softer. The body closes at the top rather than joining to a separately made head.
Once the body is complete, position the beak and cheek circles, then add the curved brows. Make the crest by surface crocheting one taller center loop and two shorter side loops at the crown. The wings remain unfilled and are folded closed before sewing. Lightly fill and shape the feet, create their shallow toe grooves, and pin them under the front base. Check the seated pose before committing to both foot seams.
The crochet chick pattern is easier to assemble when all paired pieces are laid out together. Keep the PDF open at its placement notes, pin before sewing and pause to compare front, side and back views. Small corrections at this stage prevent larger changes after the seams are secured.
Practical tips for neat details
- Keep the body’s underside flat while adding filling above it.
- Pin the beak horizontally instead of letting its seam turn it into a round ball.
- Leave the wings unfilled so they sit close to the body.
- Sculpt two grooves per foot to create the suggested three-toe shape.
- Keep all three crest loops open, with the center visibly taller.
When working from the crochet chick pattern, leave the recommended sewing tails and keep the attachment order visible beside your work. Avoid tightening a seam so strongly that it dents the stuffed shape. If a piece rotates while sewing, stop, re-pin it and check the reference markers before continuing.
Troubleshooting
Why does this project lean forward?
Check the distribution of filling at the base and compare the two foot positions on a level surface. Rounded, overfilled feet can roll under the body and change its balance. Keep the foot shapes low and their attachment seams matched. Correct the fill or attachment while access remains rather than adding an unrelated weight or support.
Why does the beak look like a ball?
The beak is a lightly filled horizontal oval. Remove excess filling before sewing it down and spread the remaining fibers evenly. Pin the long axis across the face and use an even perimeter seam. The orange outline should remain readable without an added black smile beneath it.
Why does the crest fall to one side?
Confirm that the loops originate at the crown and that the middle loop is taller than the side loops. The PDF allows a tiny yellow tack to steady a floppy loop. Use that small attachment instead of filling the loops or inserting wire, which would change their intended construction.
Finishing and care
Finish by comparing the wing angles, smoothing the cheeks and checking the foot grooves for excessive tension. Gently reshape the body with your hands instead of pulling on the crest. Follow the chosen yarn and filling labels when cleaning. The compact size does not establish a washing method or intended age group, so make those decisions from the actual materials and intended use.
Before calling your crochet chick pattern project complete, inspect the hidden joins as well as the visible face. Secure loose ends using the PDF’s finishing method and confirm that all small details are firmly attached. The design dimensions are estimates; record your own finished measurements if you plan another version with the same yarn.
Download the complete PDF pattern
This PDF contains the complete crochet pattern for Pudding the Little Chick. Digital download only; no physical item will be shipped.
Related projects: Benny the Bee.
Browse the crochet pattern collection for more project overviews.
Leave a Reply