
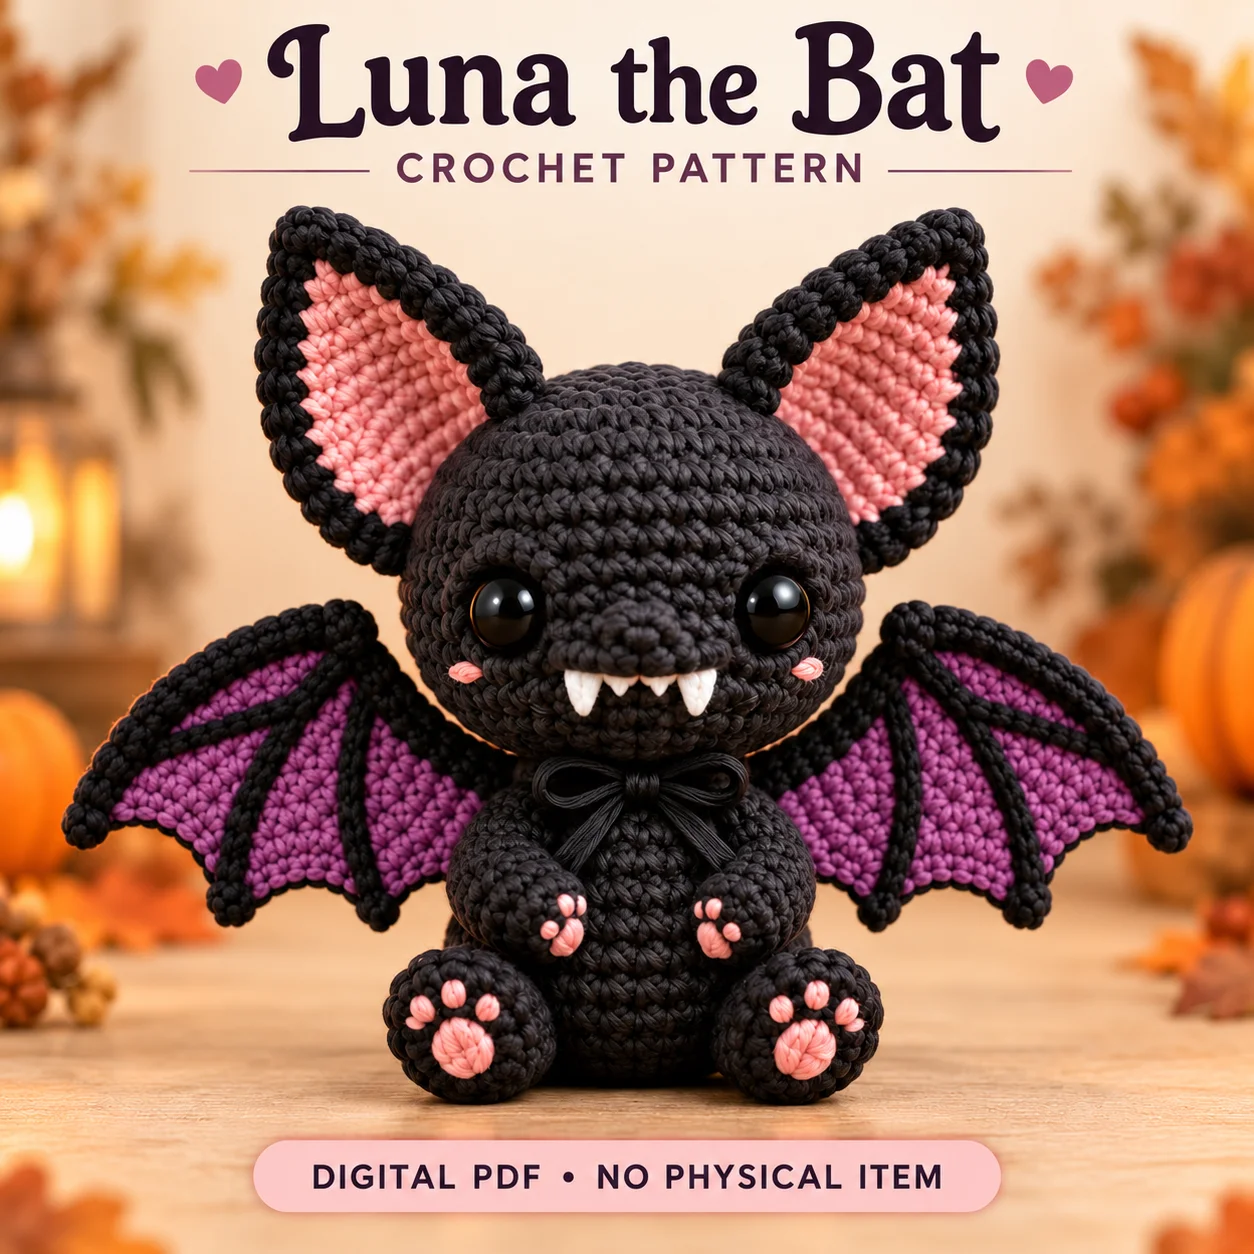
Luna is a black seated bat with tall pink-lined ears, plum wings and four small white fangs. This crochet bat pattern combines stuffed spiral shapes with flat mirrored panels, using smooth worsted yarn for clear stitch definition. The supplied corrected PDF is intended for intermediate makers using US terminology. Three black surface ribs decorate each purple wing, and pink pads appear on the undersides of all four paws. The face includes a soft black muzzle and subtle smile, with a bow beneath the chin. Review the wing orientation and closed-head attachment before starting so the assembly follows the current written version.
Features of this crochet bat pattern
The oversized round black head contrasts with a compact pear-shaped torso. Tall unfilled ears have pink inner triangles and outward-angled tips. Four white fangs sit beneath the muzzle: two larger outer cones and two smaller inner cones. Each purple wing has black perimeter edging, three lower scallops and three gently fanned black surface ribs. A small black tail projects from the lower back. The bow can be crocheted using the included instructions or replaced with the listed optional satin ribbon.
Preserve the PDF’s distinctions between flat, lightly padded and firmly stuffed pieces.
Skills and stitch methods
Head, body, muzzle, feet, arms, tail and fangs use continuous spiral rounds unless directed otherwise. Ears, inner ears, wings and bow use turned rows. The corrected wing instructions distinguish the straight root from the shaped outer edge and reverse decrease positions for the mirrored panel. Surface slip stitches form the black ribs. Standard yarn-over single crochet is assumed, with a consistent yarn-under alternative permitted. Keep round tracking independent from physical face and back placement references during assembly.
Before beginning this crochet bat pattern, identify which sections are flat and which are stuffed. Read each section heading before continuing, and check the stitch totals at the end of shaping rounds. Counting early is easier than finding a missing increase beneath several completed rounds.
Yarn, tools and filling
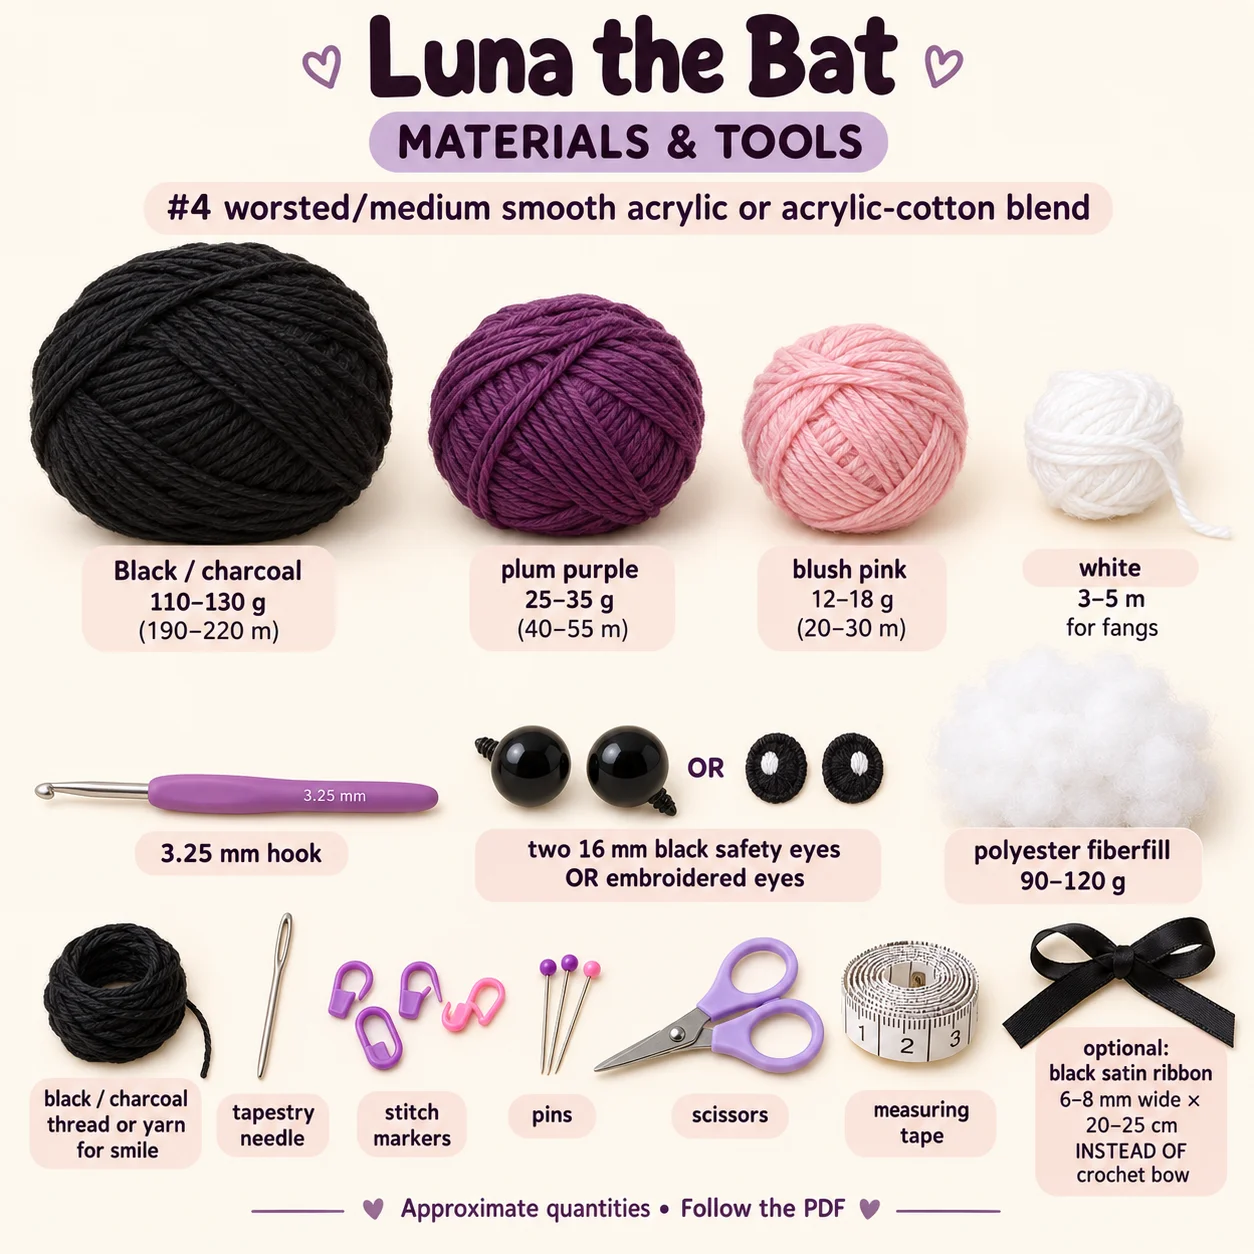
Use #4 worsted/medium smooth acrylic or acrylic-cotton blend. The approximate supplies listed in the PDF are:
Black / charcoal 110–130 g (190–220 m); plum purple 25–35 g (40–55 m); blush pink 12–18 g (20–30 m); white 3–5 m for fangs. 3.25 mm hook; two 16 mm black safety eyes OR embroidered eyes; polyester fiberfill 90–120 g; black / charcoal thread or yarn for smile; tapestry needle, stitch markers, pins, scissors, measuring tape; optional black satin ribbon 6–8 mm wide × 20–25 cm INSTEAD OF crochet bow.
Quantities vary with substitutes. Use pins and separate placement markers during assembly.
Gauge and finished proportions
The reference gauge is approximately eighteen single crochet stitches and twenty rounds over 10 cm using a 3.25 mm hook and category 4 smooth acrylic or acrylic-cotton yarn. The seated height including ears is designed to be 22–24 cm, with a wingtip span of approximately 23–26 cm. These are calculated digital ranges, not guaranteed prototype measurements. Dense fabric and consistent tension matter more than stretching stitches to match the guide. Yarn substitutions can change wing drape as well as overall scale.
For this crochet bat pattern, compare the fabric and proportions together. A swatch with visible gaps needs attention before stuffing, while a much denser substitute can change the size of every paired component. Recheck the main shapes before attaching the smaller details.
Construction and assembly order
The head is fully closed after eye installation and filling, while the torso retains a twenty-four-stitch top opening. This is a body-opening-to-head-surface join rather than two matching open neck edges. Complete the black muzzle, subtle smile, cheek embroidery, four fangs and layered ears before attaching the head to the filled body. Prepare pink pads on the limbs before sewing: each paw has one oval center pad and three small toe pads.
Center the open torso beneath the closed head and pin the physical front, back and sides before sewing around its full opening. Attach the hind feet forward and slightly upward, with the small arms rotated inward and downward. Finish both mirrored wings with black edging and three surface ribs before attaching their complete straight roots along the side-back torso. Compare wingtip heights, then add the small centered tail and chosen bow. Keep wing surfaces free rather than stitching them flat against the body.
The crochet bat pattern is easier to assemble when all paired pieces are laid out together. Keep the PDF open at its placement notes, pin before sewing and pause to compare front, side and back views. Small corrections at this stage prevent larger changes after the seams are secured.
Practical tips for neat details
- Use two larger outer fangs and two smaller inner fangs.
- Identify each wing’s straight root before beginning its mirrored shaping.
- Keep the three black surface ribs relaxed to avoid membrane puckering.
- Embroider the four paws before their attachment openings are sewn down.
- Finalize body filling before joining its open neck to the closed head.
When working from the crochet bat pattern, leave the recommended sewing tails and keep the attachment order visible beside your work. Avoid tightening a seam so strongly that it dents the stuffed shape. If a piece rotates while sewing, stop, re-pin it and check the reference markers before continuing.
Troubleshooting
Why does this project have curling wings?
Check the tension of the black perimeter and three surface ribs. Tight slip stitches can shorten the purple panel and make it curl. Relax the affected lines and lay both unstuffed wings flat before attachment. Block only using a method suitable for the chosen fiber, following the PDF’s caution about overheating acrylic. The panels should remain soft and flat without wire or reinforcement.
Why does one wing point lower?
Compare the complete root attachment routes on both sides of the torso. Repin the lower wing so its upper edge sits near the same neck level as the other wing. Distribute the straight edge evenly along the written attachment area and add a small upper-root anchor if needed. Do not sew across the whole membrane to force its angle.
Why does the head lean after attachment?
Check whether the twenty-four-stitch body opening was pinned evenly at physical front, back and both sides. The closed head receives shallow surface bites, so uneven seam placement can tip it. Compare the join and add discreet support stitches on the low side if needed, as described in troubleshooting. Keep the neck snug without cinching the torso opening narrower.
Finishing and care
Check the four fang bases, wing roots, paw-pad ends and bow center before securing the final tails. Make sure the small rear tail remains centered and both feet touch evenly. Remove all temporary pins and placement markers. The embroidered-eye alternative avoids detachable eye components; follow the local requirements that apply to the recipient. Choose cleaning methods from the actual acrylic or blend and filling labels. The current digital PDF does not claim physical test-crochet verification.
Before calling your crochet bat pattern project complete, inspect the hidden joins as well as the visible face. Secure loose ends using the PDF’s finishing method and confirm that all small details are firmly attached. The design dimensions are estimates; record your own finished measurements if you plan another version with the same yarn.
Download the complete PDF pattern
This PDF contains the complete crochet pattern for Luna the Bat. Digital download only; no physical item will be shipped.
Browse the crochet pattern collection for more project overviews.
Leave a Reply