
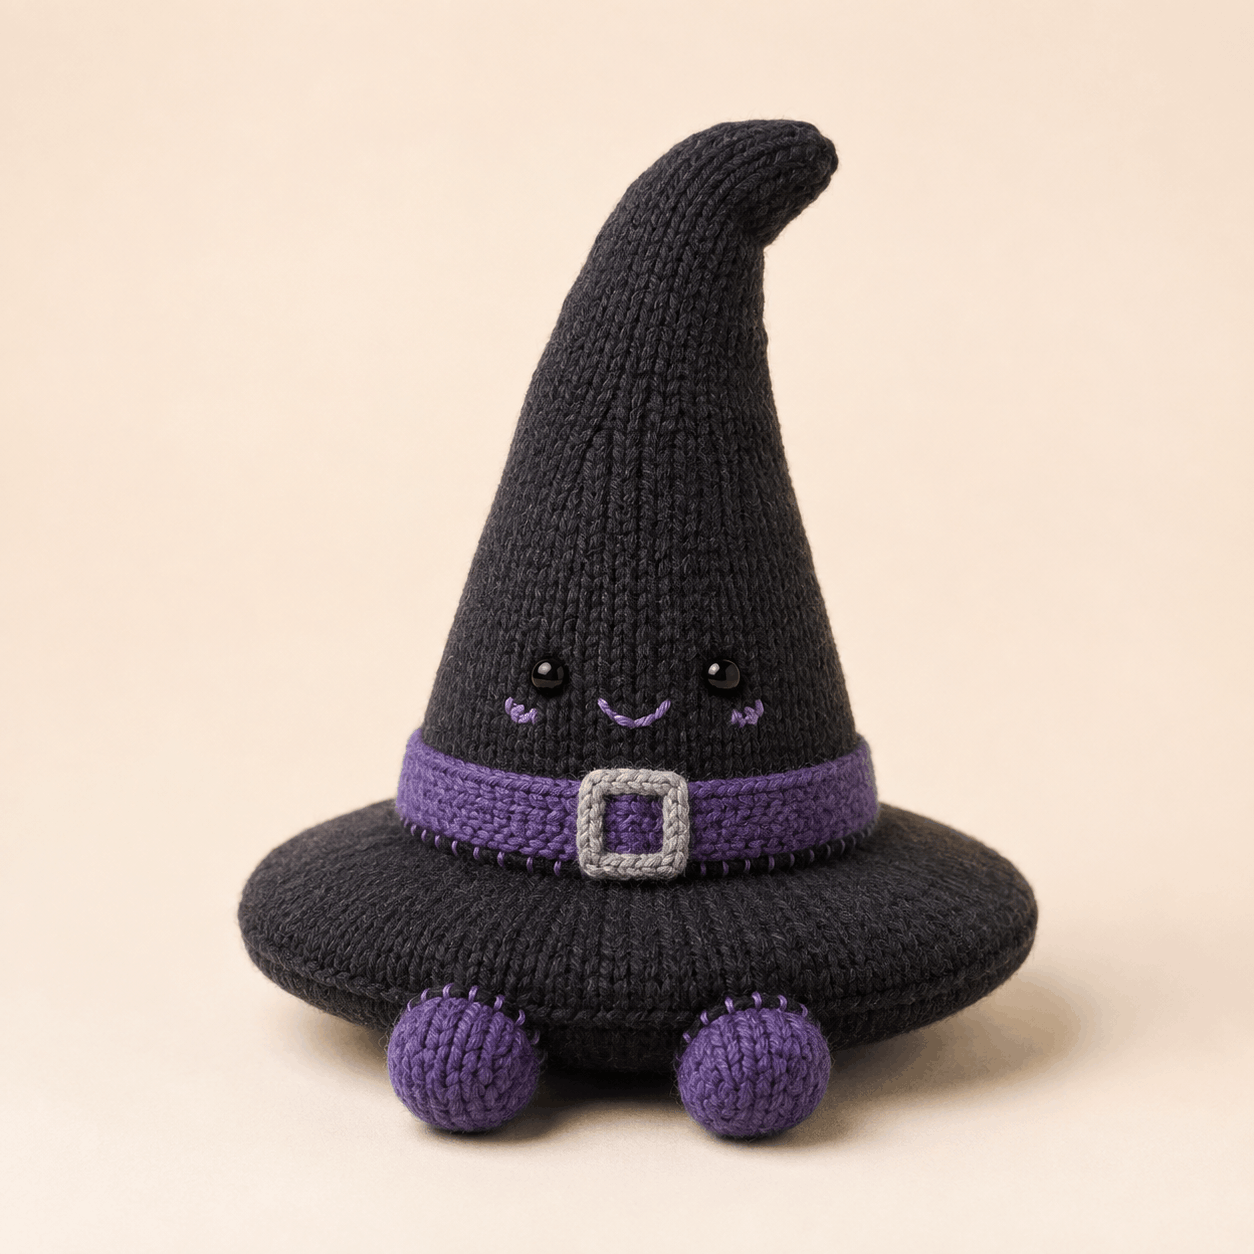
Mabel is a softly stuffed Halloween character made with a witch hat knitting pattern that combines a broad black brim, tapered cone, curved tip, purple band, grey buckle and two small purple feet. The project is knitted mainly in the round, with the hatband worked flat in garter stitch and the separate pieces sewn together during assembly. It is rated Confident Beginner / Intermediate and suits knitters comfortable with circular stockinette, shaping and careful finishing. This overview covers the materials, techniques, construction and project-specific trouble spots, while the complete instructions are available in the PDF near the bottom.
About This Witch Hat Knitting Pattern
The witch hat knitting pattern creates a character-style plush rather than a wearable hat. Mabel has a wide, lightly stuffed brim, a black tapered cone with a soft bent tip, a purple garter-stitch band and a small light-grey i-cord buckle centred at the front.
The face is compact, with two black eyes, a shallow purple embroidered smile and matching cheek accents. Two round purple feet sit beneath the front edge of the brim, giving the finished piece a seated-character look while keeping the classic witch-hat silhouette.
Skill Level, Construction and Finished Size
Craft: Knitting
Project type: Stuffed character / seasonal decoration
Skill level: Confident Beginner / Intermediate
Construction: Brim and cone in the round; hatband flat; buckle in i-cord; separate stuffed feet
Terminology: Standard knitting terminology
Gauge: 22 sts × 30 rnds = 10 × 10 cm / 4 × 4 in in stockinette worked in the round
The finished witch hat knitting pattern project is approximately 23.5–24.5 cm / 9.25–9.65 in high. The brim measures about 18–19 cm / 7–7.5 in across and 2.5–3 cm / 1–1.2 in thick after light stuffing. The cone is approximately 16–17 cm / 6.3–6.7 in high after curving, with a 10–10.5 cm / 4–4.1 in base diameter. Each foot is about 4 cm / 1.6 in in diameter.
The parts requiring the most care are keeping the brim flat, preserving the cone’s centre-back orientation, fitting the band before binding off and shaping the tip without overstuffing it.
Materials and Tools You Will Need
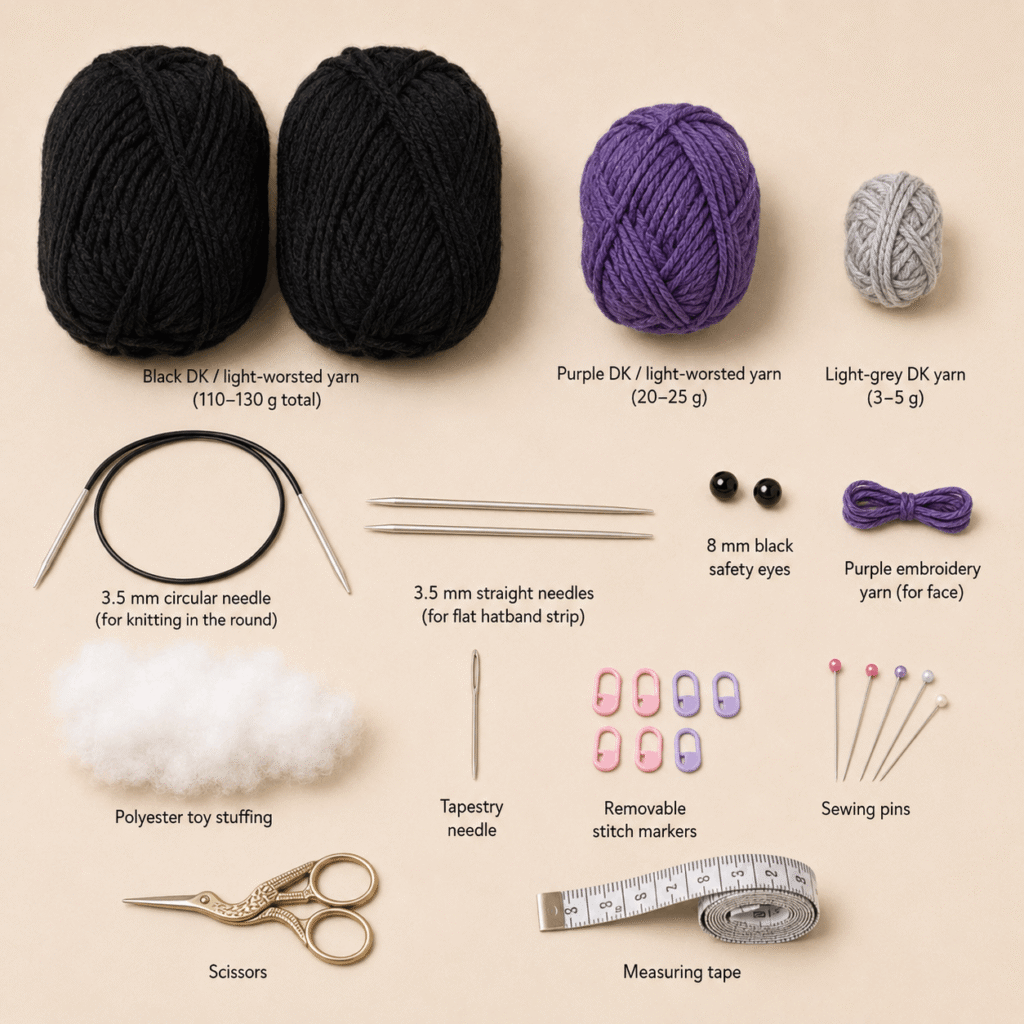
For this witch hat knitting pattern, use DK / light-worsted yarn in approximately 110–130 g of black and 20–25 g of purple, plus 3–5 g of light-grey DK yarn for the buckle. A small amount of purple yarn is also used for the smile and cheeks.
Use 3.5 mm needles suitable for small-circumference knitting, such as DPNs or a long circular needle for Magic Loop. The flat hatband can be worked on 3.5 mm straight or circular needles. You will also need about 55–70 g of polyester stuffing, two 8 mm black safety eyes or black yarn for embroidered eyes, a tapestry needle, removable markers, pins, scissors and a measuring tape.
Aim for a firm fabric so the stuffing does not show. Good lighting is especially helpful when counting decreases and sewing with black yarn.
Stitches and Techniques Used
The main skills are casting on, knitting in the round, stockinette stitch, kfb and M1R increases, k2tog decreases and binding off. The hatband adds flat garter stitch, while the buckle uses a three-stitch i-cord.
Finishing is important in this witch hat knitting pattern. The brim panels are joined edge to edge, the cone is attached to the top brim layer with small ladder-style stitches, the band is joined at centre back, and the feet are whip stitched underneath. The face is embroidered, and a hidden anchoring stitch holds the curved tip after stuffing.
How Mabel the Little Witch Hat Is Constructed
Two matching black brim panels are worked from the centre outward. Their centre openings are closed, the panels are seamed around the outer edge, and light stuffing is added before the last section is closed.
The cone is worked separately from its lower edge upward, tapering gradually through several decrease sections. The face is added before final stuffing. The purple hatband is knitted flat and checked around the lower cone while its stitches are still live; after the fit is correct, it is bound off, joined at centre back and sewn in place. The grey i-cord buckle is shaped into a rounded square at centre front.
To finish the witch hat knitting pattern, the cone is stuffed more lightly toward the upper section, the tip is bent and anchored, the cone is sewn to the centre of the brim, and the two purple feet are attached beneath the front.
Helpful Tips for Making This Project
Keep the beginning-of-round marker at centre back throughout the cone. Later face placement, band alignment and assembly depend on that reference.
Add stuffing in small amounts. The brim should remain flatter through the centre, and the upper 16-st cone section needs only light stuffing so it stays flexible enough to bend.
Check the hatband before binding off. Its short ends should meet at centre back without stretching or compressing the cone. If needed, add or unravel pairs of garter rows while the stitches are still live.
Pin the cone and feet before sewing. Check the front, sides and top so the cone is centred and both feet project forward evenly.
When working this witch hat knitting pattern in dark yarn, count the decrease rounds carefully. A missed decrease changes the taper and can make the cone look uneven.
Troubleshooting Common Problems
Why Does My Witch Hat Knitting Pattern Look Too Tall or Too Short?
Check round gauge as well as stitch gauge. The pattern uses 30 rounds per 10 cm / 4 in, so a small difference can noticeably change the cone height even when the base width looks correct.
Why Is the Brim Ruffling or Cupping?
First confirm both brim panels reached the correct final stitch count and that all increase rounds were worked. If the count is right, compare both stitch and round gauge before seaming. Blocking the panels flat can help with mild distortion.
Why Will the Curved Tip Not Hold?
The upper cone should remain lightly stuffed. Too much filling makes the tip stiff and works against the hidden anchoring stitch. Remove a little stuffing, reshape the bend and add a second hidden anchor if needed.
Why Do the Feet Sit Unevenly?
Check that both feet are the same size and that the Rnd 11 gathered end points upward into the brim. Pin both feet first and compare the front view before finishing either attachment seam.
Care Instructions for the Finished Project
The pattern does not specify a washing method, so follow the care instructions for the yarn you choose. Spot-cleaning is the cautious option for a stuffed decoration with attached features. If the fabric becomes damp, reshape the brim and curved tip and air-dry completely away from direct heat.
Check the seams, feet, buckle and band occasionally. Safety eyes are small rigid components and may not be suitable for projects intended for children under three years; embroidered eyes can be used instead.
Leave a Reply