
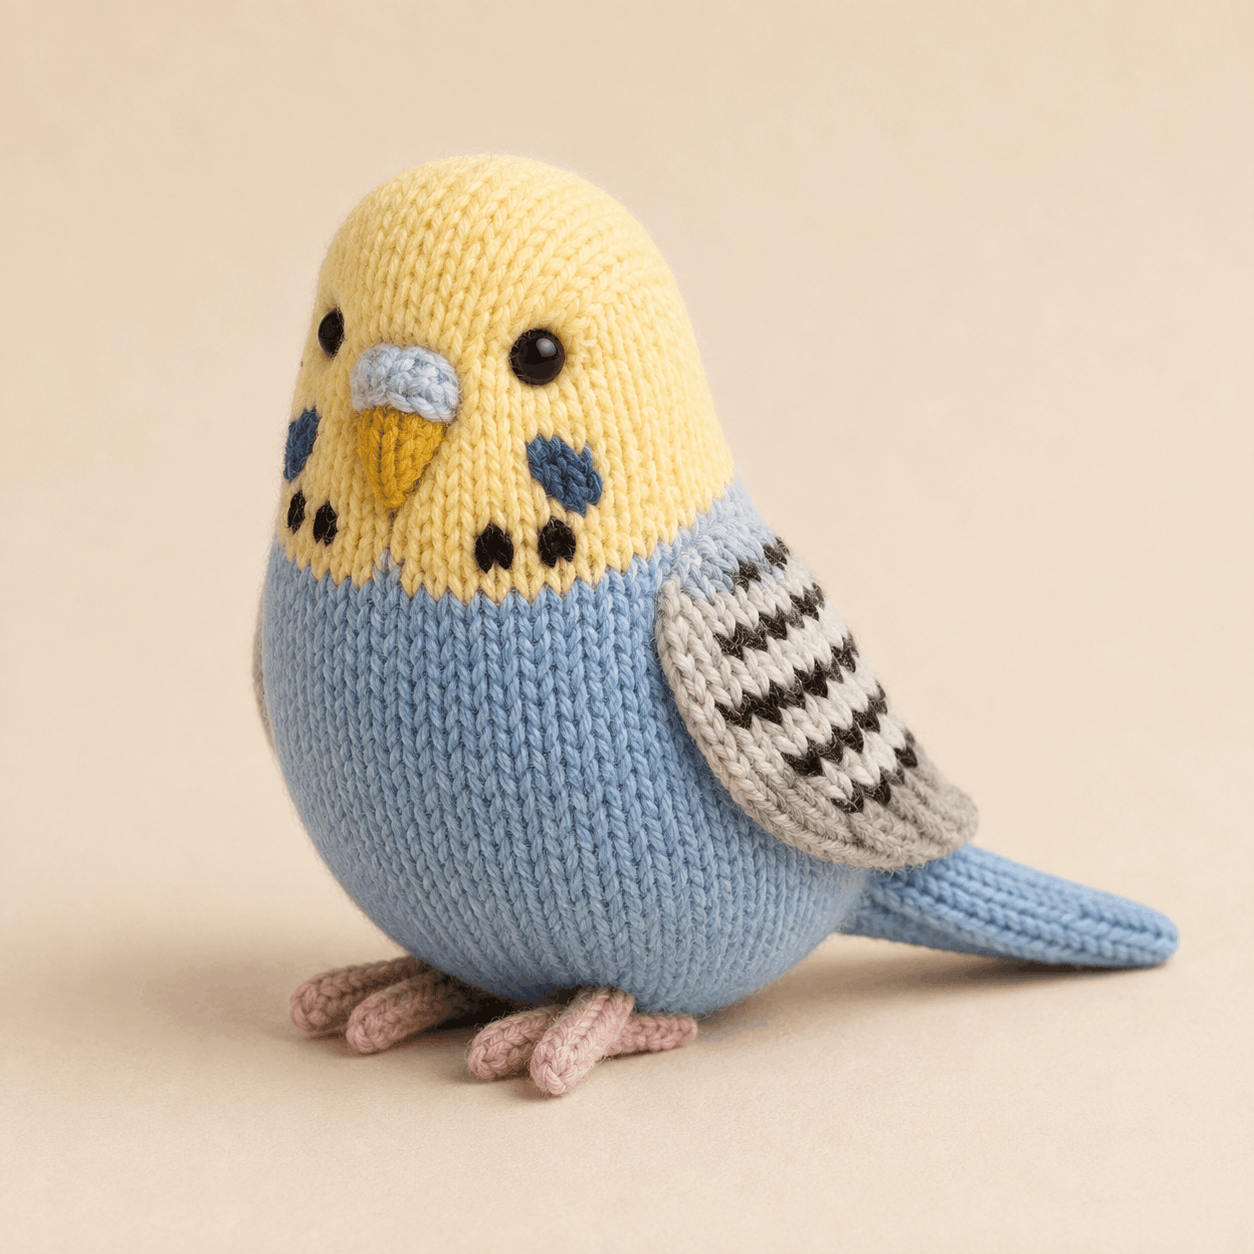
The budgie knitting pattern for Sunny the Little Budgie creates a softly stuffed bird with a rounded sky-blue body, soft yellow head, light gray or ivory wings, black feather bars, a warm gold beak, dusty pink feet and a slim blue tail. The main body and head are knitted as one continuous piece in the round, while the wings and smaller details are worked separately. The pattern is rated Confident Beginner to Intermediate, making it a good next project for knitters comfortable with basic shaping who are ready to focus on mirrored pieces, placement markers and assembly. This article covers the materials, techniques, construction and practical tips before you use the complete PDF.
About This Budgie Knitting Pattern
Sunny is a knitted bird plushie with a compact pear-shaped body, domed head and tapered tail. The blue-and-yellow colour blocking gives it a recognizable budgie look, while deep blue cheek patches, black throat spots and five black feather bars on each wing add the smaller markings that define the design.
The wings are knitted flat as a true mirrored pair so the stockinette right side and duplicate-stitch bars face outward on both sides. The feet use I-cord, while the beak and tail are worked in the round. That mix of techniques keeps the bird three-dimensional without making every component the same way.
Skill Level, Making Time and Finished Size
Craft: Knitting
Project type: Stuffed bird plushie
Skill level: Confident Beginner to Intermediate
Construction: Body/head and tail in the round; wings and cere flat; feet in I-cord
Terminology: Standard knitting terminology
Making time: Not specified
Finished height: about 18–19 cm / 7–7.5 in
Body width: about 11–12 cm / 4.3–4.7 in
Body depth: about 9.5–10.5 cm / 3.75–4.1 in
Tail length: about 9–9.5 cm / 3.5–3.75 in
The parts needing the most care are the center-back reference, mirrored wings, facial symmetry and foot placement for a balanced sitting position.
Materials and Tools You Will Need
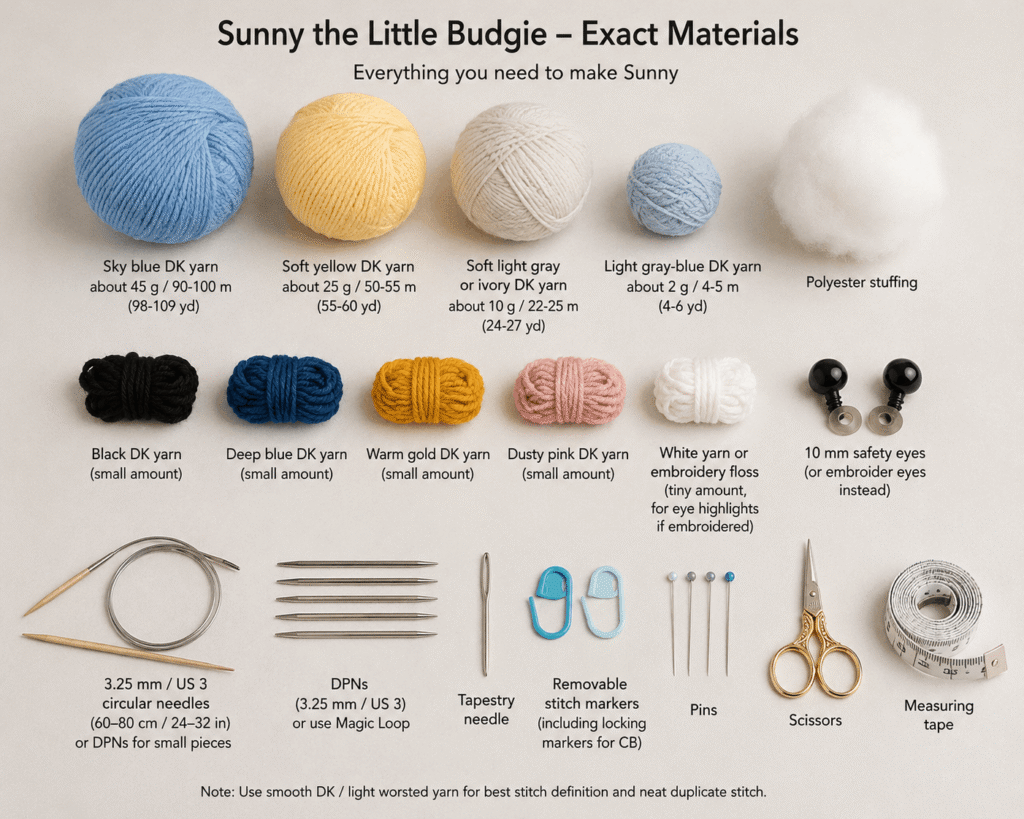
For this budgie knitting pattern, use DK or light worsted smooth yarn. The pattern calls for about 45 g of sky blue, 25 g of soft yellow and about 10 g of soft light gray or ivory for the wings. Smaller amounts of light gray-blue, black, deep blue, warm gold and dusty pink are used for the cere, markings, beak and feet.
You will also need 3.25 mm / US 3 needles. Small circular sections can be worked on DPNs or with Magic Loop, while the wings and cere are knitted flat. Other supplies include polyester stuffing, a tapestry needle, removable markers, pins, scissors and measuring tape. The face can use two 10 mm safety eyes or embroidered eyes instead.
Smooth yarn is useful because the placement marks, duplicate stitch and sewing points remain easy to see.
Stitches and Techniques Used
The project uses casting on, knit and purl stitches, knitting in the round, flat stockinette, binding off, kfb increases, k2tog and p2tog decreases. I-cord forms the feet, duplicate stitch creates the wing bars and cheek patches, and embroidery adds the throat spots.
Most of the main body is straightforward stockinette in the round. The more careful parts are preserving the center-back reference, following the mirrored wing shaping and pinning the separate pieces before sewing. That combination gives the budgie knitting pattern enough variety to build confidence with several toy-knitting techniques without making the main body overly complicated.
How Sunny the Little Budgie Is Constructed
The budgie knitting pattern starts at the underside. The body and head grow upward as one piece, changing from sky blue to soft yellow before the crown shaping. The eyes are positioned while the crown is open, then the body is stuffed gradually and gathered closed at the top.
The wings are worked separately as bird-right and bird-left mirrored pieces, then decorated with five black duplicate-stitch feather bars. The tail is knitted in the round and lightly stuffed only near its root. The gold beak is lightly stuffed, the gray-blue cere stays mostly flat, and each foot combines one I-cord base with three I-cord toes.
Assembly moves from face details to beak and cere, then tail, feet and wings, with a final balance check before the foot seams are completed.
Helpful Tips for Making This Project
Keep the center-back markers in place until the pattern tells you to transfer or remove them. Later placement for the tail, wings, feet and face depends on these axes.
Label the wings as bird-right and bird-left as soon as they are finished. They are mirrored, not identical, and each has a specific straight attachment edge.
Add the five feather bars before attaching the wings. Duplicate stitch is easier on a flat piece, and you can compare both wings side by side.
Stuff gradually rather than pushing in a large amount at once. Keep the lower body rounded but slightly flatter underneath, and avoid packing the head too firmly behind the eyes.
Pin before sewing. This budgie knitting pattern uses detailed placement points, and even a small shift in wing angle or foot position can change the bird’s posture.
Troubleshooting Common Problems
Why Does My Budgie Knitting Pattern Bird Lean or Sit Unevenly?
Check the feet while they are still held with temporary stitches. If the bird rocks backward, move both foot bases slightly toward center front. If it tips sideways, compare the height and position of the two feet before finishing the seams.
Why Are My Wings Uneven?
Confirm that you made one bird-right and one mirrored bird-left wing. Compare their upper and lower attachment points and keep the right sides with the black bars facing outward. If a wing curls away from the body, lightly damp-block it flat and sew only along the straight attachment edge.
Why Is Stuffing Showing Through the Fabric?
The target gauge is about 23 stitches and 32 rounds per 10 cm / 4 in in the round. If stuffing shows, the fabric may be too loose or overfilled. Use a smaller needle for denser fabric, or remove and redistribute some stuffing if the bird is already assembled.
Care Instructions for the Finished Project
Spot-cleaning is the gentlest routine option. Follow the care directions for the yarn you used, avoid twisting or wringing, reshape while damp if needed and let the bird air-dry completely away from direct heat.
If you use safety eyes, inspect them and the sewn attachments periodically. The pattern notes that small or rigid components may not be suitable for children under three; embroidered eyes can be used instead.
Leave a Reply