
This snowflake mittens knitting pattern creates a pair of cranberry-red winter mittens with pine-green cuffs and fingertips. Both mitten backs carry an ivory counted snowflake, with Nordic accent bands above the cuff and below the tip. The mittens are worked in the round with mirrored thumb gussets, and the colored motifs are added in duplicate stitch. The PDF brings together the materials list, gauge guidance, construction instructions and finishing checks, so you can plan the project before casting on. Use the written counts and diagrams together, and keep the selected size or row schedule visible while working. This article explains the design and preparation; the downloadable document supplies the complete instructions. Finished dimensions and yarn requirements vary with gauge and materials.
DIGITAL DOWNLOAD ONLY — NO PHYSICAL ITEM WILL BE SHIPPED.
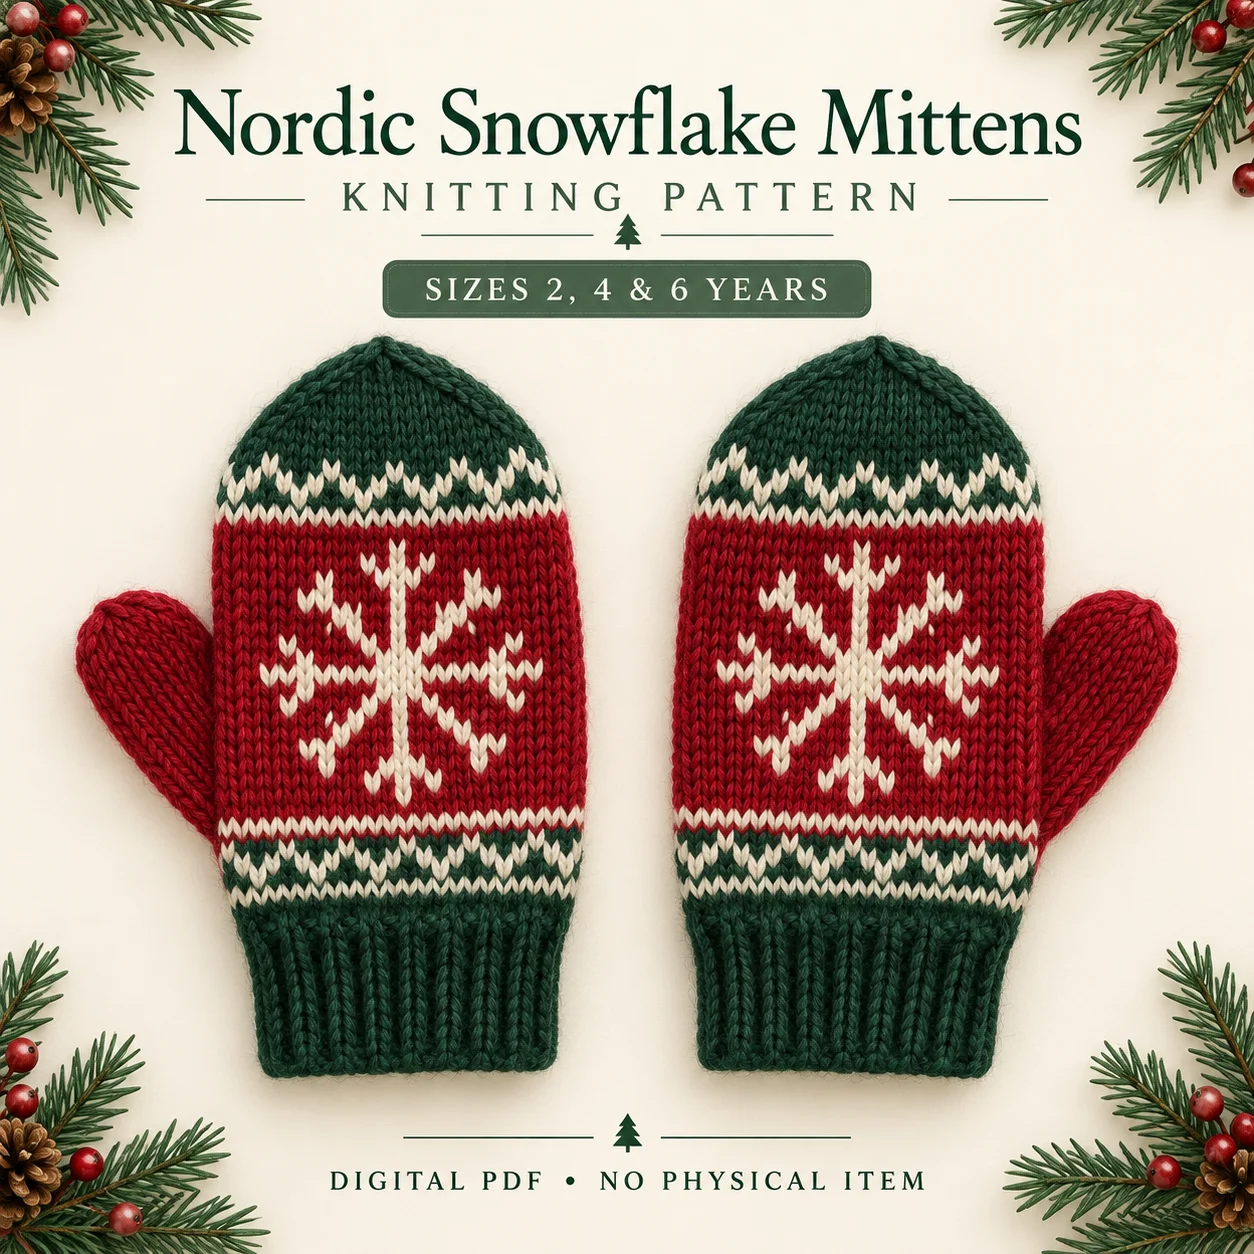
Design features of the snowflake mittens knitting pattern
Each cuff has sixteen rounds of one-by-one ribbing. The cranberry hand and thumb contrast with an entirely green shaped fingertip. A thirteen-by-thirteen snowflake occupies the back of each mitten, and the two four-row decorative bands use different chart tiles. The thumbs belong on opposite lateral edges, while the snowflakes keep the same orientation. The construction is seamless, with separately gathered hand and thumb tips.
The preview is an illustrative rendering of the intended project. For exact color locations, stitch counts and relative placement, use the PDF’s counted instructions. A decorative image cannot establish gauge or confirm the behavior of a particular yarn.
Skill level and techniques to prepare
The PDF rates this project Intermediate. Useful techniques include circular ribbing, stockinette in the round, mirrored lifted increases, thumb-gusset markers, holding stitches, bridge casting on, balanced fingertip decreases, gathering a closure and counted duplicate stitch. Read through the finishing sequence before beginning, especially where a later step depends on held stitches or a marked fabric edge.
Practice an unfamiliar technique on spare yarn first. When preparing the snowflake mittens knitting pattern, separate learning a technique from checking the project counts, so an uncertain method does not obscure which row or stitch group you are working.
Yarn colors and tools
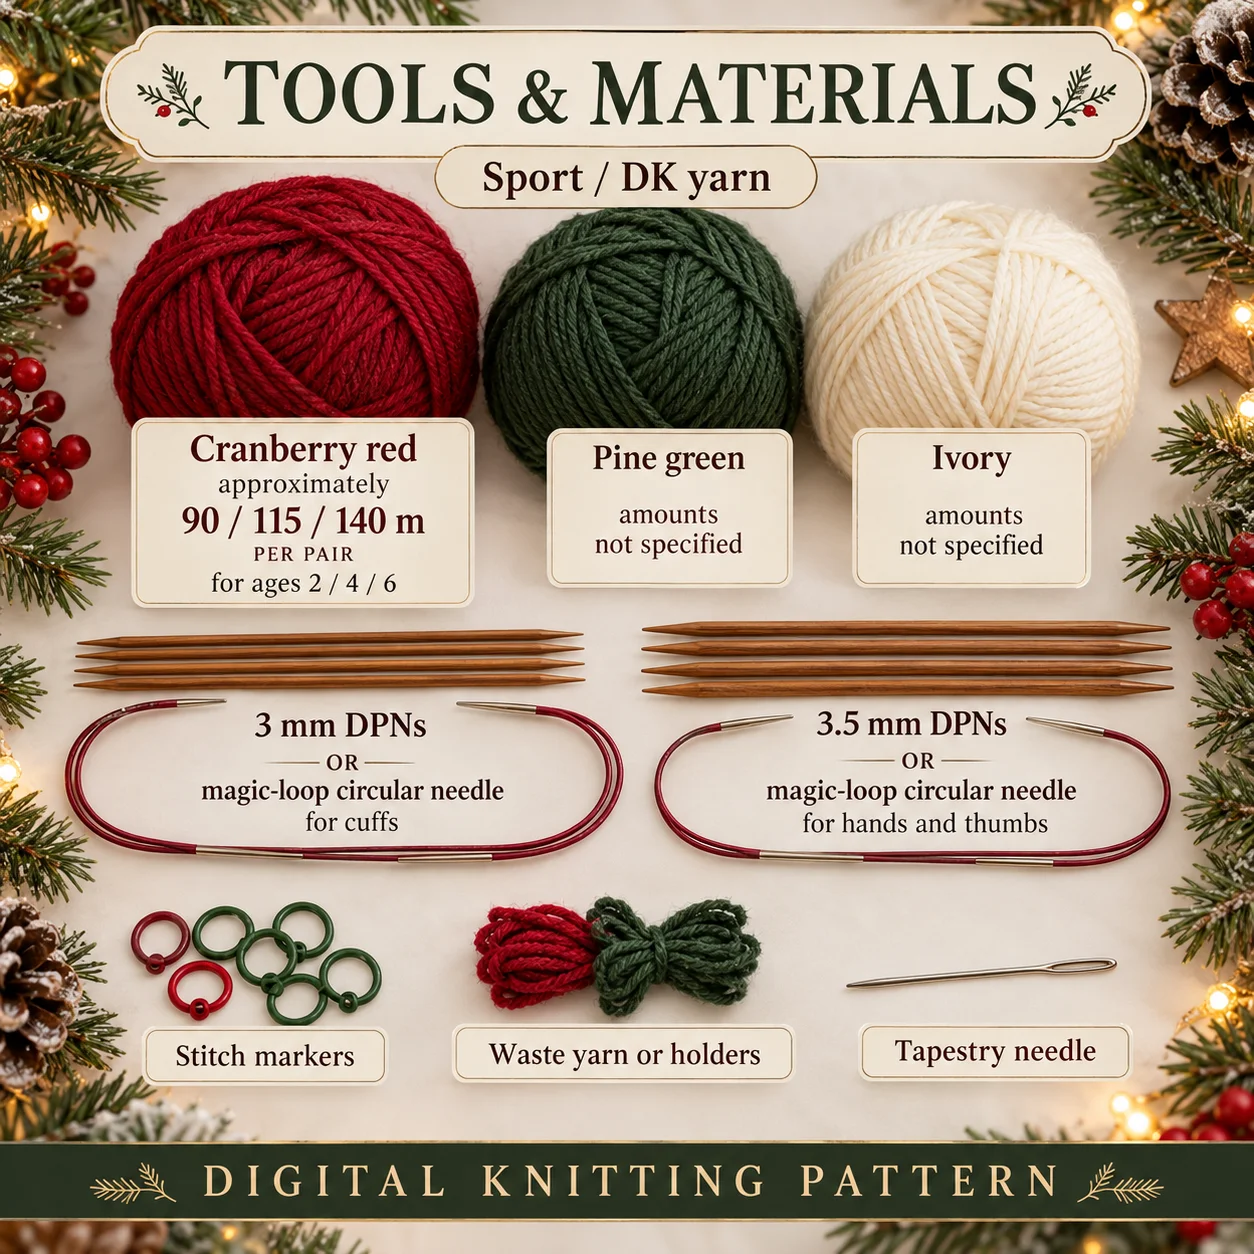
Cranberry red: approximately 90 / 115 / 140 m PER PAIR for ages 2 / 4 / 6. Pine green and ivory accents: amounts not specified; no invented meter quantities.
Equipment: 3 mm DPNs OR magic-loop circular needle for cuffs; 3.5 mm DPNs OR magic-loop circular needle for hands and thumbs; stitch markers, waste yarn or holders, tapestry needle.
These allowances should guide preparation, not be presented as measured consumption. Keep each accent color labelled and compare the fiber-care requirements before combining yarns. The tools and materials image accompanies the snowflake mittens knitting pattern as a quick reference, while the PDF remains the detailed supply source.
Gauge and finished measurements
The target is 24 stitches and 32 rounds per 10 cm in blocked stockinette on 3.5 mm needles. The cuffs use 3 mm needles, with suitable DPN or magic-loop equipment for each diameter.
The age labels are 2, 4 and 6 years. approximate mitten circumferences are 13.3, 15 and 16.7 cm for reference hand circumferences of 12, 13.5 and 15 cm. Lengths above the cuff are 11.9, 13.8 and 15.6 cm. The resulting approximate hand ease is approximately 1.3 to 1.7 cm; confirm the actual blocked fabric against the wearer.
Wash or block a swatch as permitted by the yarn label, dry it flat and measure a central ten-centimeter area. Use the actual blocked gauge when assessing dimensions. Too many stitches per ten centimeters generally requires larger needles; too few requires smaller needles. Re-swatch after changing needles. The snowflake mittens knitting pattern measurements are approximate measurements, so blocking should not be used to disguise a significant gauge mismatch.
Construction and finishing sequence
Cast on 32, 36 or 40 stitches in green and complete sixteen cuff rounds. Change to red and begin counting hand rounds separately. Keep the beginning-of-round marker at the palm center through gusset shaping. Mirrored increases inside the gusset markers grow the initial stitch into nine, eleven or thirteen thumb stitches. Hold that group and cast on one bridge stitch, restoring the original hand count. Change to green before fingertip shaping, relocate the round marker to the side, and decrease evenly to eight stitches before gathering.
Keep a row record as you work and pause at the stitch-count checkpoints. Read the selected instruction line independently instead of mixing values from different sizes. For the snowflake mittens knitting pattern, the written construction sequence provides the reliable order of operations; use its counts rather than reconstructing the garment from the promotional image.
Counted decoration and practical tips
The thumb uses the held stitches plus one bridge pickup, giving ten, twelve or fourteen stitches. Work the stated red rounds before its closing decrease. The ivory snowflake belongs over hand rounds nine through twenty-one on the original back columns, excluding all extra gusset stitches. The wrist tile occupies the first four hand rounds, with the one thumb-base overlay omitted. The upper-hand tile is placed after thumb separation and before green fingertip shaping. Each four-stitch repeat fits eight, nine or ten times around the restored circumference.
Useful checks while working:
- Keep cuff and hand round records separate.
- Keep the palm-centered round marker fixed through gusset shaping.
- Place both increases inside the thumb markers.
- Change to green before the first fingertip decrease.
- Identify the original back columns before stitching a snowflake.
Before putting the snowflake mittens knitting pattern away between sessions, record the last completed row and the next action. A simple note makes it easier to resume at the correct point without repeatedly recounting the whole piece.
Troubleshooting
Why does this project have the wrong thumb count?
Both gusset increases must be inside its two markers on each scheduled increase round. Check the segment count of nine, eleven or thirteen and the full total of forty, forty-six or fifty-two stitches before setting the thumb aside.
Why is there a hole at the thumb base?
Check the one bridge stitch and its thumb pickup. The PDF suggests securing a small gap with matching-yarn duplicate stitches rather than casting on extra uncontrolled stitches.
Why is the fingertip asymmetrical?
After relocating the round marker, keep the halfway marker exactly opposite it. Each decrease round removes two stitches from each half, four in total. Compare both halves at every shaping checkpoint.
Care and final inspection
Hand wash as appropriate to the yarn’s wool content, reshape the fingers and thumbs and dry flat. Weave decorative ends inside where they cannot snag fingers. Block without forcing a mitten to another size, and compare the left and right counts before use.
Check the finished project against the original stitch counts, row counts and placement notes. Inspect the edges and all secured yarn ends before use. The snowflake mittens knitting pattern should be assessed using your actual fabric and wearer needs, with the source’s size guidance kept in mind.
Download the digital PDF
The document includes a project overview, supplies, abbreviations, construction guidance, counted decoration or color schedule, and finishing advice. Read it alongside the diagrams and keep the gauge information available while working. It is a digital knitting guide for making the project yourself.
For a general sense of child hand measurements, see the Craft Yarn Council hand size charts. The hand length and circumference of the intended wearer, your gauge and the pattern’s finished measurements matter more than age labels.
Leave a Reply