
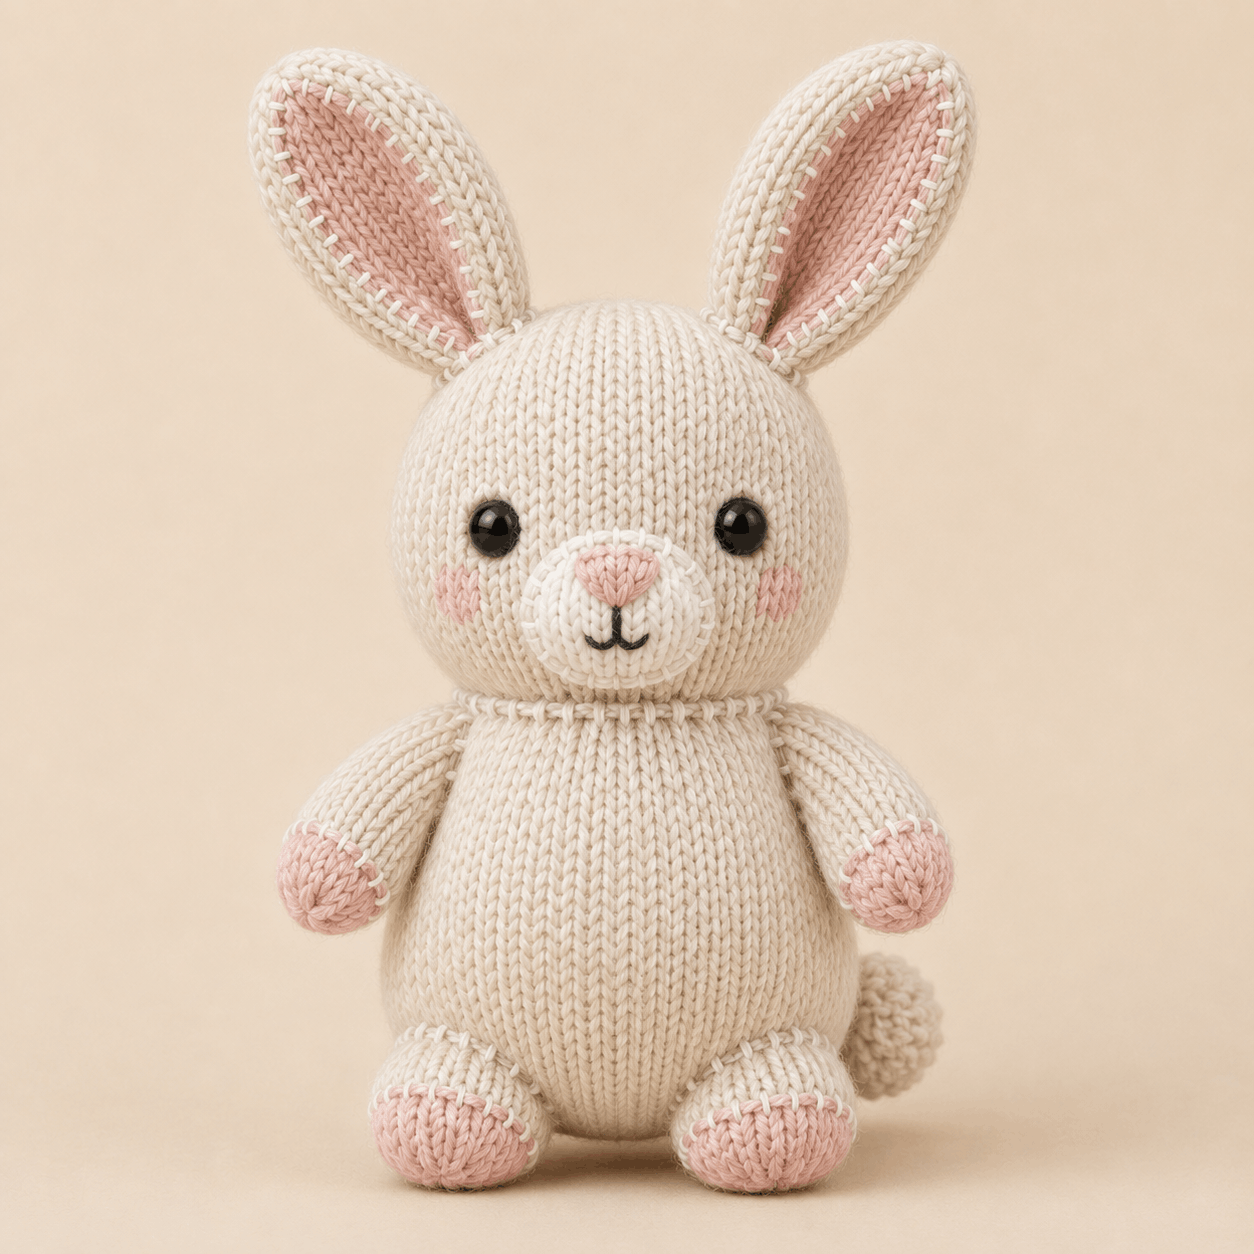
The bunny knitting pattern for Petal creates a softly rounded seated rabbit with a cream body, tall upright ears, blush-pink inner ears and paws, a padded white muzzle, and a small pom-pom tail. Most of the project is knitted in the round, while the pink inner-ear panels are worked flat and sewn onto the cream outer ears. The pattern is rated confident beginner to intermediate, making it suitable for knitters who are comfortable with basic shaping and ready to practise small-circumference knitting, colour changes, stuffing, embroidery, and assembly. This overview covers the main materials, sizing, construction, techniques, and finishing points so you can decide whether to make Petal before using the complete PDF instructions near the bottom.
About This Bunny Knitting Pattern
Petal is a seated knitted plushie with a pear-shaped body and a large rounded head. The long ears create most of the height, while blush-pink panels, paw tips, nose, and cheeks contrast with the cream yarn. A natural-white oval muzzle sits low on the face, finished with a pink embroidered nose and small black smile. At the back, a round cream pom-pom forms the tail.
The PDF includes front, side, back, and three-quarter finished views, which are useful references when checking the intended posture and placement before sewing.
Skill Level, Construction and Finished Size
Craft: Knitting
Project type: Seated stuffed bunny plushie
Skill level: Confident beginner to intermediate
Construction: Mainly knitted in the round, with flat inner-ear panels
Terminology: Standard knitting terminology
Gauge: 26 stitches x 38 rounds = 10 x 10 cm / 4 x 4 in in stockinette on 3.0 mm needles
Finished height: approximately 25-27 cm / 9.8-10.6 in from seated base to ear tips
Width across feet: approximately 11.5-13 cm / 4.5-5.1 in
Estimated making time: not specified in the PDF
The parts requiring the most care are paired-piece consistency, stuffing density, and placement. Each ear is about 8.5-9.5 cm long, so even small differences in tension or attachment depth can be visible.
Materials and Tools You Will Need
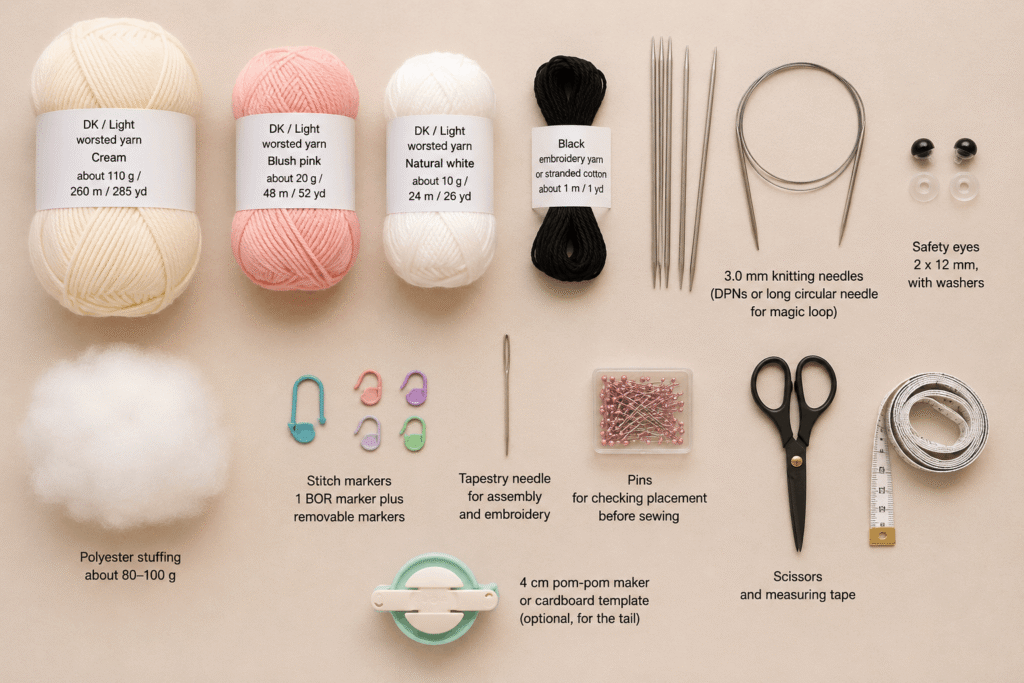
The bunny knitting pattern uses DK/light worsted yarn: about 110 g cream, 20 g blush pink, and 10 g natural white, plus a small amount of black embroidery yarn or stranded cotton.
The specified needles are 3.0 mm DPNs or a long circular needle for magic loop. You will also need two 12 mm safety eyes with washers, approximately 80-100 g of polyester stuffing, stitch markers, a tapestry needle, pins, scissors, and a measuring tape. A 4 cm pom-pom maker or cardboard template is optional for the tail.
Firm, even tension matters because Petal is stuffed. If filling shows between stitches, the PDF advises reducing stuffing pressure or using a smaller needle.
Stitches and Techniques Used
You should be comfortable casting on, joining in the round without twisting, knitting, purling flat rows, increasing with kfb, decreasing with k2tog and ssk, and binding off.
The project also includes small tubular pieces, cream-to-pink colour changes on the paws and toes, gathered closures, flattened attachment edges, whip or mattress-style seams, duplicate stitch for the cheeks, satin stitch for the nose or optional embroidered eyes, and small backstitches for the mouth.
These techniques are straightforward individually, but accurate finishing matters because Petal is assembled from several separate pieces.
How Petal the Knitted Bunny Is Constructed
The head is worked from the crown downward and left open at the neck. The body is made separately from the seated base upward, also ending with an open neck. The bunny knitting pattern keeps the beginning of round at centre back and uses centre front as a placement reference.
The outer ears are knitted in the round as double-layer tubes, closed at the tips, left unstuffed, and flattened. Pink inner-ear panels are worked flat and sewn to the front with visible cream whip stitches.
The muzzle is a separate lightly stuffed natural-white oval. Its nose and mouth are embroidered before attachment. Arms and legs are worked in the round, finished with pink ends, stuffed, and flattened at their open tops.
Assembly is staged so the ears and facial details are completed while the head opening is still accessible. The head and body are then joined, followed by the limbs and pom-pom tail.
Helpful Tips for Making Petal
Keep the centre-back and centre-front references easy to find because the placement instructions use them repeatedly.
Work matching pieces under similar tension. This is especially important for the ears, arms, and legs. Compare each pair before sewing rather than trying to correct differences during assembly.
Do not overstuff the muzzle. It should stay low and oval, not become ball-shaped. Keep the shoulder ends of the arms and upper edges of the legs soft enough to flatten neatly.
Pin every component before sewing. The bunny knitting pattern allows small placement adjustments for individual stuffing, but the left and right pieces should remain mirrored. Check the bunny from the front, top, sides, and back before tightening seams.
Keep limb colour-change joins on the underside or back, and shape the lower body into a broad seated base so the finished plushie can rest steadily.
Troubleshooting Common Problems
Why Does My Bunny Knitting Pattern Project Rock Instead of Sitting Flat?
Move some stuffing away from the very bottom centre and toward the lower side walls, then massage the base into a broad oval. Check that both leg seams are shallow and mirrored and that the pink toes face slightly forward and outward.
Why Do the Ears Point in Different Directions?
Flatten both cream ear tubes with their side folds aligned before attachment. Compare them from the top as well as the front, and make sure both pink panels face the same direction. If one ear sits higher despite equal knitting, adjust its sewing depth rather than stretching it.
Why Does the Muzzle Look Too Round?
Reduce the stuffing and gently flatten the oval before sewing. If the muzzle is already attached, the PDF suggests reopening the perimeter seam, reshaping it, and resewing without compressing it into a ball.
Why Is Stuffing Showing Between the Stitches?
Reduce stuffing pressure first. If the fabric remains too open, the pattern recommends using a smaller needle while keeping the same stitch counts. Consistent gauge helps all attachment edges remain compatible.
Care Instructions for the Finished Project
The PDF does not provide laundering instructions, so follow the care label for the yarn you use. A cautious approach is to spot-clean when possible, avoid twisting or wringing, reshape while damp, and air-dry completely away from direct heat.
If you use the specified safety eyes, inspect them and the seams periodically. The pattern notes that safety eyes and other small rigid components may not be suitable for children under three years old; embroidered eyes are offered as an alternative.
Leave a Reply