
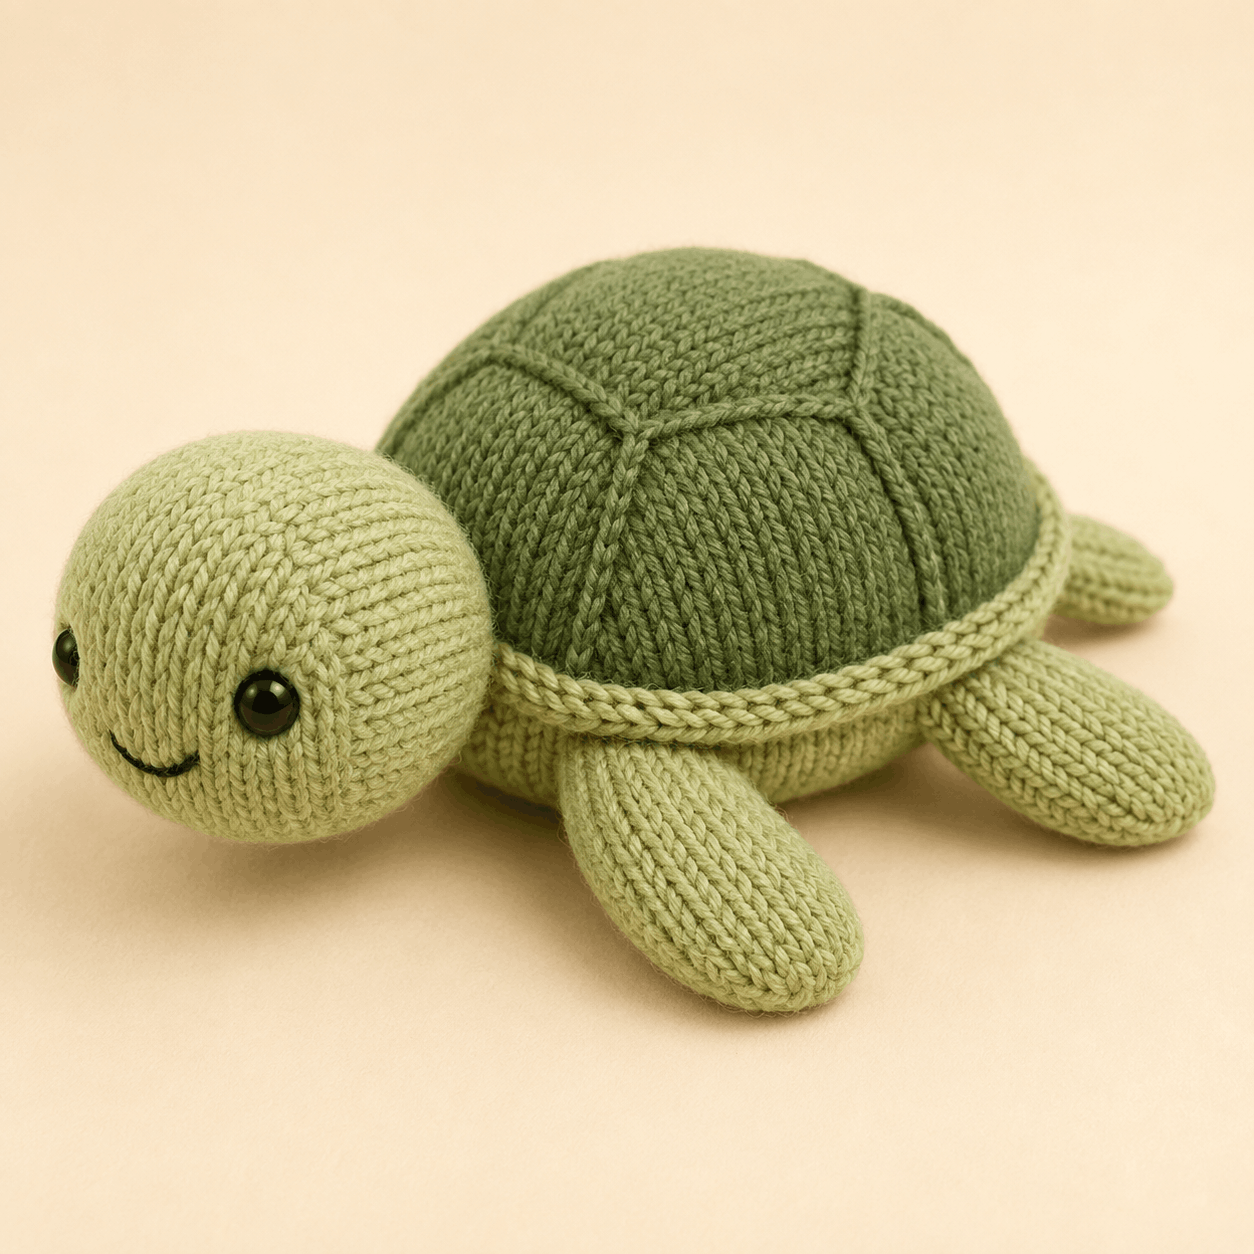
Mossy is a softly stuffed turtle with a rounded sage-green head, a low oval body, four flippers and a deeper olive shell with raised surface details. This knitted turtle pattern is worked mainly in the round, using simple increases and decreases to create the shaping. It suits a confident beginner who is comfortable with small-circumference knitting and careful sewing. This overview explains the materials, techniques, construction and common finishing issues before you use the complete PDF near the bottom.
About This Knitted Turtle Pattern
The light sage head, body and flippers contrast with a darker olive shell. The shell is the main decorative feature: it is knitted as a separate dome, then finished with a softly six-sided upper polygon and six embroidered outer ribs. A narrow three-stitch I-cord runs around the shell base to form the raised rim.
This knitted turtle pattern uses separate three-dimensional pieces rather than flat body panels. The flippers are lightly stuffed and flattened where they attach, while the body is kept slightly flatter underneath so the turtle can rest more steadily.
Skill Level, Construction, and Finished Size
Craft: Knitting
Project type: Stuffed turtle plushie
Skill level: Confident beginner
Construction: Knitted in the round, with separate stuffed pieces and sewn assembly
Terminology: Standard knitting terminology
Gauge: 22 sts × 30 rnds = 10 × 10 cm / 4 × 4 in in stockinette worked in the round
Finished size is approximately 20–22 cm / 8–8.75 in long, 16–17 cm / 6.25–6.75 in wide across the front flippers, and 9–10 cm / 3.5–4 in high. The head is about 7–8 cm / 2.75–3.25 in in diameter. The upper shell is about 10–11 cm / 4–4.25 in long and wide, and 6–7 cm / 2.25–2.75 in high.
Because the knitted turtle pattern depends on balanced assembly, the areas needing the most care are mirroring the flippers, keeping the head straight and pinning the shell evenly before sewing.
Materials and Tools You Will Need
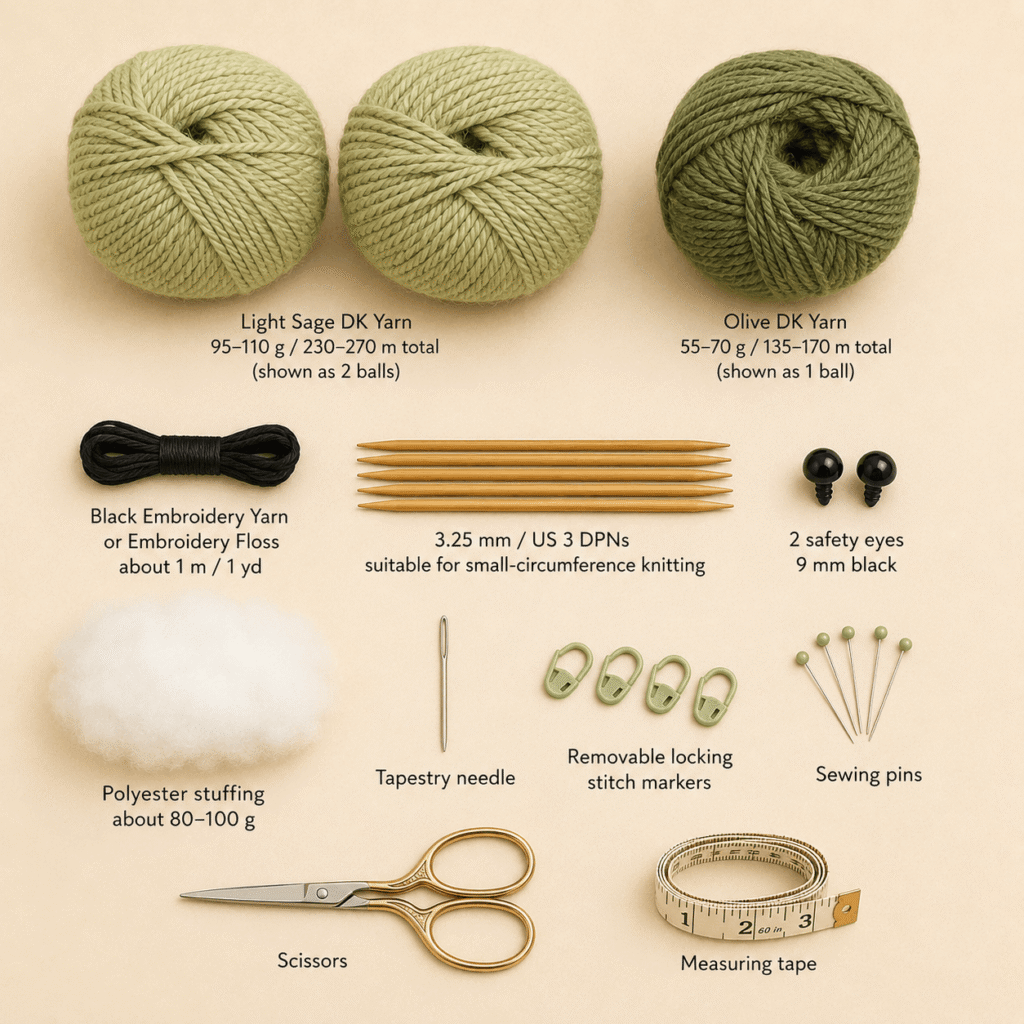
For this knitted turtle pattern, use DK / light worsted yarn in two greens: approximately 95–110 g / 230–270 m of light sage and 55–70 g / 135–170 m of olive. You will also need about 1 m / 1 yd of black embroidery yarn or floss.
The pattern uses 3.25 mm / US 3 needles suitable for small-circumference knitting, either DPNs or a long circular needle for Magic Loop. Other supplies are two 9 mm black safety eyes or black yarn for embroidered eyes, approximately 80–100 g of polyester toy stuffing, a tapestry needle, removable locking stitch markers, sewing pins, scissors and a measuring tape.
Use similar yarn construction for both greens so the body and shell stay in proportion, and aim for firm fabric that does not show stuffing.
Stitches and Techniques Used
The main knitting techniques are casting on, knitting, kfb increases, k2tog decreases, binding off and working continuously in the round. The shell rim uses a three-stitch I-cord.
Finishing includes embroidered chain stitch for the shell details, ladder stitch for the head and shell joins, and whip stitch for the I-cord rim. The flippers use a flattened two-layer attachment, so each sewing stitch captures both layers before entering the body.
The knitting is straightforward; assembly is where placement and sewing tension matter most.
How Mossy the Little Turtle Is Constructed
The head is knitted as a rounded light-sage piece. The eyes are positioned before the decrease section closes access, then the head is stuffed, gathered closed and finished with a shallow embroidered smile.
The body is a separate oval piece worked in the round and stuffed with a slightly flatter underside. The olive shell cap is knitted separately, then the upper polygon and six outer ribs are embroidered before attachment.
Two front flippers and two shorter hind flippers are lightly stuffed near their rounded tips and kept flatter at the attachment ends. The I-cord rim remains unstuffed.
Assembly is worked in this order: flippers, head, shell cap, then I-cord rim. A thin layer of stuffing is added under the shell before its seam is fully closed.
Helpful Tips for Making This Project
Keep the BOR markers accurate. The head uses centre back, the body uses the underside centre line, and the shell uses the back midpoint. These orientation lines guide later placement.
Close the small cast-on openings as instructed. Several pieces start with eight stitches, and the cast-on tail is used to gather those starting loops closed.
Add stuffing in small amounts. This helps keep the head smooth, the body softly oval and the shell domed without becoming hard.
Pin all four flippers before sewing. In this knitted turtle pattern, the front pair angle forward and outward, while the hind pair angle slightly backward and outward.
Keep the shell embroidery relaxed so the chain stitches sit on the surface without puckering the knitted dome.
Fit the I-cord around the shell before finalizing its length. The ends should meet naturally at centre back without stretching.
Troubleshooting Common Problems
Why Does My Knitted Turtle Pattern Roll to One Side?
Check the body stuffing and flipper angles first. The underside should be slightly flattened. If one side is heavier, redistribute the stuffing and compare the corresponding front and hind flipper attachment lines from underneath. A flipper sewn too high can make the body rock.
Why Does the Shell Look Flat or Ripple?
A flat shell may need a thin, even layer of stuffing before the shell seam is fully closed. Keep the edge lightly filled. If the bound-off edge ripples, remove several pins and redistribute the shell around the body rather than stretching one area.
If the embroidered ribs pucker, gently ease the chain stitches with a tapestry needle.
Why Does One Flipper Point Upward?
The attachment edge may have been sewn too vertically or too tightly. Reopen the seam and reattach the flipper along a short line following the body round, making sure each stitch captures both flattened layers.
Care Instructions for the Finished Turtle
The pattern does not give a specific washing method, so follow the yarn manufacturer’s care instructions. Spot-cleaning is a conservative option for a stuffed project with attached features. Reshape gently while damp and air-dry completely away from direct heat.
Safety eyes and other small rigid components may not be suitable for projects intended for children under three years. The pattern gives embroidered eyes as an alternative.
Leave a Reply