
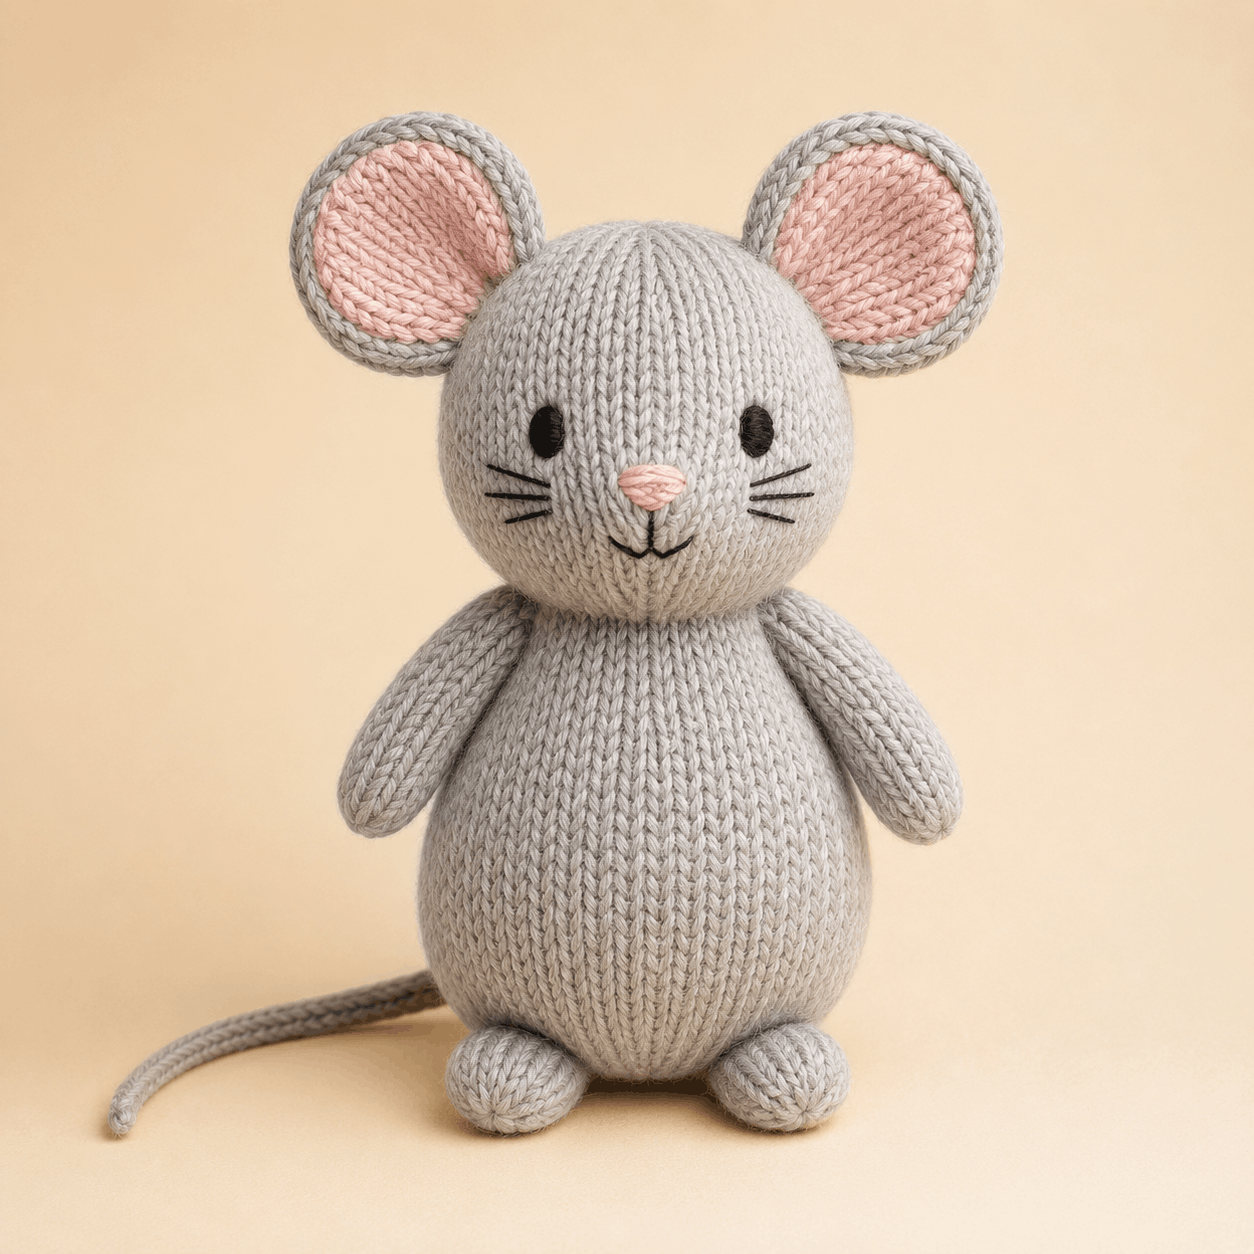
Milo the Little Mouse is a softly stuffed knitted toy with a rounded head, pear-shaped body, large pink-lined ears, embroidered whiskers, small forward-facing feet, and a flexible i-cord tail. This knitted mouse pattern is aimed at a confident beginner who is comfortable working small circumferences in the round and wants to practise shaping, stuffing, seaming, and simple embroidery. The project uses standard knitting terminology, DK yarn, DPNs or magic loop, and separately knitted pieces that are joined during assembly. Below you will find a practical overview of the materials, techniques, construction, placement, and troubleshooting, while the complete round-by-round instructions remain in the PDF near the bottom.
About This Knitted Mouse Pattern
The mouse is worked mainly in Mouse Gray, with Blush Pink used for the inner ears and nose and black thread or thin yarn for the face. Its head and body are both approximately 10-10.5 cm / 4-4.25 in wide, giving the finished toy a balanced, rounded silhouette.
The ears are especially distinctive. Each one is built from two gray outer discs sewn back-to-back, with a smaller pink disc attached to the front. This layered construction gives the ears enough body to stand upright without stuffing. The arms, feet, head, body, and ear discs are knitted in the round, while the tail is made as a four-stitch i-cord.
Skill Level, Making Time and Finished Size
Craft: Knitting
Project type: Stuffed mouse plushie
Skill level: Confident Beginner
Construction: Mainly worked in the round, then assembled
Terminology: Standard knitting terminology
Overall height: Approx. 25-26 cm / 9.75-10.25 in to the ear tips
Height to crown: Approx. 23-24 cm / 9-9.5 in
Head width: Approx. 10-10.5 cm / 4-4.25 in
Body width: Approx. 10-10.5 cm / 4-4.25 in
Outer ear diameter: Approx. 5-5.5 cm / 2-2.25 in
Tail length: Approx. 12 cm / 4.75 in
The PDF does not give a making-time estimate. The parts that need the most care are the body and head shaping, the layered ears, and the final placement of paired features before sewing.
Materials and Tools You Will Need
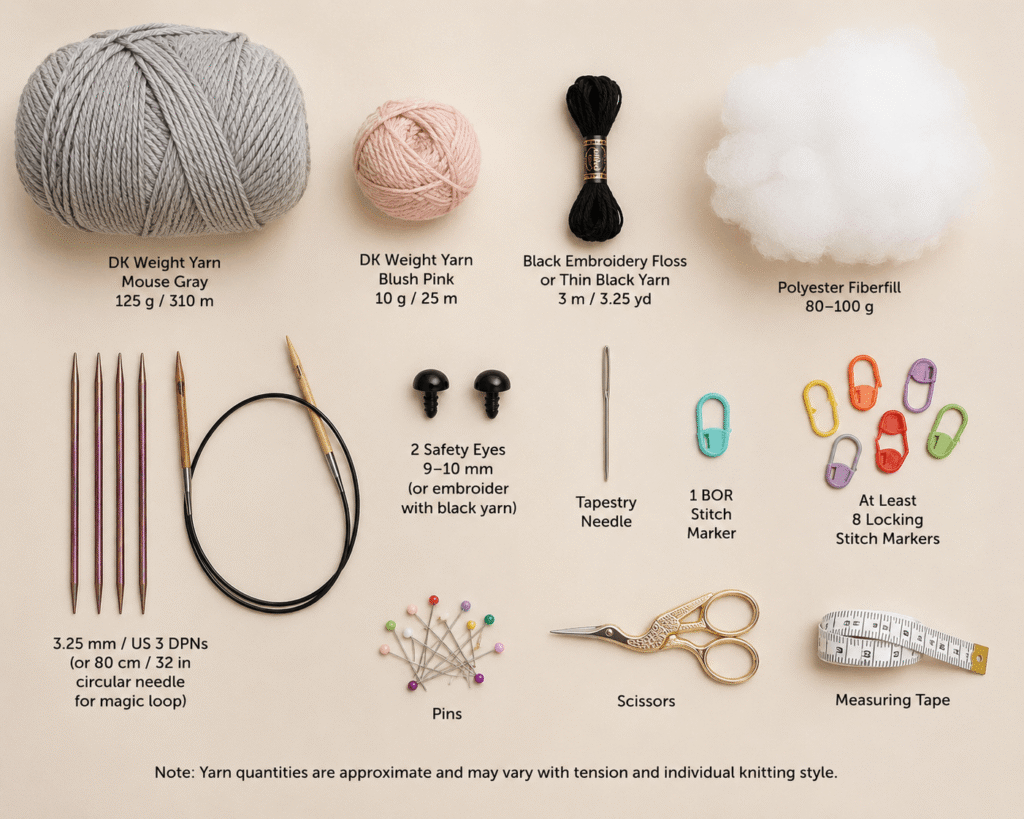
For this knitted mouse pattern, the PDF specifies DK weight yarn: about 125 g / 310 m of Mouse Gray and about 10 g / 25 m of Blush Pink. You will also need about 3 m / 3.25 yd of black embroidery floss or thin black yarn.
Use 3.25 mm / US 3 DPNs, or an 80 cm / 32 in circular needle for magic loop, plus about 80-100 g of polyester fiberfill. Other tools include a tapestry needle, one BOR marker, at least eight locking stitch markers, pins, scissors, and a measuring tape. The eyes can be made with two 9-10 mm black safety eyes or embroidered with black yarn.
Gauge is 24 stitches by 32 rounds in 10 x 10 cm / 4 x 4 in of stockinette worked in the round. The fabric should be firm and dense enough to contain the stuffing.
Stitches and Techniques Used
The main techniques are casting on, knitting in the round, kfb increases, k2tog decreases, binding off, and working a four-stitch i-cord. Small circumferences can be managed on DPNs or with magic loop.
The finishing work includes whip stitch or a mattress-style join, stuffing, flattening tubular openings before attachment, and basic embroidery for the nose, mouth, and whiskers. If those skills are familiar, this knitted mouse pattern is a manageable toy-making project with clear shaping and assembly stages.
How Milo the Little Mouse Is Constructed
The body is worked from the lower centre upward to a 24-stitch neck opening. It is stuffed through the neck, with the bottom kept slightly flatter so the mouse can sit. The head begins at the neck and is worked upward to the crown. The eyes are positioned before the crown is closed, then the head is stuffed and gathered shut.
The ears, arms, feet, and tail are made separately. The arms and feet are lightly stuffed and their open edges are flattened for attachment. Facial embroidery is completed after the head is stuffed but before the head is sewn to the body. The ears are attached next, followed by the neck seam, arms, feet, and centre-back tail. This order keeps the face and ear placement easy to check before the head is permanently joined.
Helpful Tips for Making This Project
Keep the placement markers in the fabric until assembly is finished. The knitted mouse pattern relies on these guides for consistent symmetry. They mark areas such as centre front, foot centres, arm centres, and head axes, making them useful reference points when pinning.
Add stuffing gradually. The body should be firm enough to hold its pear shape, but the upper neck rounds remain a little softer for a smooth head join. Arms and feet need only light stuffing.
Pin paired parts before sewing and compare them from the front and side. Equal ear height, horizontal shoulder seams, and forward-facing feet make a noticeable difference to the finished shape.
When sewing a flattened arm or foot opening, catch both layers before passing the needle into the body. This helps the limb keep the intended direction.
Troubleshooting Common Problems
Why Does My Knitted Mouse Pattern Look Uneven After Assembly?
Use the centre-front and side markers rather than relying only on visual estimation. The pattern gives counted positions for the eyes, ears, arms, and feet. If one piece sits higher, re-pin it from the same round or marker as its pair and compare both sides before resewing.
Why Is the Head Leaning?
A leaning head usually needs adjustment at the 24-stitch neck join or in the stuffing around the shoulders. Before fully securing the seam, loosen the affected section, redistribute the stuffing, re-pin the neck evenly, and sew again without pulling the opening smaller.
Why Are the Feet Pointing Downward?
The heel openings should be flattened and attached along short, approximately horizontal seams. If the seam turns vertically, the feet can hang instead of projecting forward. Re-pin each heel around its marked position with the rounded toe facing forward.
Why Is Stuffing Showing Through?
Check the knitted mouse pattern gauge and fabric density. Loose stockinette can open around the stuffing, especially if the toy is overfilled. Use firmer tension or a smaller needle if necessary, and add fiberfill in smaller amounts.
Care Instructions for the Finished Project
The PDF does not specify a particular washing method. Follow the care instructions for the yarn you choose and handle the stuffed shape, embroidery, and sewn joins gently.
The pattern notes that safety eyes and other small or rigid components may not be suitable for projects intended for children under three years. Embroidered eyes are included as an alternative.
Leave a Reply