
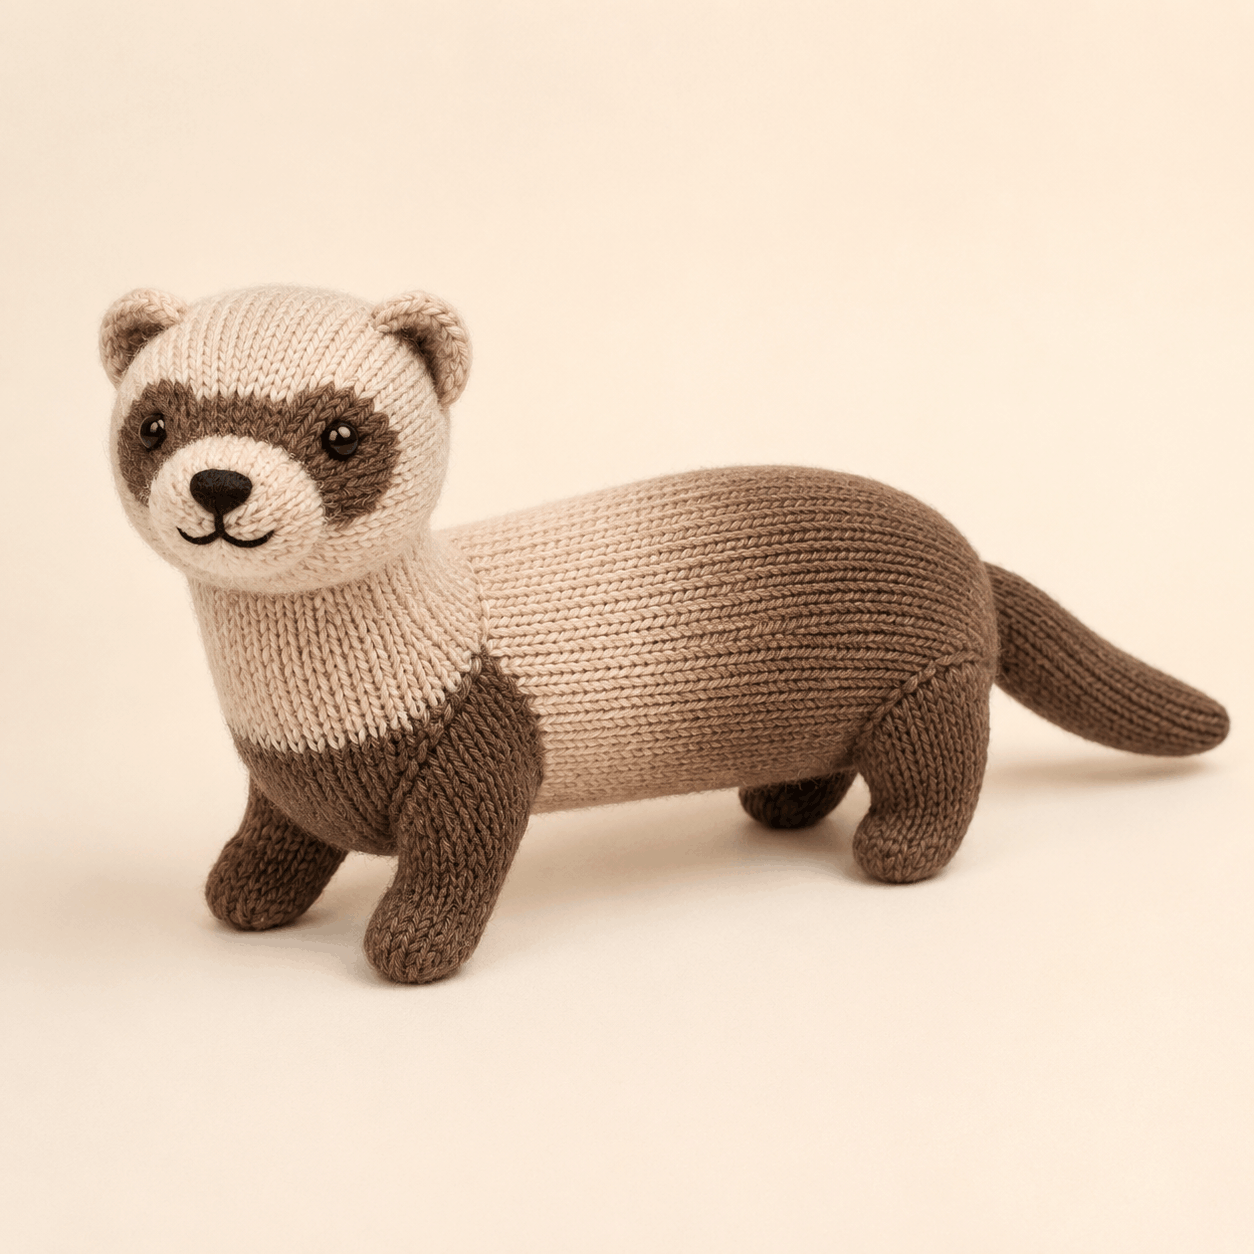
Pippin is a long-bodied knitted ferret plush with an upright cream head, a cocoa-brown eye mask, compact rounded ears, four sturdy brown legs and a tapered tail. This ferret knitting pattern is rated intermediate and is worked mainly in stockinette in the round, with a small flat chest patch and duplicate-stitch colour detail on the face. The finished shape depends on careful round gauge, balanced stuffing and accurate placement of the head and legs. Below is a practical overview of the materials, techniques, construction and common finishing issues, while the complete instructions are available in the PDF near the bottom of the page.
About This Ferret Knitting Pattern
The two-colour palette creates a clear ferret silhouette without stranded colourwork. Oat Cream forms the head, muzzle, throat and front body, while Cocoa Brown is used for the eye mask, chest patch, legs, rear body and tail. Black yarn finishes the nose and mouth.
This ferret knitting pattern is especially defined by its long, low body and upright head. The body keeps its full width through much of the rear section before narrowing into the rump, while the brown face marking is added afterward with duplicate stitch rather than knitted as intarsia or stranded colourwork.
Skill Level, Construction and Finished Size
Craft: Knitting
Project type: Stuffed animal plushie
Skill level: Intermediate
Construction: Mainly knitted in the round; chest patch knitted flat
Terminology: Standard knitting terminology
Gauge: 24 sts and 32 rnds = 10 × 10 cm / 4 × 4 in in stockinette in the round
The completed ferret measures approximately 39–42 cm / 15.25–16.5 in from nose to tail tip and 19–21 cm / 7.5–8.25 in from floor to crown. The body is about 22–23 cm / 8.75–9 in long and 9–10 cm / 3.5–4 in wide. The tail is about 14–15 cm / 5.5–6 in long.
The face mask, limb orientation and neck seam require the most care. Small changes in round gauge can also noticeably alter the long body proportions.
Materials and Tools You Will Need
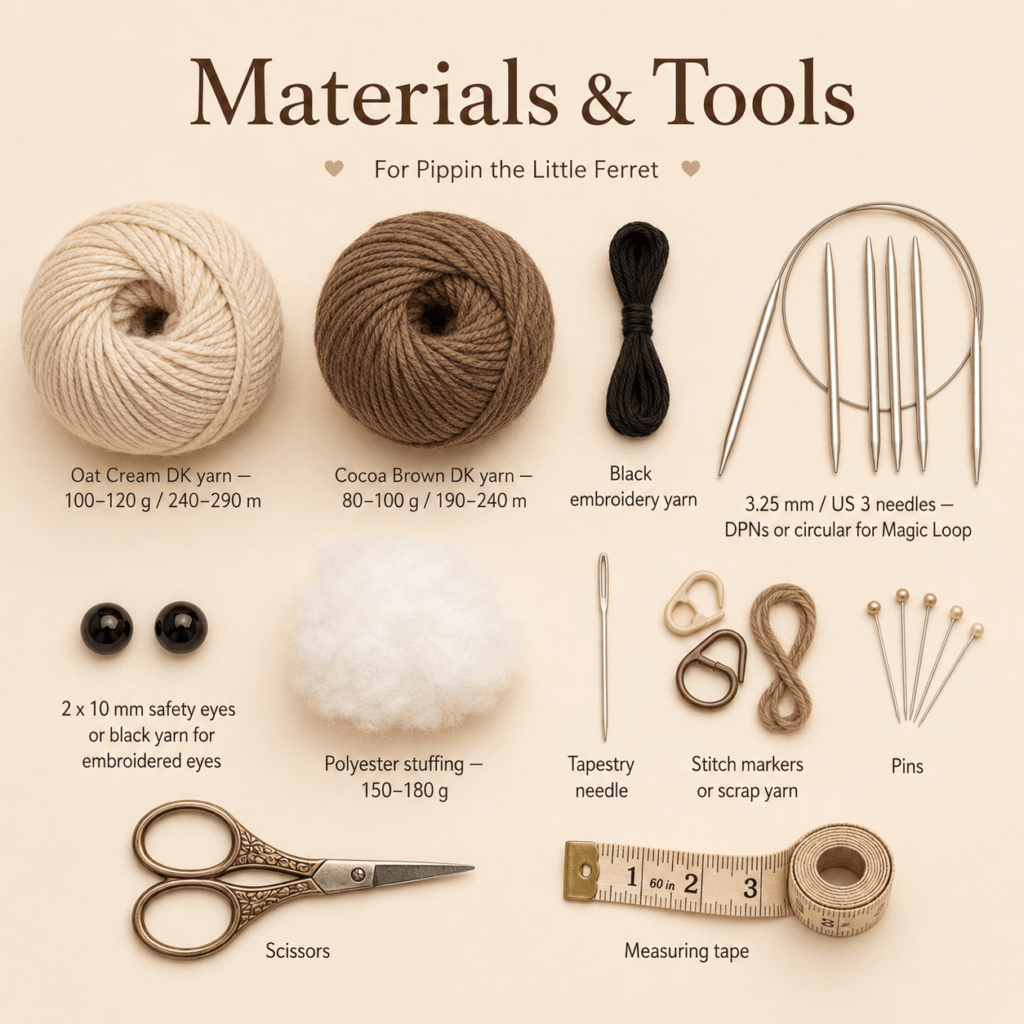
The ferret knitting pattern uses DK weight yarn in two main colours: approximately 100–120 g / 240–290 m of Oat Cream and 80–100 g / 190–240 m of Cocoa Brown. You will also need a small amount of black embroidery yarn or floss.
Use 3.25 mm / US 3 needles suitable for small-circumference knitting, either a long circular needle for Magic Loop or double-pointed needles. Other supplies are two 10 mm black safety eyes or black yarn for embroidered eyes, approximately 150–180 g of polyester toy stuffing, a tapestry needle, removable markers or scrap yarn, pins, scissors and a measuring tape.
A smooth DK yarn helps keep the duplicate-stitch mask, shaping and sewing lines easy to see. The finished fabric should be firm enough that stuffing does not show between stitches.
Stitches and Techniques Used
The main skills are casting on and joining to work in the round, knitting stockinette, increasing with kfb, decreasing with k2tog and ssk, binding off, and working a small flat stockinette section with knit and purl rows.
Duplicate stitch creates the brown face mask and inner-ear detail. Assembly uses whip stitch for circular edges, flat patch edges and flattened two-layer joins. The ferret knitting pattern also relies on marker placement, counting stitch columns, controlled stuffing and careful symmetry rather than complicated stitch patterns.
How Pippin the Little Ferret Is Constructed
For this ferret knitting pattern, the head is knitted first in Oat Cream. Before the crown is finished, the brown mask is added with duplicate stitch and the eyes are positioned symmetrically around centre front. The head is then closed at the crown and stuffed through the open neck edge.
The muzzle and compact ears are made separately. The body begins at the front in cream, expands to its full circumference, then changes to Cocoa Brown for the rear section. The rump taper is concentrated near the back so the body stays long.
Two front legs, two hind legs and the tail are knitted in brown, and the chest patch is knitted flat. Assembly finishes the ears, muzzle, nose and mouth on the head first. The tail, chest patch and legs are attached to the body next, with the head sewn on last so its angle can be checked from all sides.
Helpful Tips for Making Pippin
Keep both stitch gauge and round gauge under control. The long torso in this ferret knitting pattern is sensitive to round gauge, so matching only the stitch count across 10 cm is not enough.
Keep orientation markers in place until the major pieces are pinned. The centre-front, centre-back and body-underside references help keep the mask, muzzle, legs and neck aligned.
Work duplicate stitch gently. Each brown stitch should cover the cream V without pulling the fabric inward, otherwise the face can pucker.
Pin paired parts before sewing. Compare both ears from the front and top, and both pairs of legs from the side. The front legs should point down and slightly forward; the hind legs sit farther back and angle slightly backward.
Add stuffing gradually. Keep the body elongated rather than rounded, and leave the upper legs and tail base slightly softer for cleaner attachment seams.
Troubleshooting Common Problems
Why Does My Ferret Knitting Pattern Look Too Short or Too Round?
Check round gauge as well as stitch gauge. If you are making more rounds per 10 cm than the stated gauge, the body will become shorter even if every round is worked correctly. Overstuffing can also make the torso look rounder. Redistribute the filling so the body keeps a long oval profile.
Why Do the Eyes or Brown Mask Look Uneven?
Use the centre-front reference and compare both sides before securing the eyes. The mask is symmetrical, so unevenness usually comes from miscounted stitch columns or duplicate stitches worked at different tensions.
Why Are the Legs Pointing Sideways?
The top of each leg is flattened before attachment. If the seam runs too far along the body length, the leg can rotate outward. Re-pin the top so the seam follows a short line around the body circumference, then check the angle from the front and side.
Why Is the Head Leaning?
Check that the neck opening is distributed evenly around the body oval and that the stuffing at the lowest head rounds is balanced. If the main seam is even but the head still tips, the pattern allows a few hidden stabilising stitches at the back of the neck.
Care Instructions for the Finished Ferret
The PDF does not specify a washing method. Follow the care instructions for the yarn you choose and take the safety-eye hardware into account before cleaning. Avoid pulling on the sewn muzzle, ears, legs or tail, and reshape the plush to its long, low form as it dries.
Safety eyes and other small rigid components may not be suitable for projects intended for children under three years. Embroidered eyes can be used instead.
Leave a Reply