
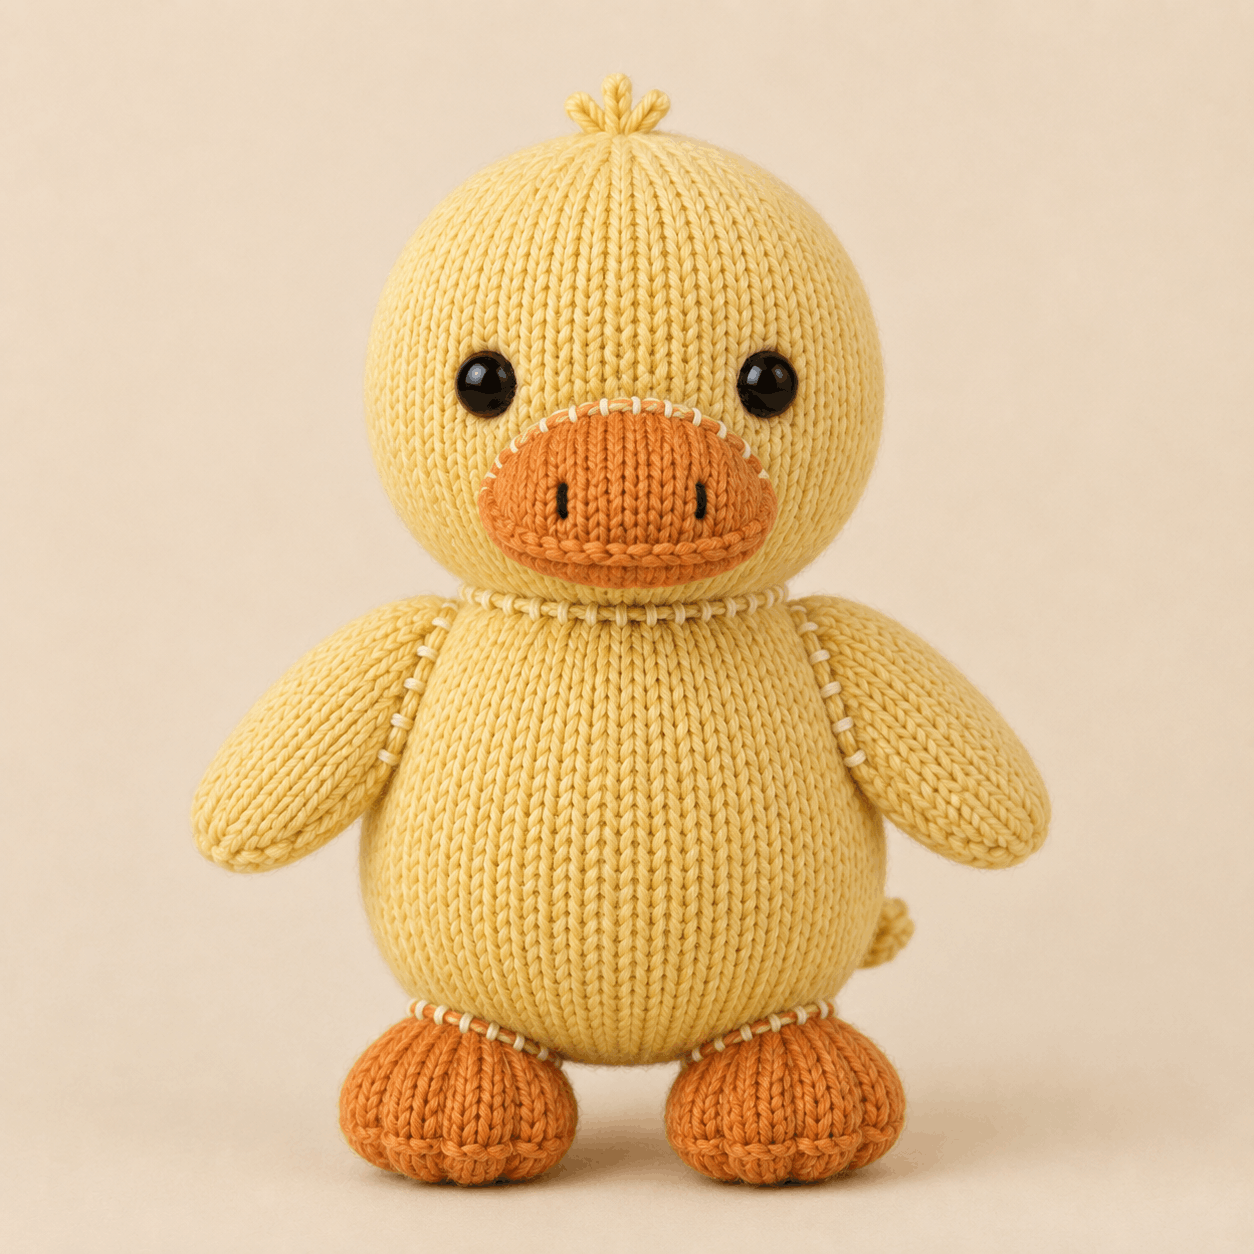
The duck plushie knitting pattern for Sunny Duck creates a soft, rounded bird with a large head, pear-shaped body, short yellow wings, orange feet, a padded orange beak, and a tiny three-loop crown tuft. Most pieces are worked in stockinette stitch in the round, while the beak is knitted flat and sewn on later. The pattern is rated Confident Beginner / Easy Intermediate, so it suits knitters who are comfortable with simple shaping, stuffing, and sewn assembly. This overview covers the materials, techniques, construction, finishing details, and likely trouble spots before you download the complete PDF near the bottom.
About This Duck Plushie Knitting Pattern
Sunny Duck has a simple rounded silhouette with carefully placed details. The large smooth head sits above a broad lower body, and the orange beak is lightly stuffed so it projects forward instead of lying flat. Two short embroidered nostrils sit vertically on the front.
The wings hang gently downward and slightly forward. A small rounded tail sits on the centre-back line, while three short I-cord loops form a fan-shaped crown tuft with the centre loop slightly taller than the outer two. Cream decorative stitches highlight the neck, wing joins, foot joins, and upper edge of the beak.
Skill Level, Making Time and Finished Size
- Craft: Knitting
- Project type: Stuffed duck plushie
- Skill level: Confident Beginner / Easy Intermediate
- Construction: Mainly knitted in the round; beak worked flat
- Finished height: Approximately 26–28 cm / 10.25–11 in
- Head: Approximately 13 cm wide and 12 cm high
- Body: Approximately 11 cm wide and 11–12 cm high
- Wing length: Approximately 6–6.5 cm
- Foot width: Approximately 4–4.5 cm
- Beak: Approximately 6.5–7 cm wide and 4.5–5 cm high
- Estimated making time: Not specified in the PDF
For a duck plushie knitting pattern of this size, the placement and assembly stages need the most care because the eyes, beak, wings, feet, and tail all rely on centre lines or round landmarks for symmetry.
Materials, Tools, Gauge and Fabric Density
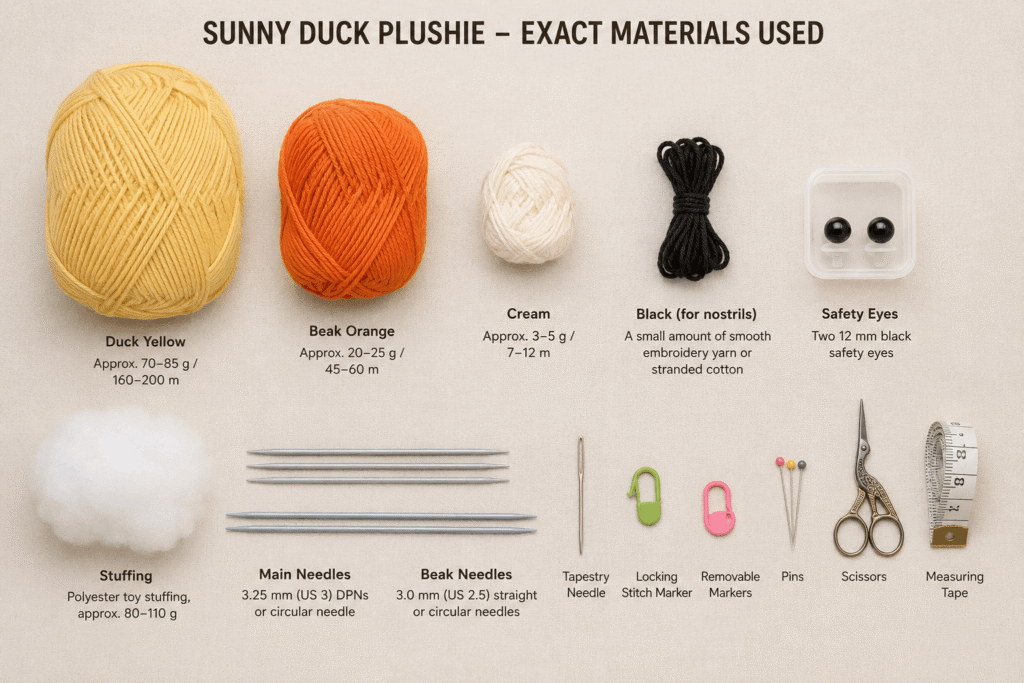
The duck plushie knitting pattern uses smooth DK / light-worsted (#3) yarn. The PDF suggests cotton, cotton-acrylic, or smooth acrylic. You will need approximately 70–85 g / 160–200 m of Duck Yellow, 20–25 g / 45–60 m of Beak Orange, and 3–5 g / 7–12 m of Cream for decorative joins. A small amount of black embroidery yarn or stranded cotton is used for the nostrils.
The main pieces use 3.25 mm (US 3) DPNs or a circular needle suitable for magic loop. The beak uses 3.0 mm (US 2.5) needles, or the size needed for its separate flat gauge. Other supplies include about 80–110 g polyester toy stuffing, a tapestry needle, markers, pins, scissors, measuring tape, and either two 12 mm safety eyes or black yarn for embroidered eyes.
Main stockinette gauge is 24 stitches by 32 rounds over 10 cm / 4 in. The flat beak gauge is about 26 stitches by 36 rows over 10 cm / 4 in. For this duck plushie knitting pattern, firm fabric matters because stuffing should not show through. A looser gauge makes the toy larger; a tighter gauge makes it smaller.
Stitches and Techniques Used
The project uses casting on, knit and purl stitches, knitting in the round, kfb increases, k2tog and ssk decreases, binding off, and simple three-stitch I-cord. The beak is the main section worked back and forth in rows.
Finishing includes whip-stitch assembly, embroidered nostrils, decorative Cream stitches, and embroidered chain stitch along the lower beak edge and visible lower front curve of each foot. The knitting itself is straightforward, but accurate placement and even seaming require more attention.
How the Sunny Duck Is Constructed
The body is knitted first from the lower centre upward and stuffed through the neck opening. Its upper area is kept slightly softer so the head can sit neatly on top.
The head starts at the neck opening and is worked upward to the crown. The eyes are installed while the head is still open enough to reach the backs. The crown is gathered closed, then the head is finished through the lower opening.
The beak is knitted flat, embroidered with nostrils, pinned to the stuffed head, and lightly padded before the final seam closes. Two wings, two orange feet, one small tail, and three short I-cords are made separately.
Assembly joins the head to the body first, followed by the feet, wings, tail, and crown tuft. The duck plushie knitting pattern also includes front and back placement maps to help check symmetry and orientation before sewing.
Helpful Tips for Making This Project
Keep the beginning-of-round marker easy to identify on both the head and body. Those centre-back lines matter when joining the neck and centring the tail.
Pin both matching pieces before sewing either one permanently. This is especially useful for the wings and feet because their heights and angles should mirror each other.
Stuff in small amounts. The feet should stay low and oval, the wings are only lightly stuffed, the tail needs just a pinch, and the beak should remain softly rounded rather than firm.
Use the placement maps with the written landmarks. The duck plushie knitting pattern provides reference points for the eyes, beak, wings, feet, and tail, which helps prevent a tilted or uneven finish.
Keep the Cream decorative stitches relaxed. Pulling them too tightly can dent the stockinette fabric.
Troubleshooting Common Problems
Why Does My Duck Plushie Knitting Pattern Project Look Too Large or Small?
Check the main stockinette gauge. The PDF explains that looser knitting enlarges circumference and height, while tighter knitting makes the project smaller. If stuffing shows between stitches, firmer tension or a smaller needle is more useful than adding extra stuffing.
Why Does the Head Lean After Assembly?
Check that the centre-back beginning-of-round lines on the head and body are aligned. Uneven neck-seam tension or uneven stuffing can shift the head. If needed, open a short section, redistribute the stuffing, and resew evenly.
Why Do the Wings Twist Backward?
The flattened wing opening should form a short, approximately horizontal shoulder seam. A vertical seam can rotate the wing backward. Pin both wings first and compare their angles from the front and back.
Why Are the Beak or Eyes Uneven?
Use centre front as the main reference. The eyes should be level and equally spaced from it, while the beak should remain centred and horizontal below them. Marking both sides before permanent attachment makes the rounded head easier to balance.
Care Instructions for the Finished Project
Spot-clean the surface when practical and follow the care instructions for the yarn you used. If the plushie becomes damp, reshape it gently and air-dry it completely away from direct heat. Avoid twisting or wringing because this can disturb stuffing and sewn placement.
Inspect seams and attached features regularly. The PDF notes that safety eyes and other small or rigid components may not be suitable for children under three years; embroidered eyes can be used instead.
Leave a Reply