
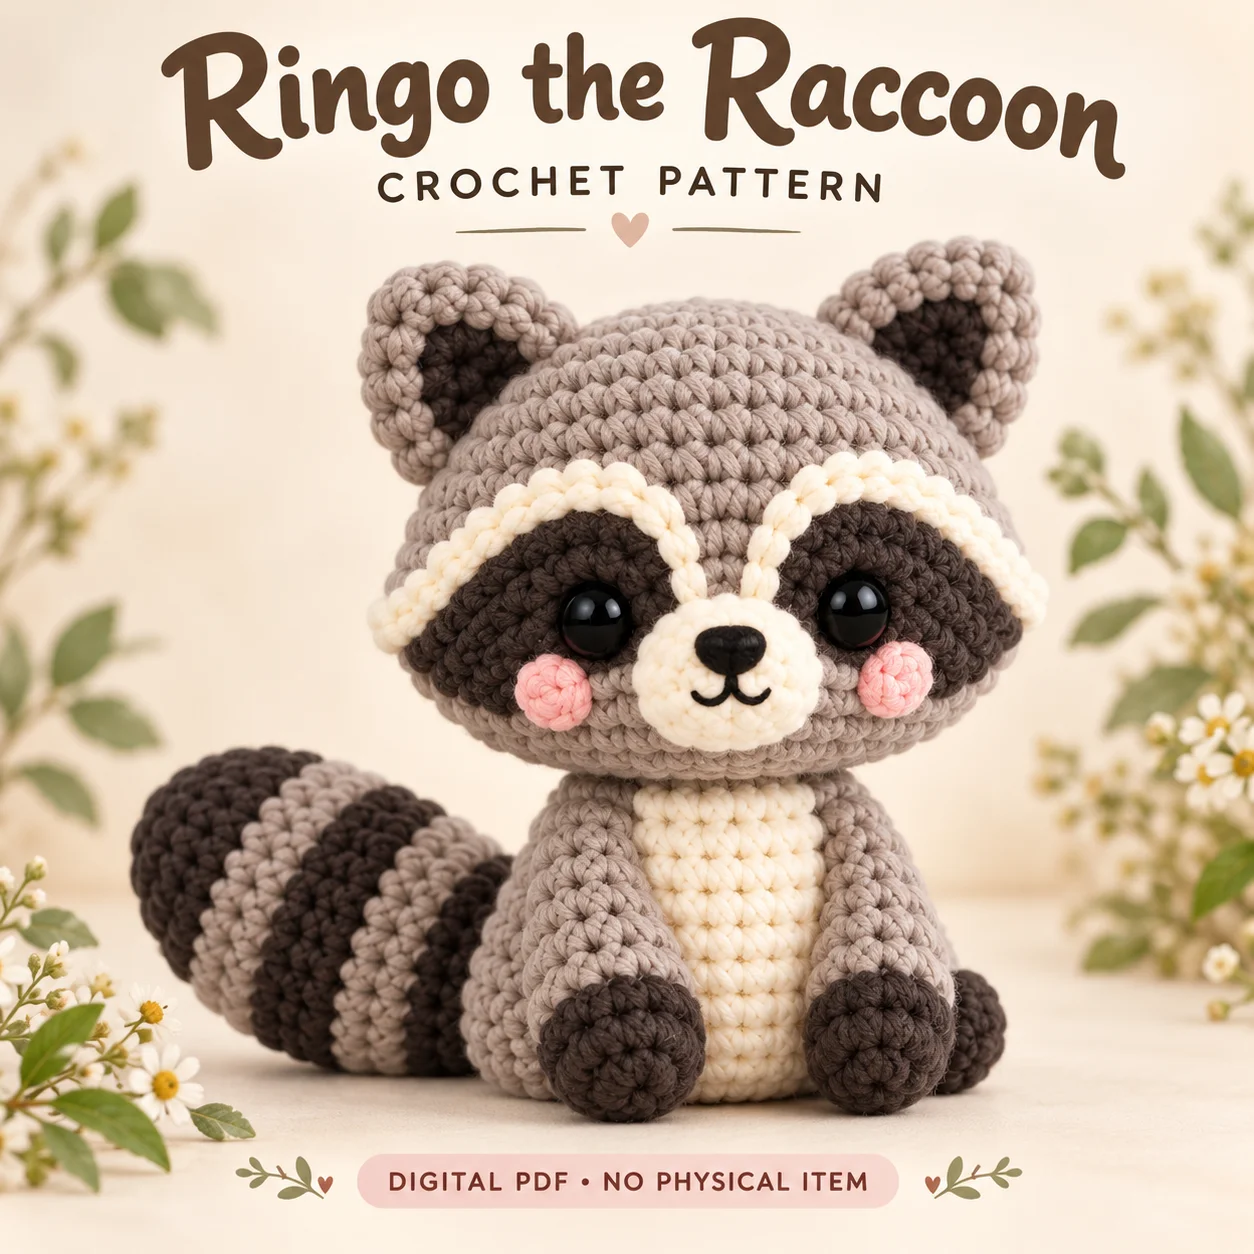
Ringo is a seated taupe raccoon with dark face patches, cream mask borders and a broad striped tail. This crochet raccoon pattern uses smooth worsted cotton-acrylic yarn, producing a finer stitch texture than the collection’s plush chenille designs. The supplied PDF is written for advanced beginners using standard US terms. A cream muzzle and upright belly panel contrast with dark paw tips, while pink cheeks soften the expression. The mask borders follow the outer, upper and inner edges rather than outlining the entire patch. Read their finishing notes and the tail color sequence before beginning so these recognizable details stay clear during assembly.
Features of this crochet raccoon pattern
The round taupe head is larger than the torso and carries two dark horizontal mask patches. Narrow cream embroidery borders run over their outer curves and upper edges, then down toward the muzzle; the lower edges remain dark. Taupe ears have dark inner circles and gently cupped bases. The cream muzzle is softly padded, while the cream belly stays flat. A broad tail alternates dark and taupe sections from a rounded dark tip toward its open taupe base.
Flat, lightly padded and firmly stuffed pieces serve different purposes. Preserve those distinctions for a recognizable silhouette.
Skills and stitch methods
The main shapes and circular or oval appliques use continuous spiral rounds with standard yarn-over single crochet. Oval pieces begin around foundation chains. The PDF includes an invisible finish for flat appliques and invisible decreases through front loops for shaping. Change colors on the final pull-through before a new stripe begins. Use the round-start marker for counting only; establish physical front and back guides on the shaped pieces for placement and neck alignment.
Before beginning this crochet raccoon pattern, identify which sections are flat and which are stuffed. Read each section heading before continuing, and check the stitch totals at the end of shaping rounds. Counting early is easier than finding a missing increase beneath several completed rounds.
Yarn, tools and filling
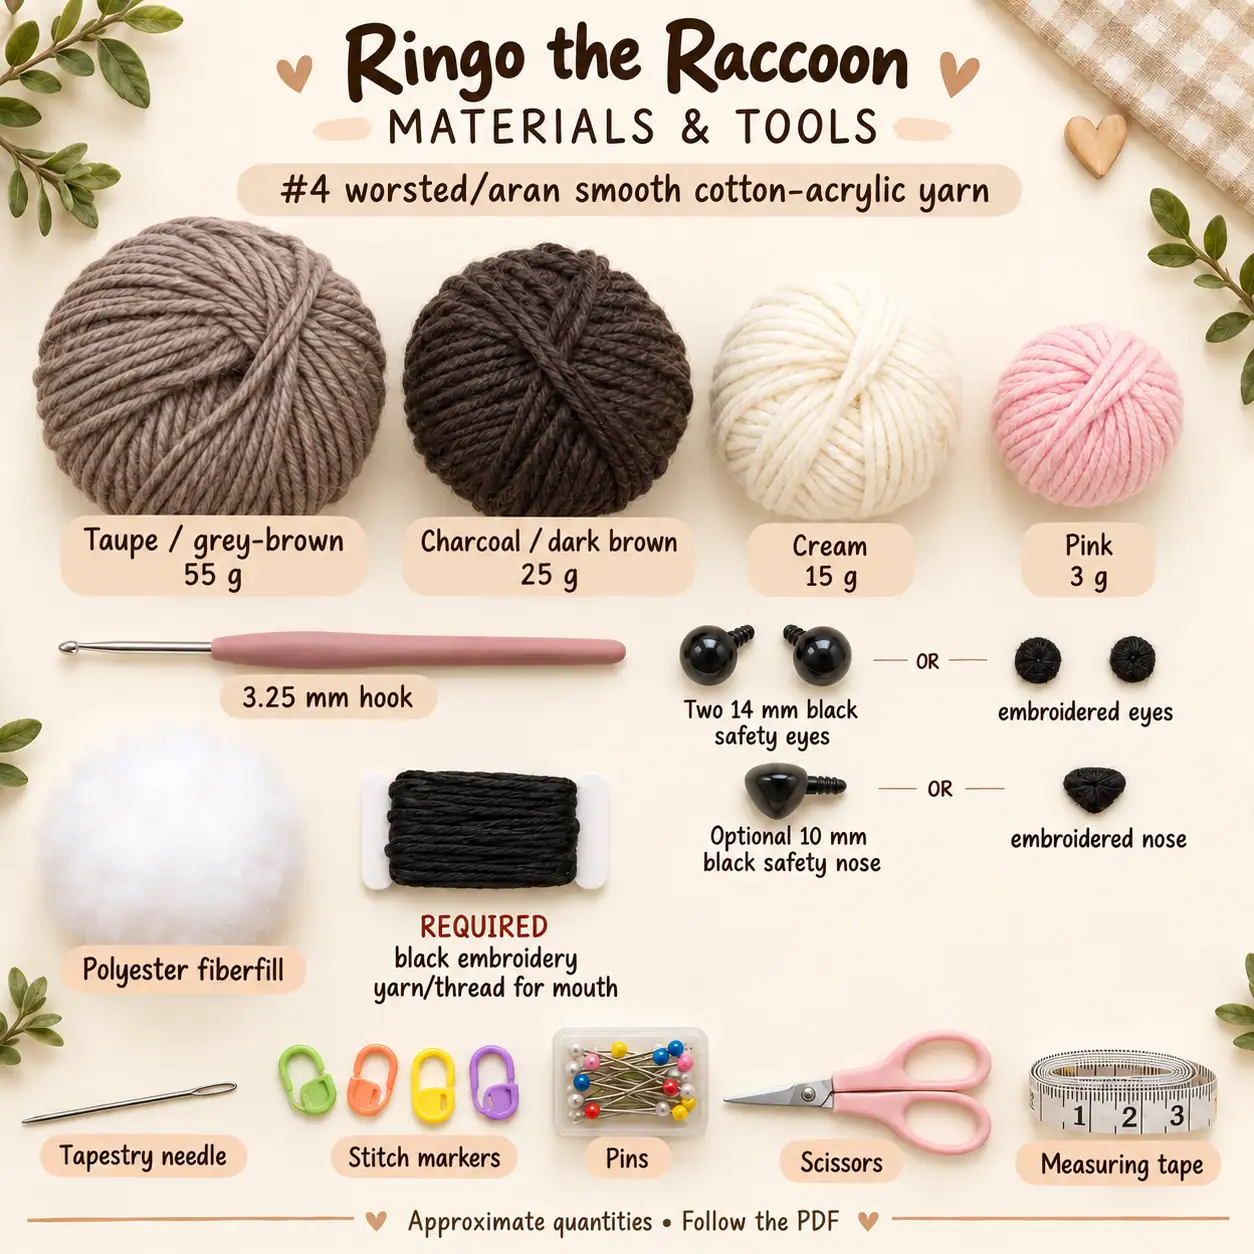
Use #4 worsted/aran smooth cotton-acrylic yarn. The approximate supplies listed in the PDF are:
Taupe / grey-brown 55 g; charcoal / dark brown 25 g; cream 15 g; pink 3 g. 3.25 mm hook; two 14 mm black safety eyes OR embroidered eyes; optional 10 mm black safety nose OR embroidered nose; polyester fiberfill (PDF gives no weight); REQUIRED black embroidery yarn/thread for mouth; tapestry needle, stitch markers, pins, scissors, measuring tape.
Quantities are approximate and change with substitute yarns. Keep embroidery supplies separate from main yarn colors. Use pins for placement and locking markers for face and back references.
Gauge and finished proportions
The target gauge is about twenty-two single crochet stitches and twenty-four rounds over 10 cm, worked in continuous rounds with a 3.25 mm hook. The recommended yarn is category 4 worsted or aran cotton-acrylic, or a comparable smooth amigurumi yarn. The approximate dimensions is 16–18 cm. The striped tail is designed to be 8–9 cm long and 3.5–4 cm at its widest point. These targets vary with tension and filling, and substituting chenille changes both texture and scale.
For this crochet raccoon pattern, compare the fabric and proportions together. A swatch with visible gaps needs attention before stuffing, while a much denser substitute can change the size of every paired component. Recheck the main shapes before attaching the smaller details.
Construction and assembly order
Prepare the flat face pieces before the head’s eye-installation pause. Each hardware eye passes through a dark mask patch and the taupe head, or the positions can be used for embroidery. Complete the head with its twenty-four-stitch neck opening accessible. Add the cream muzzle, chosen nose, black mouth and pink cheeks. Sew or couch the cream mask borders evenly without pulling the dark patches into wrinkles. The body retains a matching twenty-four-stitch top opening.
Sew the vertical cream belly onto the shaped torso, keeping its lower edge above the sitting surface. Align physical front and back at the twenty-four-to-twenty-four neck seam. Attach legs, arms and mirrored ears with dark feet pointing forward. Sew the full open tail base at lower center back and let the tail rest alongside the body. Use light filling and a few hidden underside tacks if needed to hold its soft curve without wire.
The crochet raccoon pattern is easier to assemble when all paired pieces are laid out together. Keep the PDF open at its placement notes, pin before sewing and pause to compare front, side and back views. Small corrections at this stage prevent larger changes after the seams are secured.
Practical tips for neat details
- Use smooth category 4 yarn for the intended finer stitch texture.
- Leave the lower edges of both dark masks unoutlined.
- Keep the tail tip rounded and its broad striped section flexible.
- Make stripe changes on the previous stitch’s final pull-through.
- Center the full open tail base before adding curve-control tacks.
When working from the crochet raccoon pattern, leave the recommended sewing tails and keep the attachment order visible beside your work. Avoid tightening a seam so strongly that it dents the stuffed shape. If a piece rotates while sewing, stop, re-pin it and check the reference markers before continuing.
Troubleshooting
Why does this project have a tail pointing incorrectly?
Check the open tail base against the physical center-back guide rather than the drifting beginning-of-round marker. Re-pin the broad base and let the tail touch the sitting surface. Shape the light filling by hand, then use a few hidden underside tacks to control the curve if needed. Avoid packing the tail hard or adding wire to force its direction.
Why are the cream mask borders uneven?
Compare the complete upper edges and mirrored inner paths before tightening the embroidery. The lower edges should remain unoutlined. Closely spaced couching or backstitches can keep the cream line raised and consistent. If one patch puckers, loosen the affected border stitches and recheck its flat attachment rather than pulling the other side tighter.
Why is there a step between tail stripes?
Complete the final stitch before a new stripe with the new color on its last pull-through, then work the next round in that color. A small spiral transition can remain visible. Keep the change toward the underside or back when possible, and maintain even tension. Do not insert an extra stitch or joined round to hide the transition.
Finishing and care
Check the mask-border ends, flattened limb seams and full tail-base seam during finishing. Confirm that the muzzle is centered and every temporary guide has been removed before burying the last tails. The mouth requires black embroidery thread even if hardware eyes and the optional safety nose are used. Select cleaning methods from the actual smooth-yarn and filling labels. Record your own finished dimensions; the PDF’s approximate dimensions do not guarantee a physically tested result.
Before calling your crochet raccoon pattern project complete, inspect the hidden joins as well as the visible face. Secure loose ends using the PDF’s finishing method and confirm that all small details are firmly attached. The design dimensions are estimates; record your own finished measurements if you plan another version with the same yarn.
Download the complete PDF pattern
This PDF contains the complete crochet pattern for Ringo the Raccoon. Digital download only; no physical item will be shipped.
Related projects: Maple the Fox, Hazel the Hedgehog.
Browse the crochet pattern collection for more project overviews.
For more projects with animal markings and tails, browse the free crochet animal pattern library. If you are unsure what the shorthand in Ringo’s pattern means, compare the Craft Yarn Council crochet notation guide before starting the striped tail.
Leave a Reply