
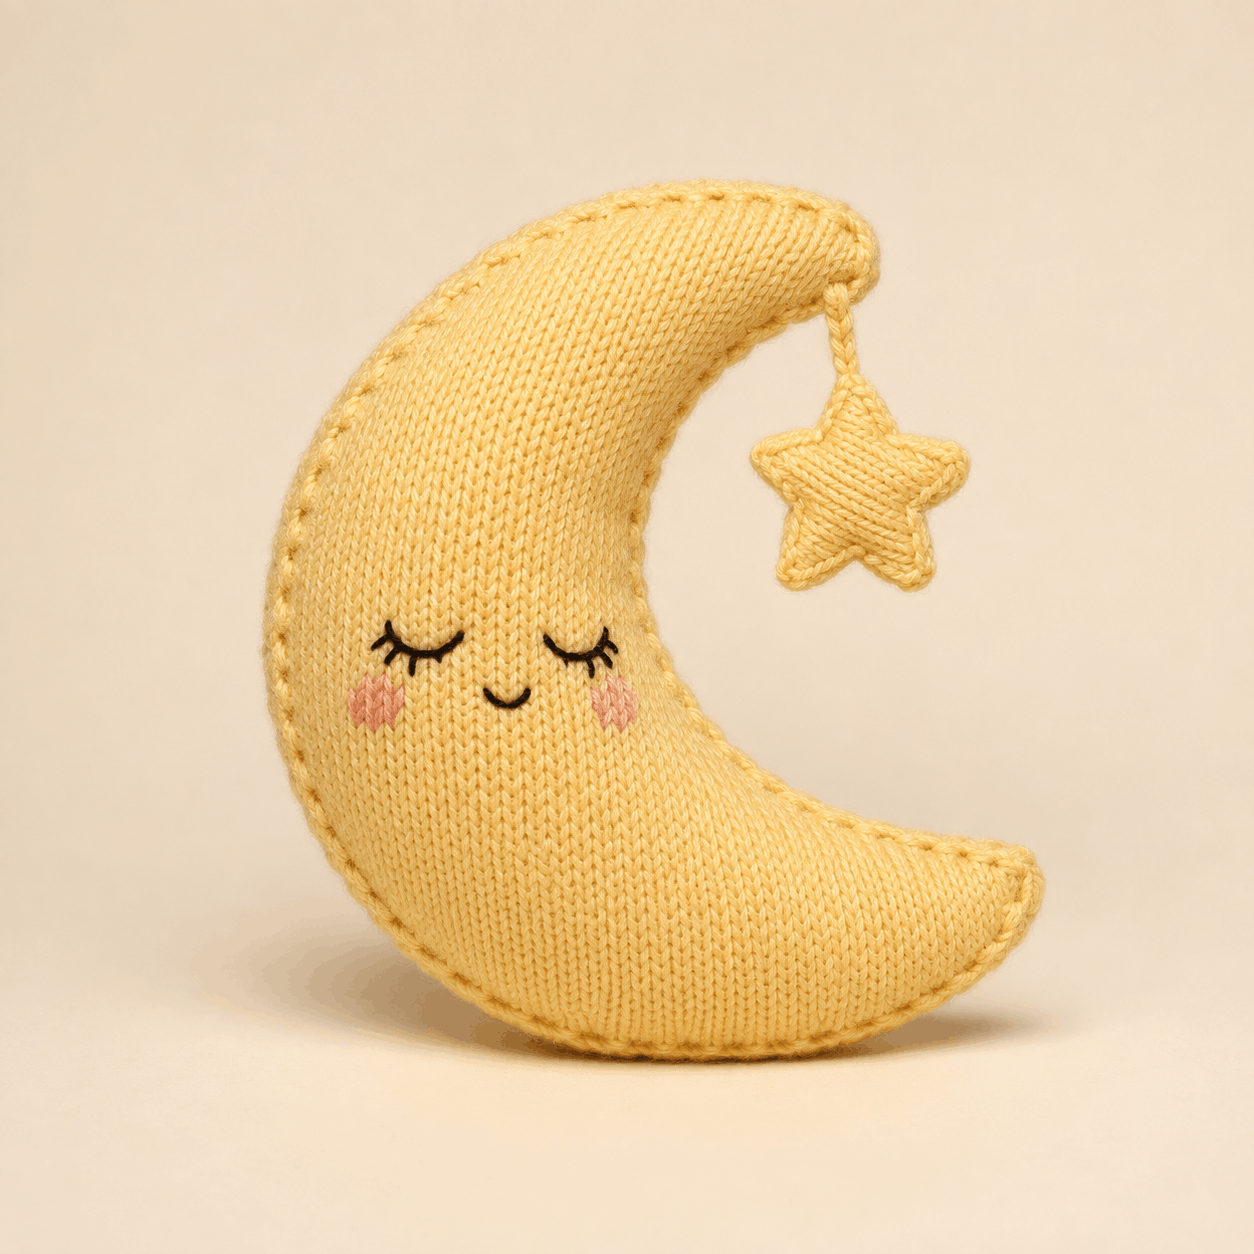
Celeste is a softly stuffed knitted moon with a sleepy embroidered face, pink cheeks, a visible golden whip-stitch edge, and a small star hanging inside the upper curve. This crescent moon knitting pattern combines flat stockinette shaping with a little circular knitting for the star, making it best suited to knitters comfortable with basic increases, decreases, seaming, and simple embroidery. The crescent’s curved silhouette is created entirely with increases and decreases rather than short-row shaping. Below you will find the essential yarn, gauge, construction, finishing, and troubleshooting details. The complete row-by-row instructions, stitch counts, placement guidance, and assembly sequence are in the PDF near the bottom.
About this crescent moon knitting pattern
Celeste is a stuffed decorative plush worked mainly in warm golden-yellow yarn. The crescent has tapered upper and lower points, closed embroidered eyes with lashes, a small curved mouth, and soft pink duplicate-stitch cheeks. A matching five-point star hangs from a short knitted I-cord inside the open center. The visible whip-stitch seam is intentionally part of the finished look.
The moon is made from two mirrored flat panels, so the main body can be worked on straight needles. That flat construction is a useful feature of this crescent moon knitting pattern, while the separately knitted star adds a small circular-knitting element.
Skill Level and Finished Size
The PDF lists the project as intermediate. The main skills are manageable, but the mirrored shaping and counted face placement reward careful row tracking.
| Detail | Pattern information |
|---|---|
| Craft | Knitting |
| Construction | Two mirrored flat moon panels |
| Star | Center in the round; five points worked flat |
| Moon height | Approx. 27-29 cm / 10.5-11.5 in |
| Moon width | Approx. 22-24 cm / 8.75-9.5 in |
| Stuffed depth | Approx. 4-5 cm / 1.5-2 in |
| Star width | Approx. 6-6.5 cm / 2.4-2.6 in |
| I-cord | Approx. 2.2-2.5 cm / 0.9-1 in |
Finished size may vary with yarn, needle size, tension, stuffing, and individual technique.
Materials and Tools You Will Need
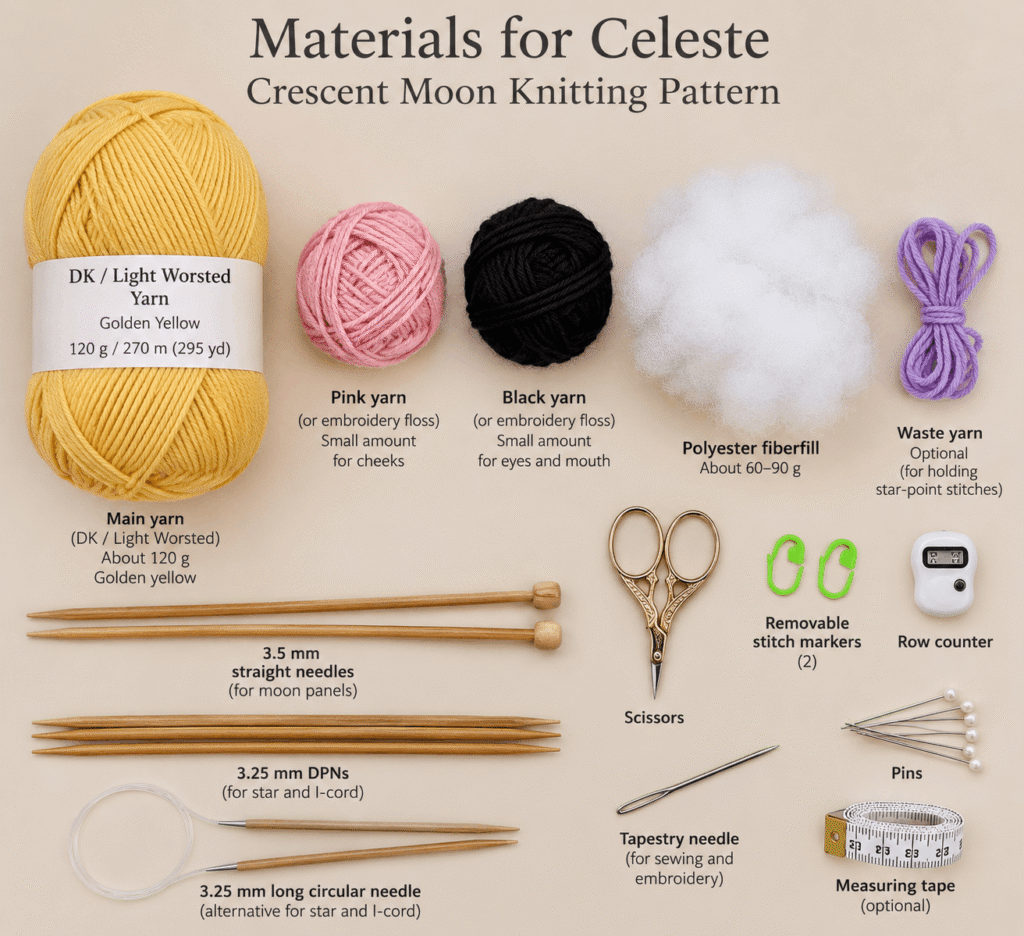
The pattern uses DK/light-worsted (#3) yarn in warm golden yellow, about 120 g / 270 m / 295 yd. You will also need a small amount of soft pink yarn or embroidery floss for the cheeks, black yarn or embroidery floss for the face, and about 60-90 g of polyester fiberfill.
Use 3.5 mm straight needles for the moon panels and 3.25 mm DPNs or a long circular needle for the star and I-cord. Other tools include a tapestry needle, scissors, pins, row counter, two removable stitch markers, and optional smooth waste yarn for holding star-point stitches.
Gauge is 22 sts x 30 rows over 10 x 10 cm / 4 x 4 in for the moon and about 24 sts x 32 rows for the star. Aim for a firm fabric that keeps stuffing hidden.
Stitches and Techniques Used
You will use knit and purl stitches, M1L and M1R increases, ssk and k2tog decreases, kfb, binding off, a small section of circular knitting, three-stitch I-cord, duplicate stitch, facial embroidery, and visible whip-stitch seaming.
The crescent is shaped without short rows. Instead, carefully placed increases and decreases create both curves. In this crescent moon knitting pattern, keeping an accurate row count is especially important because the front and back panels mirror one another rather than repeating exactly.
How Celeste Is Constructed
Knit the front moon panel flat from the lower point upward, then work the back panel with mirrored shaping. The sleepy eyes, lashes, mouth, and cheeks are added to the front while it is still flat.
Next, place the moon panels wrong sides together and join the perimeter with visible whip stitch, leaving a lower outer-curve opening. Stuff the points lightly, add more filling to the broad center, and keep the inner concave edge slightly softer so the opening stays defined.
The star uses two matching panels. Each has a small center worked in the round and five points worked flat. After the star is lightly stuffed and closed, a short three-stitch I-cord connects it to the upper inner curve. This mixed construction gives the crescent moon knitting pattern its distinctive hanging-star detail.
Helpful Tips for Making This Project
Keep the removable edge marker in place on each moon panel. The front and back reverse which edge forms the outer curve, so that small marker helps prevent two identical panels.
Use a row counter and verify stitch counts after shaping rows. Some sections change the silhouette while keeping the same total count, which can make a missed increase or decrease harder to notice.
Embroider the face before seaming. The PDF gives counted row and stitch positions for the eyes, mouth, and cheeks, making alignment much easier while the panel is flat.
Add stuffing in small pieces. Keep the pointed ends light and move more fiberfill toward the broad outer curve. This helps the crescent moon knitting pattern retain an open inner curve instead of becoming too rounded.
Use only a trace of stuffing in the star points. Keeping most of the filling in the center preserves the five-point shape and reduces bulky tips.
Troubleshooting Common Problems
Why does my crescent moon knitting pattern project look too narrow?
If the inner opening looks tight, move some fiberfill away from the concave edge and toward the outer curve. The pattern intentionally keeps the inner edge softer. Gently massage the seam inward rather than packing more stuffing around it.
Why do the two moon panels not line up?
Confirm that the back panel used the mirrored shaping and match corresponding row numbers instead of stretching one edge to fit. If the mismatch begins partway up, return to the last shaping section where the stitch count was correct.
Why is the face or star sitting unevenly?
Check the counted face positions before closing the moon. After stuffing, redistribute fiberfill if the face appears pushed toward the inner curve. If the star twists, the pattern recommends adding an extra securing stitch with a short new length of golden-yellow yarn at the back of the star’s top point.
Care Instructions for the Finished Project
Spot-clean when possible and follow the care instructions for your chosen yarn. Avoid twisting or wringing the stuffed moon. Reshape the crescent and star while damp, then air-dry completely away from direct heat. After cleaning, check the visible whip-stitch seam, I-cord attachment, and star seam for looseness.
Leave a Reply