
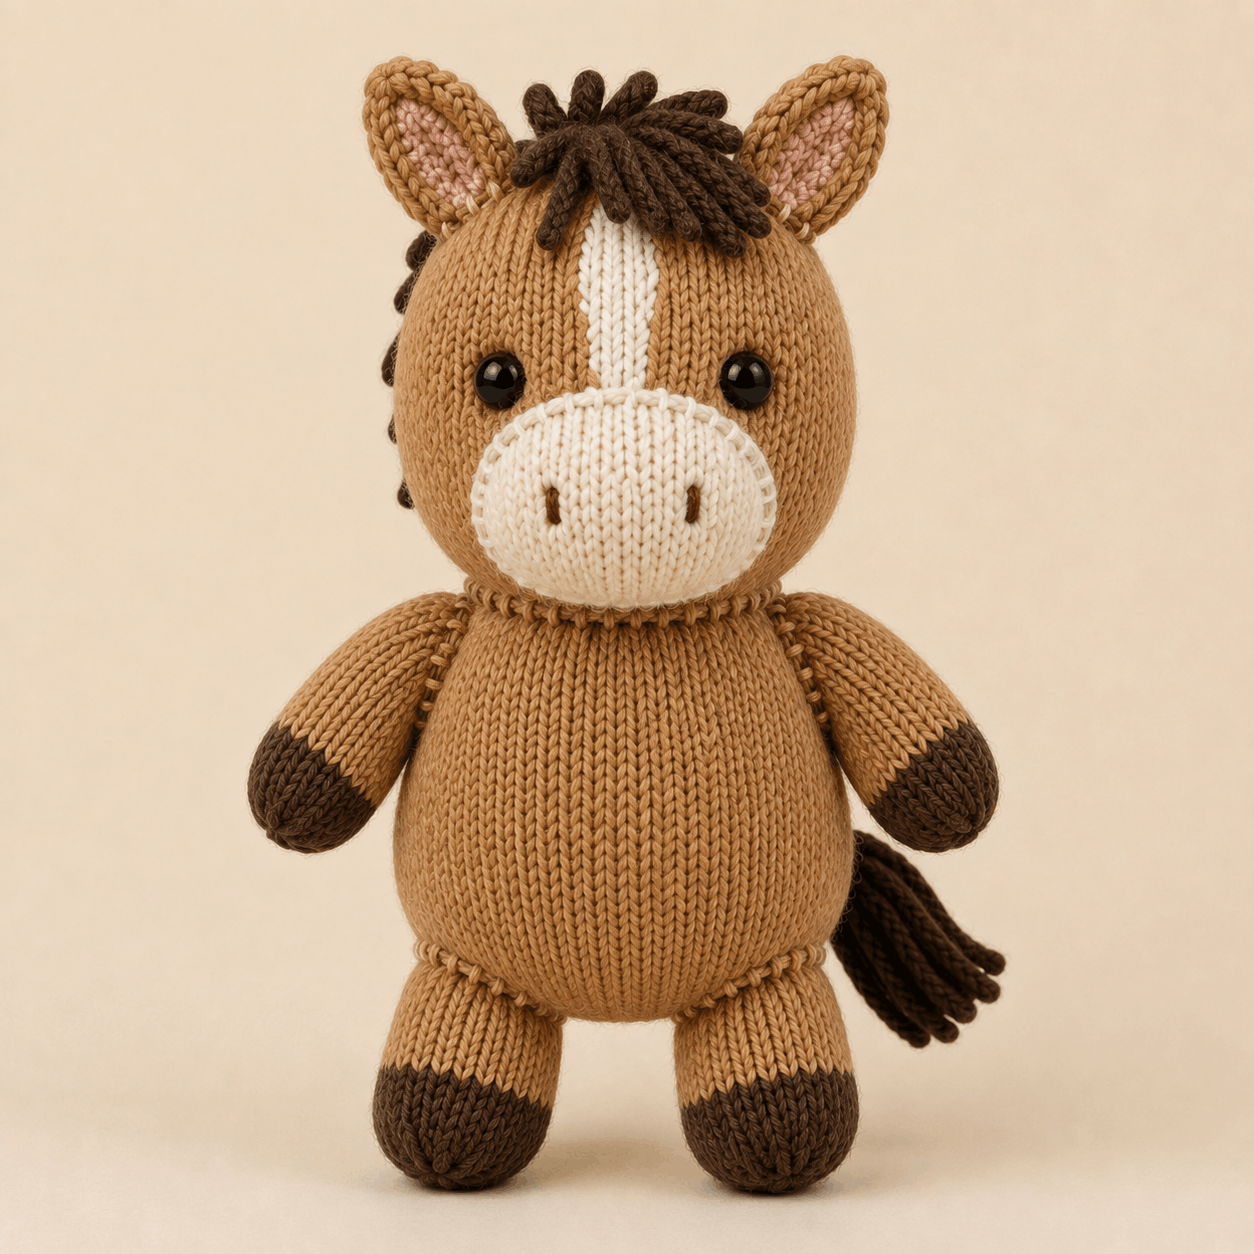
Cedar the Cozy Pony is a round-bodied stuffed pony with a large head, upright ears, short legs, dark hooves, a cream blaze and muzzle, and a dark-brown looped mane and tail. This pony knitting pattern is worked mainly in the round, with a few flat stockinette pieces for the muzzle and ears, plus duplicate stitch and simple embroidery for the facial details. The stated skill level is Confident Beginner to Intermediate, so it suits knitters who are comfortable with basic shaping and ready to spend extra time on careful placement and assembly. Below, you can review the materials, construction, finishing details, and likely trouble spots before downloading the complete PDF near the bottom.
About This Pony Knitting Pattern
Cedar has a soft, rounded silhouette rather than realistic horse proportions. The tan head and body are balanced by a cream oval muzzle, a centered cream forehead blaze, dusty-pink inner ears, and dark-brown hoof sections. The finished images show a standing plush with a broad face, outward-pointing ears, and a dense mane running from the forelock over the crown and down the back of the head.
A distinctive feature of this pony knitting pattern is the mane and tail construction. Instead of loose strands, the design uses three-stitch I-cords folded into loops. Their varied lengths create an overlapping mane and a fuller tail cluster.
Skill Level, Making Time and Finished Size
Craft: Knitting.
Project type: Stuffed pony plushie.
Skill level: Confident Beginner to Intermediate.
Construction: Mainly continuous circular knitting, with the muzzle and ears worked flat.
Terminology: Standard knitting abbreviations and orientation markers such as BOR, RS, WS, center front, and center back.
Estimated making time: Not stated in the PDF.
The finished standing height is approximately 25–27 cm / 9.8–10.6 in, with a width across the forelegs of about 17–19 cm / 6.75–7.5 in. The head is approximately 10–11 cm wide and the body approximately 9–10 cm wide. The PDF also provides target measurements for the muzzle, ears, legs, and tail. Finished size can vary with yarn, needle size, tension, stuffing, and technique.
The parts that need the most care are the face placement, double-layer ears, leg alignment, and I-cord loops.
Materials and Tools You Will Need
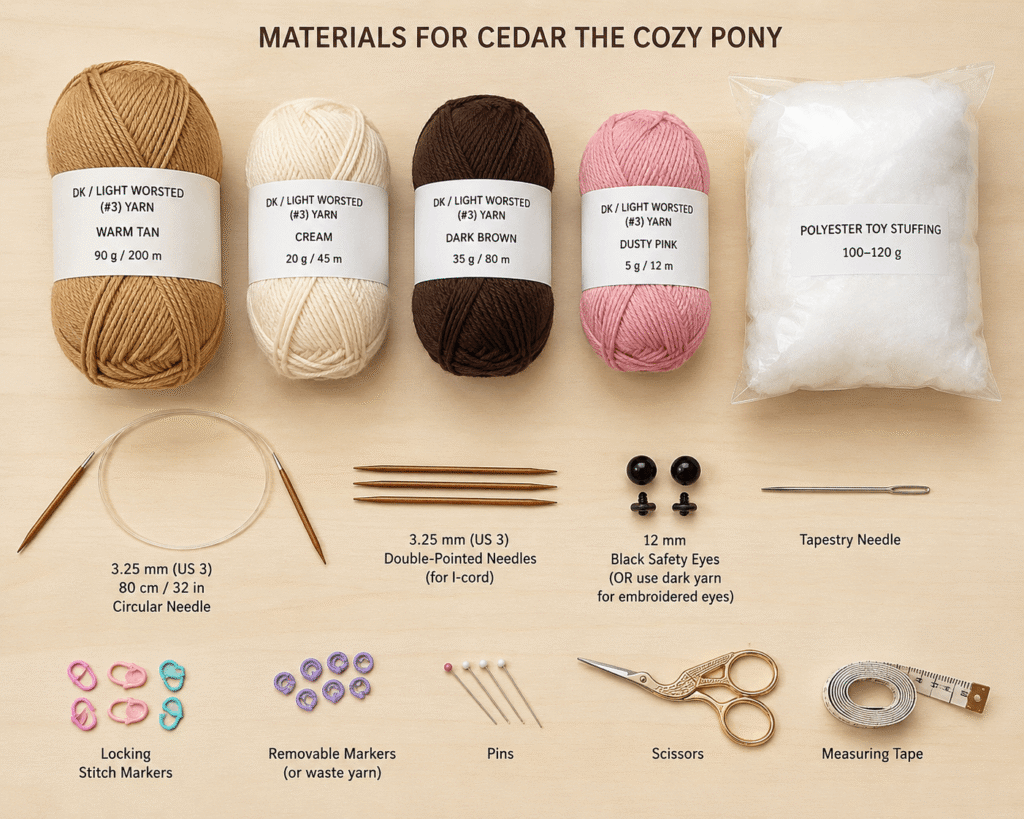
The pony knitting pattern uses DK / light-worsted (#3) smooth yarn with 3.25 mm needles. The specified amounts are approximately 90 g / 200 m of warm tan, 20 g / 45 m of cream, 35 g / 80 m of dark brown, and 5 g / 12 m of dusty pink. You will also need about 100–120 g of polyester toy stuffing.
For small-circumference knitting, use DPNs or an 80 cm / 32 in circular needle for magic loop, plus same-size DPNs for I-cord. The remaining tools are a tapestry needle, locking and removable markers, pins, scissors, measuring tape, and two 12 mm black safety eyes or dark yarn for embroidered eyes.
Smooth yarn is useful because the blaze is duplicate stitched and several placement instructions depend on seeing individual stitches clearly.
Stitches and Techniques Used
You should be comfortable casting on, knitting and purling, binding off, knitting in the round, working flat stockinette, and making basic increases and decreases. Shaping uses kfb, k2tog, and ssk. The cream forehead blaze is worked in duplicate stitch, while the nostrils are embroidered.
The mane and tail introduce three-stitch I-cord. Seaming includes mattress stitch, whip stitch, ladder stitch or small whip stitches around the muzzle, and flattened two-layer seams for the legs. These finishing steps make the pony knitting pattern more involved than a very basic one-piece toy.
How Cedar the Cozy Pony Is Constructed
The head is knitted in the round from a small crown cast-on, increased to full width, then decreased toward a 24-stitch lower opening left for stuffing and the neck join. The crown opening is gathered closed before stuffing. The blaze, eyes, and lightly stuffed flat-knit muzzle are then added.
Each ear uses two tan outer pieces with a dusty-pink inner panel sewn to the front. The body is knitted in the round from the neck opening to a gathered lower base. Forelegs and hind legs begin at dark-brown hoof tips, then change to tan; all hoof openings are closed before stuffing.
The mane is made from seventeen I-cord loops and the tail from six longer loops. The PDF provides exact placement landmarks for the face, ears, legs, mane, tail, and neck seam so the pony knitting pattern can be assembled consistently.
Helpful Tips for Making This Project
Keep the beginning-of-round marker at center back. Later placements use center front, center back, and counted stitch positions, so losing orientation can shift the face or limbs.
Check gauge before knitting the main pieces. The stated gauge is 22 stitches by 30 rounds over 10 cm / 4 in in stockinette worked in the round. Firm, dense fabric helps prevent stuffing from showing.
Mark the face before securing the eyes or muzzle permanently. The blaze, eyes, and muzzle all depend on measured placement, and a front-view check helps preserve symmetry.
Keep the upper leg rounds slightly softer and flatten the bound-off rims before sewing. This makes the attachment seams sit more cleanly and helps both hind hooves meet the floor.
For I-cord, pull the working yarn firmly across the back and tug the cord lengthwise every few rows so the back ladders close.
Troubleshooting Common Problems
Why Does My Pony Knitting Pattern Tip Backward?
The PDF links balance to hind-leg position and lower-body shaping. If Cedar leans backward, move the upper hind-leg seams slightly forward, flatten the lower front of the body a little, or add a small amount of firm stuffing toward the front of the hind legs. Test the pony on a flat surface before closing those seams.
Why Does the Muzzle Look Off-Center?
The muzzle should sit horizontally with its midpoint on center front. If one side is too high or too far sideways, unpick only that section, repin the oval, and compare the distance from each eye before resewing. Keep the muzzle lightly stuffed so it stays softly rounded rather than distorted.
Why Do the I-Cord Loops Look Laddered or Bulky?
For visible ladders, tighten the strand carried across the back and stretch the finished cord lengthwise periodically. If the back mane looks too heavy, the PDF suggests removing one or two of the longest loops or spacing neighboring loops one round farther apart.
Care Instructions for the Finished Project
The PDF does not specify a yarn fiber or washing method, so follow the care label for the yarn you use. Spot-cleaning is the cautious option for a stuffed toy with sewn features. If your yarn allows wet cleaning, use cool or lukewarm water, avoid twisting or wringing, reshape while damp, and air-dry completely away from direct heat.
Inspect the neck, legs, ears, mane, and tail attachments periodically. The PDF notes that safety eyes and other small or rigid components may not be suitable for children under three years; embroidered eyes are the provided alternative.
Leave a Reply